
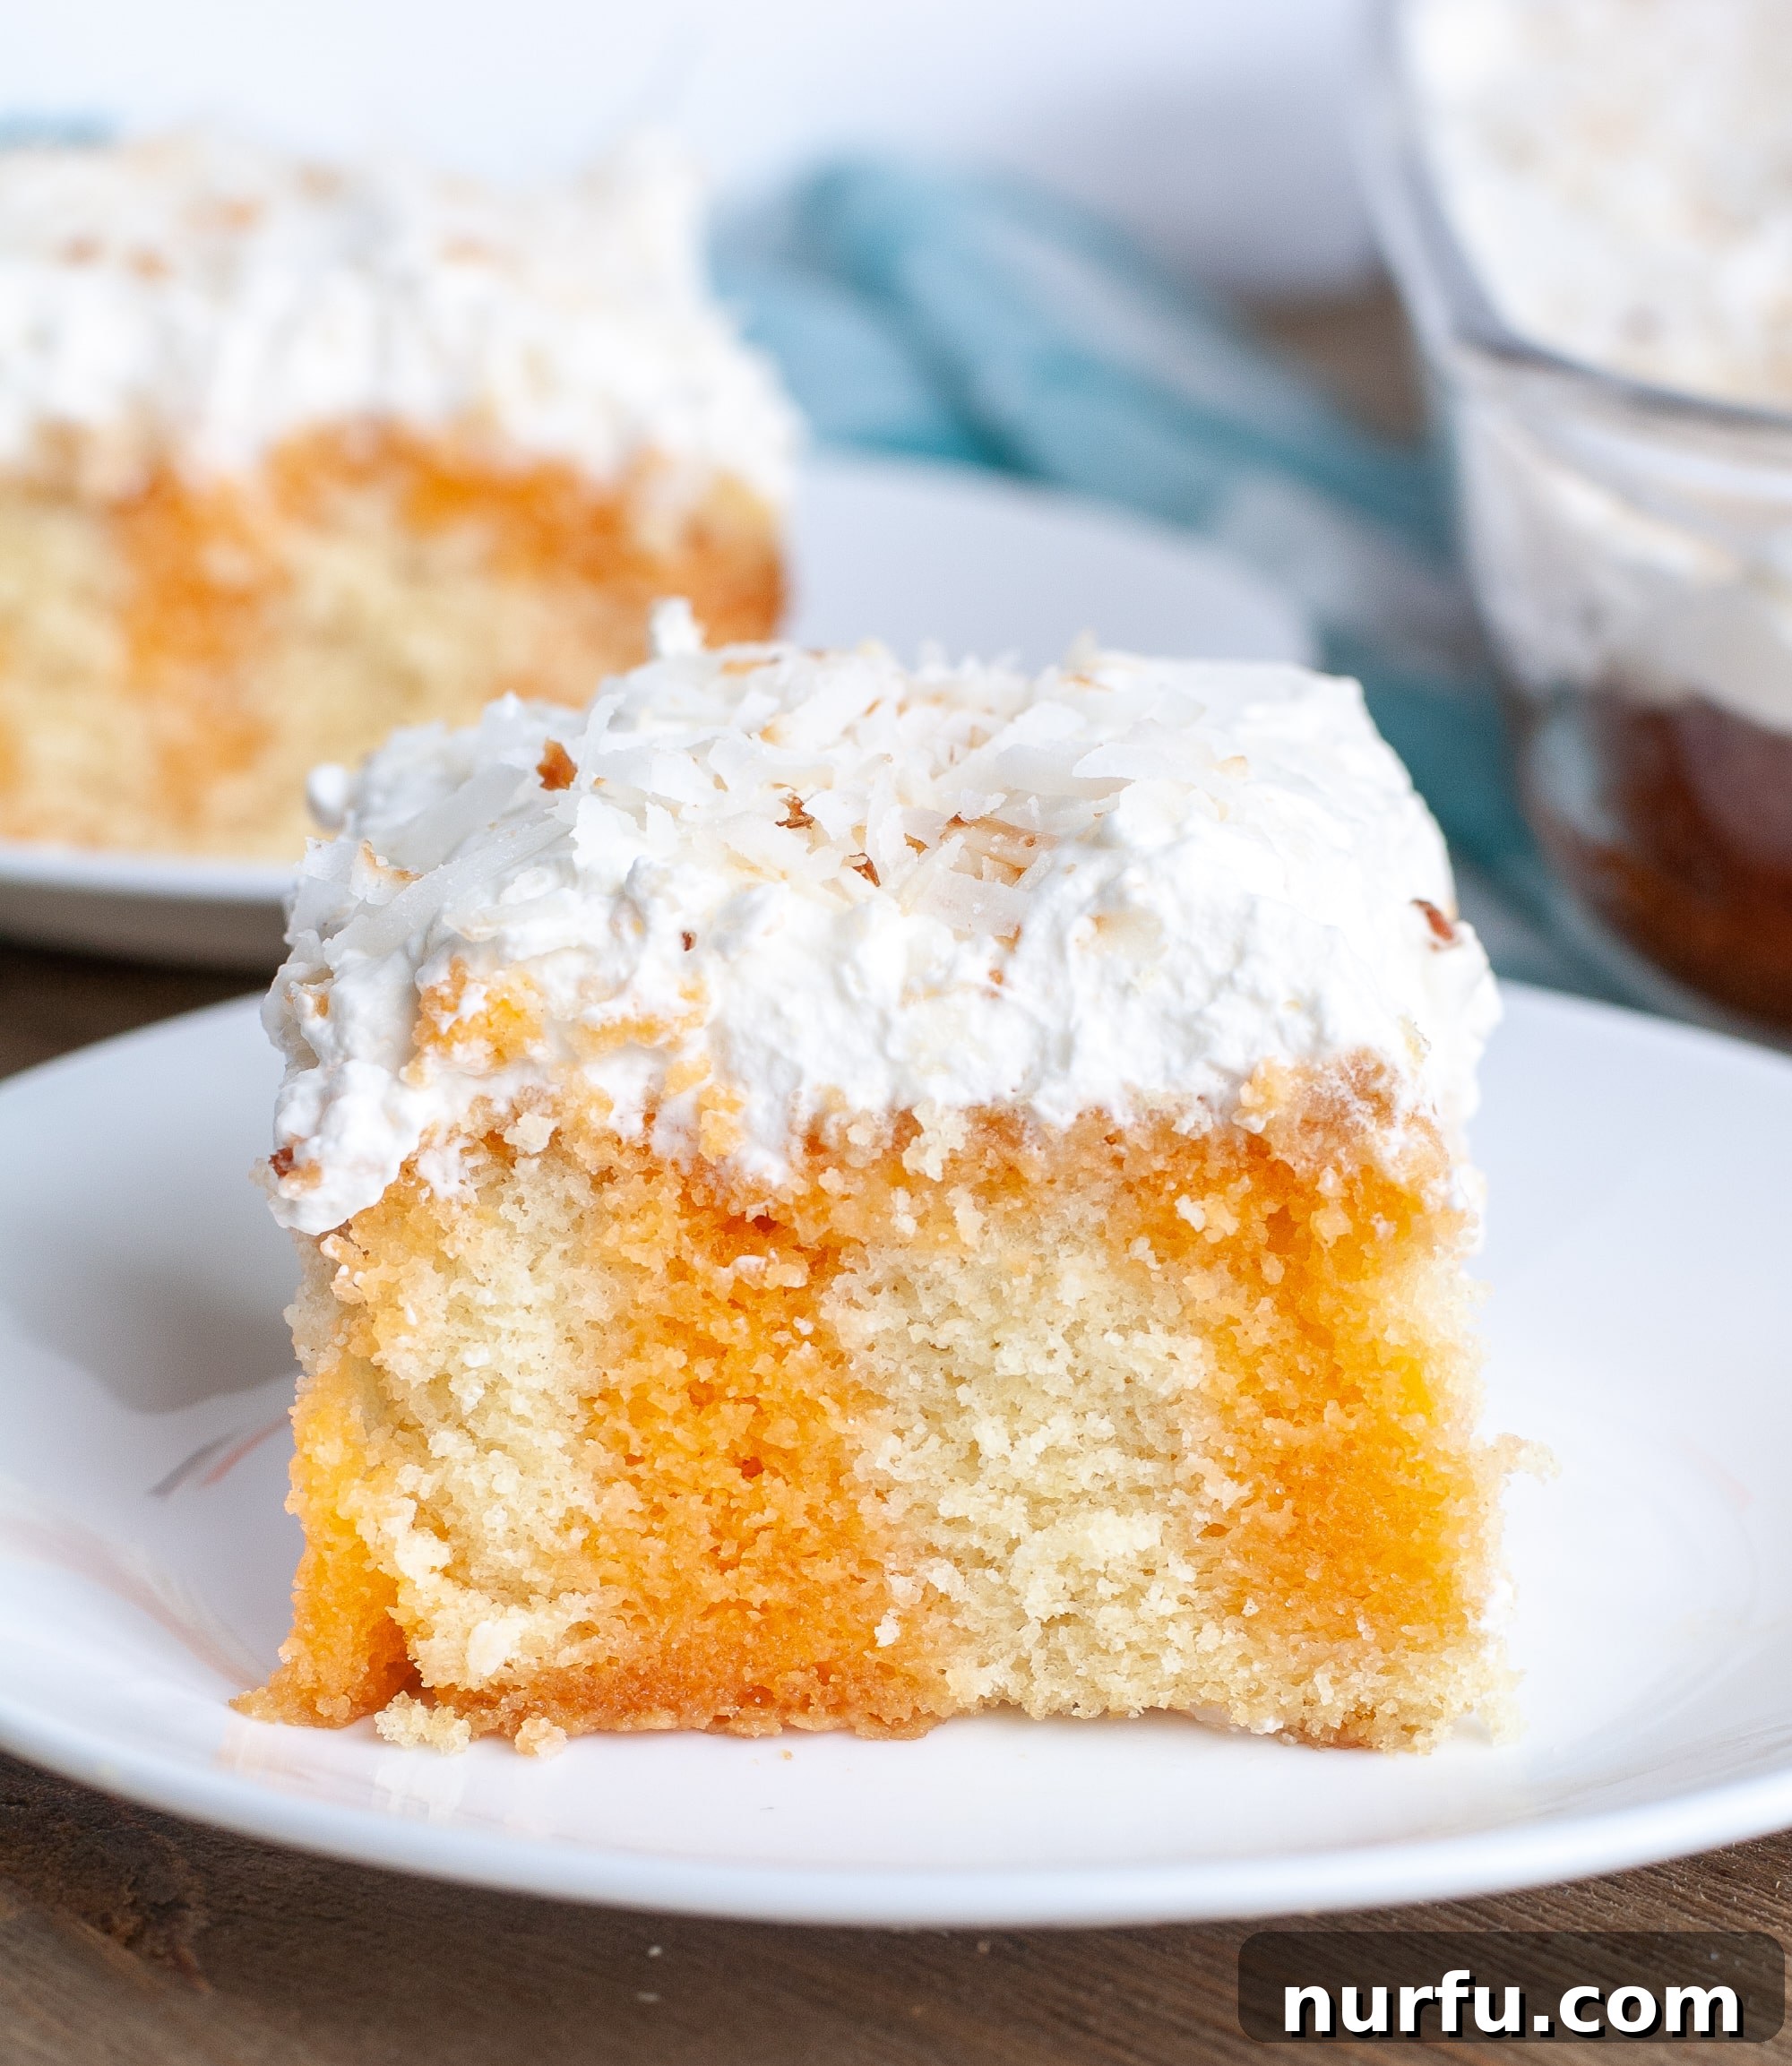
Irresistible Orange Poke Cake with Toasted Coconut: Your Ultimate Guide
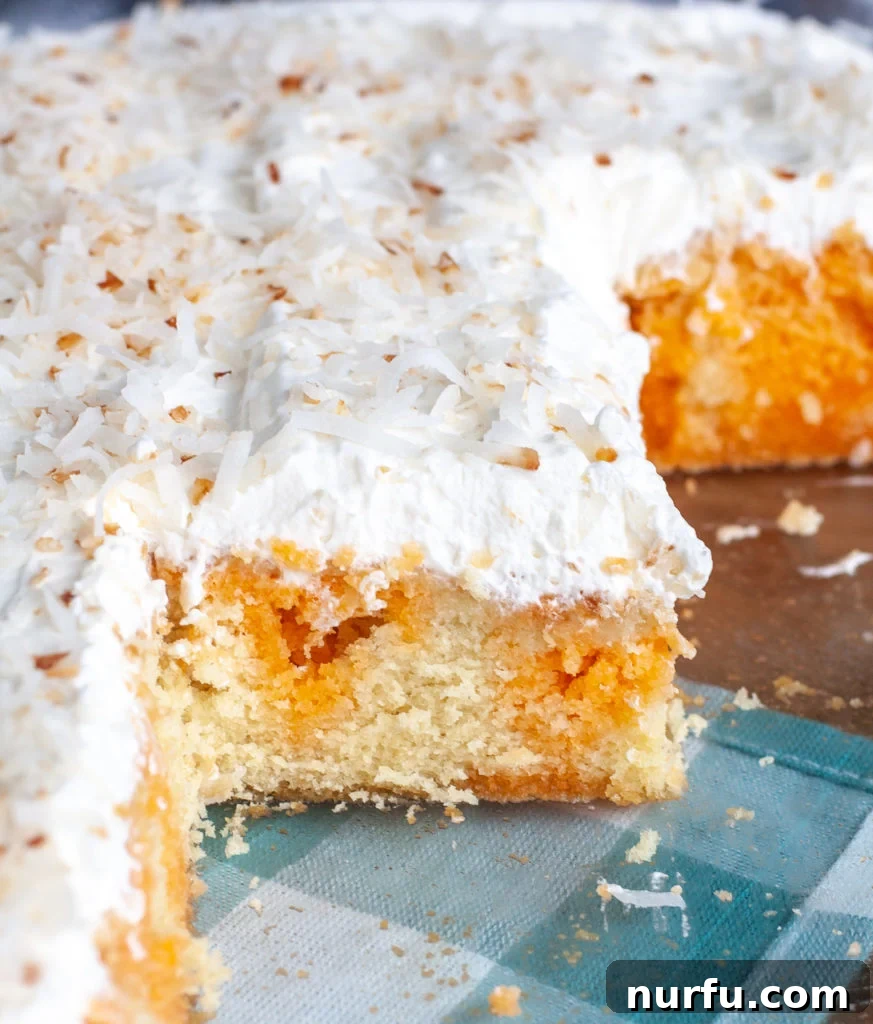
Prepare to be enchanted by a dessert that perfectly captures the essence of sunshine and celebration: the Orange Poke Cake with Toasted Coconut. This isn’t just any cake; it’s a symphony of bright, zesty orange flavor, an incredibly moist homemade yellow cake base, and a cloud-like Chantilly cream topping adorned with perfectly golden, toasted coconut flakes. Whether you’re planning a spring gathering, a summer BBQ, or simply craving a refreshing treat, this cake promises to deliver a smile with every single forkful.
In this comprehensive guide, we’ll walk you through crafting this delightful dessert from scratch, ensuring a flawless execution that will impress your guests and satisfy your sweet tooth. We’ll delve into the secrets of creating a tender cake, infusing it with vibrant orange flavor, whipping up the perfect topping, and achieving that irresistible toasted coconut crunch. Get ready to bake a cake that’s as beautiful as it is delicious!
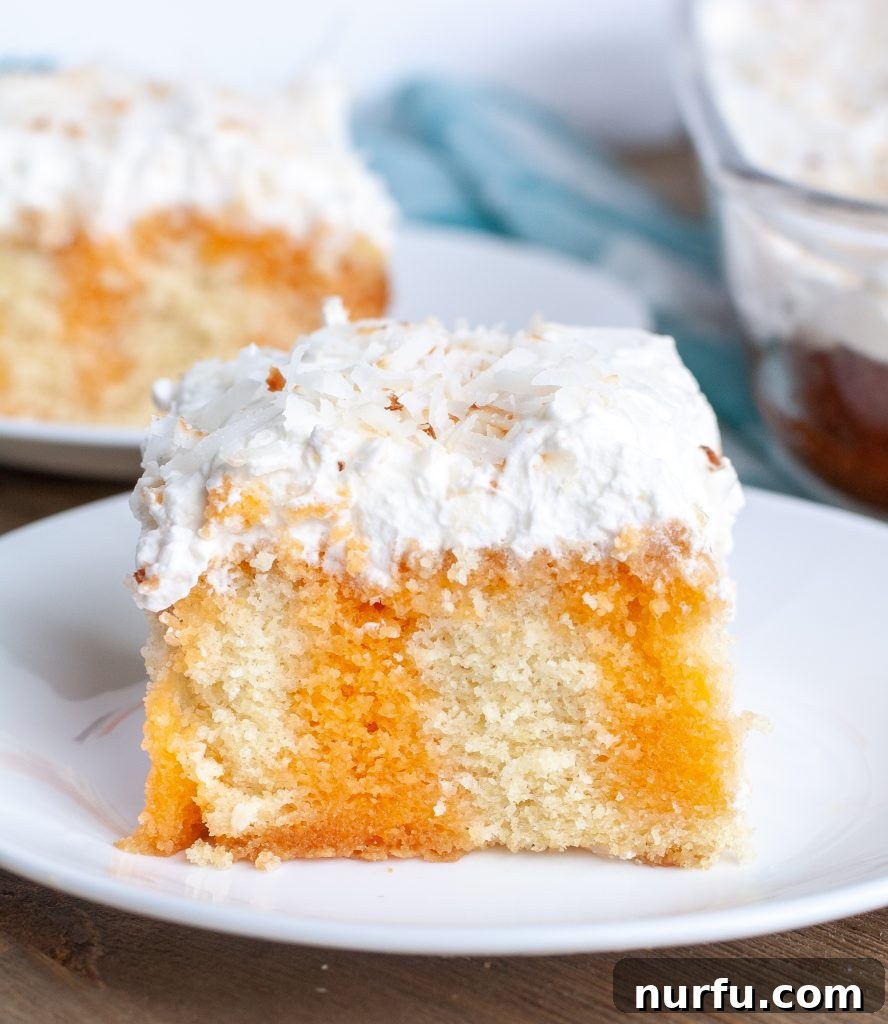
The Magic of Poke Cakes: Why We Love Them
Poke cakes have earned their place in the hearts of dessert lovers for a reason: they are incredibly versatile, consistently moist, and a true delight to make. The concept is brilliantly simple yet profoundly effective: a baked cake is “poked” with holes, then drenched in a liquid—often gelatin, pudding, or condensed milk—allowing the flavor to seep deep into the cake, creating an explosion of taste and an unparalleled moist texture in every bite.
This unique method ensures that the cake remains incredibly juicy and flavorful long after it’s baked, making it an ideal choice for make-ahead desserts. From vibrant holiday-themed Jell-O cakes to rich chocolate indulgences, the possibilities are endless. Our Orange Poke Cake stands out as a particular favorite once the weather warms up, thanks to its bright, citrusy profile. The sunny color and refreshing taste are an instant mood booster, bringing a touch of happiness to any occasion.
Unveiling the Zest: What Makes This Orange Poke Cake Special?
While many poke cakes rely on a box mix for convenience, our Orange Poke Cake begins with a from-scratch yellow cake. This foundation is crucial, as it provides a rich, tender crumb that perfectly complements the vibrant orange infusion. A homemade cake allows for superior flavor and texture, ensuring that your dessert isn’t just easy, but also exceptionally delicious.
The magic truly happens when the warm cake is generously drenched in a sweet, tangy orange gelatin mixture. This liquid permeates every nook and cranny created by the “poke” holes, transforming an already good cake into an extraordinary one. The result is a cake bursting with juicy orange flavor, beautifully moist, and delightfully refreshing. To complete this masterpiece, a light and airy Chantilly cream topping provides a perfect balance, offering a cool, smooth contrast to the cake’s zestiness. Finally, a generous sprinkle of perfectly toasted coconut adds a nutty aroma, a delightful texture, and a beautiful golden finish, elevating this cake to an unforgettable dessert experience.
Essential Ingredients for Your Orange Poke Cake Masterpiece
Crafting this delightful Orange Poke Cake requires a few simple, yet essential ingredients. Using quality ingredients ensures the best flavor and texture for your homemade dessert.
For the Moist Yellow Cake Base:
- All-Purpose Flour: The structural backbone of our cake.
- Granulated Sugar: For sweetness and tenderness.
- Unsalted Butter: At room temperature, for richness and a soft crumb.
- Large Eggs: At room temperature, for binding and moisture.
- Milk: At room temperature, for moisture and tenderizing.
- Vanilla Extract: Enhances the overall flavor profile.
- Baking Powder & Baking Soda: Leavening agents for a light, fluffy cake.
- Salt: Balances sweetness and brings out flavors.
For the Zesty Orange Infusion:
- Orange Flavored Gelatin: The key to the cake’s vibrant orange flavor and signature moistness. Choose a high-quality brand for the best taste.
- Boiling Water: To dissolve the gelatin completely.
- Cold Water: To help the gelatin set properly and cool it down before pouring.
For the Light & Fluffy Chantilly Cream Topping:
- Heavy Whipping Cream: Chilled, for the perfect whipped topping.
- Powdered Sugar (Confectioners’ Sugar): For sweetness and a smooth texture.
- Vanilla Extract: Adds depth to the cream.
For the Golden Toasted Coconut:
- Sweetened Shredded Coconut: Toasted until golden brown for a delightful nutty crunch and aroma. Unsweetened can also be used for a less sweet alternative.
Step-by-Step Guide: How to Bake the Perfect Orange Poke Cake with Toasted Coconut
Follow these detailed instructions to create an Orange Poke Cake that is moist, flavorful, and absolutely stunning.
Preparing Your From-Scratch Yellow Cake:
- Preheat & Prepare: Preheat your oven to 350°F (175°C). Lightly grease and flour a 9×13 inch baking dish, or line with parchment paper for easy removal.
- Combine Dry Ingredients: In a medium bowl, whisk together the flour, baking powder, baking soda, and salt. Set aside.
- Cream Butter & Sugar: In a large mixing bowl, using an electric mixer, beat the softened butter and granulated sugar together on medium speed until light and fluffy, usually 2-3 minutes. This step incorporates air, contributing to the cake’s tender texture.
- Add Eggs & Vanilla: Beat in the eggs one at a time, ensuring each is fully incorporated before adding the next. Stir in the vanilla extract. Scrape down the sides of the bowl as needed.
- Alternate Wet & Dry: Gradually add the dry ingredient mixture to the wet ingredients, alternating with the milk. Begin and end with the dry ingredients (e.g., add 1/3 flour mixture, mix; add 1/2 milk, mix; add 1/3 flour mixture, mix; add remaining milk, mix; add remaining 1/3 flour mixture, mix). Mix on low speed just until combined; be careful not to overmix, which can result in a tough cake.
- Bake: Pour the batter evenly into your prepared baking dish. Bake for 30-35 minutes, or until a wooden skewer inserted into the center comes out clean.
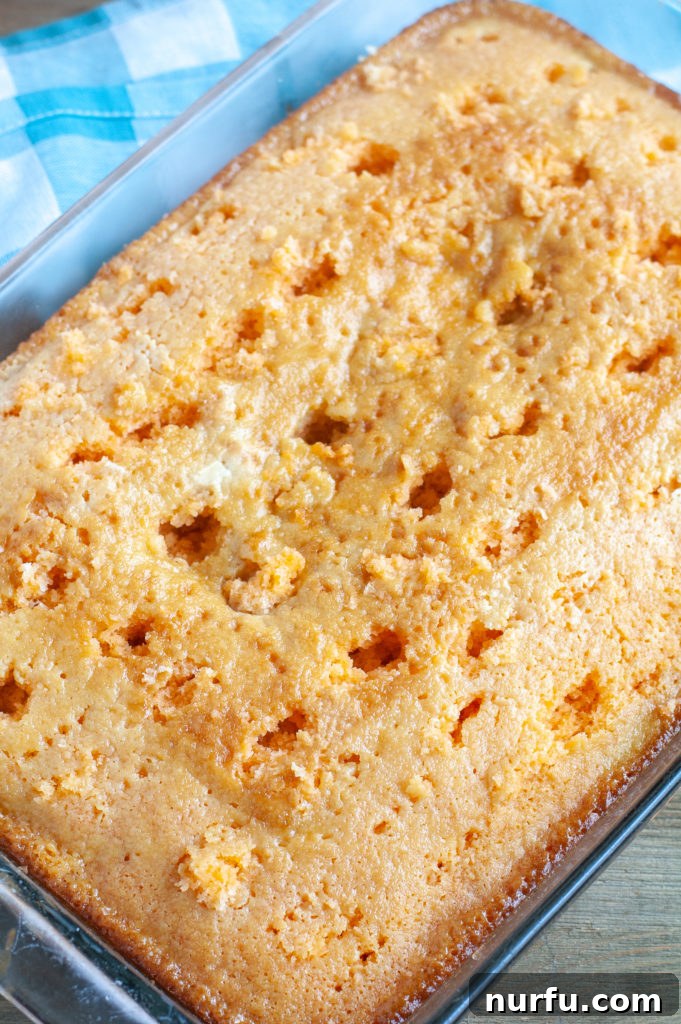
- Cool & Poke: Remove the cake from the oven and let it cool in the pan on a wire rack for 5-10 minutes. This initial cooling helps the cake structure. While still warm, use the back of a wooden spoon or a fork to poke holes all over the top of the cake, spaced about 1 inch apart. Ensure the holes go deep into the cake without tearing it excessively.
Infusing with Citrus Goodness (The “Poke” Part):
- Prepare Gelatin: In a medium bowl, dissolve the orange gelatin powder completely in 1 cup of boiling water, stirring until no granules remain.
- Add Cold Water: Stir in 1/2 cup of cold water. This helps to cool the gelatin mixture and ensures it’s not too hot when poured over the cake, preventing it from cooking the cake further.
- Pour Over Cake: Carefully and evenly pour the gelatin mixture over the entire surface of the poked cake, making sure it seeps into all the holes.
- Chill: Cover the cake tightly with plastic wrap and place it in the refrigerator for at least 3 hours. This crucial step allows the gelatin to set properly within the cake, creating its signature moist texture and infusing it with vibrant orange flavor. For best results and maximum flavor absorption, an overnight chill is highly recommended.
Crafting the Light & Fluffy Topping:
- Prepare Chantilly Cream: Ensure your heavy whipping cream is very cold. For best results, chill your mixing bowl (preferably a stand mixer bowl) and whisk attachment in the freezer for 10-15 minutes before starting.
- Whip Cream: Pour the cold heavy whipping cream, powdered sugar, and vanilla extract into the chilled bowl. Using an electric mixer (stand mixer or hand mixer) fitted with the whisk attachment, start on low speed and gradually increase to high. Whip until stiff peaks form, meaning the cream holds its shape firmly when the whisk is lifted. Be careful not to over-whip, or it will turn grainy.
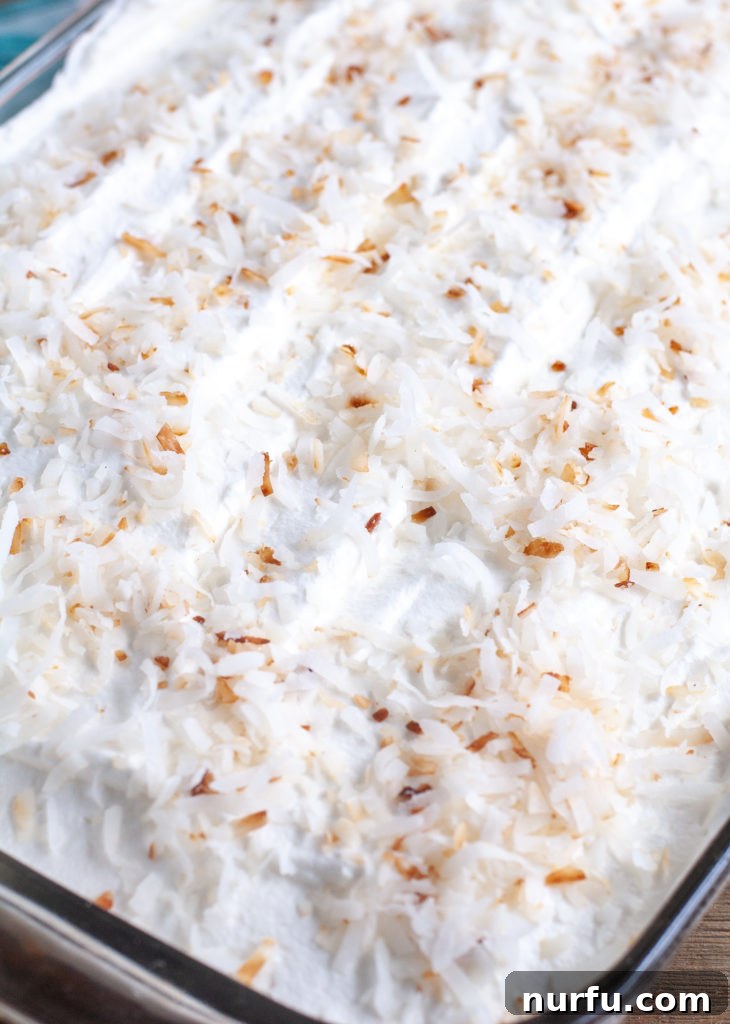
- Top the Cake: Once the cake is thoroughly chilled and the gelatin is set, remove it from the refrigerator. Generously spread the light and fluffy Chantilly cream evenly over the top of the cake.
Toasting and Garnishing with Coconut:
- Toast Coconut: There are two easy methods for toasting coconut:
- Skillet Method: Place shredded coconut in a dry skillet over medium heat. Stir constantly for 3-5 minutes until golden brown. Watch carefully as it can burn quickly.
- Oven Method: Spread shredded coconut in a single layer on a baking sheet. Bake in a preheated oven at 300°F (150°C) for 5-10 minutes, stirring occasionally, until golden.
- Garnish: Immediately after topping with cream, sprinkle the freshly toasted coconut evenly over the entire cake. The aroma of toasted coconut is irresistible!
Expert Tips & Tricks for a Flawless Orange Poke Cake
Achieving the perfect Orange Poke Cake is simple with a few insider tips:
- Don’t Rush the Chill: The 3-hour minimum refrigeration time for the gelatin to set is non-negotiable. If you skimp on this, the gelatin won’t fully absorb, and your cake won’t have that signature moist, juicy texture. Making the cake part the night before and chilling it overnight before frosting in the morning is an excellent strategy for optimal results and convenience.
- Cold Bowl for Whipped Cream is Key: For the fluffiest, most stable whipped cream, always ensure your mixing bowl and whisk attachment are thoroughly chilled. A cold environment helps the fat molecules in the cream emulsify properly, allowing it to whip up faster and hold its peaks longer.
- Watch Your Coconut Closely: Toasted coconut adds an incredible depth of flavor and texture, but it can go from perfectly golden to burnt in a matter of seconds. Whether using a skillet or oven, keep a vigilant eye and stir frequently.
- Evenly Poked Holes: When poking holes, aim for consistent spacing (about 1 inch apart) and depth. This ensures that the orange gelatin is distributed evenly throughout the cake, guaranteeing uniform moisture and flavor in every slice.
- Serving Temperature: Orange Poke Cake is best served chilled. The cold temperature enhances the refreshing orange flavor and keeps the whipped topping firm.
- Embrace Room Temperature Ingredients (for cake batter): For the cake base, ensure butter, eggs, and milk are at room temperature. This allows them to emulsify better, resulting in a smoother batter and a more tender, even-textured cake.
Storage and Make-Ahead Options
This Orange Poke Cake is an excellent make-ahead dessert, perfect for parties and gatherings.
- Storage: Store any leftover Orange Poke Cake in an airtight container in the refrigerator. It will stay fresh and delicious for 3-4 days. The flavors tend to meld even further over time, making it potentially even better on the second day!
- Make-Ahead: You can bake the yellow cake, poke it, and drench it with gelatin up to 2 days in advance. Ensure it’s tightly covered with plastic wrap and refrigerated. Prepare the Chantilly cream and toast the coconut on the day of serving for the freshest taste and best texture. This allows you to spread out the prep work and enjoy a stress-free serving experience.
Frequently Asked Questions (FAQ)
Can I use a box cake mix instead of making the cake from scratch?
Yes, you absolutely can! While a from-scratch cake offers superior flavor and texture, using a high-quality yellow or white box cake mix is a convenient alternative. Simply prepare the cake mix according to package directions, bake it, and then proceed with the poking, gelatin, and topping steps as outlined in this recipe.
What if I don’t like coconut?
No problem! The toasted coconut adds a lovely nutty crunch, but it’s not essential for the cake’s core deliciousness. You can omit it entirely, or substitute it with white chocolate curls, a sprinkle of orange zest, or even some finely chopped candied oranges for an extra citrusy kick.
Can I use fresh orange juice instead of gelatin?
While fresh orange juice would add fantastic flavor to a regular cake, it won’t work as a substitute for gelatin in a poke cake. The gelatin’s specific properties allow it to set and create the moist, infused pockets that define a poke cake. You can, however, add some fresh orange zest to your cake batter for an extra layer of citrus flavor in the cake itself.
How far in advance can I make this Orange Poke Cake?
You can make the cake and infuse it with gelatin up to 2 days in advance. Ensure it’s well-covered and refrigerated. It’s best to add the whipped cream topping and toasted coconut no more than a few hours before serving to keep the cream fresh and the coconut crunchy. This makes it an ideal dessert for planning ahead for parties.
Why This Cake Will Be Your New Go-To Dessert
The Orange Poke Cake with Toasted Coconut is more than just a dessert; it’s a culinary experience that brightens any table and delights every palate. Its combination of a moist, tender homemade cake, the refreshing burst of orange, the luxurious Chantilly cream, and the irresistible crunch of toasted coconut creates a harmonious blend of flavors and textures.
Easy to make, yet incredibly impressive, this cake is perfect for a myriad of occasions—from casual family dinners and festive holiday gatherings to vibrant spring brunches and leisurely summer picnics. It’s a guaranteed crowd-pleaser that brings a touch of sunshine to any moment. Its make-ahead friendly nature and beautiful presentation make it a stress-free option for hosts and hostesses looking to serve something truly special.
So, why wait? Gather your ingredients, follow our detailed guide, and prepare to bake a dessert that will undoubtedly become a cherished favorite. Enjoy the process, and most importantly, savor every last, delicious bite!