
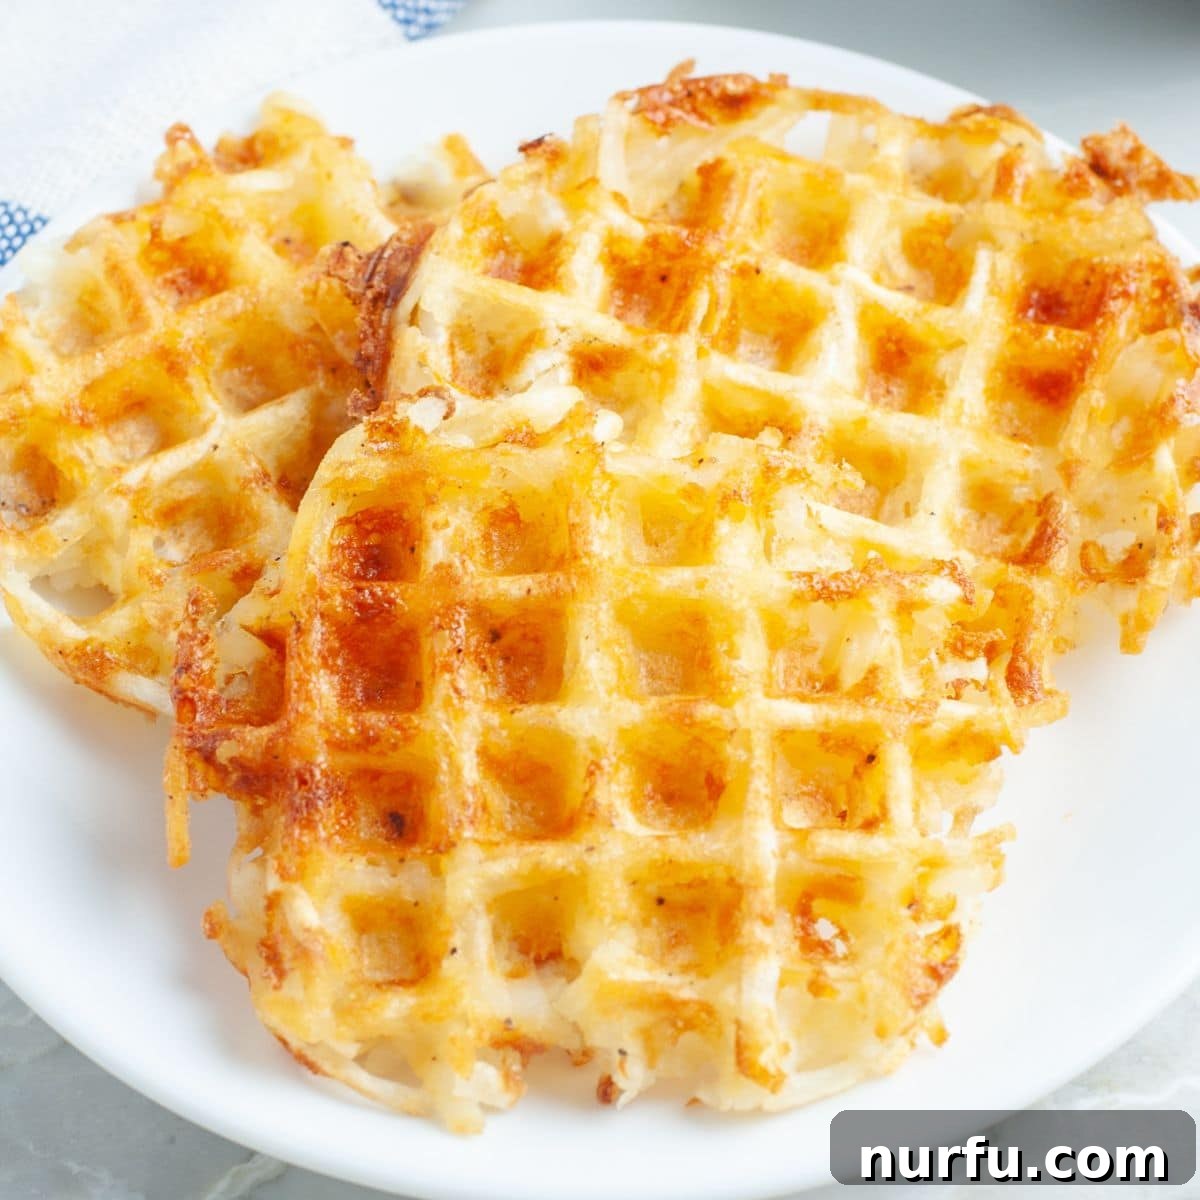
Transform your breakfast, brunch, or dinner with this incredibly simple recipe for crispy hash brown waffles. Made effortlessly in minutes, these golden, tender-on-the-inside, and perfectly crunchy waffles offer a fun and delicious twist on classic hash browns, suitable for any meal of the day.
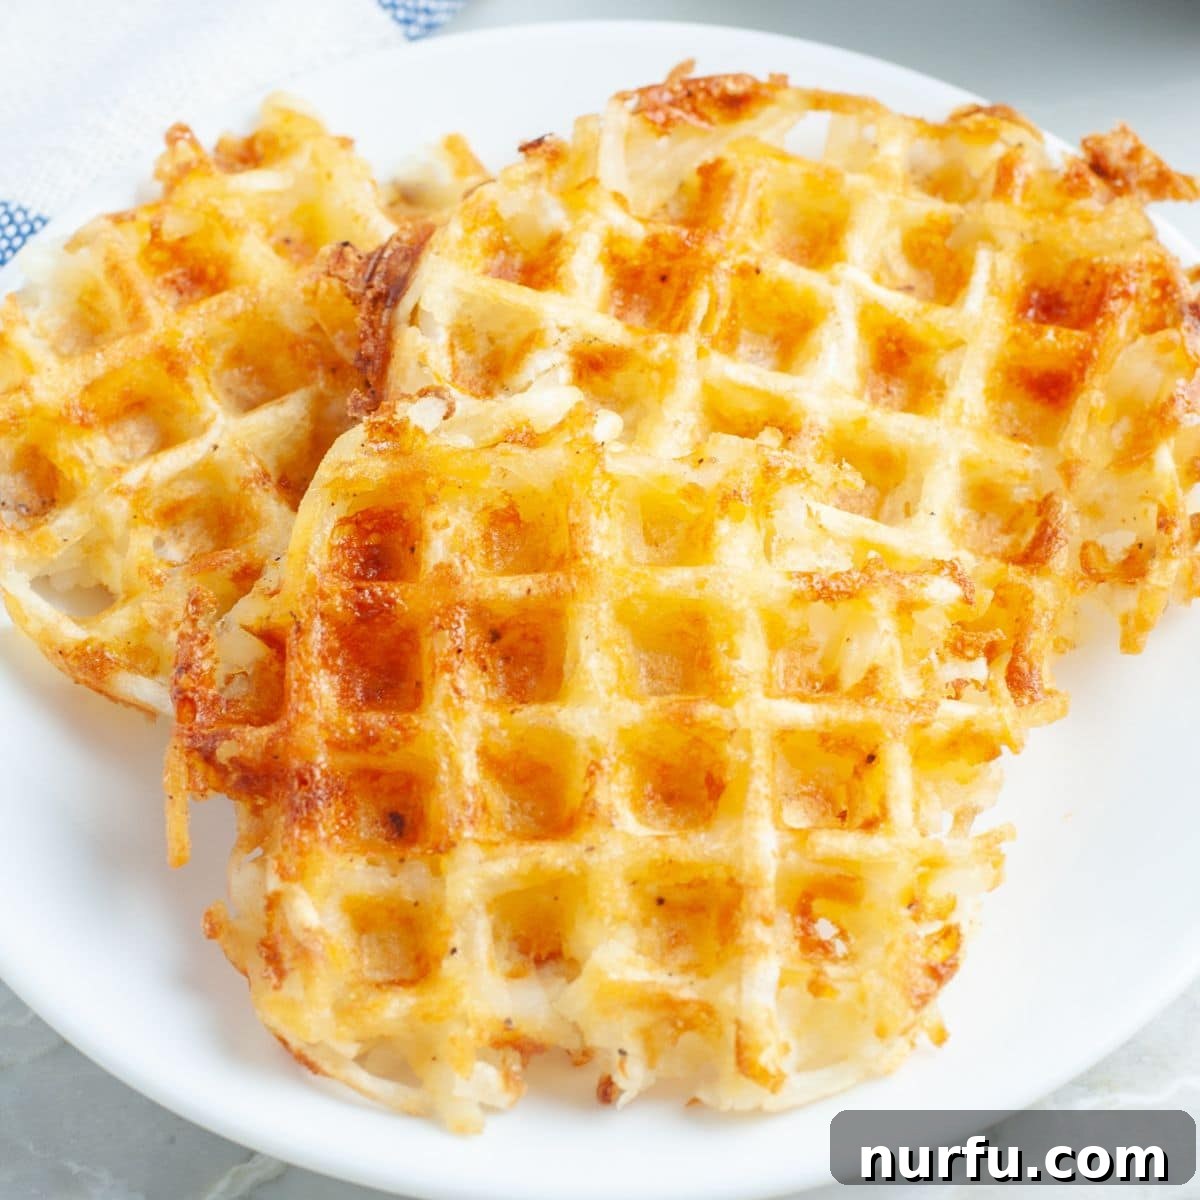
The culinary journey into waffle maker versatility began for many, myself included, with the acquisition of a mini waffle maker. Beyond the traditional sweet waffles, I was eager to explore savory possibilities. Hash browns immediately came to mind as a perfect candidate, given their universal appeal and suitability for any time of day. This particular experiment quickly blossomed into a family favorite, proving that a waffle iron isn’t just for batter.
After a few trials and adjustments to cooking times and ingredient ratios, I perfected this super simple hash brown waffle recipe. The result is a delightful culinary creation: hash browns that are wonderfully crispy on the outside, forming a beautiful lattice pattern, while remaining irresistibly tender and moist on the inside. This texture contrast is what elevates them from ordinary to extraordinary.
These savory waffle iron hash browns are incredibly versatile. They are absolutely perfect served alongside a classic breakfast spread of fluffy scrambled eggs and crispy bacon. But don’t limit them to just mornings! They also make a fantastic, hearty side dish for dinner entrees such as a perfectly cooked tender pork tenderloin, succulent grilled chicken, or even a juicy steak. Their robust flavor and satisfying texture complement a wide array of main courses, making them a go-to option when you want to add a touch of gourmet flair with minimal effort.
Essential Ingredients for Perfect Hash Brown Waffles
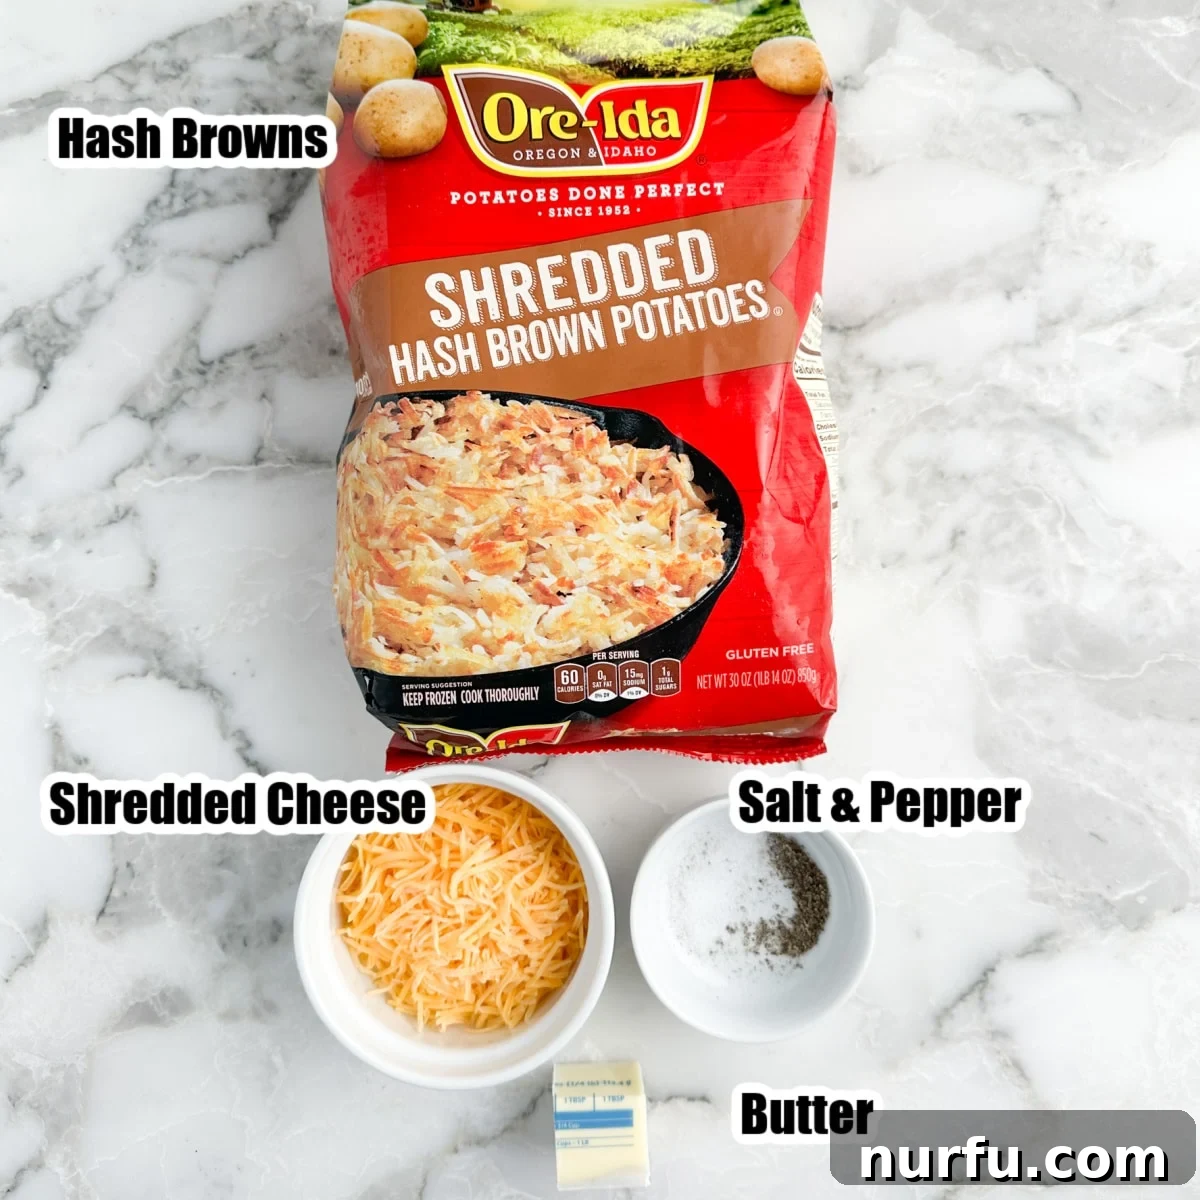
Crafting these delicious hash brown waffles requires just a handful of simple ingredients. The beauty of this recipe lies in its flexibility, allowing you to easily customize it to your taste preferences. Here’s what you’ll need to get started:
- Shredded Hash Browns: You have options here! Frozen shredded hash browns work wonderfully, but ensure they are completely thawed before use. Alternatively, fresh, refrigerated shredded hash browns are also an excellent choice for convenience and quality. The key is to remove excess moisture for maximum crispiness.
- Shredded Cheese: This adds a delightful richness and helps bind the hash browns together, creating a savory interior. While I often opt for sharp cheddar for its classic flavor, feel free to experiment with your favorite shredded cheese varieties. Monterey Jack, a Mexican blend, or even a spicy pepper jack cheese can add a fantastic dimension to your waffles.
- Melted Butter: Unsalted melted butter is crucial for achieving that coveted golden-brown crisp exterior. It also infuses the hash browns with a rich, buttery flavor that’s simply irresistible.
- Salt and Ground Black Pepper: These fundamental seasonings enhance the natural potato flavor. Don’t hesitate to adjust the amounts to your personal taste, or consider swapping them out for other favorite spice blends to create unique flavor profiles.
- Non-stick Cooking Spray: A light coating of cooking spray on your waffle iron is essential to prevent sticking and to encourage that beautiful, crispy crust.
Step-by-Step Guide: How to Make Irresistibly Crispy Hash Brown Waffles
Creating these delightful hash brown waffles is incredibly straightforward. Follow these simple steps for perfectly golden and delicious results every time. Even if you’re a novice in the kitchen, you’ll find this recipe easy to master!
Step One: Prepare Your Hash Browns for Optimal Crispness
If you are using frozen shredded hash browns, it is absolutely crucial that they are completely thawed before you begin. You can achieve this quickly by microwaving them in 30-second intervals, stirring in between, until they are no longer frozen. Once thawed, the most important step for achieving truly crispy waffles is to remove as much excess moisture as possible. Place the thawed hash browns in a clean kitchen towel or several layers of paper towels and squeeze firmly. This step prevents soggy waffles and promotes a beautiful golden crust.
Step Two: Preheat Your Waffle Iron
Plug in your waffle iron and allow it to fully preheat. Most waffle makers have an indicator light that signals when it’s ready to use. Proper preheating ensures even cooking and prevents the hash browns from sticking.
Step Three: Combine the Hash Brown Mixture
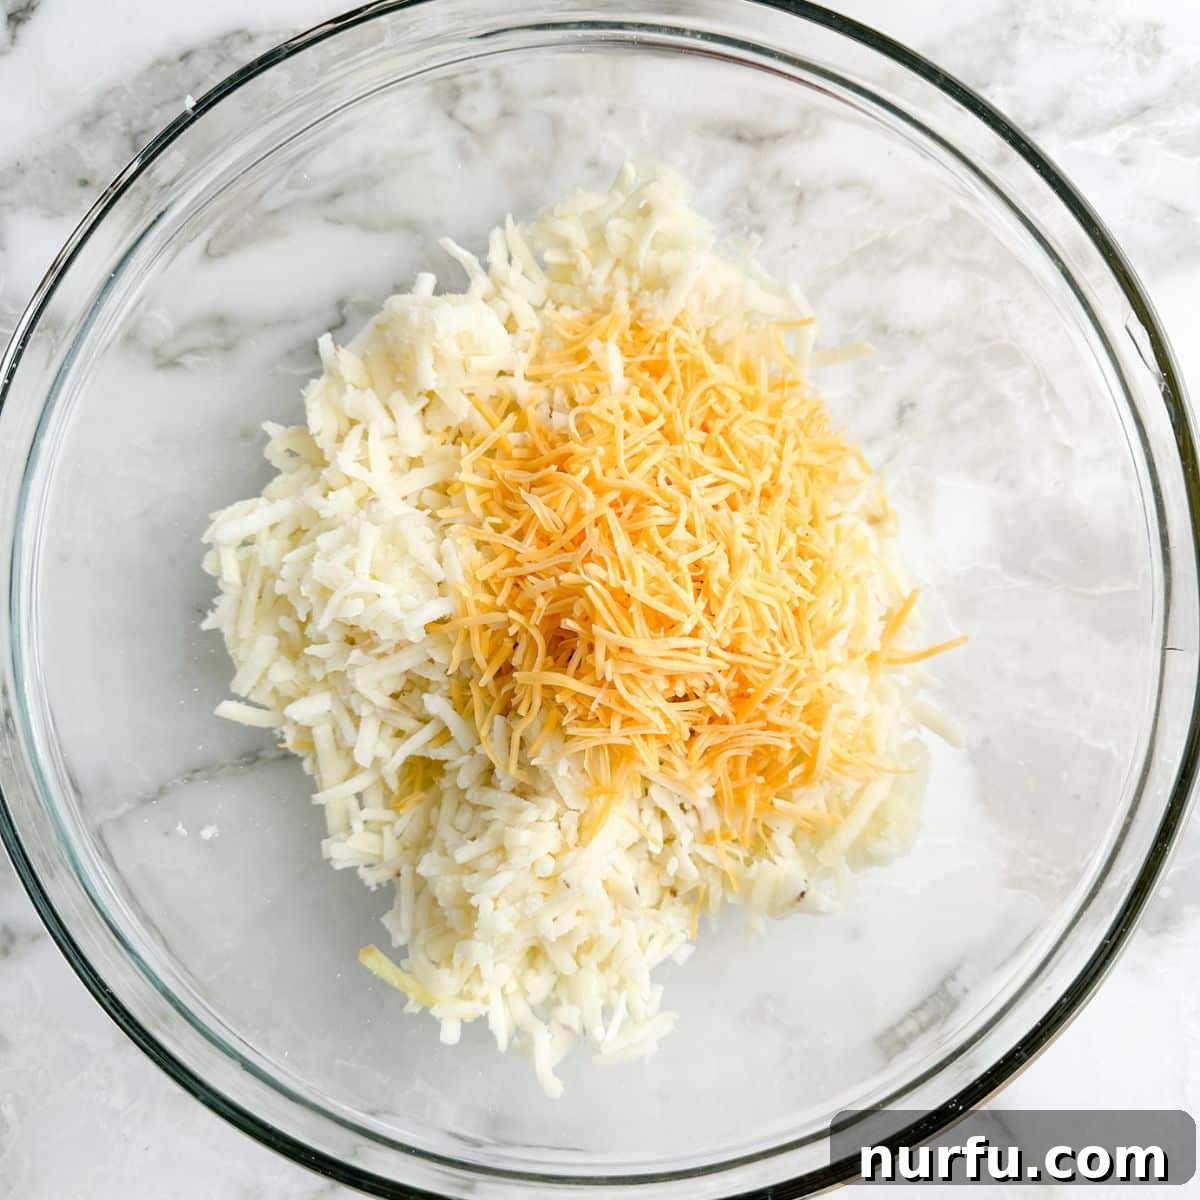
In a large mixing bowl, combine the thoroughly dried hash browns, your chosen shredded cheese, melted butter, salt, and ground black pepper. Mix everything together until the hash browns are evenly coated with the butter and seasonings, and the cheese is well distributed. The melted butter helps to bind the mixture and provides a rich flavor, while the cheese adds a gooey, savory element.
Step Four: Cook to Golden Perfection
Lightly spray the heated waffle iron plates with non-stick cooking spray, ensuring good coverage to prevent sticking. Spoon a generous amount of the hash brown mixture onto the center of the waffle iron. The exact amount will depend on the size of your waffle maker; aim for enough to cover most of the surface without overfilling. Close the lid and cook until the hash browns are beautifully golden brown and crispy, typically about 8-12 minutes. Cooking time can vary based on your waffle iron’s wattage and your desired level of crispness. Resist the urge to open the waffle iron too early, as this can interrupt the cooking process and prevent proper browning.
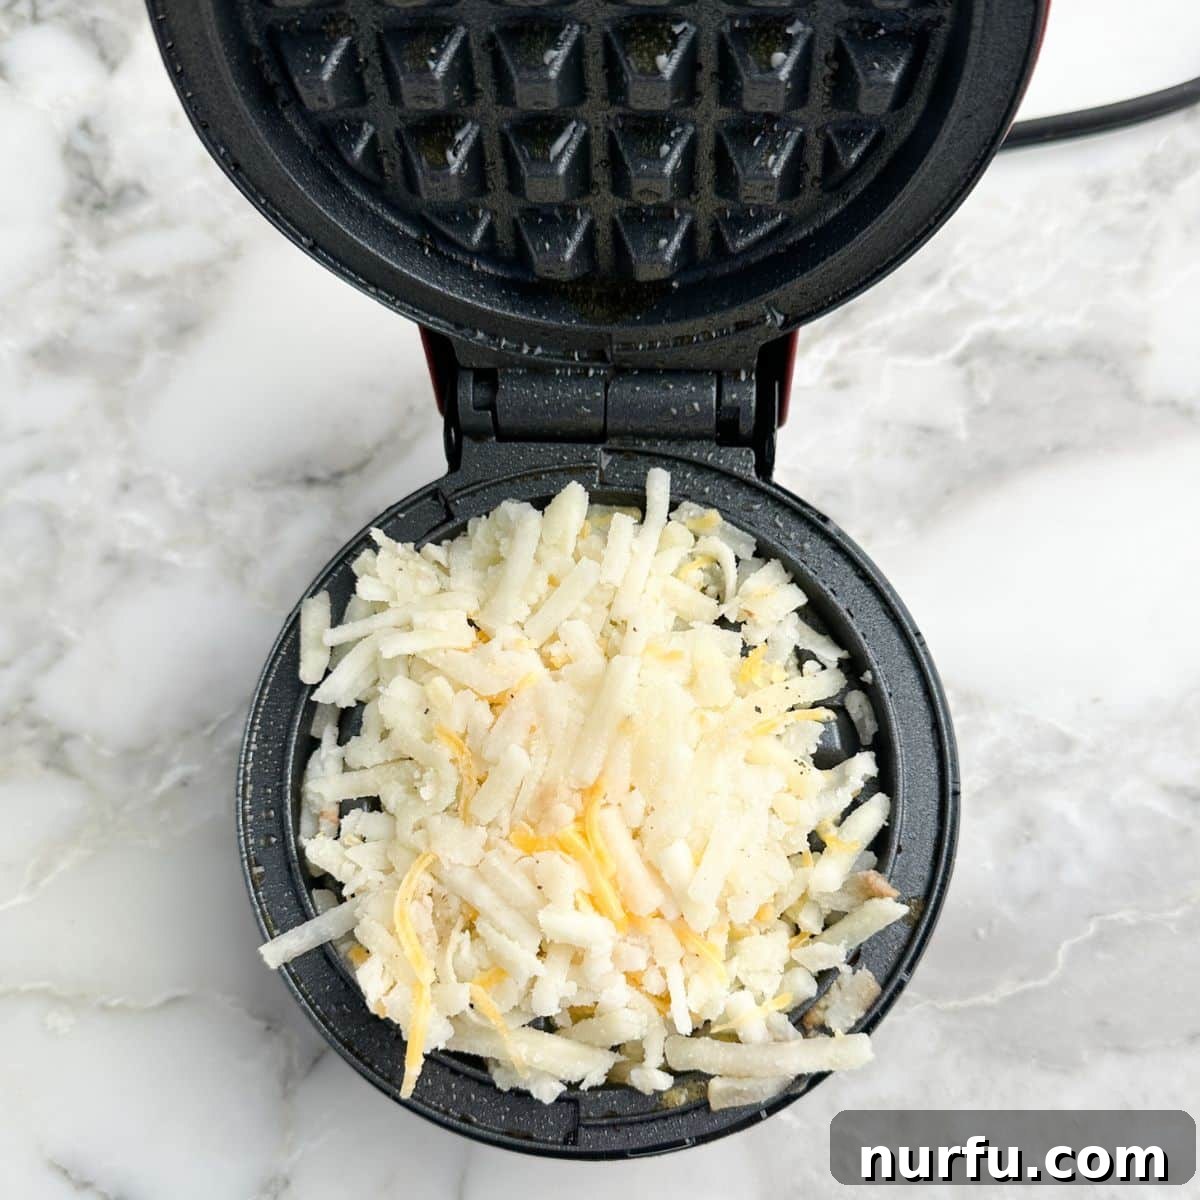
Step Five: Serve Warm and Keep toasty for a Crowd
Carefully remove the hash brown waffles from the iron and serve them immediately while they are warm and at their crispiest. If you’re preparing a larger batch for a crowd or meal prepping, you can keep the finished waffles warm. Simply preheat your oven to 200 degrees F (93 degrees C) and place the cooked waffles on a baking sheet. Keep them in the warm oven until you are ready to serve. This method helps maintain their texture and warmth without overcooking.
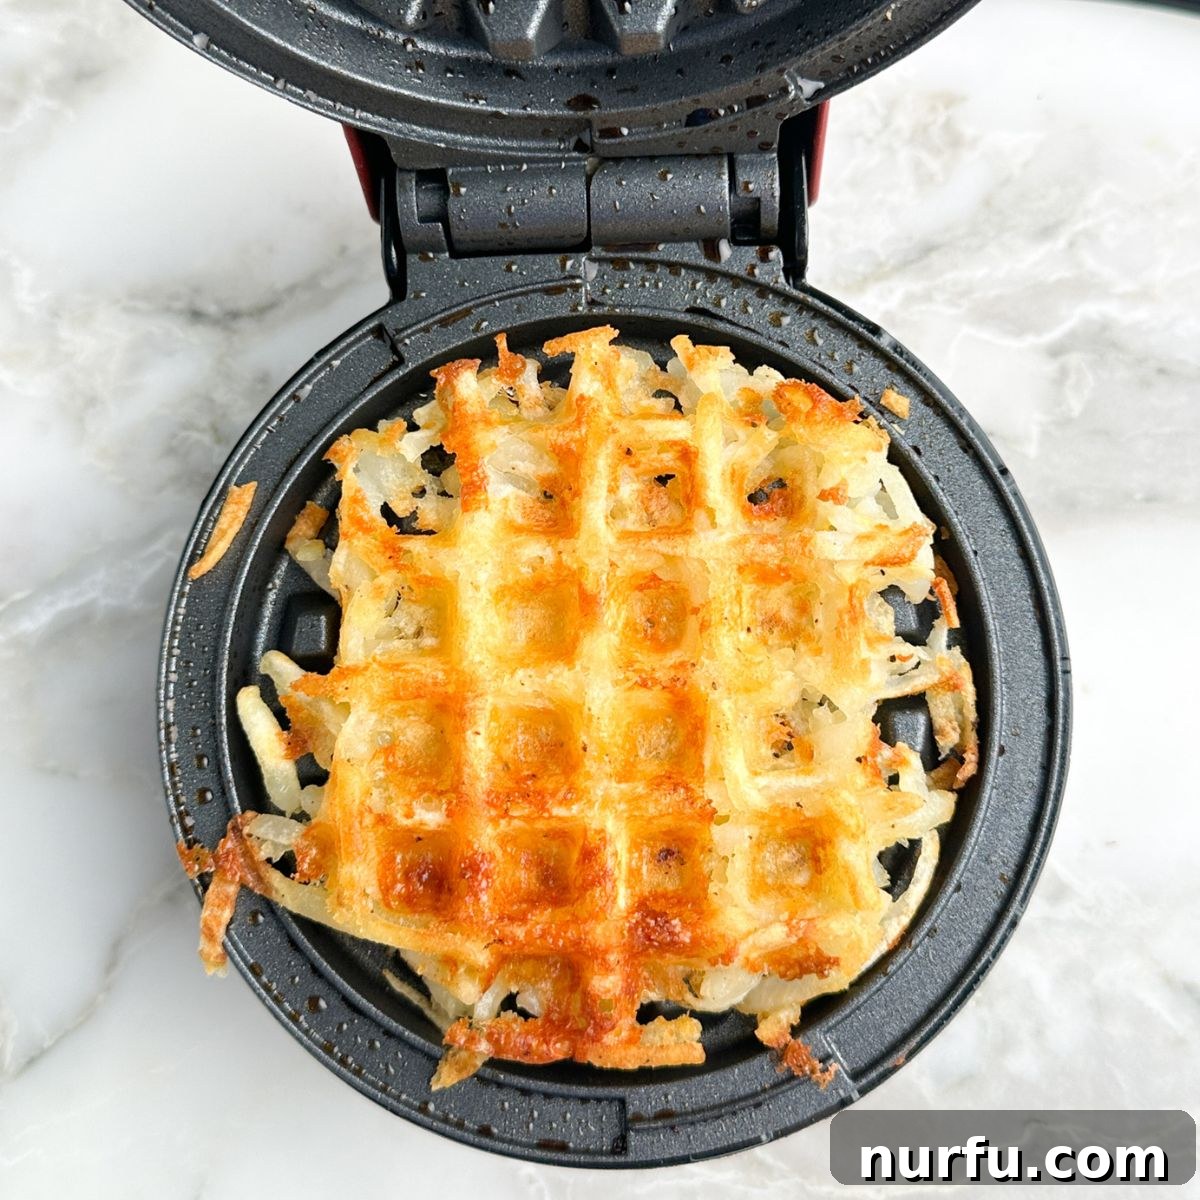
Exciting Recipe Variations to Customize Your Hash Brown Waffles
One of the best aspects of this hash brown waffle recipe is its incredible adaptability. Feel free to unleash your culinary creativity and experiment with different flavors and additions to make them uniquely yours. Here are some ideas to inspire you:
Seasonings: Beyond salt and pepper, a world of flavor awaits! Consider incorporating a pinch of garlic powder for an aromatic boost, onion powder for a savory depth, or smoked paprika for a hint of smoky warmth. Seasoned salt can add an extra layer of complexity, while a sprinkle of Italian seasoning offers a Mediterranean twist. For those who love everything bagels, a generous dash of Everything Bagel Seasoning provides a fantastic blend of sesame, poppy seeds, garlic, and onion, creating a truly unique waffle. A touch of cayenne pepper or red pepper flakes can introduce a subtle heat, perfect for spice lovers.
Flavorful Fillings: Turn your hash brown waffles into a complete meal or a more substantial side by adding various fillings. Finely chopped cooked bacon or diced ham are excellent choices for a meaty, savory addition. For a touch of freshness and color, incorporate diced bell peppers (any color!), finely minced onions, or even some chopped spinach. You can also mix in a beaten egg with the hash brown mixture, especially if omitting cheese, to help bind the ingredients and add extra protein and richness. Just remember to chop any added ingredients very finely to ensure they cook evenly and integrate well into the waffle structure.
Creative Ways to Serve Waffle Iron Hash Browns
Waffle maker hash browns are incredibly versatile and can be enjoyed in countless ways, whether as a starring main dish or a satisfying side. Their crispy texture and savory flavor make them a perfect canvas for a variety of toppings and pairings. Here are a few of our absolute favorite ways to enjoy them:
- Loaded Hash Brown Waffles: Elevate them to a gourmet breakfast or brunch item by topping with a dollop of cool sour cream, a sprinkle of crispy bacon bits, and finely diced green onions. It’s like a deconstructed baked potato, but with a fantastic crispy waffle base!
- Sweet & Savory Combo: For an unexpected yet utterly delicious pairing, serve your hash brown waffles topped with tender crispy chicken tenders and a generous drizzle of warm maple syrup. The combination of savory potato, crispy chicken, and sweet syrup is a match made in heaven, reminiscent of chicken and waffles.
- Breakfast Stack: Create a hearty and fulfilling breakfast by stacking your hash brown waffles with fluffy scrambled eggs and a vibrant salsa or your favorite hot sauce for a zesty kick. Add some sliced avocado for extra creaminess and healthy fats.
- Burger or Sandwich Bun Alternative: Use two hash brown waffles as a unique, gluten-friendly bun for mini sliders, breakfast sandwiches, or even a deconstructed burger. The crispy texture adds an exciting element that traditional bread simply can’t match.
- As a Hearty Side: Simply serve them plain alongside grilled steak, roasted chicken, or any other dinner protein for a comforting and delicious side dish that’s far more interesting than plain mashed or baked potatoes.
Storing and Reheating Leftover Hash Brown Waffles
These hash brown waffles are so delicious, you might not have many leftovers! But if you do, they store and reheat beautifully, making them an excellent option for meal prep or quick future meals.
Store: To maintain freshness, allow any leftover hash brown waffles to cool completely to room temperature. Once cooled, transfer them to an airtight container or a heavy-duty zip-top freezer bag. Properly stored, they will keep well in the refrigerator for up to 5 days. This makes them a convenient option for quick breakfasts or snacks throughout the week.
Freeze: Hash brown waffles freeze exceptionally well, offering a fantastic make-ahead solution. After cooking, let them cool completely. For best results, you can flash freeze them first by placing them in a single layer on a baking sheet until solid (about 30-60 minutes). Then, transfer the frozen waffles to a freezer-safe bag or container, removing as much air as possible to prevent freezer burn. They can be stored in the freezer for up to 3 months, ready whenever a craving strikes.
Warm Up: To bring your hash brown waffles back to life, reheating them is easy. For optimal crispness, reheat leftovers in a toaster oven or a conventional oven preheated to 350 degrees F (175 degrees C) for about 5-10 minutes, or until thoroughly heated through and crispy again. You can also use a regular toaster for individual waffles, making them perfect for a quick weekday morning. Avoid microwaving, as this tends to make them soft and less appealing.
Common Questions About Hash Brown Waffles
Here are answers to some frequently asked questions about making hash brown waffles, ensuring you have all the tips for success:
Yes, absolutely! You can certainly use fresh, raw shredded potatoes to make these waffles. The most important step when using fresh potatoes is to ensure you squeeze out as much excess water and moisture as possible after shredding. Use a clean kitchen towel or paper towels and wring them out thoroughly. This critical step prevents the waffles from becoming soggy and helps achieve that desired crispy texture. You might even want to let them sit for a few minutes after shredding and squeezing, then give them another squeeze.
Yes, they can certainly be made without cheese! If you are avoiding dairy or simply prefer a simpler hash brown, you can omit the shredded cheese. To help bind the hash browns together in the absence of cheese, I recommend mixing in one beaten egg with the hash brown mixture. The egg acts as a natural binder, ensuring your waffles hold their shape while still crisping up beautifully in the waffle iron. You might also consider adding a tablespoon of flour or cornstarch to help with binding and crispness.
Any standard waffle iron will work well for making hash brown waffles, whether it’s a traditional size or a mini waffle maker. The key is to ensure it’s a non-stick model and that you preheat it thoroughly before adding the hash brown mixture. Mini waffle makers are fantastic for individual, perfectly portioned crispy hash browns, while a larger iron can create bigger, more substantial waffles ideal for a main course or for serving a group.
While it’s best to cook the hash brown waffles immediately after mixing for optimal crispness, you can prepare the mixture a few hours in advance. If preparing ahead, cover the bowl tightly with plastic wrap and refrigerate. When you’re ready to cook, give the mixture a good stir, and you might want to add another light spray of cooking oil to the mixture itself to ensure everything is well coated before placing it on the hot waffle iron. This helps maintain moisture and prevents the potatoes from oxidizing and turning brown.
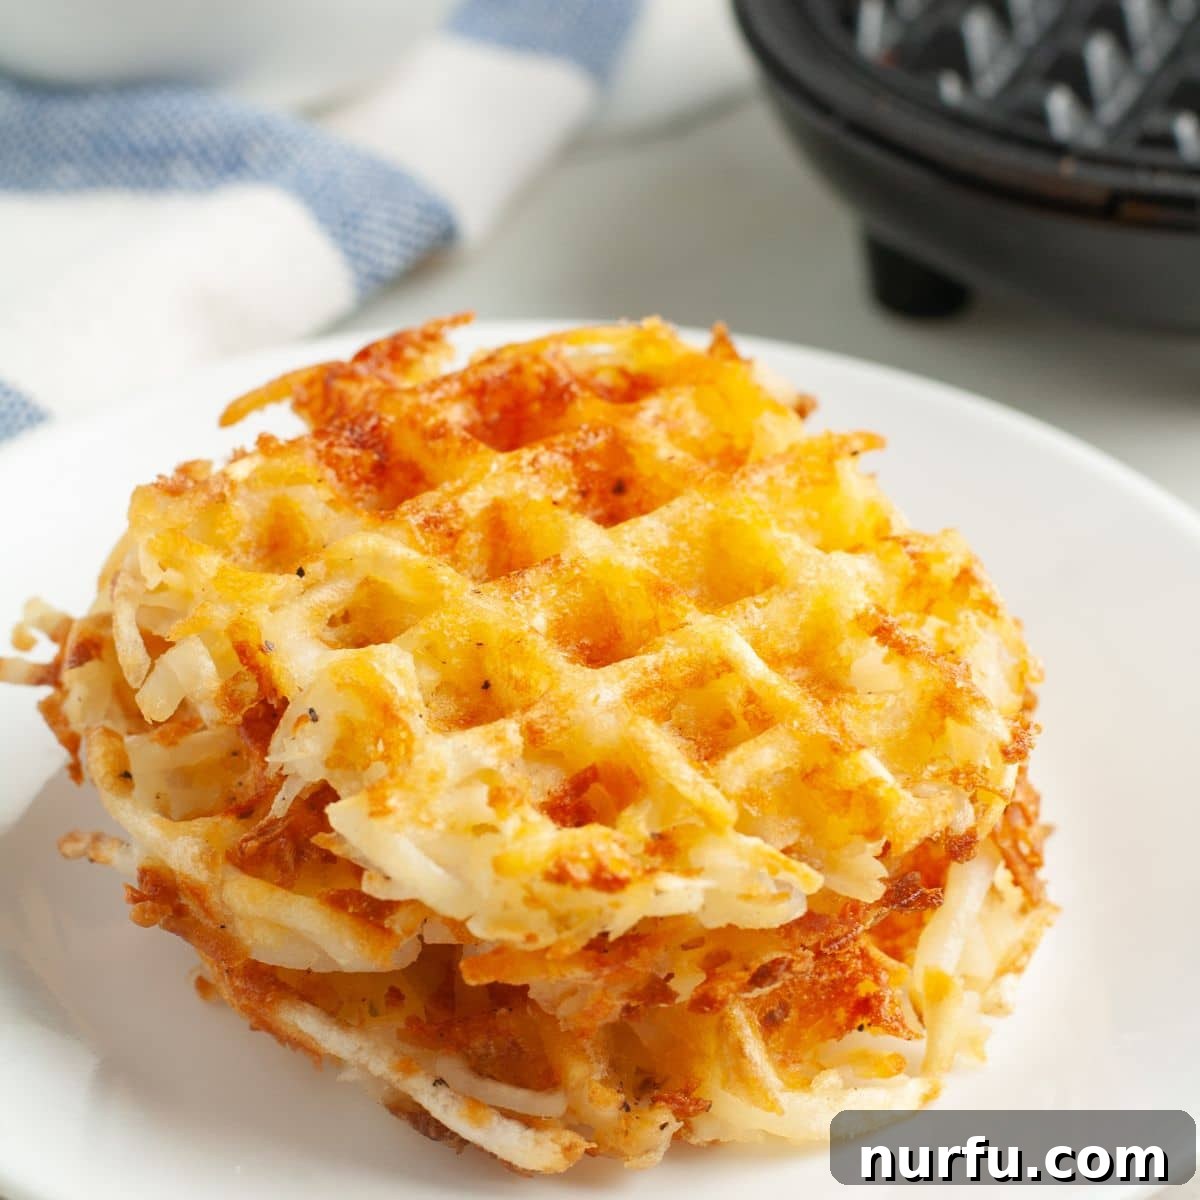
I genuinely hope you give this easy and incredibly versatile hash brown waffle recipe a try. It’s a game-changer for quick meals, creative side dishes, and delightful breakfasts. Once you experience the crispy exterior and tender interior, you’ll wonder why you ever made hash browns any other way!
Please let me know if you try this delicious recipe in the comments below. I’d love to hear about your experience and any creative variations you come up with!
Discover More Easy and Creative Waffle Maker Recipes
The versatility of the waffle iron extends far beyond traditional waffles. If you enjoyed making these hash brown waffles, you’ll love exploring these other simple and fun waffle recipes that transform everyday ingredients into extraordinary treats:
- Cinnamon Roll Waffles: Take canned cinnamon rolls to a new level by cooking them in your waffle maker. They come out gloriously gooey and crispy, perfect for a quick, decadent breakfast or dessert, especially in a mini waffle maker.
- Tater Tot Waffles: A playful and equally delicious alternative to hash browns, tater tot waffles offer a delightful crunch and are incredibly simple to make. They’re a fantastic side dish or appetizer.
- Bisquick Waffles: For classic, fluffy waffles with minimal effort, Bisquick mix is your best friend. This recipe makes light and airy waffles that are perfect for a traditional breakfast.
- Cornbread Waffles: Transform humble cornbread into a delightful waffle form. These savory waffles are excellent served with chili, stew, or as a unique side for BBQ, offering a crispy exterior and a tender, slightly sweet interior.

Cheesy Hash Brown Waffles
Equipment
- 1 Waffle iron (mini or standard size)
Ingredients
- 15 ounces shredded hash browns, thawed and excess moisture squeezed out
- 1 tablespoon unsalted butter, melted
- 1/2 cup shredded cheese (e.g., cheddar, Monterey Jack, or a blend)
- 1/2 teaspoon salt (or to taste)
- 1/4 teaspoon ground black pepper (or to taste)
- Non-stick cooking spray
Instructions
- If using frozen hash browns, ensure they are fully thawed. Place thawed hash browns in a clean kitchen towel or paper towels and squeeze out as much excess moisture as possible. This step is crucial for crispy waffles.
- Preheat your waffle iron according to the manufacturer’s instructions.
- In a large mixing bowl, combine the dried hash browns, melted butter, shredded cheese, salt, and black pepper. Mix thoroughly until all ingredients are well combined and the hash browns are evenly coated.
- Lightly spray the preheated waffle iron with non-stick cooking spray. Spoon approximately 1/4 of the hash brown mixture onto the center of the waffle iron plates and close the lid. Cook for about 8-12 minutes, or until the hash brown waffle is golden brown and crispy. Cooking time may vary depending on your waffle iron.
- Carefully remove the cooked hash brown waffle and serve warm. Repeat with the remaining mixture. If making for a crowd, keep finished waffles warm by placing them on a baking sheet in an oven set to 200°F (93°C).
Nutrition
Carbohydrates: 19g |
Protein: 5g |
Fat: 7g |
Saturated Fat: 4g |
Polyunsaturated Fat: 0.5g |
Monounsaturated Fat: 2g |
Trans Fat: 0.1g |
Cholesterol: 19mg |
Sodium: 424mg |
Potassium: 316mg |
Fiber: 2g |
Sugar: 0.1g |
Vitamin A: 183IU |
Vitamin C: 9mg |
Calcium: 83mg |
Iron: 1mg
Nutrition information is automatically calculated and should only be used as an approximation. It may vary based on specific ingredients and brands used.
Additional Info
Enjoyed this recipe? Share your thoughts and culinary creations by leaving a comment below! Your feedback and ideas are always welcome.