
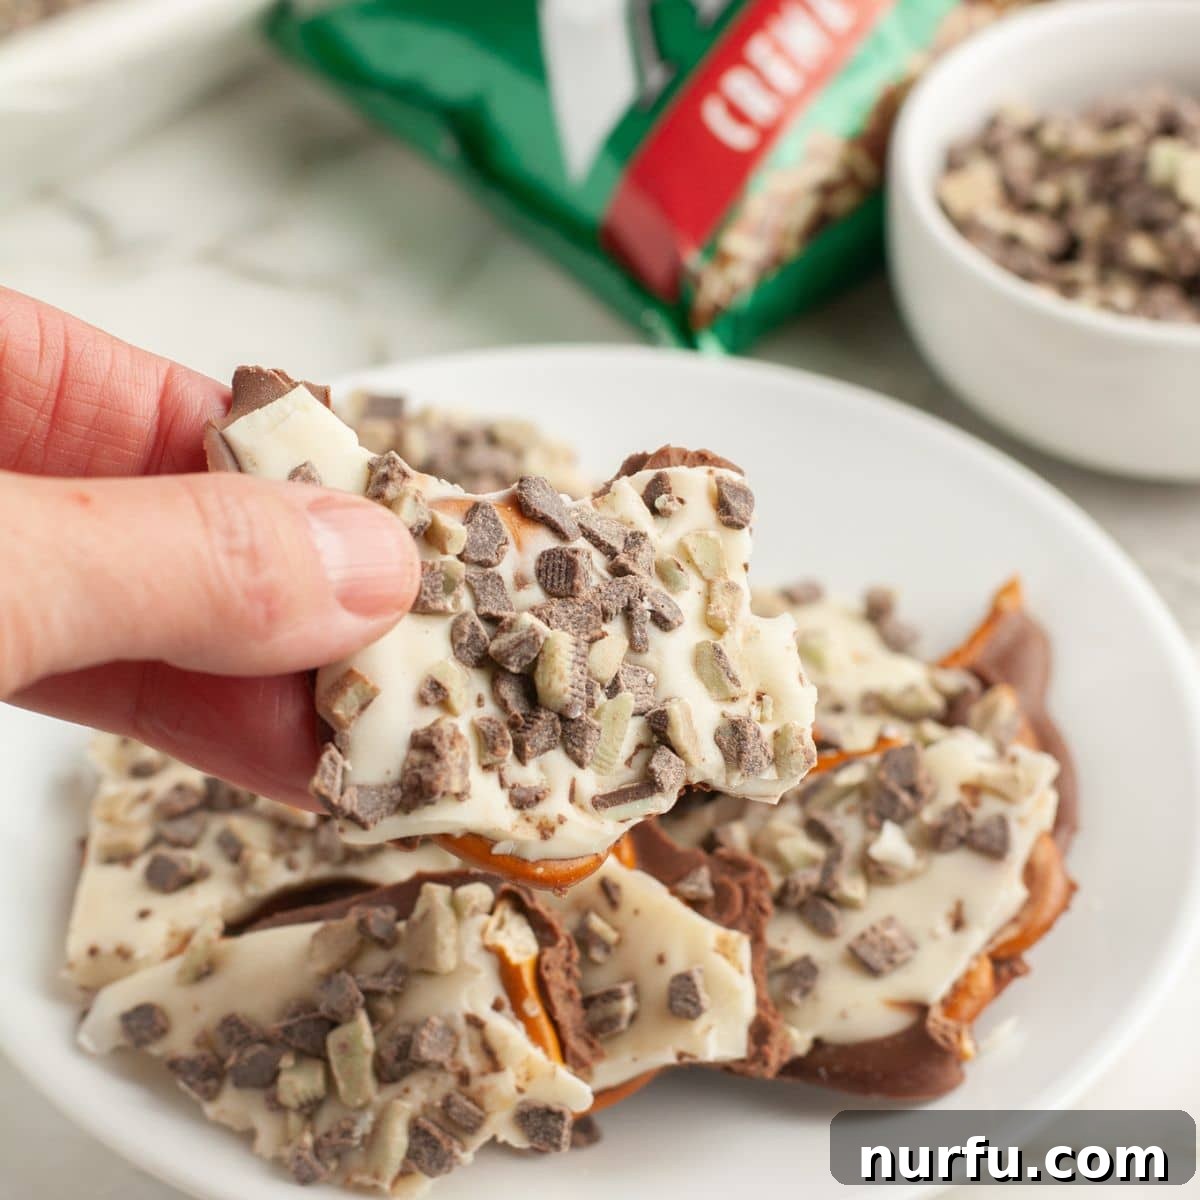
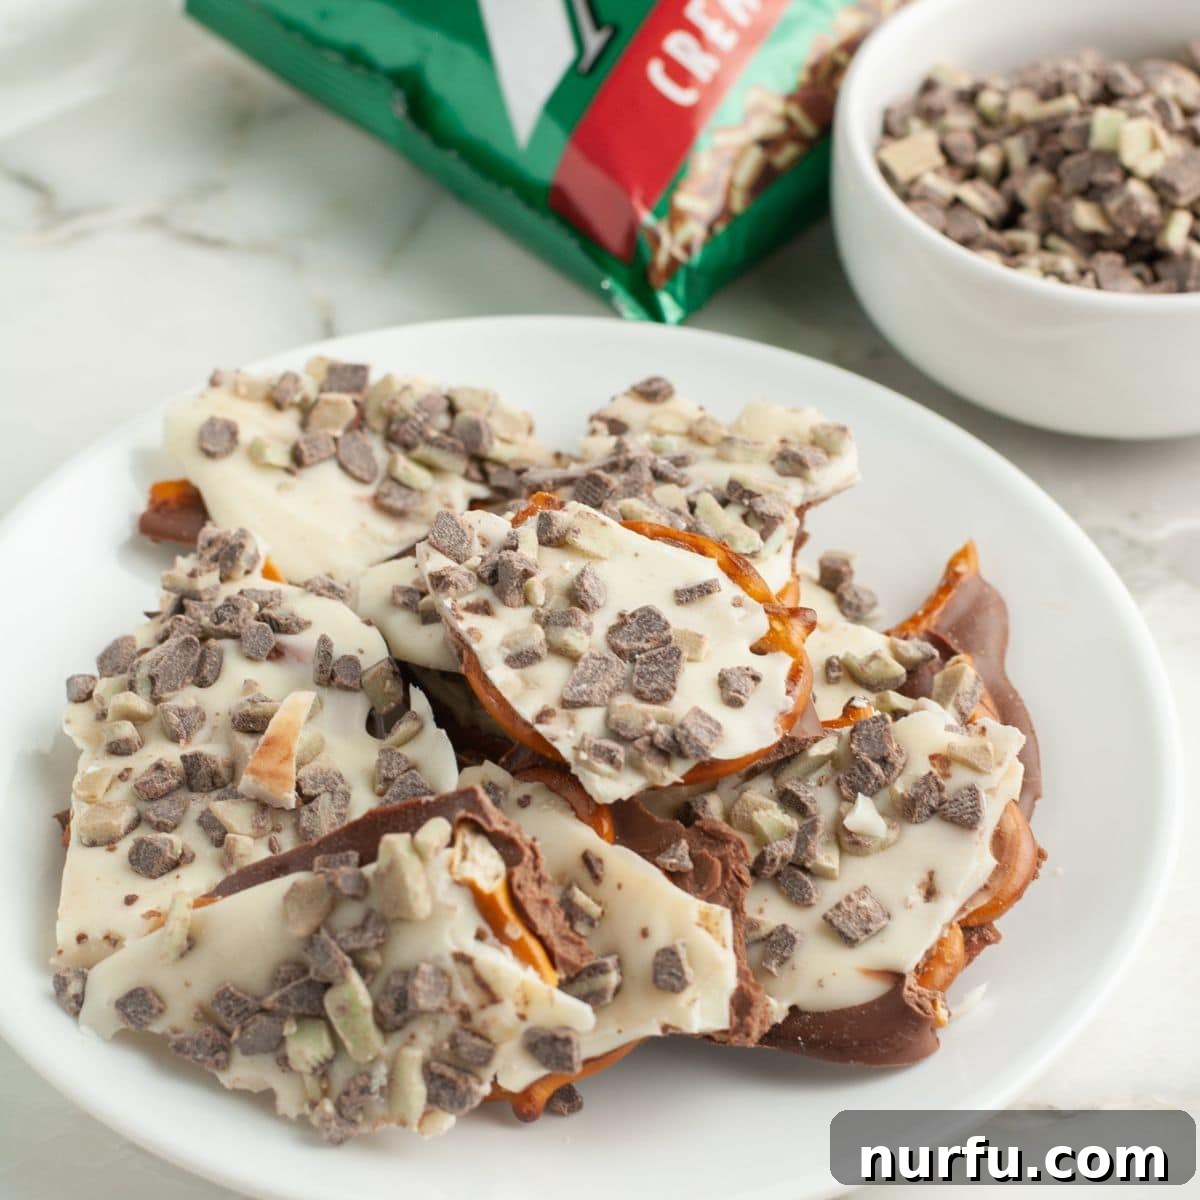
Prepare to delight your senses with this incredible Andes Mint Pretzel Bark, destined to become your go-to holiday treat. This exquisite confection masterfully balances the irresistible flavors of sweet and salty, elevated by the refreshing hint of cool mint. Whether you’re seeking a last-minute holiday dessert, a crowd-pleasing party snack, or a thoughtful homemade gift, this simple yet spectacular recipe is an absolute must-try. Its ease of preparation combined with its vibrant, festive appeal makes it perfect for any occasion that calls for a touch of magic, promising a delightful experience for both the maker and the fortunate recipients.
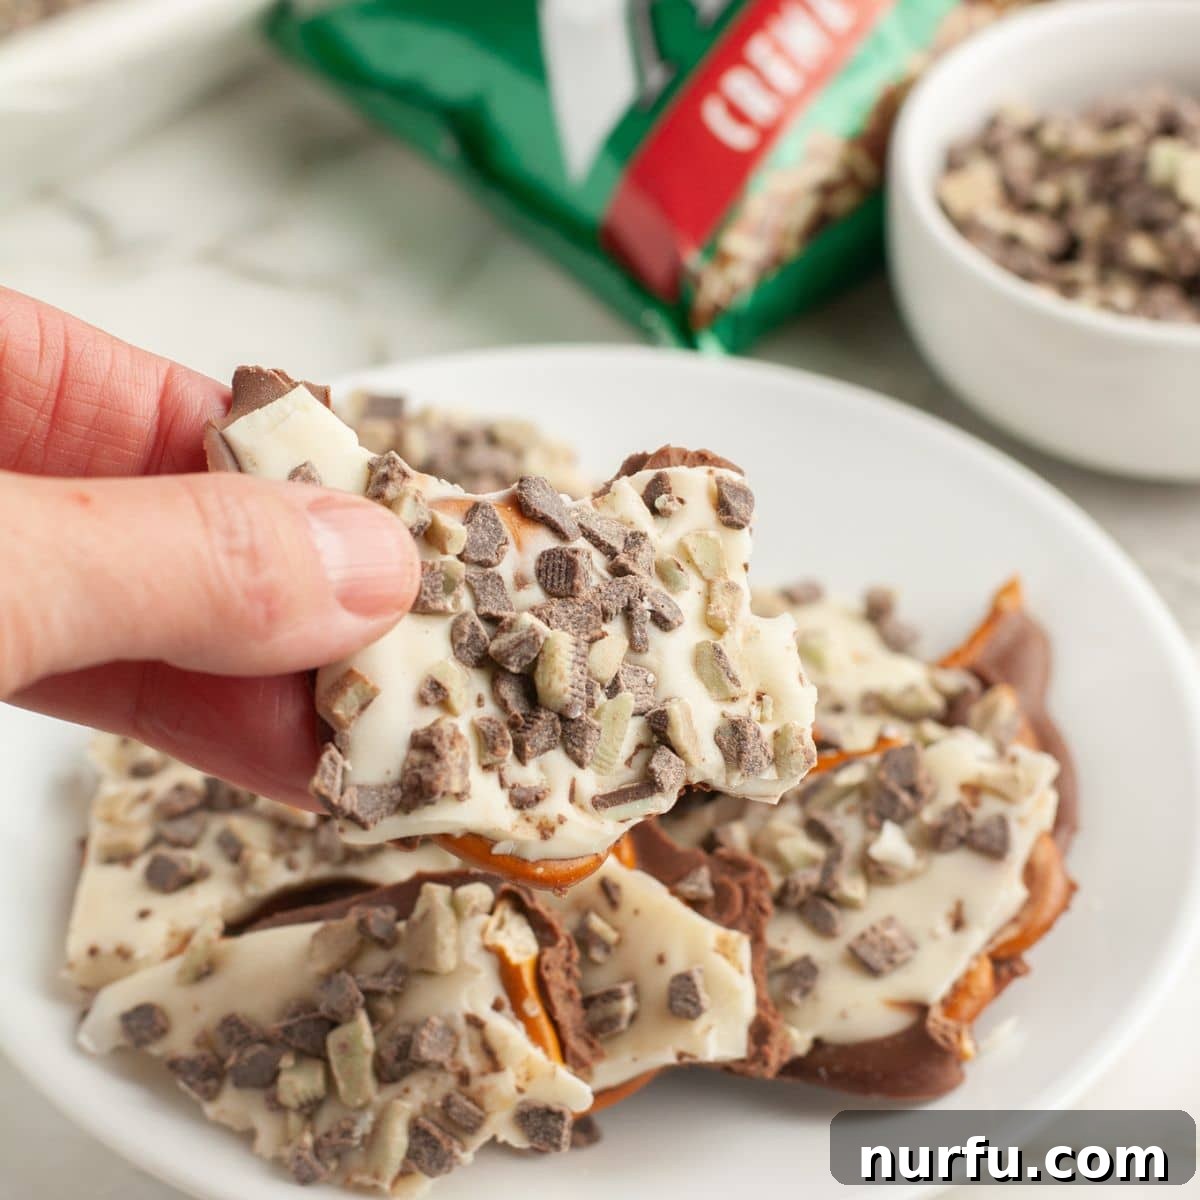
Growing up, one of my most cherished dining memories involved the delightful Andes Mints offered after a meal at certain restaurants. That moment, savoring the cool, creamy blend of mint and chocolate, was the perfect conclusion to any dinner. It’s precisely this nostalgic, beloved flavor profile that inspires my deep affection for this Andes Mint Pretzel Bark. It captures the essence of those classic after-dinner treats, transforming them into an easy-to-make, shareable bark that brings joy with every bite. The ingenious combination of textures – the crisp, salty pretzel, the smooth, melting chocolate, and the refreshing, crunchy mint pieces – creates an experience that is both familiar and exciting, truly a taste of childhood comfort reimagined for festive occasions. This bark isn’t just a dessert; it’s a celebration of simple pleasures and timeless flavors.
Why You’ll Adore This Andes Mint Pretzel Bark Recipe
This Andes Mint Pretzel Bark isn’t just another sweet treat; it’s a culinary experience designed for simplicity and maximum enjoyment. Here are the top reasons why this recipe will quickly become a cherished favorite in your kitchen, especially during the bustling holiday season:
- Unforgettable Flavor Symphony: Prepare your palate for a truly harmonious blend of tastes and textures. The cool, refreshing burst of mint from the Andes candies perfectly complements the rich sweetness of both milk and white chocolate. This delightful duo is then beautifully balanced by the satisfying crunch and subtle saltiness of the pretzels. This complex yet harmonious blend creates an incredibly addictive treat that will leave everyone craving more. It’s a sophisticated twist on a classic candy, elevated by the textural contrast of the pretzels, making it a truly unique and memorable dessert.
- Remarkably Quick and Effortless Preparation: In today’s fast-paced world, finding time for elaborate baking can be a challenge. This recipe is your ultimate solution! You can whip up this decadent Andes Mint pretzel bark in under 30 minutes of active preparation time, making it an absolute lifesaver for busy holidays, impromptu gatherings, or when you simply need a delicious fix without the fuss. Its minimal ingredient list and straightforward steps mean you spend less time in the kitchen and more time enjoying the festivities, all while serving an impressive homemade treat.
- Infinitely Customizable to Your Taste: While the classic Andes Mint combination is undeniably divine, this pretzel bark recipe offers boundless opportunities for personalization and creative flair. Feel free to unleash your inner confectioner by adding various food colorings to the white chocolate for a themed look, scattering festive sprinkles for extra sparkle, incorporating crunchy nuts like pecans or pistachios for added texture, or even experimenting with different types of chocolate bases. This adaptability allows you to tailor the bark precisely to your preferences, match it to any occasion, or simply explore new flavor combinations.
- Perfect for Any Occasion: Beyond its delicious taste and ease of creation, this Andes Mint Pretzel Bark is incredibly versatile. From elegant holiday parties and cozy family gatherings to casual movie nights or as a charming hostess gift, this treat fits right in. It’s durable for transport, easy to portion into individual servings, and visually appealing with its distinct layers and vibrant mint pieces. Furthermore, its homemade charm makes it a heartfelt present that’s sure to impress friends, family, and neighbors, spreading joy and deliciousness wherever it goes.
Essential Ingredients for Your Minty Masterpiece
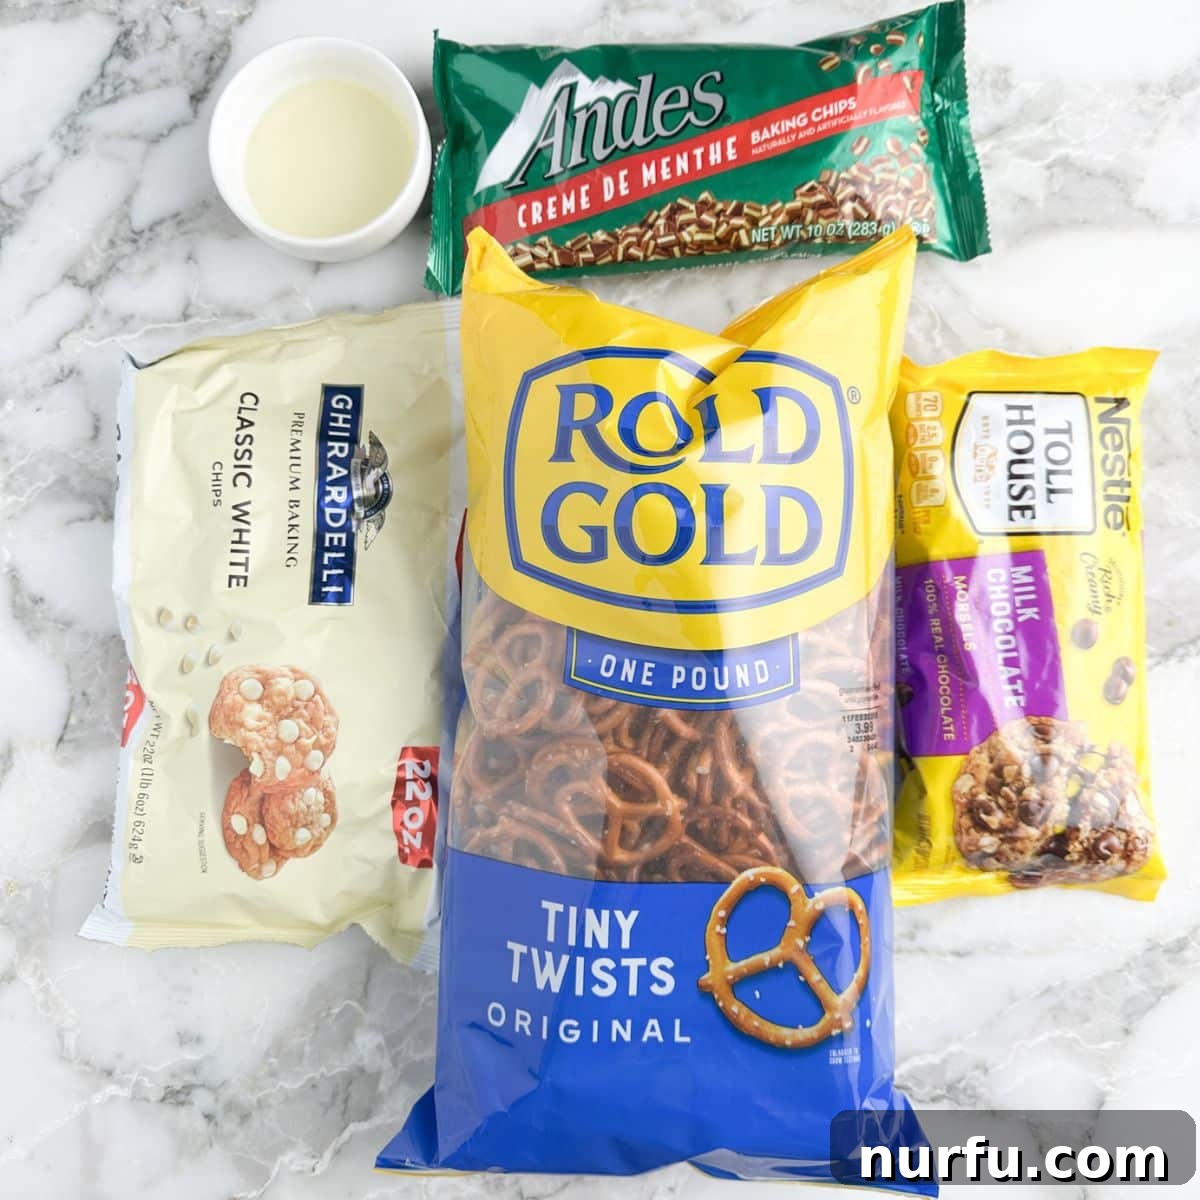
Crafting this irresistible Andes Mint Pretzel Bark requires just a few readily available and high-quality ingredients. The beauty of this recipe lies in its simplicity, but choosing good quality components will significantly elevate your final product, ensuring every bite is as delicious and visually appealing as it looks. Let’s delve into the specifics of each ingredient:
- Milk Chocolate Chips – These form the foundational, rich, and creamy layer of our bark. Milk chocolate offers a classic sweetness that perfectly complements the cool mint, creating a familiar and comforting flavor profile. When selecting, opt for a brand you enjoy eating on its own, as its flavor will be prominent. For those who prefer a deeper, more intense chocolate flavor, you can easily substitute semi-sweet chocolate chips. If you lean towards a less sweet profile or desire a bolder contrast to the mint, high-quality dark chocolate chips (around 60-70% cacao) are an excellent alternative. Whichever you choose, ensure they are fresh for optimal melting and taste.
- White Chocolate Chips – The bright white layer not only adds a striking visual contrast to the dark chocolate but also contributes a creamy sweetness that harmonizes beautifully with both the milk chocolate and the Andes Mints. High-quality white chocolate chips are essential for a smooth melt and a beautiful, even set. Be mindful that white chocolate is more prone to seizing if overheated or exposed to moisture, so melt it gently. As a convenient and reliable alternative, you could also substitute with almond bark (vanilla candy coating). Almond bark is often formulated to melt more smoothly and easily, yielding a very consistent texture, although its flavor is subtly different from pure white chocolate.
- Coconut Oil – This is a clever ingredient that acts as a natural thinning agent for your melted chocolate. Just a small amount helps to achieve a perfectly smooth, fluid, and spreadable consistency, preventing the chocolate from becoming too thick or brittle. It also contributes to a lovely, glossy sheen once the bark hardens. You can use unrefined coconut oil, which might impart a very subtle, pleasant coconut flavor, or refined coconut oil for a neutral taste. Vegetable oil or even a tiny amount of solid shortening (like Crisco) can serve as equally effective substitutes without altering the flavor profile significantly.
- Pretzels – The hero of the “salty” and “crunchy” components! I highly recommend using mini pretzels for this bark. Their smaller size provides a consistent crunch in every bite and fits wonderfully within the layered structure of the bark. Their intricate, twisted shape also helps to trap and hold the chocolate effectively. However, don’t feel limited! You can certainly use your favorite pretzel shape – pretzel sticks, snaps, or even waffle pretzels can add a unique textural element. The crucial aspect is to ensure they are arranged in a single, even layer across the chocolate base to guarantee a balanced taste and prevent the bark from becoming too uneven. The saltiness of the pretzels is absolutely vital for cutting through and balancing the sweetness of the chocolates and mint.
- Andes Mints – These iconic, refreshing mint chocolate pieces are the very heart of this bark, imparting its signature flavor and festive color. For ultimate convenience, you can purchase pre-chopped Andes Mint bits, which are readily available in many baking aisles during the holidays. Alternatively, you can buy the classic rectangular Andes Candies and chop them yourself. Chopping them into varying sizes can add an interesting visual and textural variety to your finished bark. If Andes Mints are difficult to source, you can substitute with other mint chocolate candies (like peppermint patties, chopped) or, for a similar mint flavor, you can add 1-2 drops of high-quality peppermint extract to your melted white chocolate layer and sprinkle with crushed plain chocolate.
Step-by-Step Guide: Crafting Your Andes Mint Pretzel Bark
Creating this stunning and delicious pretzel bark is surprisingly simple, making it an ideal project even for novice bakers. Follow these clear, detailed steps to achieve a perfectly layered, minty chocolate treat that will impress everyone with its professional appearance and irresistible taste:
- Prepare Your Workspace and Baking Sheet: Begin by lining a large, sturdy baking sheet with wax paper or parchment paper. This crucial preparatory step prevents the chocolate from sticking to the pan, ensuring easy removal and significantly simplifying cleanup. Make sure the paper covers the entire surface of the baking sheet to prevent any chocolate spills directly onto the metal. Having everything ready before you start melting the chocolate will make the process much smoother.
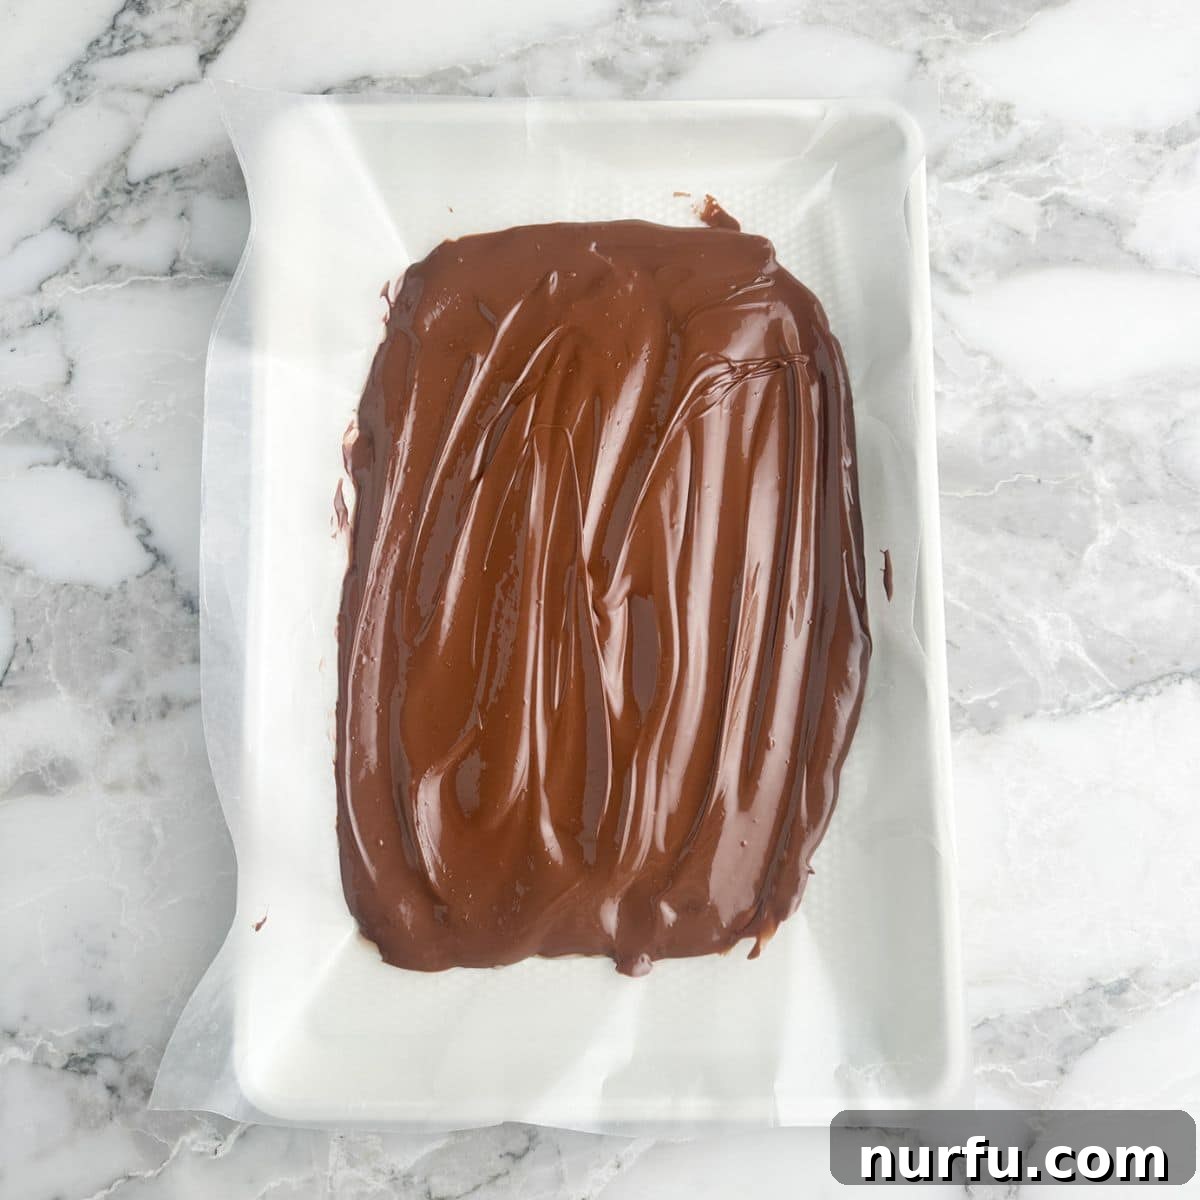
- Melt the Milk Chocolate Base Layer: Set up a double boiler. To do this effectively, find a heat-safe glass or metal bowl that fits snugly over a medium saucepan without the bottom of the bowl touching the water when placed on top. Fill the saucepan halfway with water and bring it to a gentle simmer over medium heat; avoid a rolling boil as too much steam can damage the chocolate. Once simmering, place the bowl on top. Pour your milk chocolate chips into the bowl, along with half of your measured coconut oil (approximately 1 tablespoon). Stir constantly and gently with a rubber spatula or whisk until the chocolate is completely melted and beautifully smooth, without any lumps. The indirect heat of the double boiler is key to preventing the chocolate from burning or seizing, guaranteeing a perfect, glossy consistency.
- Create and Spread the First Chocolate Layer: Carefully remove the bowl of perfectly melted milk chocolate from the double boiler, being cautious of residual steam. Pour the entire quantity of melted chocolate onto the prepared wax paper on your baking sheet. Working quickly, use an offset spatula, the back of a spoon, or a clean pastry scraper to spread the chocolate evenly across the paper. Aim for a thin, consistent layer that is about 1/8 to 1/4 inch thick. This ensures that the bark is easy to break and chew without being overly dense or brittle.
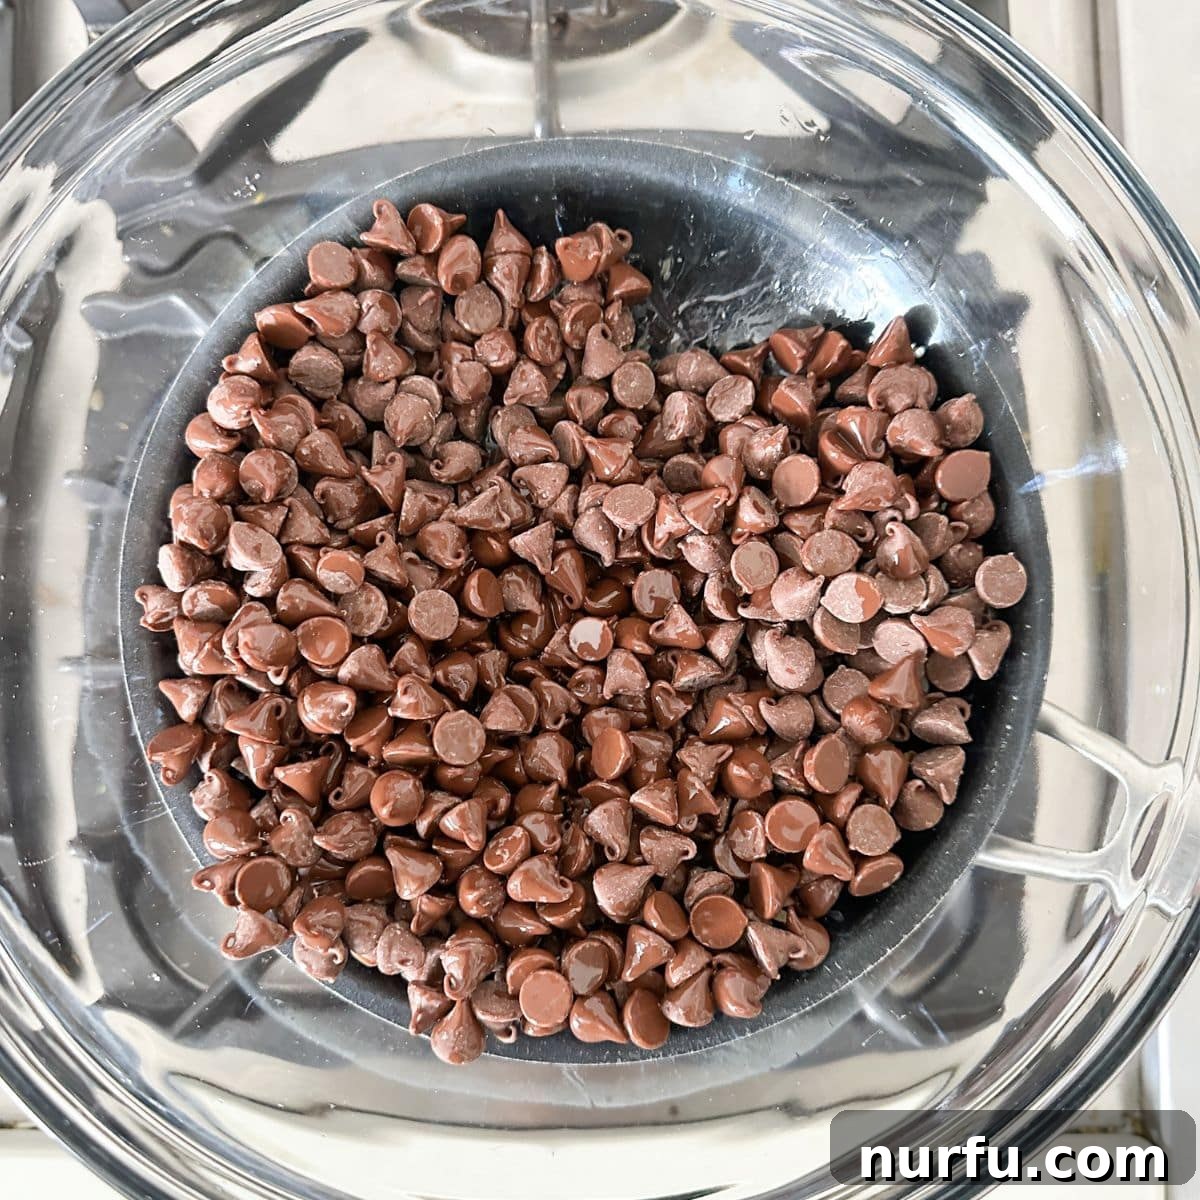
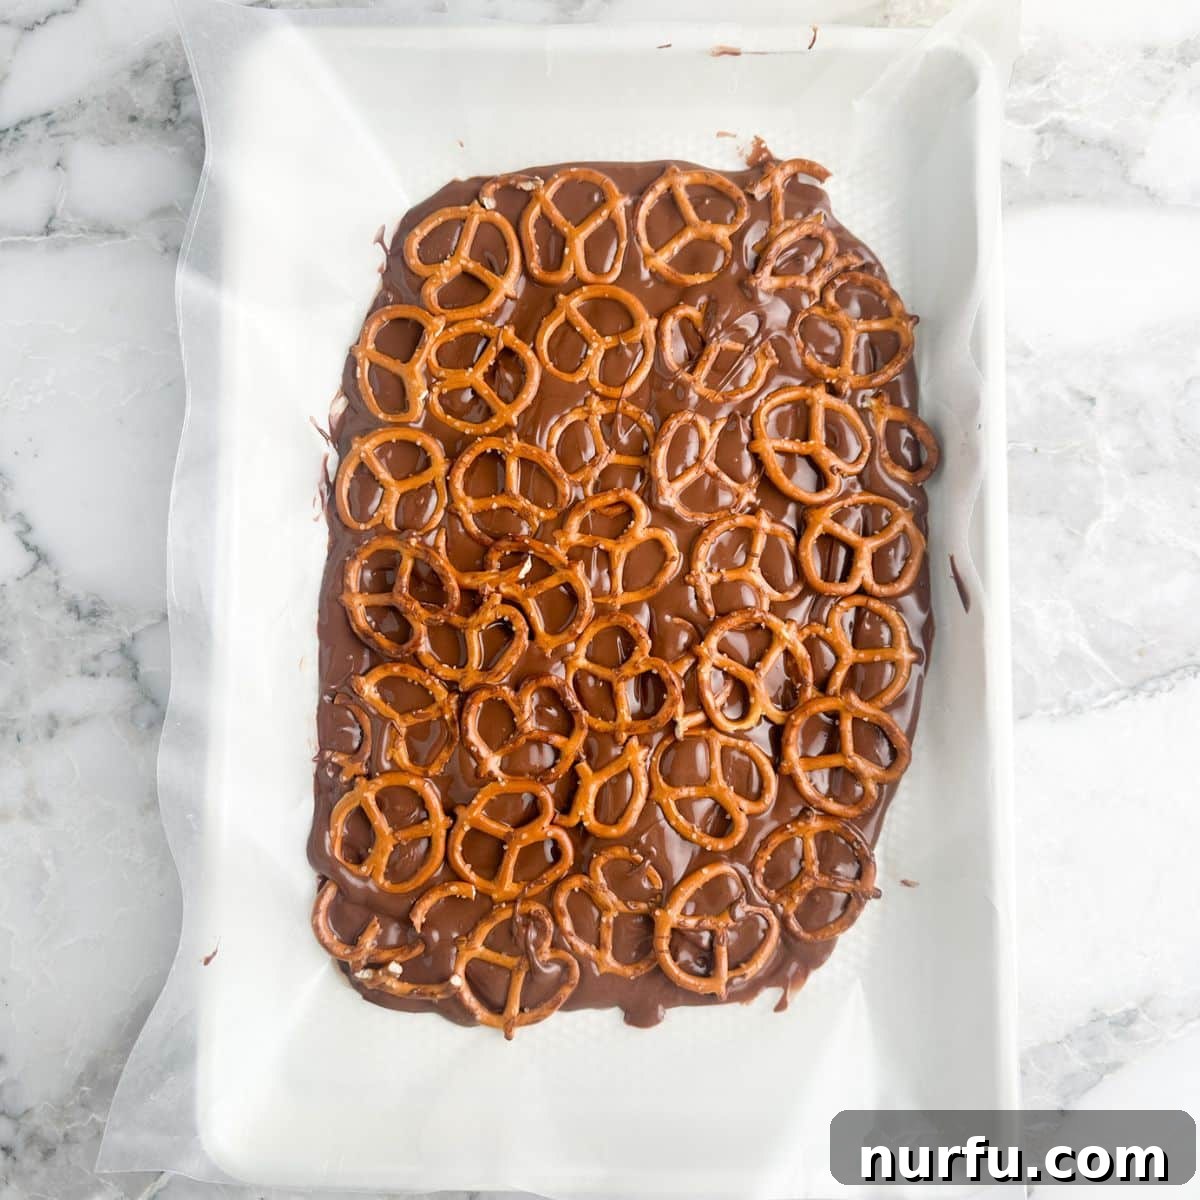
- Add Pretzels and Initiate Chilling: While the milk chocolate layer is still warm and wet (this is crucial for adhesion), generously sprinkle your mini pretzels over the entire chocolate surface. Arrange them in a single, relatively even layer, covering as much of the chocolate as possible without overlapping too much. Gently press the pretzels down lightly with the back of your hand or a clean spatula to ensure they adhere firmly to the chocolate. Once the pretzels are in place, carefully transfer the baking sheet to the freezer for approximately 10 minutes. This quick chill helps the chocolate set firm, creating a stable base for the next layer and preventing the pretzels from shifting or floating when the white chocolate is added.
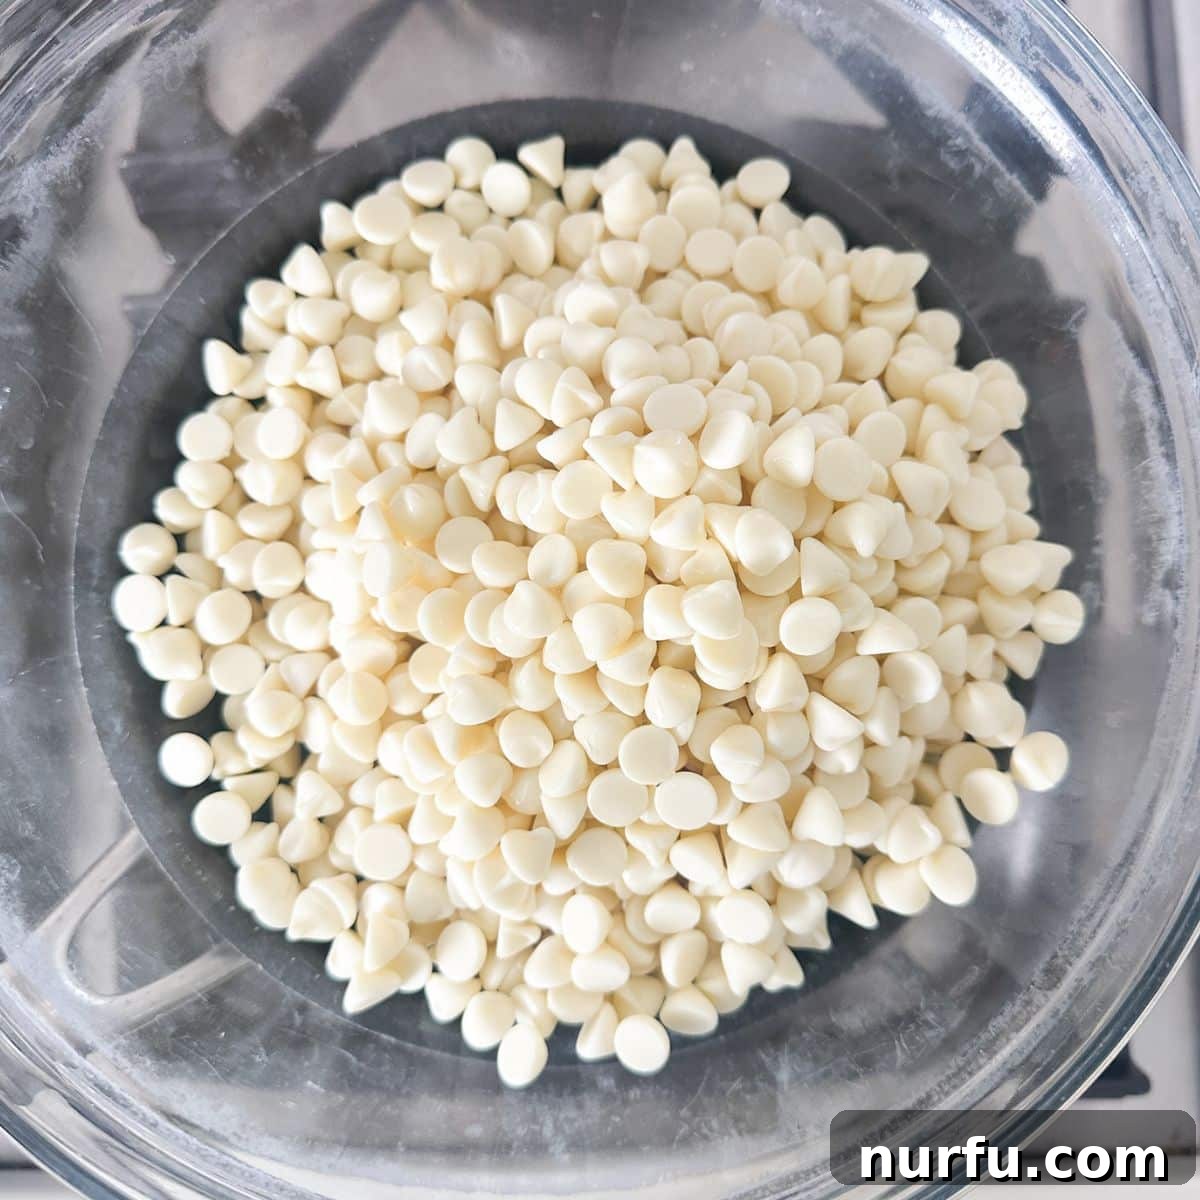
- Melt the White Chocolate Layer: While the first layer is chilling in the freezer, clean your double boiler bowl thoroughly or use a fresh one. Place it back over the simmering water. Add your white chocolate chips and the remaining 1 tablespoon of coconut oil to the bowl. Just as with the milk chocolate, stir constantly until the white chocolate is completely smooth and melted, with a beautiful, pourable consistency. The coconut oil is particularly beneficial here, as white chocolate can sometimes be trickier to melt smoothly than milk or dark chocolate. Ensure there are no lumps remaining.
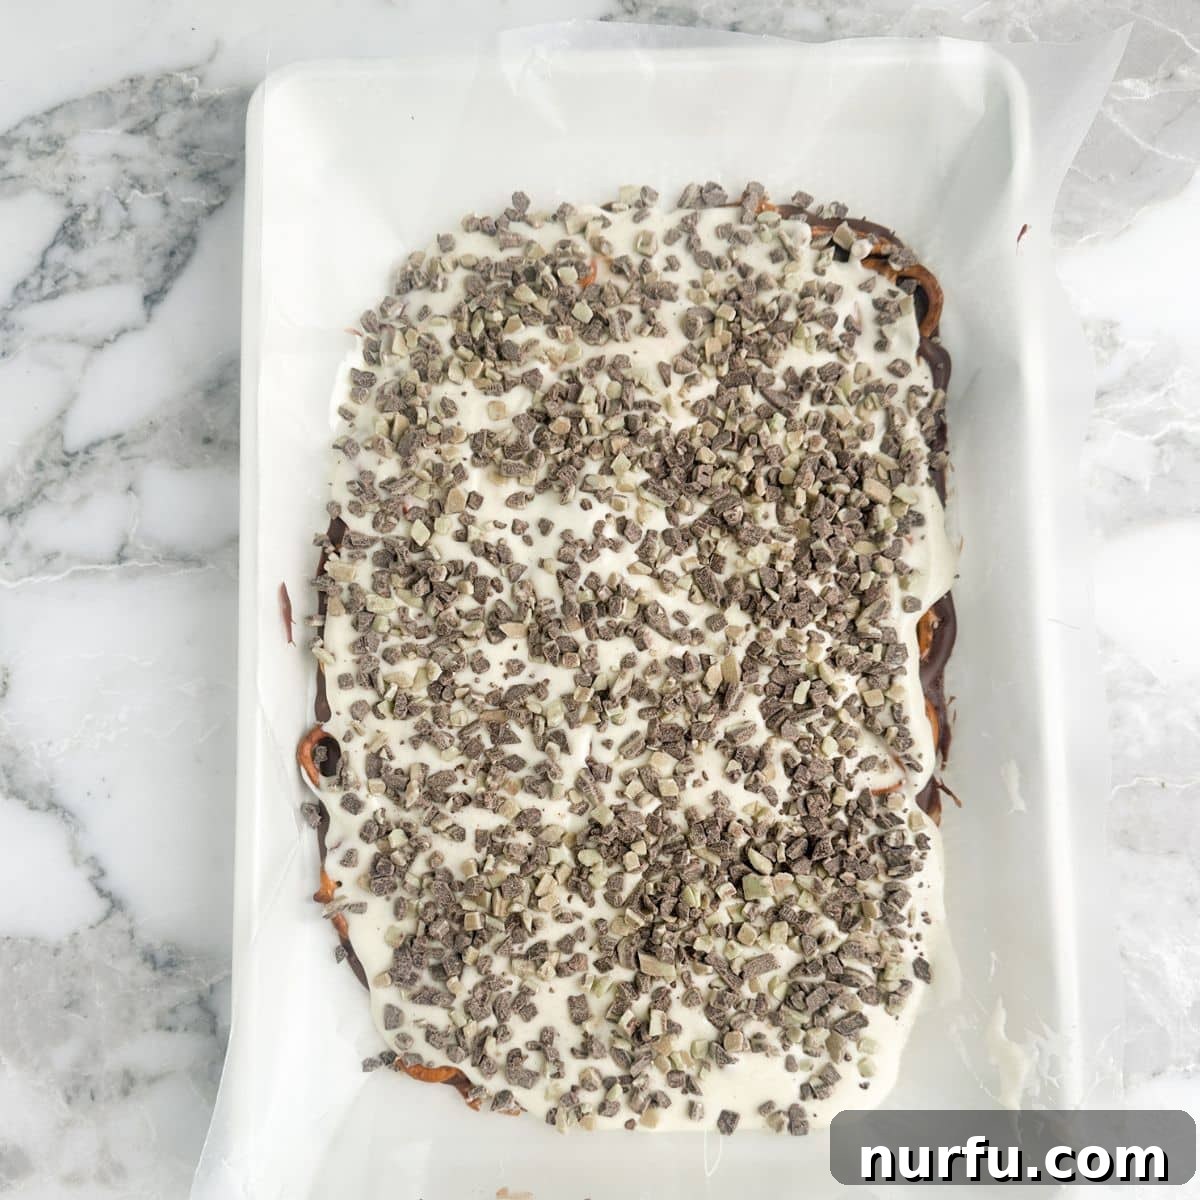
- Layer White Chocolate and Andes Mints: Retrieve the baking sheet from the freezer. Pour the freshly melted white chocolate evenly over the now-chilled pretzel and milk chocolate layer. Swiftly spread it with an offset spatula or the back of a spoon to ensure it covers the pretzels completely and forms a uniform layer. Immediately after spreading the white chocolate (while it’s still very wet and pliable), generously sprinkle the chopped Andes Mints or Andes Mint bits over the entire surface. This quick action ensures the mint pieces adhere beautifully to the white chocolate. For an even more visually appealing finish, you can gently press some of the mint pieces into the white chocolate with your fingers or a clean spatula.
- Final Chill, Break Apart, and Serve: Now comes the final step of setting the bark. You have two options: allow the entire bark to sit undisturbed at room temperature until it is fully hardened, which can take a few hours depending on your kitchen’s temperature. Alternatively, for a much quicker set, place the baking sheet back in the freezer for another 15-20 minutes, or until the bark is completely firm and snaps cleanly. Once absolutely firm, gently lift the bark from the baking sheet using the wax paper. Carefully peel off the paper. Using your hands, break the hardened bark apart into irregular, rustic, bite-sized pieces or larger shards. Arrange them on a platter and serve immediately, or store for later enjoyment.
Heather’s Expert Tips for Perfect Pretzel Bark
Achieving perfectly smooth, delicious, and visually appealing pretzel bark is easier than you think, especially when armed with a few expert tips. These pointers will help you avoid common pitfalls, ensure a professional-looking finish, and guarantee your Andes Mint Pretzel Bark turns out beautifully every single time, making you a bark-making pro:
- Constant Stirring is Key to Success: When melting both the milk chocolate and especially the white chocolate, it’s absolutely crucial to stir constantly. Chocolate, particularly white chocolate, is very delicate and can scorch or seize easily if exposed to direct or uneven high heat. Continuous, gentle stirring over your double boiler ensures even melting, preventing hot spots and resulting in a silky-smooth, pourable consistency that is perfect for spreading. Never leave melting chocolate unattended, even for a moment!
- Understand the Role of Oil: The coconut oil (or your chosen substitute like vegetable oil or shortening) isn’t just for thinning the chocolate; it plays a vital role in achieving that desirable smooth texture and beautiful, glossy finish once the bark hardens. If, after melting, your chocolate seems too thick or sluggish to spread easily, you can add a tiny bit more oil – half a teaspoon at a time – until you reach the desired, fluid consistency. Be cautious not to add too much, however, as excessive oil can make the chocolate greasy or prevent it from setting properly.
- Ensure Absolutely Dry Equipment: This tip is paramount for successful chocolate melting. When using a double boiler, make certain that your glass or metal melting bowl and all your stirring utensils are completely and utterly dry. Even a single tiny drop of water or condensation can cause melted chocolate to “seize.” Seized chocolate instantly transforms from a smooth, liquid state into a thick, grainy, and crumbly mess that is almost impossible to recover for bark making.
- Aim for Even and Thin Layers: While tempting to make your bark thick and chunky, aiming for relatively thin and even layers of chocolate is best. This ensures that when you break the bark, it’s not overly dense, difficult to bite through, or prone to cracking unevenly. Thin layers also allow the distinct sweet, salty, and refreshing minty flavors to shine through in a perfect, balanced harmony with every bite, creating a more enjoyable eating experience.
- Patience During the Hardening Process: While it’s tempting to rush to the tasting phase, allowing the bark ample time to harden completely is essential for the best results. If the chocolate is still slightly soft or tacky, it will be challenging to break cleanly, resulting in messy, uneven pieces. Room temperature hardening can take several hours, but placing the baking sheet back in the freezer for another 15-20 minutes after the final layer is added will significantly accelerate this process. Ensure it’s truly firm before attempting to break it.
- Optimal Storage Solutions for Freshness: Once your Andes Mint Pretzel Bark has fully hardened, proper storage is key to maintaining its freshness and delightful texture. Store the bark in an airtight container at room temperature. Kept this way, it will remain fresh and delicious for up to two weeks. If you live in a particularly warm climate, or if you desire extended storage, you can safely store it in the refrigerator for up to a month. When layering pieces in the container, place parchment paper between them to prevent sticking. For even longer preservation, the bark can be frozen for up to three months; simply allow it to thaw at room temperature for a few minutes before serving.
Exciting Variations to Customize Your Pretzel Bark
One of the greatest joys of making pretzel bark is its incredible versatility. While the classic Andes Mint version is truly a showstopper, there are countless ways to customize this recipe to suit different tastes, dietary preferences, or festive themes. Don’t be afraid to get creative and make this pretzel bark uniquely your own! Here are a few inspiring suggestions to spark your imagination:
- Add a Splash of Festive Color: Transform your bark into a visually stunning centerpiece perfect for any holiday! For Christmas, for example, add a few drops of vibrant green or rich red gel food coloring to the melted white chocolate layer. Gel food coloring works best as it’s highly concentrated and won’t thin the chocolate like liquid food coloring can. This simple addition creates an eye-catching, celebratory treat that is sure to stand out on any dessert table.
- Sprinkle with Extra Festive Flair: Beyond the delightful Andes Mints, a generous scattering of colorful sprinkles can add an extra layer of visual excitement and fun texture. Opt for holiday-themed sprinkles (like red, green, and white nonpareils or jimmies) for Christmas, or choose sprinkles to match any other celebration, birthday, or season. The key is to apply them immediately after spreading the white chocolate, while it’s still wet, ensuring they adhere beautifully and don’t just roll off.
- Boost the Crunch with Nuts: If you’re a true fan of added texture and nutty flavor, consider topping your bark with a sprinkling of finely chopped nuts. Pecans, pistachios, or almonds are excellent choices that provide a delightful crunch and a subtle earthy note, complementing the sweet and minty elements beautifully. For an even richer flavor, lightly toast the nuts in a dry pan for a few minutes before chopping and sprinkling them over the white chocolate layer.
- Intensify the Mint Flavor: For those who truly adore an extra kick of mint, you can easily amplify the refreshing sensation in your bark. Carefully add 1-2 drops of high-quality peppermint extract into the melted white chocolate along with the coconut oil. Be cautious and add sparingly, as extracts are potent; a little goes a long way! Stir well and taste a tiny bit before adding more to achieve your desired level of mintiness without overpowering the other flavors.
- Swap the Chocolate Varieties: While milk chocolate and white chocolate create a classic and delicious combination, feel free to experiment with different types of chocolate for your layers. Use dark chocolate for both layers for a more sophisticated, less sweet, and richer bark. Alternatively, try a layer of caramel-flavored chips or even ruby chocolate for a unique color and a subtly fruity note. You could also use milk chocolate for the bottom and dark chocolate for the top layer, or vice versa, to play with flavor intensity.
- Explore Alternative Toppings: The possibilities are endless when it comes to toppings! Consider crushed candy canes (especially for winter holidays, adding both flavor and color), mini chocolate chips for extra chocolatey goodness, or even a contrasting chocolate drizzle (dark chocolate drizzled over white chocolate, or vice versa) once the main layers have fully set. Crushed cookies, shredded coconut, or a sprinkle of flaky sea salt can also add interesting dimensions.
Frequently Asked Questions About Andes Mint Pretzel Bark
Here are answers to some common questions that often arise when making this delightful Andes Mint Pretzel Bark. These insights will help ensure your baking experience is smooth, successful, and yields the best possible results, allowing you to create this treat with confidence:
Absolutely! While a double boiler offers a very controlled, gentle heat that is ideal for melting chocolate smoothly and preventing scorching, melting chocolate in the microwave is a perfectly convenient and quick alternative, especially for busy individuals. To do this, place your chocolate chips and coconut oil in a microwave-safe bowl. Heat in short bursts, typically 20-30 second intervals, stirring thoroughly after each interval. This staggered approach is crucial to prevent the chocolate from overheating, burning, or seizing. Continue this process until the chocolate is smooth and fully melted. Be particularly careful with white chocolate, as it contains more sugar and milk solids, making it more prone to burning than milk or dark chocolate.
Yes, you certainly can use your favorite pretzel shape for this recipe! Mini pretzels are often recommended for their uniform size, which provides excellent coverage and a consistent crunch in every bite. However, pretzel sticks or pretzel squares (often called snaps or grids) work just as well and can introduce a slightly different visual appeal and textural experience to your bark. The most important thing to remember, regardless of the pretzel shape you choose, is to ensure that the pretzels are laid out in a single, relatively even layer on the chocolate. This allows for proper adhesion, ensures that each piece of bark gets a good chocolate-to-pretzel ratio, and prevents the bark from becoming excessively thick or difficult to break. You might need to gently break larger pretzels into smaller, more manageable pieces to fit them well onto the chocolate layer.
For optimal freshness and to prevent any undesirable melting or stickiness, it’s best to store your Andes Mint Pretzel Bark in an airtight container. Kept at cool room temperature (below 70°F or 21°C), the bark will maintain its delicious flavor and crisp texture for up to 2 weeks. If your home tends to be warmer, or if you desire extended storage, you can keep it in the refrigerator for up to a month; just ensure it’s in a tightly sealed container to prevent it from absorbing any moisture or odors from other foods. For maximum longevity, this pretzel bark freezes beautifully for up to 3 months. When ready to enjoy, simply allow it to thaw at room temperature for about 15-20 minutes before serving, which will restore its perfect texture.
Chocolate seizing is a common baking frustration that occurs when even a tiny amount of water (or sometimes extreme overheating) comes into contact with melted chocolate, causing the cocoa solids and sugar to clump together, turning it into a thick, grainy, and unusable paste. If your chocolate unfortunately seizes, don’t despair! You might be able to rescue it by stirring in a teaspoon of vegetable oil, coconut oil, or melted shortening at a time, until it becomes smooth again. While the texture might not be as perfectly glossy as unseized chocolate, it could still be used for other purposes, like a drizzle topping or a base for cookies. However, prevention is always the best approach: always ensure your melting bowl and all your utensils are completely dry, and melt chocolate over gentle, indirect heat, avoiding steam from touching the chocolate directly.
Discover More Easy Treat Recipes You’ll Love
If you thoroughly enjoyed the simplicity, vibrant flavors, and sheer deliciousness of this Andes Mint Pretzel Bark, then you’re in for a continuous treat! Our extensive collection features a variety of quick, delightful, and equally impressive recipes perfect for any occasion, from casual snacking to festive celebrations. Expand your repertoire of easy-to-make snacks and desserts with these other highly-rated and family-favorite recipes:
- Sweet and Crunchy Churro Snack Mix: A festive, cinnamon-sugar coated snack perfect for parties or movie nights.
- Decadent Pecan Pie Bark: All the flavors of a classic pecan pie in a quick and easy chocolate bark form.
- Irresistible Glazed Pecans: Sweet, crunchy, and perfect for snacking, salads, or gifting.
- Buttery Delight: Butter Toffee Pretzels: The ultimate sweet and salty combination, coated in rich toffee.
- Addictive Sweet Chex Mix: A customizable, crunchy, and wonderfully sweet snack mix that’s impossible to resist.
We hope these additional recipes bring as much joy and deliciousness to your home and gatherings as the Andes Mint Pretzel Bark. Happy baking and enjoyable snacking!

Andes Mint Pretzel Bark
Pin Recipe
Rate Recipe
Print Recipe
Ingredients
- 11.5 ounce milk chocolate chips
- 22 ounce white chocolate chips
- 2 cups mini pretzels (ensure pretzels are laid out in a single layer for best results)
- 2 tablespoons coconut oil or vegetable oil
- 1 cup Andes Mint bits (or finely chopped Andes Mints for topping)
Instructions
-
Line a large baking sheet with wax paper or parchment paper for easy removal. Prepare your double boiler by filling a medium saucepan halfway with water and bringing it to a gentle simmer over medium heat.
-
Place a heat-safe glass bowl over the simmering saucepan (ensuring it doesn’t touch the water). Add the milk chocolate chips and 1 tablespoon of coconut oil to the bowl. Stir continuously until the chocolate is fully melted and smooth.
-
Pour the melted milk chocolate onto the prepared wax paper. Use an offset spatula or the back of a spoon to spread it into an even layer. Immediately top with the mini pretzels, ensuring they form a single layer. Place the baking sheet in the freezer for 10 minutes to allow the chocolate to set firmly.
-
While the first layer chills, clean your glass bowl or use a new one. Place it back on the double boiler. Add the white chocolate chips and the remaining 1 tablespoon of coconut oil. Stir constantly until the white chocolate is completely melted and smooth.
-
Remove the baking sheet from the freezer. Pour the melted white chocolate over the pretzel layer, spreading it quickly and evenly to cover the pretzels. Generously sprinkle the chopped Andes Mints over the wet white chocolate.
-
Allow the bark to harden completely at room temperature (or chill in the freezer for another 15-20 minutes for a faster set). Once firm, break the bark into irregular pieces and serve your delightful Andes Mint Pretzel Bark!
Nutrition
Nutrition information is automatically calculated, so should only be used as an approximation. Individual nutritional values may vary based on specific brands, quantities, and preparation methods used. Please consult a registered dietitian for precise nutritional guidance.