This shop has been compensated by Collective Bias, Inc. and its advertiser. All opinions are mine alone. #VinoBlockParty #CollectiveBias
The following content is intended for readers who are 21 or older.
Transform Your Backyard: DIY Wine Bottle Tiki Torches for Pest-Free Entertaining
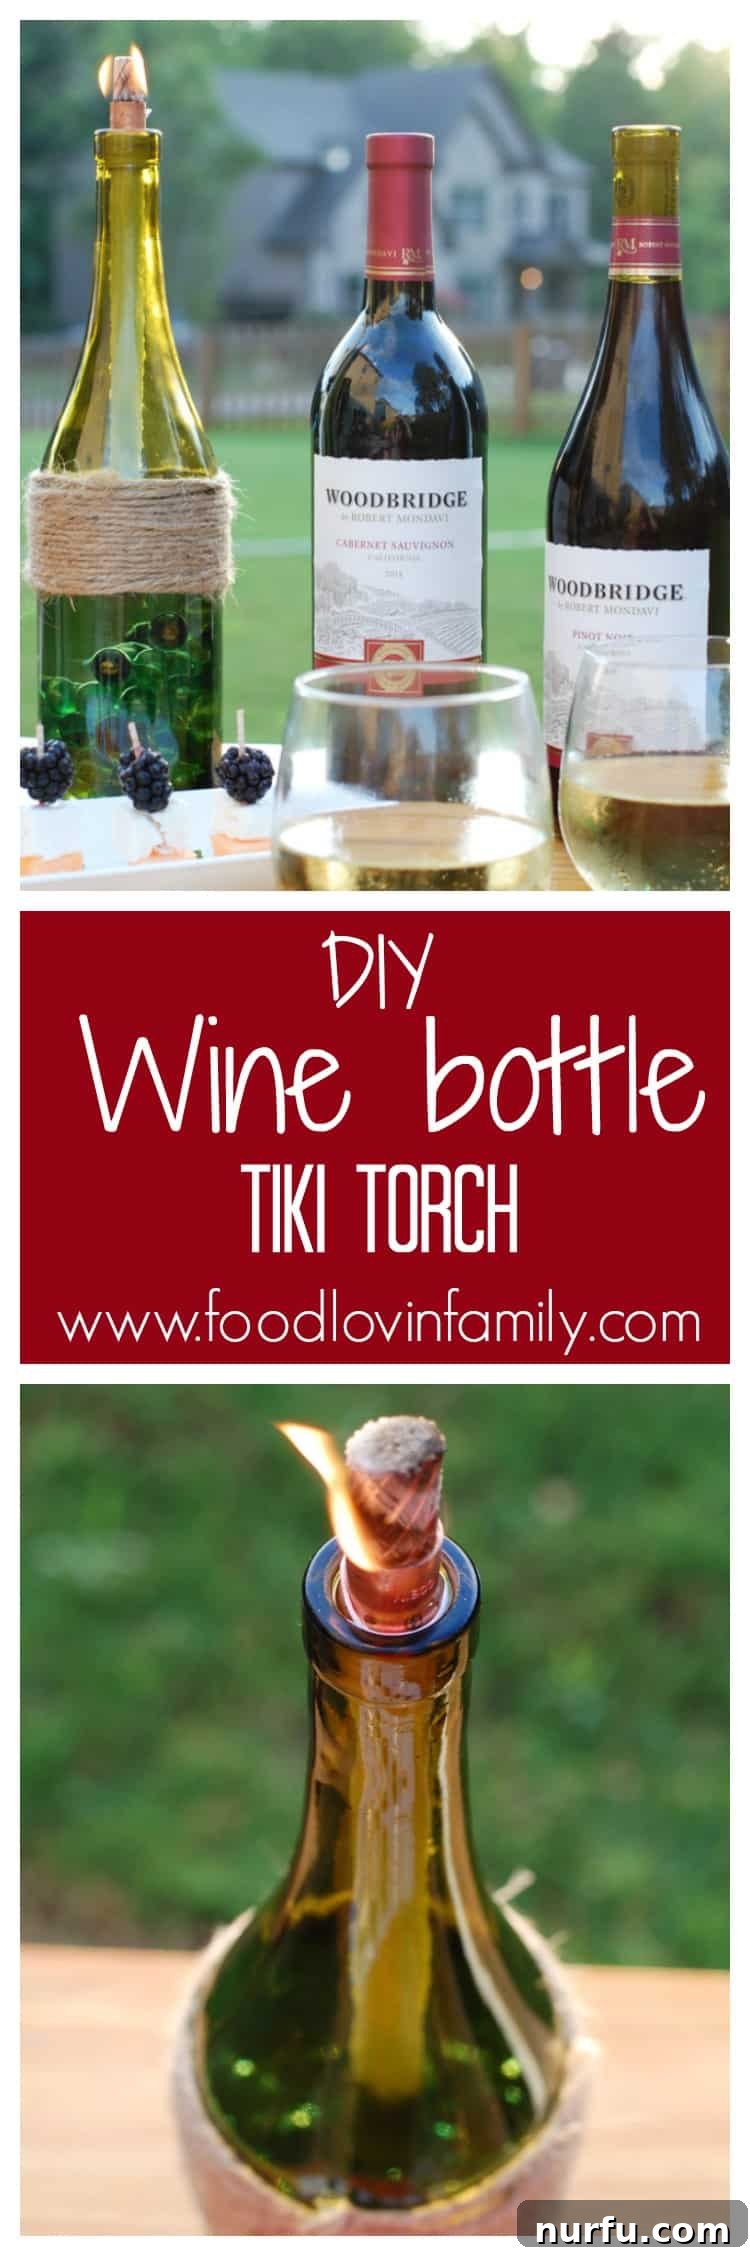
There’s something undeniably magical about spending a warm evening outdoors, enjoying the company of friends and family under the stars. Whether it’s a spontaneous gathering on the porch or a meticulously planned neighborhood block party, creating an inviting and comfortable atmosphere is key. However, one unwelcome guest often spoils the fun: pesky bugs. From buzzing mosquitoes to curious gnats, these tiny invaders can quickly turn a blissful evening into a swatting frenzy. But what if you could elegantly banish them while simultaneously adding a touch of rustic charm to your outdoor décor? Enter the ingenious DIY Wine Bottle Tiki Torch – a sustainable, stylish, and highly effective solution for pest-free backyard entertaining.
This project is more than just a craft; it’s an opportunity to upcycle your empty wine bottles into functional pieces of art. Imagine the warm glow of flickering flames, casting dancing shadows as the citronella-infused fuel works its magic, keeping bothersome insects at bay. Not only do these charming torches enhance your ambiance, but they also offer a fantastic way to give new life to bottles that might otherwise end up in the recycling bin. Let’s uncork the potential and dive into creating these beautiful, bug-repelling luminaries that promise to make your outdoor gatherings more enjoyable and memorable.
The Charm of Outdoor Gatherings and the Quest for Comfort
As summer draws to a close and the school year beckons, we often find ourselves savoring every last drop of the season. For many, this means maximizing time spent outdoors, enjoying the vibrant energy of community. In close-knit neighborhoods, impromptu get-togethers are a cherished tradition – a quick walk out the front door can lead to an evening filled with laughter, shared stories, and delicious food. Each year, as the days shorten, our community celebrates the end of summer with a grand block party, an event known for stretching from late afternoon well past sunset. And, as with any truly memorable gathering, everyone contributes a dish, a drink, and a willingness to share.
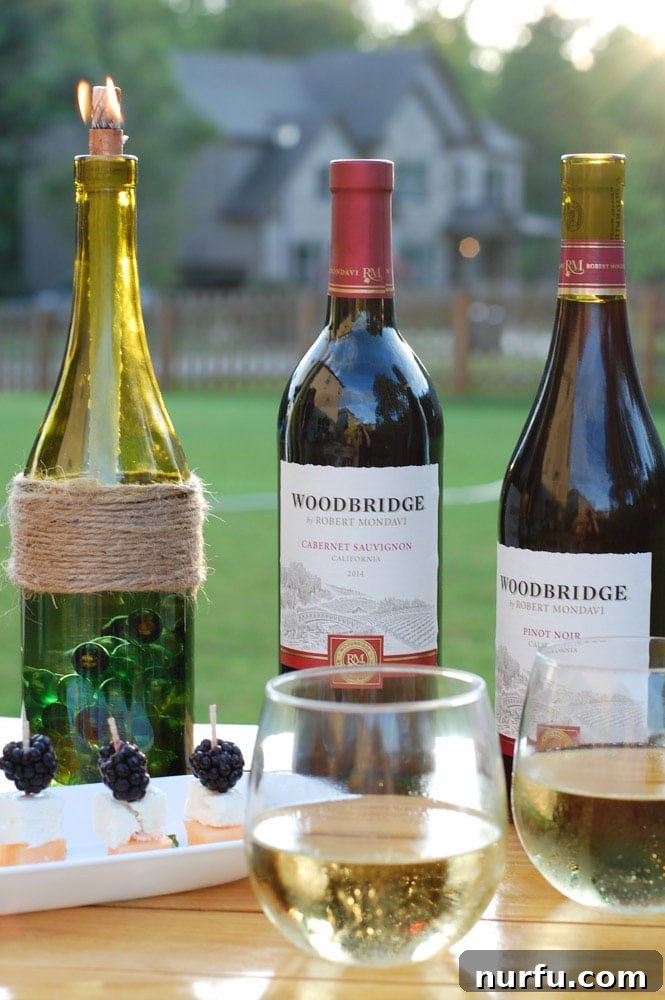
Living in warmer climates, the appeal of outdoor living is immense. However, this enjoyment often comes with a significant caveat: the relentless presence of buzzing insects. Picture this: a perfectly chilled glass of wine, a spread of delectable appetizers, and then – a mosquito landing right on the rim of your glass! It’s enough to test anyone’s patience. We’ve often relied on large, commercial tiki torches to create a protective perimeter around our patio, but their stationary nature limits their use. This challenge sparked a creative idea: portable, decorative, and highly effective citronella tiki torches made from recycled wine bottles. These aren’t just practical bug repellents; they double as charming centerpieces, casting a warm, inviting glow that truly lights up the party well into the evening.
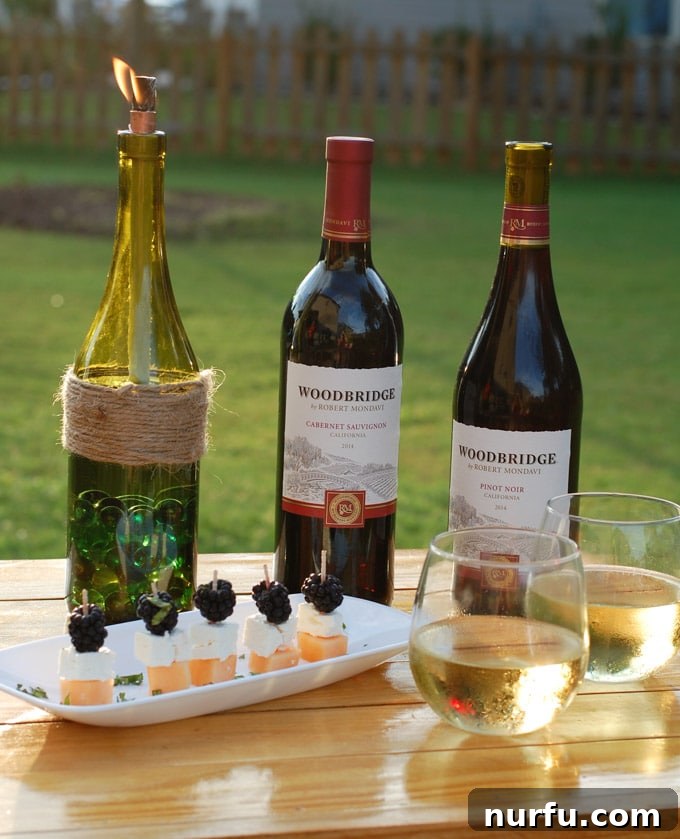
The beauty of this project lies in its simplicity and the readily available materials, especially if you’re a fan of fine wines. For our gatherings, a bottle of Woodbridge by Robert Mondavi is always a staple. Its versatile range of wines, like the crisp Chardonnay with its medium body, pairs beautifully with a variety of appetizers – making it a perfect companion for any summer soirée. The clear green bottles of some varietals also make an ideal canvas for showcasing decorative elements like marbles inside, adding an extra layer of visual appeal to your finished torches. What better way to foster camaraderie than by opening a bottle to share with friends, and then transforming the empty bottle into something beautiful and functional?
Essential Supplies for Your DIY Wine Bottle Tiki Torch
Gathering your materials is the first exciting step in any DIY project. For these stunning and functional wine bottle tiki torches, you’ll find most items are easily accessible at your local hardware store, craft shop, or even online. The best part? The star of the show, an empty wine bottle, is often already waiting in your recycling bin!
What You Will Need:
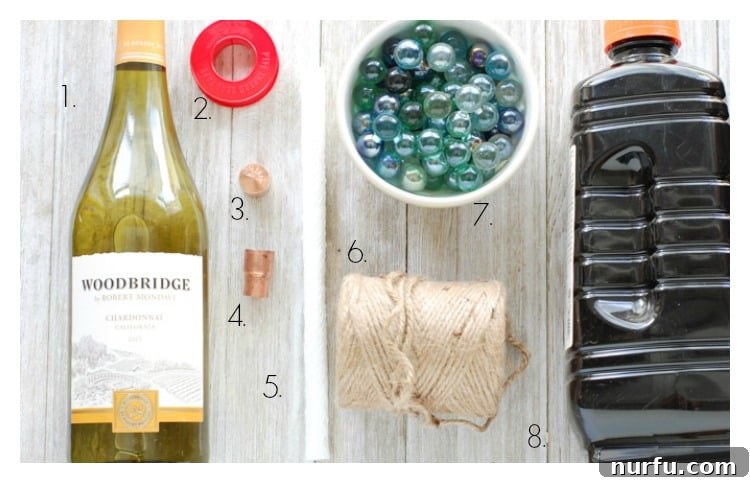
- An Empty, Clean Wine Bottle: The foundation of your torch! Opt for a sturdy bottle with a relatively straight neck. Clear or lightly colored bottles, like those often used for Woodbridge by Robert Mondavi Chardonnay, beautifully showcase any decorative elements you place inside, such as marbles. Ensure it’s thoroughly washed, and any labels are completely removed. A simple soak in warm, soapy water usually does the trick, followed by a good scrub with a sponge.
- Teflon Tape (Plumber’s Tape): This thin, white tape is crucial for creating a tight, secure seal around your wick assembly, preventing fuel leaks and ensuring a snug fit in the bottle neck.
- 1/2-inch Copper Cap: This small cap will sit atop your wick assembly when the torch is not in use, protecting the wick from weather and extinguishing the flame.
- 1/2 x 3/8-inch Copper Coupling: This is the key component that will hold your wick. Its precise dimensions are important for a proper fit.
- Tiki Replacement Wick: Choose a standard replacement wick designed for outdoor tiki torches. These are typically made of fiberglass and are designed for long-lasting performance.
- Jute Twine (Optional but Recommended): For an added touch of rustic elegance, jute twine can be wrapped around the bottle. It provides texture and a handcrafted look.
- Marbles, Small Rocks, or Decorative Gravel: These serve a dual purpose: they add weight to the bottle, making it more stable and less prone to tipping, and they provide a beautiful visual element, especially in clear bottles.
- Tiki Torch Fuel (with Citronella for Pest Control): This is what powers your torch. Look for fuels specifically designed for tiki torches. For maximum bug-repelling power, choose a fuel infused with citronella. Always handle with care and follow manufacturer safety guidelines.
Step-by-Step Guide to Crafting Your Wine Bottle Tiki Torches
Now that you have all your supplies ready, it’s time to transform those humble wine bottles into dazzling, functional backyard accessories. Follow these simple steps for a successful and enjoyable DIY experience.
Step 1: Enjoy the Wine (and Prepare Your Bottle!)
This is arguably the most delightful step in the entire process. Before you can upcycle a wine bottle, you first need to empty it! So, pour yourself and your guests a refreshing glass of your favorite wine – perhaps a crisp Woodbridge by Robert Mondavi Chardonnay, perfect for a summer evening. Once the bottle is empty, it’s time for preparation. Wash the bottle thoroughly with warm, soapy water. Use a sponge or scrub brush to remove any lingering residue. For stubborn labels, a good soak in hot water, sometimes with a dash of baking soda or vinegar, can help them peel off cleanly. Ensure the bottle is completely dry before moving on to the next step, as any moisture could interfere with the fuel and the overall integrity of your torch.
Step 2: Add Decorative Jute (Optional but Stylish)
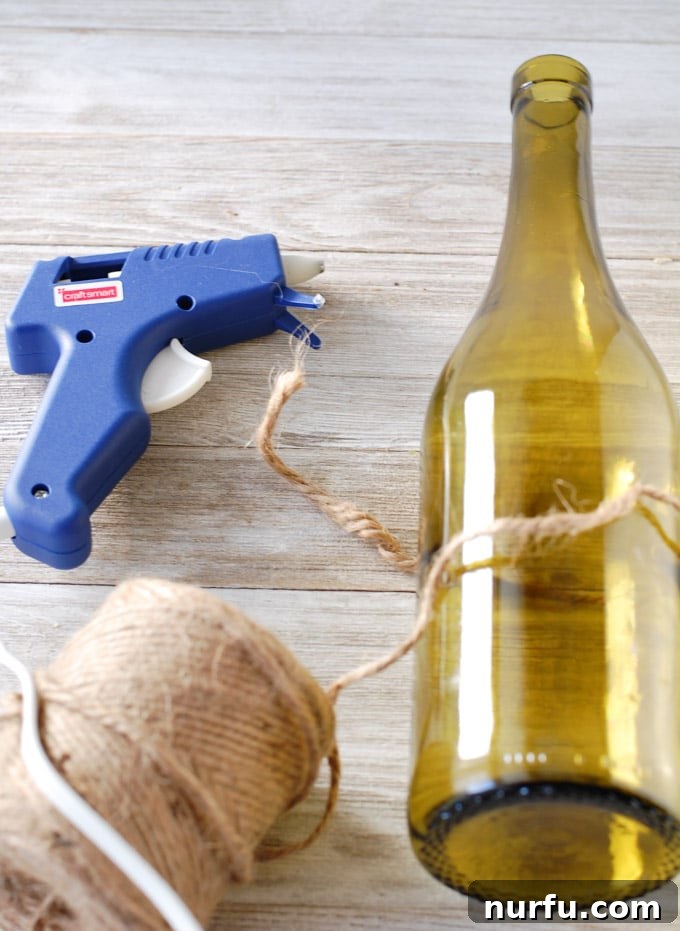
For those who appreciate a touch of rustic charm, adding jute twine is an excellent way to enhance the visual appeal of your tiki torch. Using a hot glue gun, carefully wrap the jute around the middle section of the wine bottle. Start by securing one end with a small dab of hot glue, then tightly wrap the twine, applying small dots of glue intermittently to keep it secure and neat. Continue wrapping until you’ve created a band of your desired width. Finish by securing the end with another dab of hot glue. This step adds texture and a handcrafted feel, making your torches truly stand out, complementing various outdoor decors from bohemian to farm-style rustic.

Step 3: Fill with Marbles or Rocks for Stability and Beauty
Now, it’s time to add weight and visual interest to your bottle. Gently add marbles, small rocks, or decorative gravel to the wine bottle, filling it approximately 1/4 to 1/2 of the way up. This step is crucial for stability, as the added weight at the base will prevent your torch from easily tipping over, especially outdoors where breezes can be a factor. A word of caution: when first attempting this project, I made the mistake of simply dropping the marbles straight into an upright bottle, which unfortunately caused the glass to break. To avoid this common pitfall, I highly recommend turning the bottle on its side and carefully rolling the marbles or rocks into it. This gentle approach will prevent any cracks or shattering, ensuring your bottle remains intact for its new purpose. If using clear bottles, the marbles will beautifully catch the light, adding an extra dimension to your outdoor décor.
Step 4: Prepare the Wick Assembly
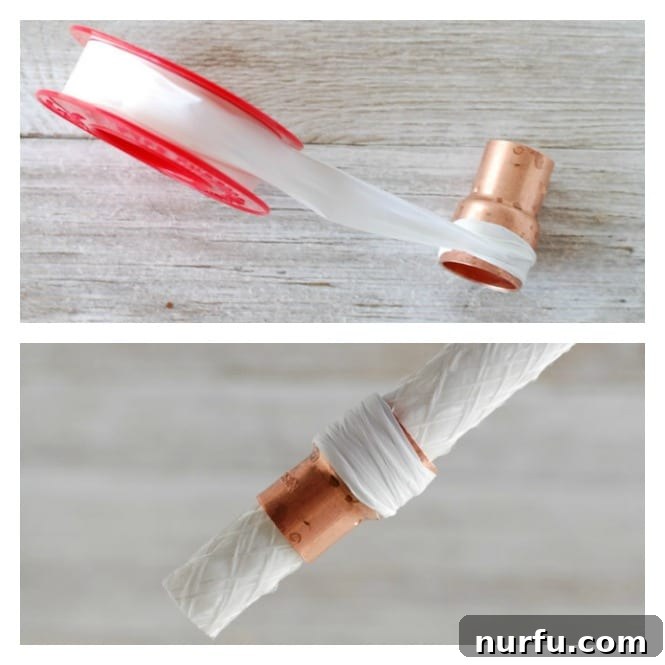
This step ensures a secure and functional wick, essential for safe operation. Take your 1/2-inch copper coupling. Begin wrapping one end of the coupling with Teflon tape. Continue wrapping the tape, building up layers until the coupling, when tested, fits snugly into the mouth of your wine bottle without falling through. The goal is to create a tight seal that will hold the coupling firmly in place and prevent fuel from leaking out around it. Once the coupling is taped, insert your tiki replacement wick through the coupling. Adjust the wick so that approximately 1/4 inch of it extends above the top end of the coupling. This small exposed portion is where the flame will ignite. The rest of the wick should extend down into the bottle to absorb the fuel efficiently.
Step 5: Fill with Fuel and Ignite
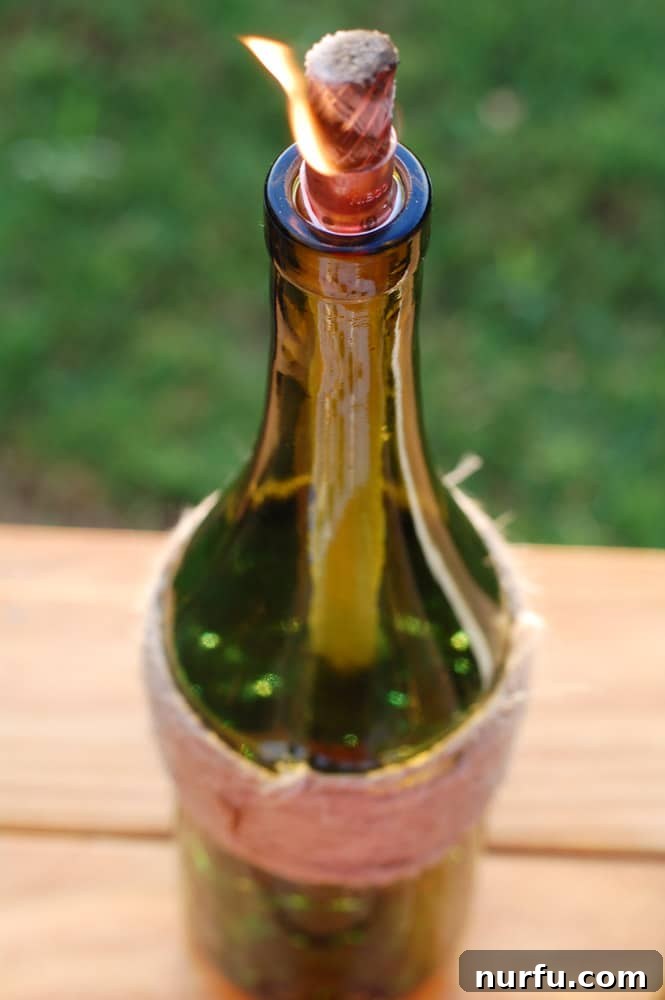
Carefully insert a funnel into the neck of your wine bottle. Slowly pour the tiki torch fuel (preferably with citronella) into the bottle, filling it to a level that will allow the wick to be submerged. Do not overfill the bottle; leave some space at the top to prevent spills and allow for expansion. Once filled, carefully insert your prepared wick and coupling assembly into the bottle’s neck, pressing down firmly to ensure a tight fit created by the Teflon tape. It’s crucial to allow the wick sufficient time to absorb the fuel before attempting to light it. Let it soak for at least 5-10 minutes. This ensures the wick is fully saturated, leading to a steady and consistent flame. Once saturated, carefully light the wick. Enjoy the warm glow and the added benefit of pest control that these charming torches provide!
Safety First: Essential Tips for Using Your Tiki Torches
While DIY wine bottle tiki torches are beautiful and functional, safety should always be your top priority when dealing with open flames and flammable liquids. Follow these guidelines to ensure a safe and enjoyable experience for everyone at your next outdoor gathering:
- Placement is Key: Always place your tiki torches on a stable, flat surface, away from any flammable materials like dry leaves, curtains, overhead branches, or furniture. Keep them out of reach of children and pets who might accidentally knock them over. Consider using a sturdy stand or a dedicated outdoor table to secure them further.
- Never Leave Unattended: An open flame should never be unsupervised. Always extinguish your torches when you leave the area, even for a short time, or when you go inside.
- Proper Fuel Handling: Store tiki torch fuel in its original container, in a cool, dry place, away from direct sunlight, open flames, and any heat sources. Never refuel a torch while it’s lit or hot. Allow the torch to cool completely for at least 30 minutes before attempting to add more fuel to prevent accidental ignition.
- Wick Maintenance: Ensure only about 1/4 inch to 1/2 inch of the wick is exposed. A longer wick can produce a larger, less controlled, and potentially dangerous flame. Trim the wick if it becomes too long or frayed, as a clean wick ensures a steady burn.
- Extinguishing Flames: Use the copper cap provided with your supplies (or a dedicated snuffer) to extinguish the flame. Simply place the cap firmly over the wick opening to cut off the oxygen supply. Do not blow out the flame, as this can scatter hot fuel or embers.
- Emergency Preparedness: Keep a fire extinguisher, a bucket of sand, or a garden hose easily accessible when using open flames outdoors, just in case of an emergency. Knowing where your safety tools are can make a critical difference.
- Ventilation: While these are outdoor torches, ensure good air circulation even in covered patio areas to disperse fumes from the fuel.
- Inspect Regularly: Before each use, quickly inspect your torch for any damage, loose components, or signs of fuel leakage. Address any issues before lighting.
Enhancing Your Outdoor Ambiance with Sustainable Style
These DIY wine bottle tiki torches are more than just practical bug repellents; they are versatile decorative elements that can elevate the atmosphere of any outdoor event. From casual backyard barbecues and spontaneous card games on the porch to elaborate neighborhood block parties and intimate al fresco dinners, their warm glow and stylish design are sure to impress. Their portable nature allows for flexible placement, adapting to your specific entertaining needs.
Imagine a row of these beautiful torches lining your walkway, gracefully guiding guests to your entertaining area, or clustered as a dazzling centerpiece on your outdoor dining table, creating an inviting focal point. The subtle flicker of the flame, combined with the gentle, fresh scent of citronella, creates an inviting and serene environment, allowing you and your guests to relax, unwind, and fully immerse yourselves in the joy of shared moments, free from the annoyance of flying insects.
Beyond their aesthetic appeal and pest-fighting capabilities, these torches embody a commitment to sustainability and mindful living. By upcycling empty wine bottles, you’re not only reducing waste but also crafting something truly unique and personal. Each torch tells a story – perhaps a memory of a special bottle of Woodbridge by Robert Mondavi shared with loved ones during a summer evening, now given a new lease on life as a beacon of warmth and welcome. It’s a testament to how creativity can transform the mundane into something extraordinary.
So, next time you finish a bottle of your favorite wine, don’t just toss it in the recycling bin. See it as an opportunity to create something wonderful. These DIY wine bottle tiki torches are a testament to how simple materials, a little creativity, and a love for entertaining can come together to enhance our outdoor spaces, making every gathering more comfortable, more memorable, and absolutely bug-free. Light them up and let the good times roll!