
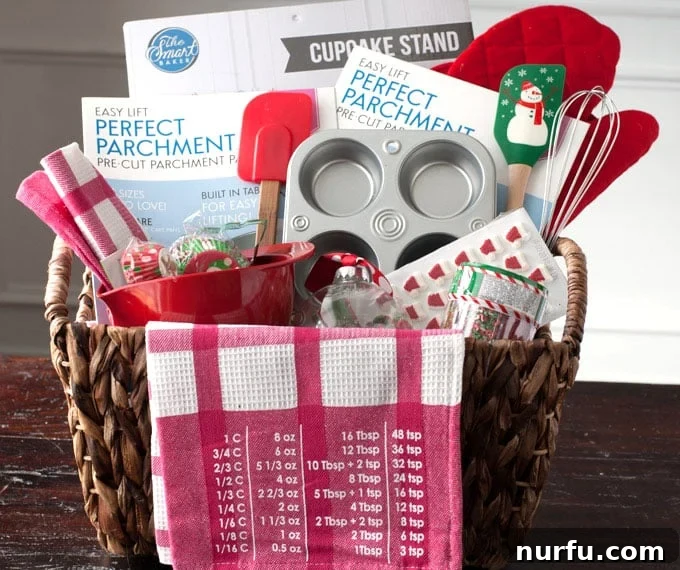
The Ultimate Guide to Crafting a DIY Baking Gift Basket
Creating a personalized DIY baking gift basket is not only incredibly easy and fun, but it also makes for a deeply thoughtful present. It’s the perfect choice for friends and loved ones who cherish their time in the kitchen and possess a passion for baking. This guide will walk you through everything you need to know to assemble a memorable and unique gift that truly stands out.
Thank you, PayPal, for sponsoring this post. All opinions expressed are my own and reflect my genuine experience.
As the holiday season approaches or any special occasion arises, finding that perfect, unique gift can often feel like a daunting task. While ready-made presents are convenient, there’s an undeniable charm and warmth in a gift that has been thoughtfully curated and assembled by hand. For those special friends or family members who light up at the thought of flour, sugar, and the aroma of freshly baked goods, a DIY baking gift basket is an unparalleled choice. It’s a heartfelt way to show just how much thought and love you put into selecting a present tailored specifically to their passion.
Today, I’m thrilled to share my simple and stress-free approach to putting together a fantastic DIY baking gift basket. What makes this process even more enjoyable is the ability to shop from the comfort of your home while simultaneously supporting incredible small businesses – a true win-win! One of my most cherished creations recently was a baking basket designed for a dear friend who adores making cupcakes. The joy it brought her was immense, affirming that handmade gifts carry an extra layer of meaning.
Planning Your Perfect Baking Gift Basket: A Step-by-Step Guide
Crafting an impressive baking gift basket begins with a clear vision. Don’t just throw items together; plan with purpose to create a cohesive and appealing presentation. Here’s how I approach it:
Selecting a Theme and Color Palette
- The very first step I take before even thinking about specific items is to choose a main color scheme and a compelling theme for the basket. This initial decision acts as a guiding principle, ensuring that all subsequent choices align beautifully. For the holiday basket I recently made, a vibrant red, festive holiday theme was chosen, and the result was absolutely adorable! Beyond holidays, consider themes like “Rustic Baker,” “Cupcake Queen,” “Cookie Monster,” or “Bread Artisan,” tailoring it to your recipient’s specific baking interests and aesthetic preferences.
Curating Essential and Unique Items
- Once your theme is set, the exciting part begins: selecting items that complement your chosen motif and are genuinely useful. To make this process incredibly convenient and enjoyable, I often snuggle up on the couch with my laptop and dive into the world of online shopping. This allows me to browse a vast array of products and, crucially, discover unique finds from small businesses that might not be available in traditional brick-and-mortar stores.
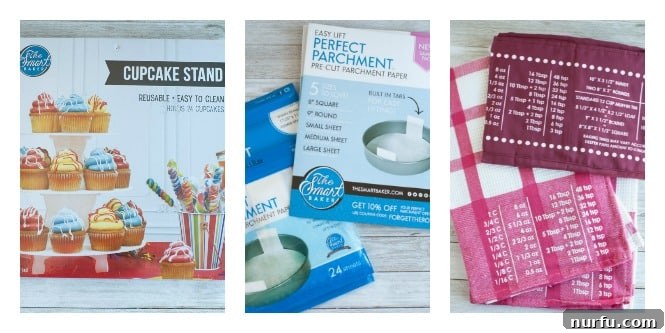
- During one of my online gift hunts, I stumbled upon an amazing small business called The Smart Baker. This company was founded by a passionate young couple who shared a love for baking and ingeniously developed “smart” products to enhance the baking experience. Their innovations include practical items like the “cheat sheet” apron, which features measurement conversions directly printed on it, and a handy measurement conversion towel. Both of these were absolute must-haves for my friend’s baking basket, offering both utility and a clever twist. I also splurged on a stylish cupcake tower and several packs of pre-cut parchment paper in various sizes – items I knew my friend would absolutely adore and find incredibly useful for her cupcake creations. The entire ordering and checkout process was a breeze, made even simpler and more secure with the help of PayPal.
In today’s fast-paced world, online shopping has become an indispensable tool for finding those perfect, thoughtful gifts, especially during busy seasons. The sheer luxury of being able to shop in my pajamas, sipping on a warm drink, is truly AWESOME! It’s a far cry from the stress and overwhelming crowds of holiday shoppers vying for parking spots and battling long lines. PayPal takes this convenience a step further with their innovative PayPal One Touch option. This feature eliminates the need to constantly reach for your wallet or repeatedly fill out credit card and billing information, streamlining the checkout process to mere seconds. It’s a game-changer for efficient and secure online transactions, allowing you to focus on finding the best items rather than administrative hurdles.
Tips for Assembling a Visually Stunning Baking Gift Basket
Once you’ve gathered your primary items, it’s time to add those finishing touches and arrange everything artfully. The presentation is key to making your gift basket truly special.
Adding Thoughtful Filler Items and Personal Touches
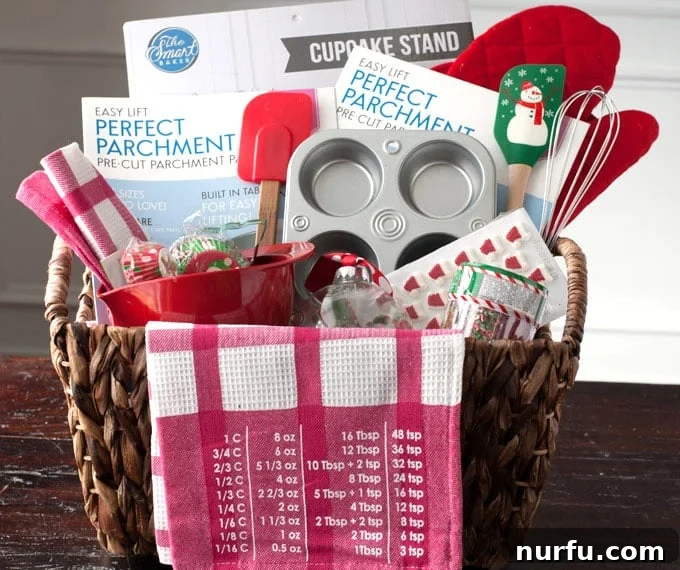
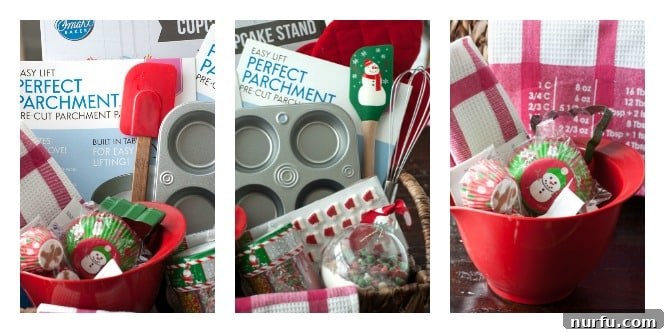
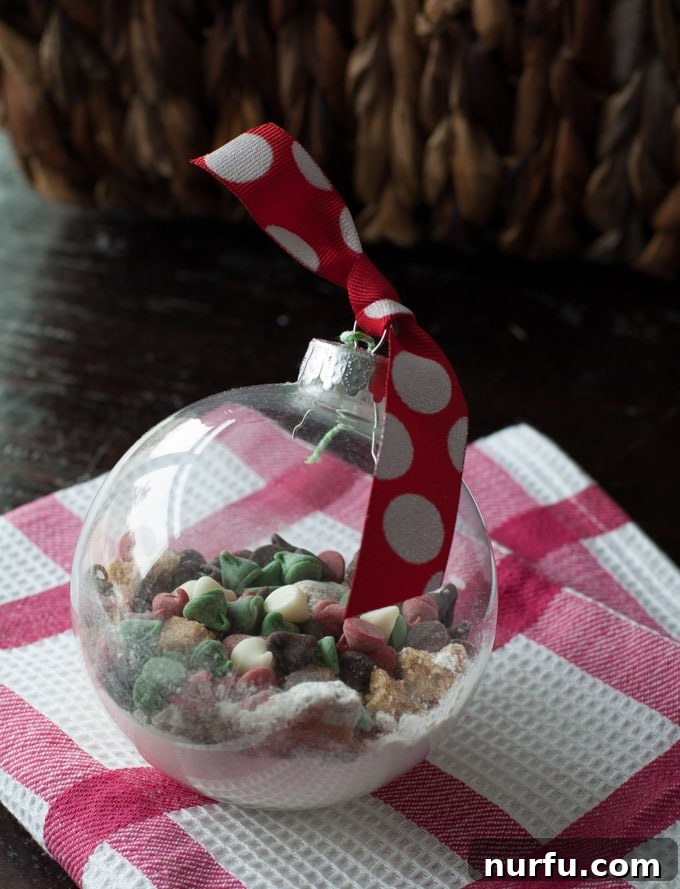
- After securing my main basket items, I always make sure to pick up a few complementary filler items that enhance the overall theme and add visual interest. For my holiday basket, this included charming cupcake liners, versatile spatulas, and a sturdy mixing bowl. A particularly creative touch I added was filling an empty, clear ornament with the dry ingredients needed to make delicious chocolate chip cookies. This not only added a festive element but also provided a fun, ready-to-make treat. Other ideas for DIY mixes could include brownie mix, pancake mix, or even a spiced hot cocoa blend layered in a jar.
Arrangement Tips for an Impressive Display
- The way you arrange items within the basket can dramatically impact its appeal. My strategy for filling the basket is to start with the largest and heaviest items, placing them towards the back and bottom. This creates a stable foundation and provides height. Then, I meticulously fill in any gaps with smaller, lighter, and more delicate items, working my way forward and upwards. To give items varying heights and make the basket appear fuller and more luxurious, you can use tissue paper, crinkle paper, or even neatly folded dish towels placed at the bottom. These also act as cushioning, protecting the contents during transport. Think about creating layers and visual focal points. A tall whisk, for example, can stand prominently in the center, surrounded by smaller, colorful items like sprinkles or cupcake liners.
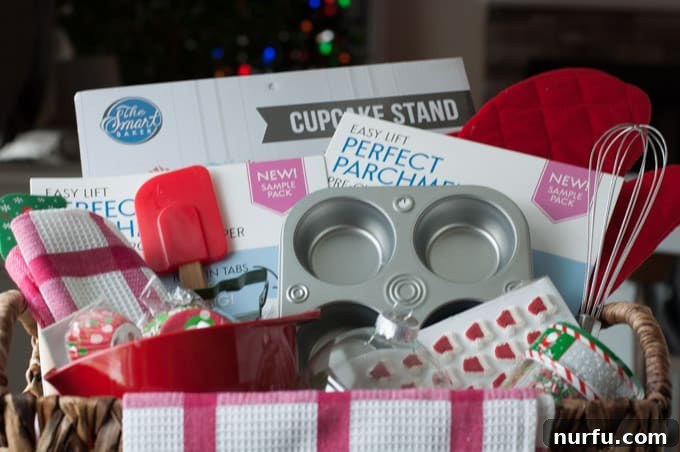
When I finally presented the completed baking basket to my friend, she was absolutely thrilled! Her excitement was palpable. She particularly loved the clever conversion towels and the “cheat sheet” apron from The Smart Baker, but I think her ultimate favorite was the elegant cupcake stand, which she immediately envisioned using for her next batch of homemade treats. The genuine appreciation on her face was all the reward I needed, truly highlighting the immense joy a handmade gift can bring.
Beyond the Basics: Creative Additions to Your Baking Basket
To ensure your baking gift basket is truly unforgettable, consider adding a mix of essential tools, gourmet ingredients, and unique, personalized touches. Here’s an expanded list of ideas:
Essential Baking Tools & Gadgets
- Dish Towels: Absorbent and stylish, choose designs that match your theme.
- Muffin Tin: A classic necessity for cupcakes and muffins.
- Spatula Set: Include various sizes and materials (silicone, rubber, offset).
- Measuring Cups & Spoons: A high-quality, durable set is invaluable.
- Mixing Bowls: A set of nesting bowls is practical and space-saving.
- Oven Mitts & Potholders: Stylish and protective.
- Cookie Sheet/Baking Pan: A good quality, non-stick sheet.
- Whisk: Essential for incorporating air and mixing ingredients smoothly.
- Rolling Pin: For pies, cookies, and pastries.
- Cooling Rack: Crucial for ensuring crisp bottoms on baked goods.
- Kitchen Timer: A cute or retro-style timer.
- Pastry Brush: For glazing or basting.
- Dough Scraper/Bench Scraper: Incredibly useful for handling dough.
Gourmet Ingredients & Consumables
- Sprinkles & Edible Decor: A colorful assortment of high-quality sprinkles, edible glitter, or sugar pearls.
- Cupcake Liners: Assorted patterns and sizes.
- Gourmet Extracts: Unique flavors like almond, peppermint, lemon, or special vanilla blends.
- High-Quality Chocolate Chips/Baking Chocolate: For elevated flavor.
- Specialty Flours: Almond flour, whole wheat pastry flour, or gluten-free blends.
- Artisan Sugars: Demerara, turbinado, or colored sugars.
- Spice Blends: Pumpkin pie spice, cinnamon, or cardamom for baking.
- DIY Mixes in Jars: As mentioned, pre-layered cookie, brownie, or pancake mixes with a recipe card attached.
Decorating & Finishing Touches
- Piping Bags & Tips: A starter set for cake and cupcake decorating.
- Cookie Cutters: A themed set (e.g., holiday, animal shapes, geometric).
- Silpat Baking Mat: A reusable, non-stick alternative to parchment paper.
- Decorating Pen/Bottles: For precise detailing with icing.
- Cake Decorating Turntable: For easier frosting.
Comfort & Inspiration
- Cookbook/Recipe Cards: A small, curated cookbook or a collection of handwritten favorite recipes.
- Personalized Apron: Embroidered with their name or a fun baking quote.
- Cute Tea/Coffee Mug: For enjoying a drink while baking.
- Gift Certificate: To a local baking supply store or a virtual baking class.
- Charming Basket/Container: Instead of a traditional basket, consider a mixing bowl, a colander, or a galvanized tub as the “basket” itself.
By carefully selecting and arranging these items, you can create a DIY baking gift basket that is not only beautiful and practical but also deeply personal. It’s a gift that celebrates a passion, fosters creativity, and truly conveys your affection. So, roll up your sleeves, unleash your creativity, and enjoy the rewarding process of crafting a perfect present for the baker in your life!