
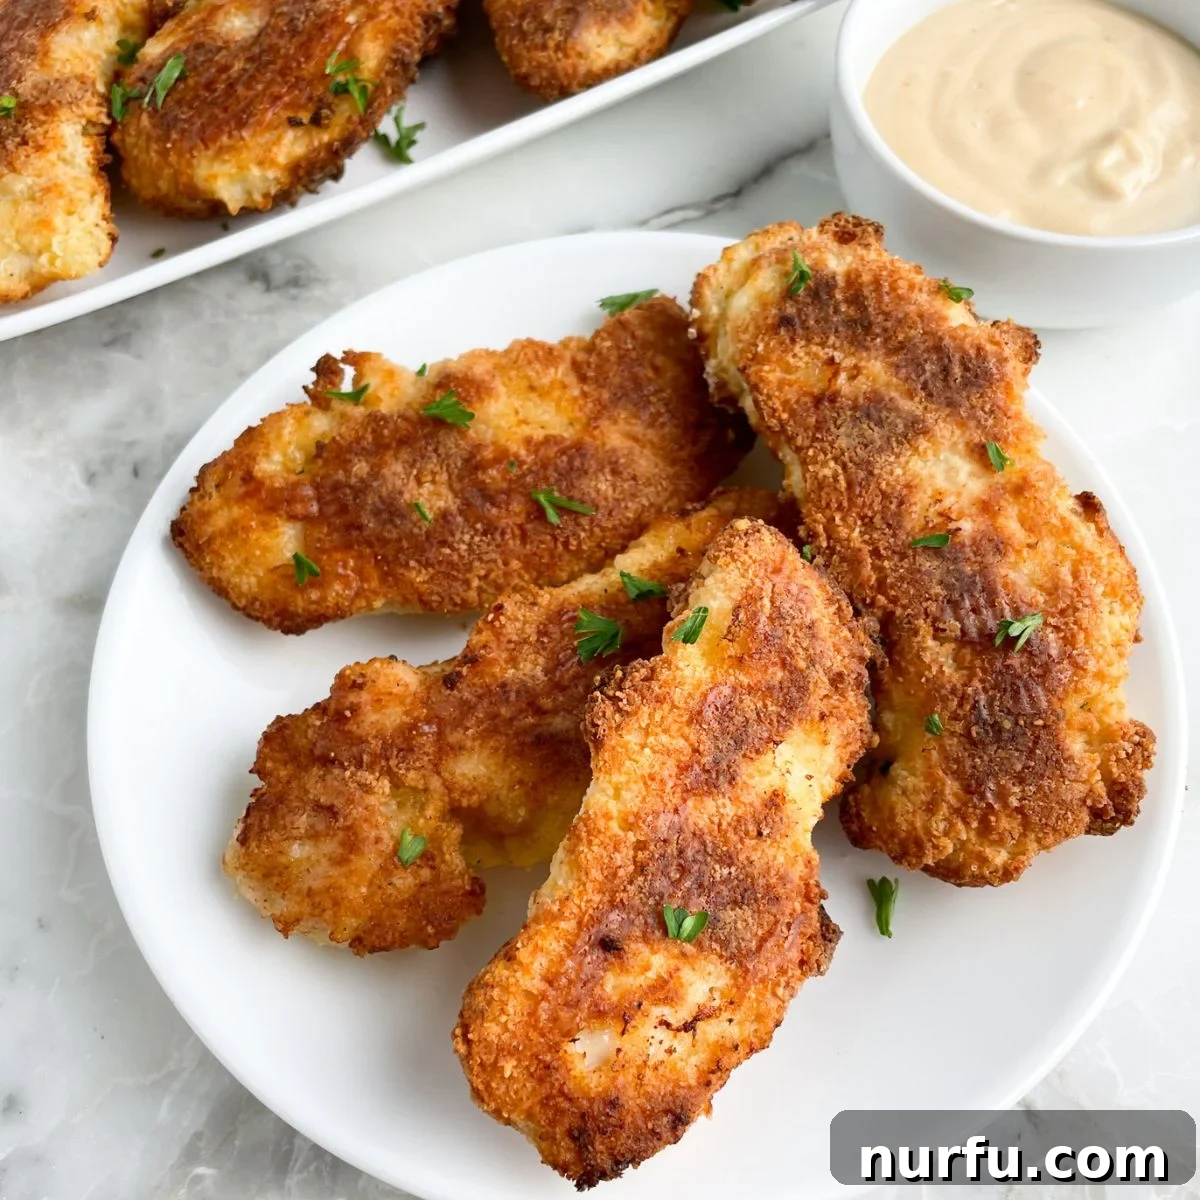
Craving a quick, satisfying meal that’s both incredibly easy to make and guaranteed to be a family favorite? Look no further than these perfectly crispy Bisquick chicken tenders. In just about 30 minutes, you can whip up a batch of golden-brown, juicy chicken tenders that boast an irresistible crunch, making them ideal for busy weeknights or a fun, kid-friendly dinner.
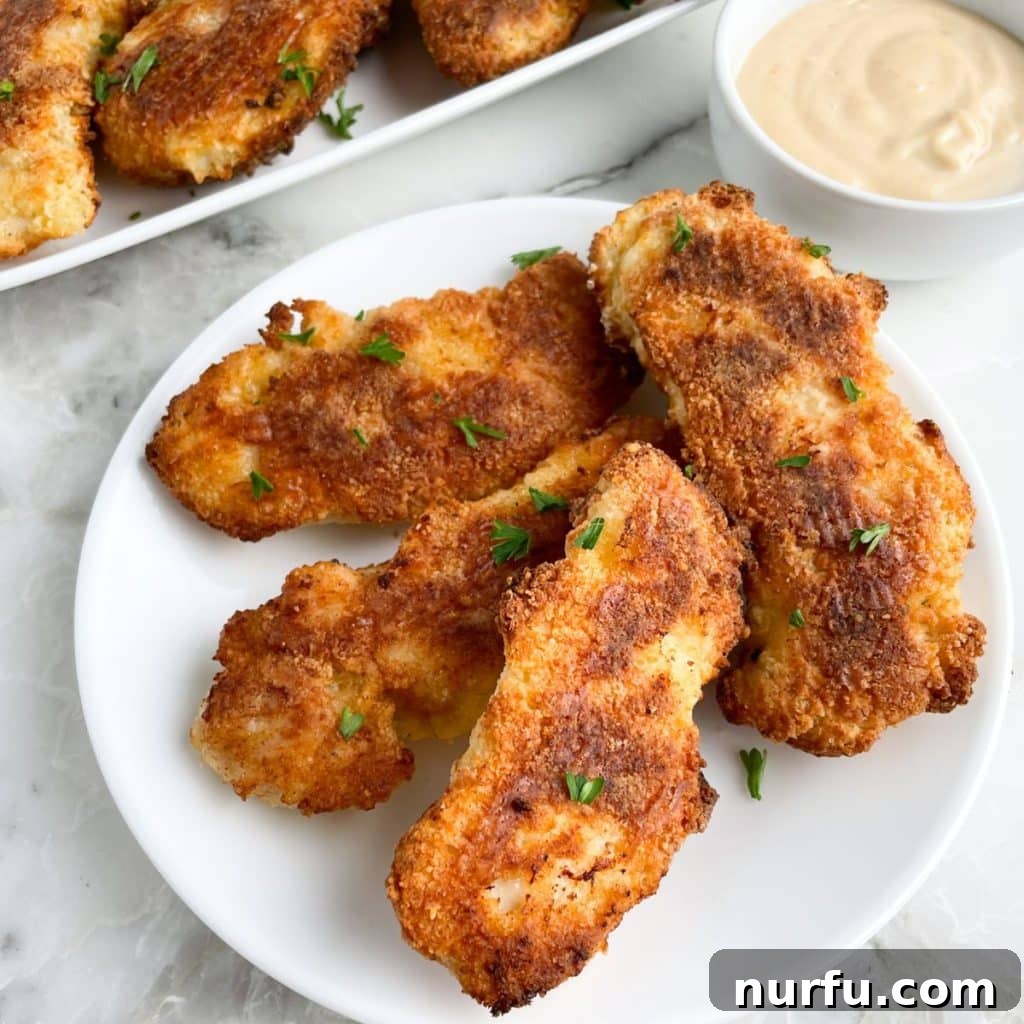
Bisquick, a versatile pantry staple, is famously known for simplifying breakfast classics like fluffy waffles and savory dishes such as crustless quiche. But its utility extends far beyond traditional baking. Using Bisquick as the base for a chicken coating is a brilliant hack to achieve incredibly crispy tenders without the fuss of complicated breading processes. Its unique blend ensures a consistently light and crunchy exterior that locks in the chicken’s moisture, resulting in tenders that are perfectly cooked every time.
Why You’ll Love This Bisquick Chicken Tenders Recipe
This recipe isn’t just about delicious food; it’s about making your life easier while delivering exceptional flavor and texture. Here’s why these Bisquick chicken tenders will become a regular in your meal rotation:
- Unbeatable Speed: From prep to plate, these crispy chicken tenders are ready in approximately 30 minutes. This makes them a lifesaver for those hectic weeknights when time is of the essence but you still want a wholesome, homemade meal. No extensive marinating or complex steps are required, just quick dipping and cooking.
- Flexible Cooking Methods: Whether you prefer the classic bake of an oven or the quick crisp of an air fryer, this recipe adapts seamlessly. Both methods yield fantastic results, allowing you to choose based on your equipment and desired convenience. Detailed instructions for both are provided to ensure perfect tenders every time.
- Endless Customization: The base recipe is simple yet incredibly versatile. Feel free to experiment with your favorite spices to tailor the flavor profile. Craving a Mediterranean twist? Add a Greek seasoning blend. Looking for a kick? Cajun seasoning works wonderfully. You can also try Italian seasoning for a classic taste or even a dash of smoked paprika for depth.
- Kid-Friendly Appeal: The mild, crispy coating and tender chicken make these a guaranteed hit with children, even picky eaters. They’re a healthier alternative to fast-food nuggets and can be paired with a variety of fun dipping sauces.
- Simple Ingredients: You likely have most of these ingredients in your pantry already, eliminating the need for a special grocery run. This recipe uses common items that come together to create something extraordinary.
Essential Ingredients for Crispy Perfection
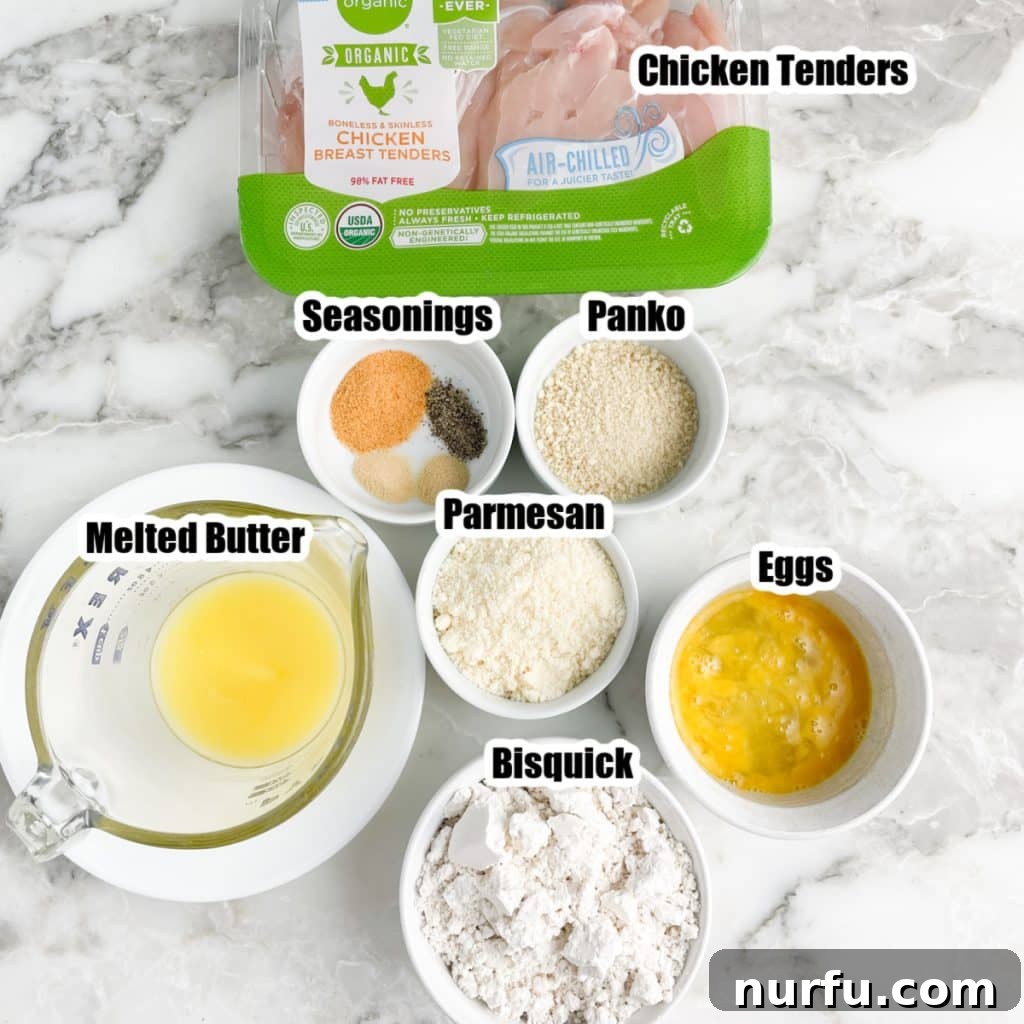
Crafting these delicious Bisquick chicken tenders requires only a handful of readily available ingredients. Each component plays a crucial role in achieving that sought-after crispy texture and savory flavor:
- Chicken Tenders: These pre-cut strips of lean chicken breast are perfect for quick cooking. They are usually found in the meat section of your grocery store. If chicken tenders aren’t available, boneless, skinless chicken breasts can be easily sliced into 1-inch thick strips, ensuring consistent cooking and tender results.
- Bisquick Baking Mix: The star ingredient! Bisquick forms the foundation of our crispy batter. Its unique blend of flour, leavening agents, and fat provides an incredibly light and airy coating that becomes wonderfully crisp when cooked. For those with dietary restrictions, Gluten-Free Bisquick can be substituted without compromising taste or texture.
- Panko Breadcrumbs: For an extra layer of crunch, panko breadcrumbs are essential. Unlike traditional breadcrumbs, panko has a coarser, flakier texture that absorbs less oil and delivers a superior crispiness. You’ll find them alongside regular breadcrumbs in most supermarkets.
- Grated Parmesan Cheese: Adding Parmesan cheese to the breading mixture infuses the tenders with a rich, savory, and slightly salty umami flavor. While optional, it significantly enhances the taste profile, making the tenders even more delicious. Freshly grated Parmesan offers the best flavor.
- Eggs: Eggs act as the binding agent, creating an adhesive layer that helps the Bisquick and panko mixture adhere to the chicken. This ensures a uniform, crispy coating that won’t fall off during cooking.
- Key Seasonings: This recipe calls for a blend of seasoned salt, onion powder, garlic powder, and ground black pepper. This combination provides a balanced and universally appealing savory flavor. Feel free to adjust these or add others like paprika, chili powder, or a pinch of cayenne for heat.
- Melted Butter: Drizzling melted butter over the coated chicken before baking or air frying is the secret to achieving that golden, irresistibly crunchy exterior. The fat helps in browning and crisping, contributing to a truly delicious finish. Olive oil spray can be an alternative, especially for the air fryer, for a slightly lighter option.
How to Prepare Perfect Bisquick Chicken Tenders
Achieving perfectly crispy and juicy Bisquick chicken tenders is straightforward, whether you choose to bake them in the oven or cook them in an air fryer. Follow these simple steps for a mouthwatering result.
Oven Method: For Golden & Crispy Results
Baking these tenders in a hot oven ensures even cooking and a beautiful golden-brown crust. This method is excellent for cooking larger batches.
Step One: Prepare Your Baking Setup
Preheat your oven to a robust 425 degrees F (220 degrees C). A high temperature is crucial for achieving that extra-crispy exterior quickly. While the oven preheats, line a large baking sheet with parchment paper or aluminum foil. This prevents sticking and makes cleanup a breeze. If using foil, lightly spray it with cooking oil.
Step Two: Create Your Breading Station
Prepare two separate stations for breading. In a gallon-sized resealable bag or a shallow baking dish, combine the Bisquick mix, panko breadcrumbs, grated Parmesan cheese, seasoned salt, onion powder, garlic powder, and ground black pepper. Shake or stir well to ensure all ingredients are thoroughly mixed. In a separate medium-sized bowl, whisk the eggs until the yolks and whites are fully combined and slightly frothy.
Step Three: Double-Dredge for Maximum Crispness
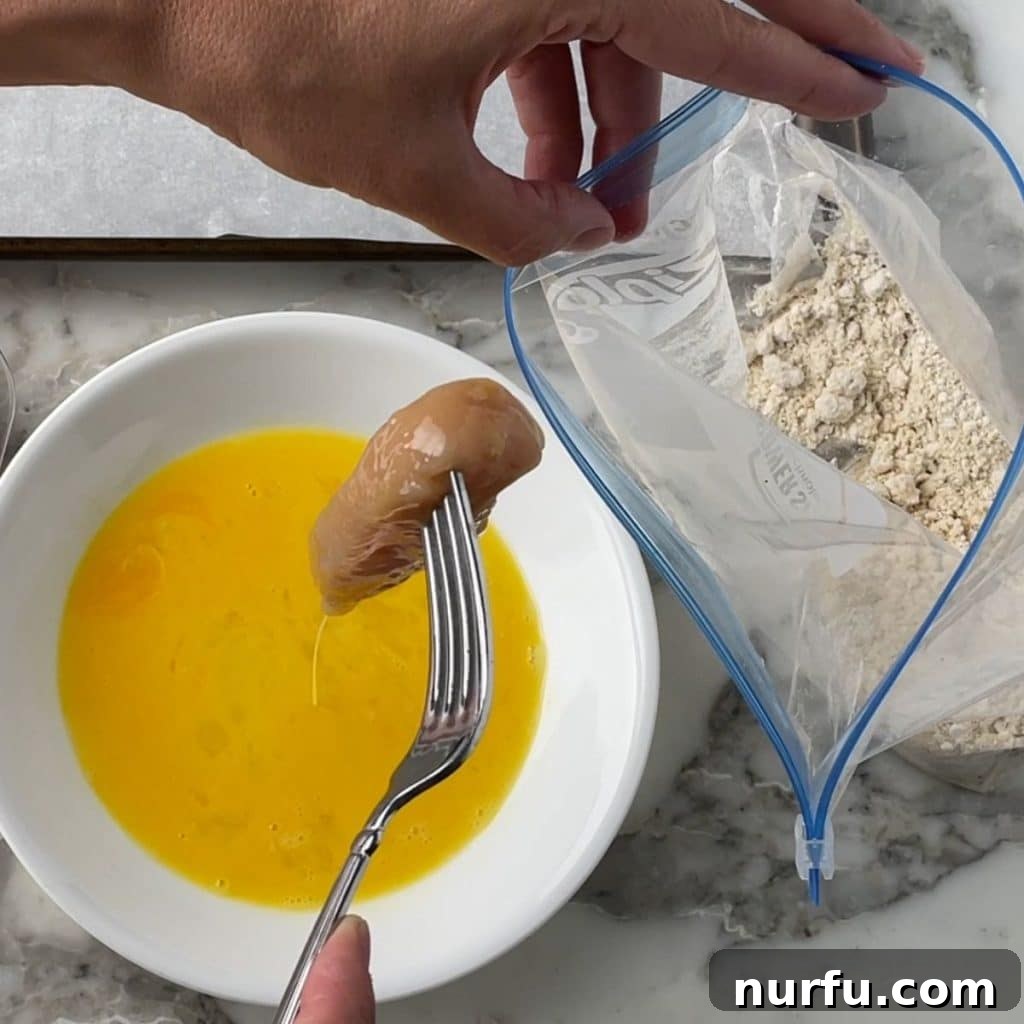
Take each chicken tenderloin and dip it completely into the whisked egg mixture, allowing any excess to drip off. Then, transfer the egg-coated chicken to the bag with the Bisquick mixture. Seal the bag and shake vigorously to ensure the chicken is thoroughly coated on all sides. For an extra thick and crispy coating, repeat this process: dip the chicken back into the egg mixture, then return it to the Bisquick bag for a second coating. This double-dredging technique significantly boosts the crunch factor.
Once coated, place each breaded chicken tenderloin in a single layer on your prepared baking sheet, ensuring they are not touching. This allows for even air circulation and crisping.
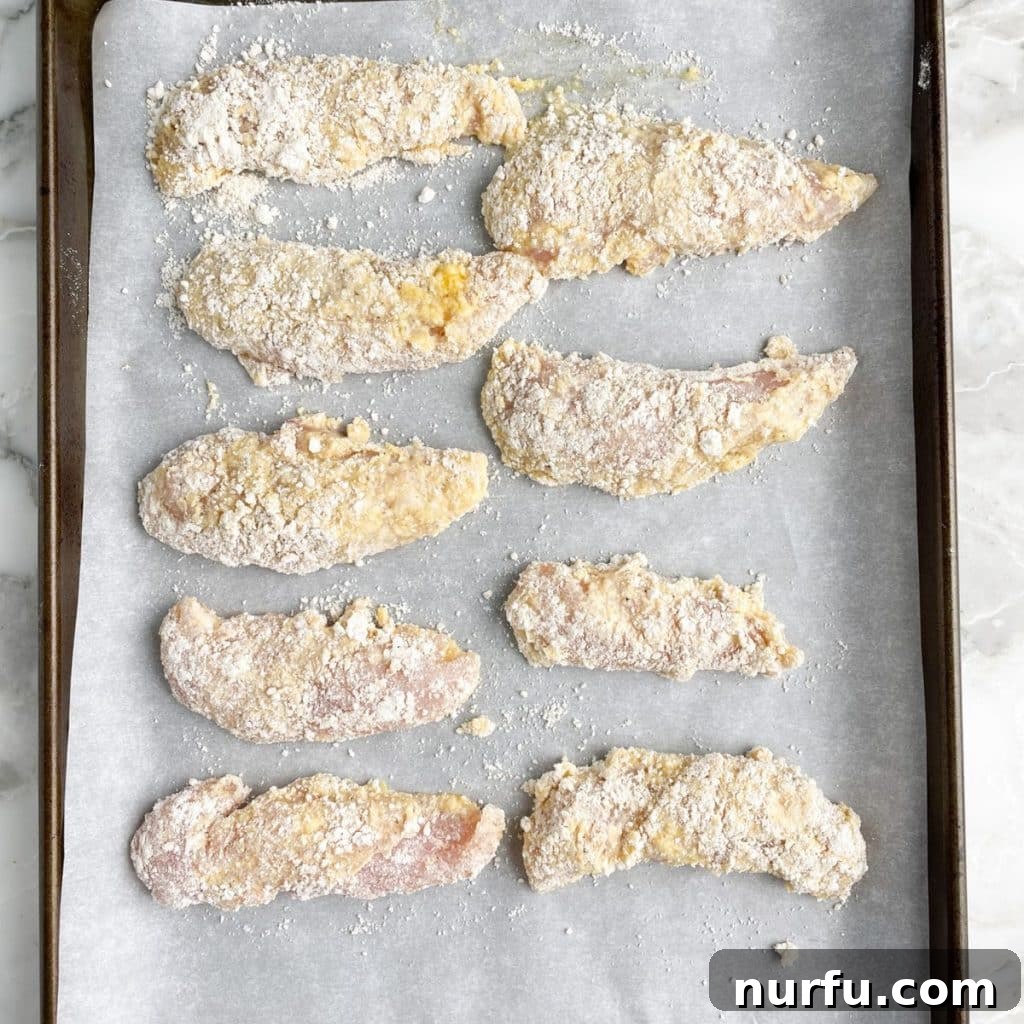
Step Four: Bake to Golden Perfection
Drizzle the melted butter evenly over the tops of the breaded tenderloins. This butter is key to developing that beautiful golden-brown color and irresistible crunch. Place the baking sheet into the preheated oven and bake for 15-20 minutes. Cooking time may vary slightly depending on the thickness of your chicken. The tenders are fully cooked when their internal temperature reaches 165 degrees F (74 degrees C) as measured with a meat thermometer. Check at the 10-minute mark to avoid overcooking and ensure they remain tender and juicy inside.
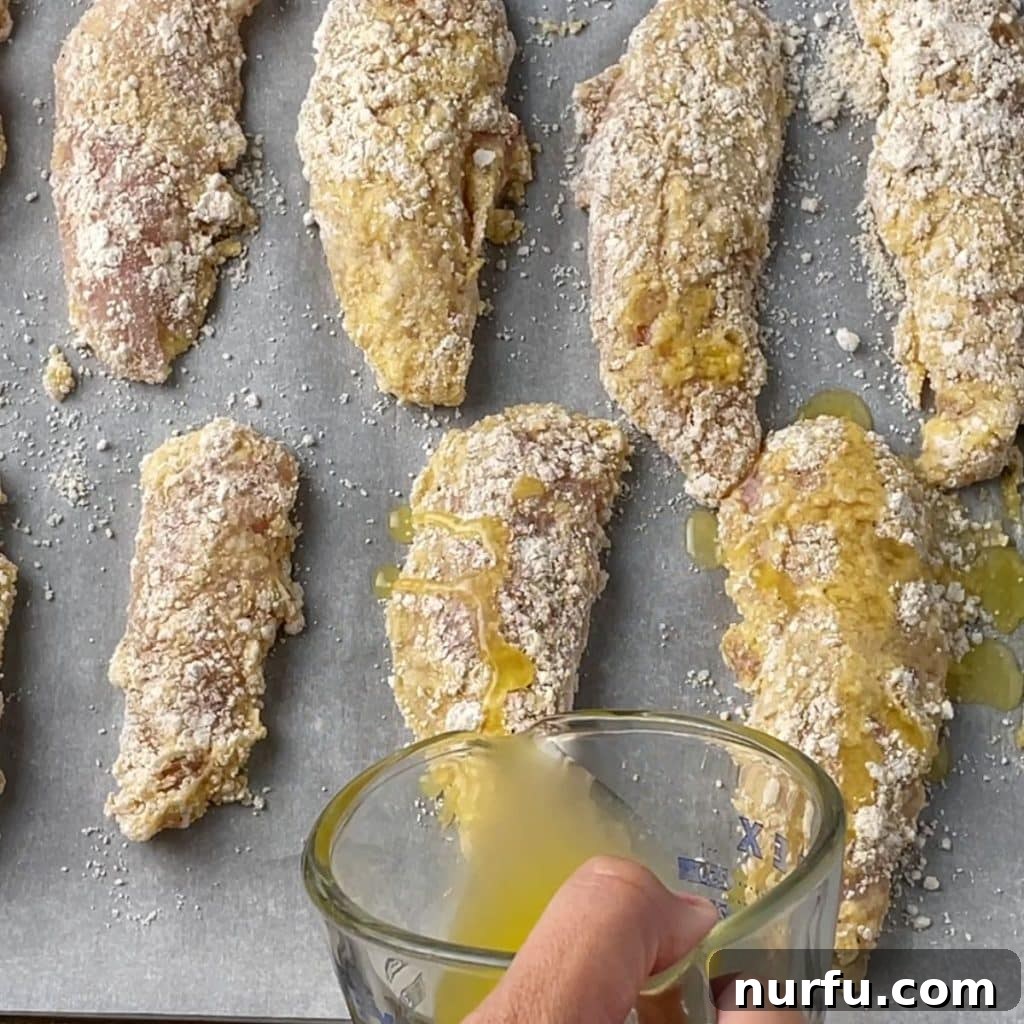
Air Fryer Method: For a Quick & Crispy Crunch
The air fryer offers an even quicker route to crispy chicken tenders with minimal oil. Perfect for smaller batches or when you’re in a hurry.
Step One: Preheat and Prepare Breading
Preheat your air fryer to 400 degrees F (200 degrees C) for 5 minutes. While it preheats, combine the Bisquick, panko breadcrumbs, Parmesan, and seasonings in a resealable bag or shallow dish, mixing thoroughly. Whisk the eggs in a separate bowl.
Step Two: Coat the Chicken
Dip each chicken tender in the whisked egg, letting excess drip off. Then, transfer it to the Bisquick mixture bag, seal, and shake to coat completely. Repeat the egg dip and Bisquick coating for a double layer of crispiness.
Carefully arrange the breaded chicken strips in a single layer within the air fryer basket. Ensure there’s enough space between each piece to allow hot air to circulate freely; this is key to getting them crispy. If needed, cook in batches. Lightly drizzle with melted butter or spray the tops generously with olive oil for optimal browning.
Step Three: Air Fry to Perfection
Cook the chicken tenders for approximately 12 minutes. Halfway through the cooking time (around the 6-minute mark), pause and flip the tenders to ensure even crisping on both sides. Continue cooking until they are golden brown and cooked through, reaching an internal temperature of 165 degrees F (74 degrees C).
Expert Tips for the Best Bisquick Chicken Tenders
Elevate your Bisquick chicken tenders from great to absolutely exceptional with these tried-and-true tips:
- Chicken Cut Options: If you don’t have chicken tenderloins on hand, boneless, skinless chicken breasts are a perfect substitute. Simply slice them lengthwise into uniform 1-inch thick strips to ensure even cooking and tender results.
- Monitor Internal Temperature: Always use a meat thermometer to ensure your chicken reaches a safe internal temperature of at least 165 degrees F (74 degrees C). Begin checking around the 10-minute mark for oven-baked tenders and adjust cooking time as needed to prevent overcooking, which can lead to dry chicken.
- Spice it Up: For those who enjoy a little heat, consider adding a pinch of cayenne pepper to the Bisquick mixture. Alternatively, mix a few drops of your favorite hot sauce into the beaten eggs for a subtle kick.
- Bisquick Alternatives: No Bisquick? No problem! Pancake mix can often be used as a suitable substitute, offering a similar flour base for your coating. Just be mindful of any added sugar in the pancake mix, which might slightly alter the flavor.
- Extra Crispy Coating: For an even crunchier texture, ensure your chicken is patted completely dry before dipping in the egg. Moisture on the chicken can prevent the breading from adhering properly.
- Prevent Sticking: When baking, ensure your baking sheet is well-lined with parchment paper or foil, and for the air fryer, lightly spray the basket with non-stick cooking spray to prevent the chicken from sticking.
- Don’t Overcrowd: Whether in the oven or air fryer, arrange the chicken tenders in a single layer with space between each piece. Overcrowding leads to steaming instead of crisping. Cook in batches if necessary.
- Rest Before Serving: Allow the chicken tenders to rest for 2-3 minutes after cooking. This helps the juices redistribute, resulting in more tender and flavorful chicken.
What to Serve with Oven Baked Bisquick Chicken Tenders
These ultimate crispy chicken tenders are versatile and pair wonderfully with a variety of sides and, most importantly, delicious dipping sauces!
Our Favorite Dipping Sauces: Adding a flavorful dipping sauce is the perfect way to elevate your chicken tender experience. Here are some top picks:
- Copycat Polynesian Sauce: A sweet and tangy delight, perfect for adding an exotic touch.
- Copycat Chick-Fil-A Sauce: Creamy, smoky, and famously delicious – a fan favorite.
- Copycat Red Robin Campfire Sauce: A unique blend of sweet, smoky, and spicy flavors.
- Boom Boom Sauce: A zesty, creamy sauce with a touch of heat that’s incredibly addictive.
- Zesty Sauce: A tangy, horseradish-infused sauce that adds a bright kick.
- Ranch Dressing: A timeless classic, creamy and herbaceous, beloved by all.
- BBQ Sauce: Sweet, smoky, and savory – a universally popular choice.
- Honey Mustard: The perfect balance of sweet and tangy, especially appealing to kids.
- Ketchup: Simple, classic, and always a winner, especially with younger diners.
Delicious Side Dishes: Complete your meal with these complementary sides:
- Crispy French Fries: The ultimate companion to chicken tenders.
- Creamy Mac and Cheese: A comforting classic that’s a hit with everyone.
- Steamed Broccoli: A fresh, healthy green vegetable to balance the meal.
- Coleslaw: A cool, crunchy, and tangy salad that offers a refreshing contrast.
- Corn on the Cob: Sweet and juicy, perfect for a summer-inspired dinner.
- Simple Green Salad: Light and crisp, with your favorite dressing.
Storage and Reheating Instructions
Got leftovers? These Bisquick chicken tenders are just as delicious the next day! Allow them to cool completely to room temperature, then transfer them to an airtight container. Store in the refrigerator for up to 3-4 days. For best results and to retain their crispiness, reheat them in the oven at 350 degrees F (175 degrees C) for about 10-15 minutes, or in an air fryer at 375 degrees F (190 degrees C) for 5-7 minutes, until thoroughly heated through and crispy once more. Avoid microwaving, as this can make them soggy.
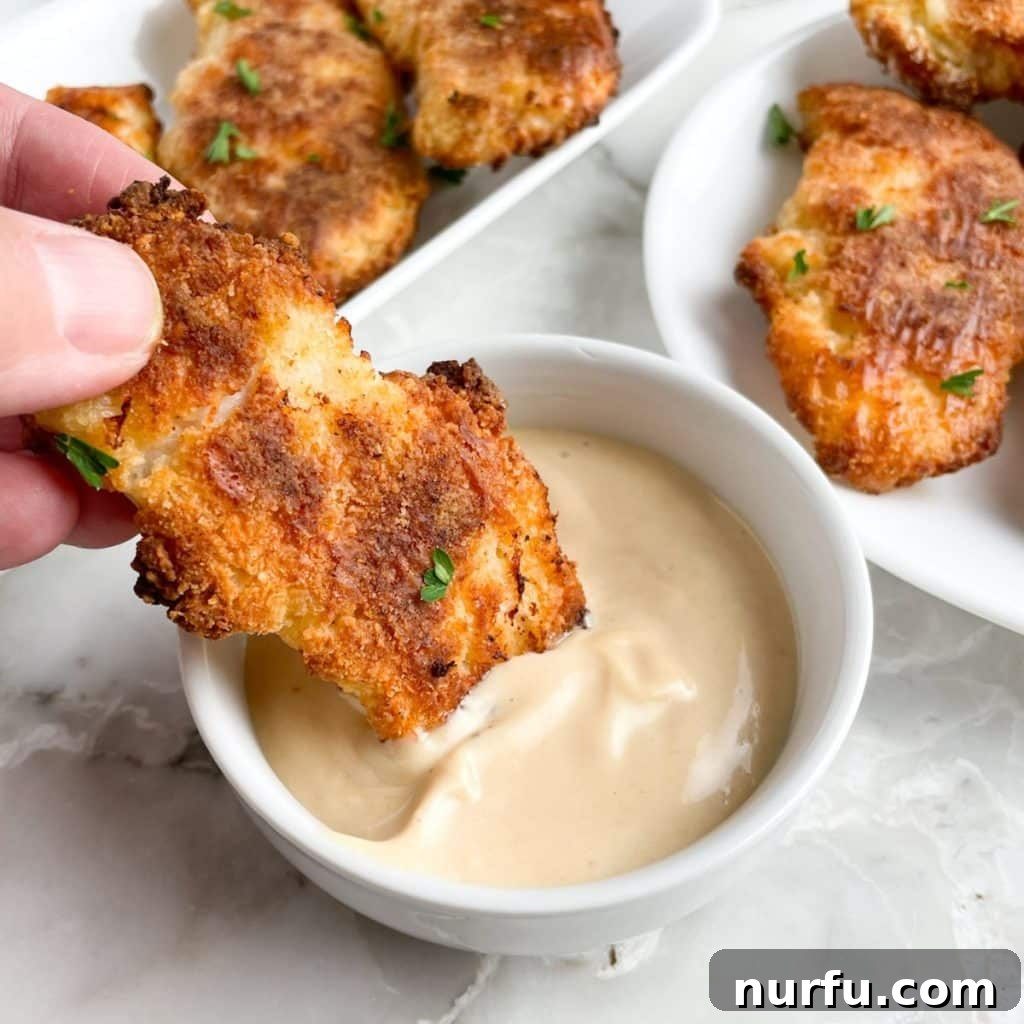
Frequently Asked Questions (FAQs)
- Can I use frozen chicken tenders? Yes, but ensure they are fully thawed and patted dry before breading. Cooking frozen chicken tenders directly will result in a soggy coating and uneven cooking.
- Can I make these gluten-free? Absolutely! Simply substitute the regular Bisquick mix with a gluten-free Bisquick alternative. Most major brands offer a gluten-free version that works just as well.
- What if I don’t have panko breadcrumbs? While panko offers superior crispiness, you can use regular fine breadcrumbs in a pinch. The texture might be slightly less crunchy, but they will still be delicious.
- Can I prepare these ahead of time? You can prepare the breading mixture ahead of time and store it in an airtight container. You can also bread the chicken tenders and refrigerate them uncooked for a few hours, but for best crispiness, it’s ideal to cook them immediately after breading.
- Can I freeze cooked chicken tenders? Yes! Once cooked and completely cooled, arrange the tenders in a single layer on a baking sheet and freeze until solid. Then, transfer them to a freezer-safe bag or container for up to 2-3 months. Reheat from frozen in the oven or air fryer until crispy and hot.
- How do I prevent the breading from falling off? Ensure the chicken is very dry before dipping in egg. The double-dredging method (egg, breading, egg, breading) also helps create a strong bond. Press the breading firmly onto the chicken.
More Delicious Chicken Recipes to Explore
- Irresistible Air Fryer BBQ Chicken Breast
- Best Ground Chicken Recipes for Quick Meals
- Top Instant Pot Chicken Recipes for Easy Dinners
- Perfectly Cooked Air Fryer Chicken Breast

Bisquick Chicken Tenders
Ingredients
- 1 lb chicken tenderloin
- 1 cup Bisquick
- 1/4 cup panko crumbs
- 1/3 cup grated Parmesan cheese
- 1 teaspoon seasoned salt
- 1/2 teaspoon ground black pepper
- 2 eggs
- 1/4 cup butter, melted
Instructions
Oven Method
- Preheat oven to 425 degrees F. Line a large baking sheet with parchment paper or aluminum foil.
- Add Bisquick, panko crumbs, Parmesan, and seasoning in a gallon-sized resealable bag or a shallow baking dish. In a separate bowl, whisk eggs.
- Dip chicken tenderloin in egg, then place in the bag of Bisquick mixture. Seal the bag and shake to coat completely. For a double coating, dip chicken back in egg and then again in the Bisquick mixture.
- Place the coated chicken tenderloins on the prepared baking sheet in a single layer.
- Drizzle melted butter over the tenderloins, then bake for 15-20 minutes, or until an internal temperature of 165 degrees F is reached.
Air Fryer Method
- Preheat air fryer to 400 degrees F for 5 minutes. Mix together Bisquick, panko crumbs, Parmesan, and seasonings in a bag. Whisk egg in a different bowl.
- Dip chicken in egg and then in the bag of Bisquick. Repeat for a double coating.
- Place chicken strips in the air fryer basket in a single layer. Drizzle with butter or spray tops with olive oil.
- Cook for 12 minutes, flipping halfway through cooking, until golden and cooked through.
Video
A video tutorial for this recipe would typically appear here.
Nutrition
Nutrition information is automatically calculated and should only be used as an approximation.
Additional Info
We hope you enjoy making and savoring these incredibly easy and delicious Bisquick chicken tenders. They are a testament to how simple ingredients and a clever pantry staple can create a meal that’s both comforting and exciting. Whether you’re rushing through a weeknight or looking for a crowd-pleasing dish, these crispy tenders are sure to become a cherished recipe in your home. Give them a try and discover your new favorite chicken dinner!
Like this recipe? We’d love to hear from you!
Leave a comment below and share your experience. Your feedback helps us and other home cooks.