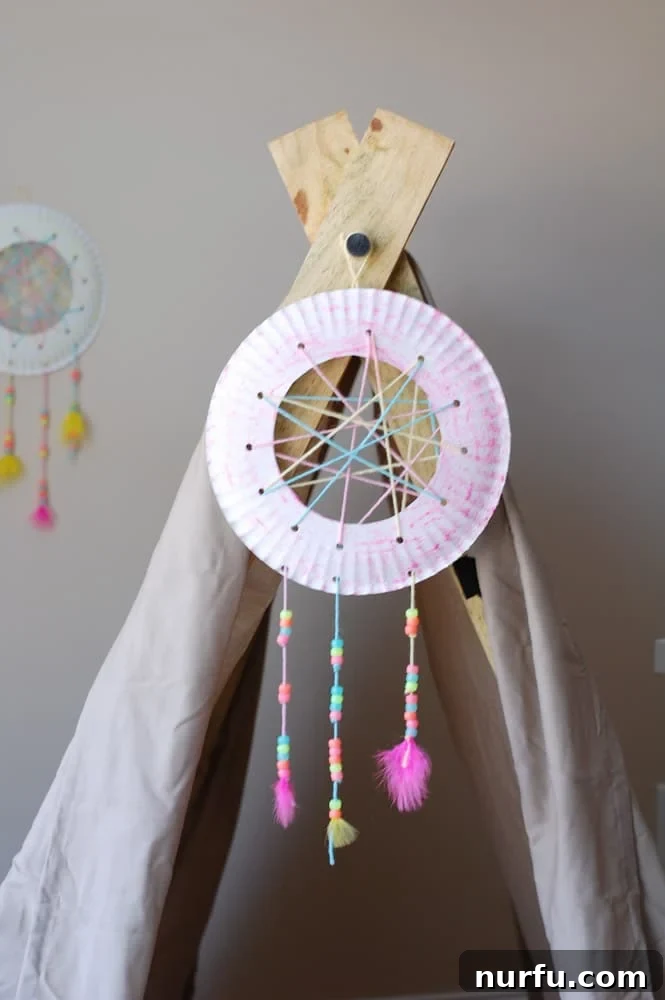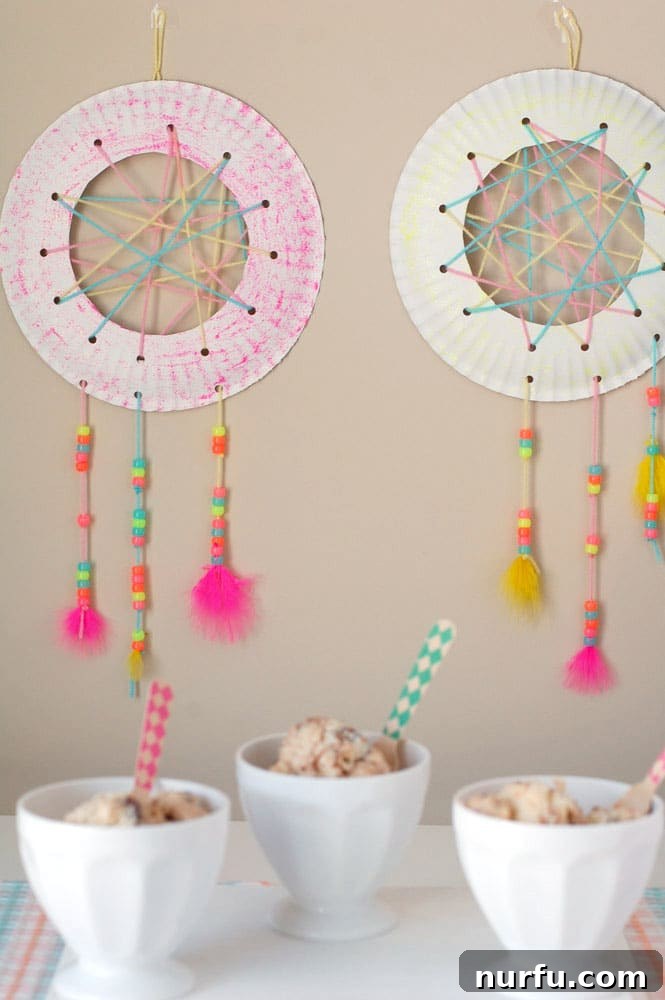
Ignite your child’s imagination and help them drift off to the sweetest of dreams with this enchanting DIY dream catcher. Crafted from simple, readily available materials, this project promises not only a beautiful keepsake but also a delightful journey into creativity and fun!
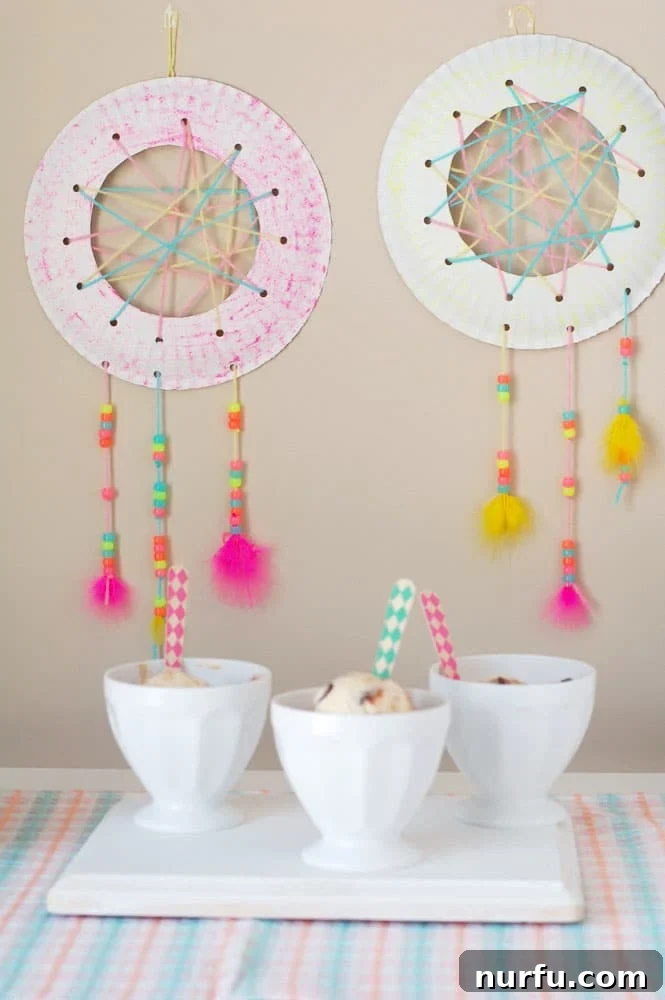
Summer offers a magical blend of sunshine, laughter, and endless possibilities, making it an AWESOME time for children to explore and grow. Beyond the pure joy of refreshing pool days and the freedom from structured school routines, summer also provides a unique opportunity for kids to reconnect with friends and nurture their inherent creativity. While busy schedules often fill with exciting camps and family vacations, there’s a special, enduring charm in creating informal gatherings that foster genuine friendship and shared experiences. For many years, I’ve made it a priority to host small, themed craft parties, like our popular ice cream and craft get-togethers. These gatherings allow my daughter, Ava, and her friends to eagerly catch up, share their latest adventures, giggle over inside jokes, and most importantly, make lasting memories together. It’s truly heartwarming to witness their genuine camaraderie, to listen to their innocent conversations, and to be momentarily transported back to a simpler time when life’s biggest decision revolved solely around choosing the perfect ice cream flavor.
These cherished moments are more than just simple playdates; they are vital for social development, emotional well-being, and the cultivation of essential life skills. Crafting together, in particular, offers a fantastic, hands-on platform for children to express themselves freely, develop crucial fine motor skills, and learn the invaluable art of collaboration. It naturally encourages problem-solving as they navigate materials and techniques, and significantly boosts self-esteem as they proudly see their creative ideas come to tangible life. In a world increasingly dominated by digital screens and passive entertainment, hands-on activities like making a DIY dream catcher provide a refreshing and much-needed break. They allow young minds to deeply engage with tangible materials, fostering a sense of accomplishment and a genuine appreciation for the process of creation from its very inception to its beautiful conclusion. Our summer craft sessions have, without a doubt, become a beloved tradition, a highlight eagerly anticipated by all the girls.
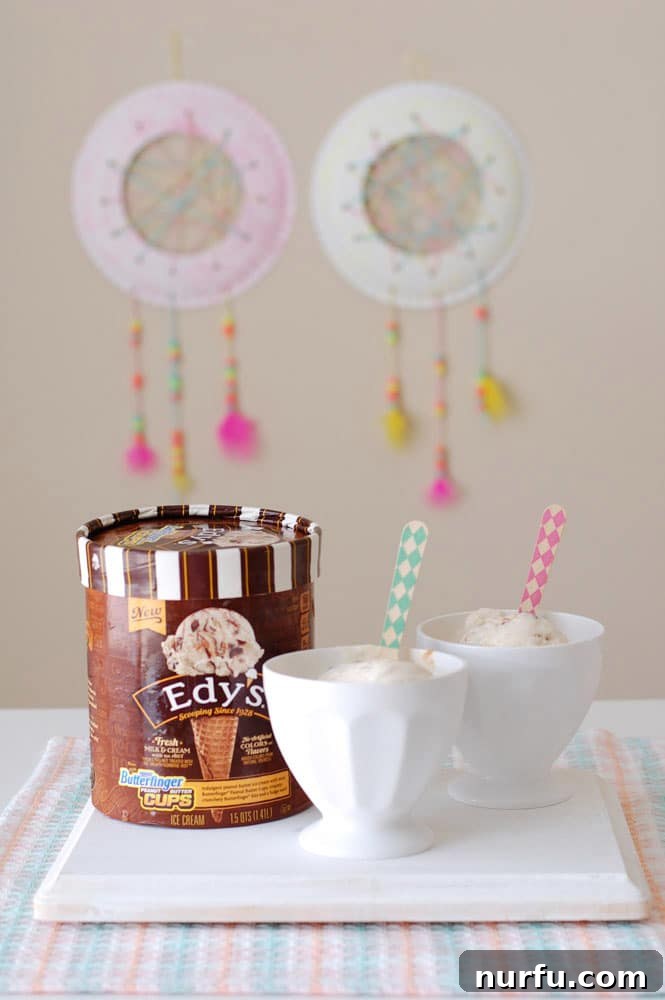
This past summer, we decided to elevate our usual gathering with a whimsical “glamping” party theme – imagine traditional camping, but infused with a delightful touch of sparkle, comfort, and playful luxury. My thoughtful stepfather even constructed adorable mini-tents for us, setting the perfect cozy and adventurous scene for our pretend wilderness escapade. For our main creative endeavor, we decided on making enchanting DIY dream catchers. This wasn’t just a fun and engaging project; it spontaneously sparked incredibly imaginative discussions among the girls about the mysterious and fascinating world of dreams. They eagerly shared their funniest, scariest, and sweetest dreams, pondering what each might mean and how dream catchers could potentially influence their nightly slumber. Historically, dream catchers were revered by various Native American cultures as powerful protective talismans. They were believed to carefully filter out bad dreams, trapping them in their intricate webs until the morning sun dissolved them, while simultaneously allowing only good dreams and positive thoughts to gently flow through to the sleeper. This rich cultural background added an extra layer of meaning, wonder, and educational value to our craft session, transforming a simple activity into a magical exploration of ancient beliefs, storytelling, and personal introspection.
Creating DIY dream catchers is an excellent and engaging way to introduce children to the concept of cultural stories, folklore, and the profound power of symbols. It also provides a fantastic opportunity for them to personalize their creations, ensuring that each dream catcher becomes a unique and cherished reflection of their individual style, preferences, and personality. The simple yet intricate act of weaving, threading, and decorating engages both their artistic and cognitive skills, making it a truly holistic and rewarding craft experience. Furthermore, hanging a self-made dream catcher in their own room can instill in children a comforting sense of security and a significant boost of confidence. It’s a tangible reminder that they have crafted something special and protective, a beautiful guardian designed to watch over their precious slumber, filling their nights with peaceful and sweet dreams. This project not only delivers a beautiful outcome but also reinforces the value of handmade items and the personal connection to their creations.
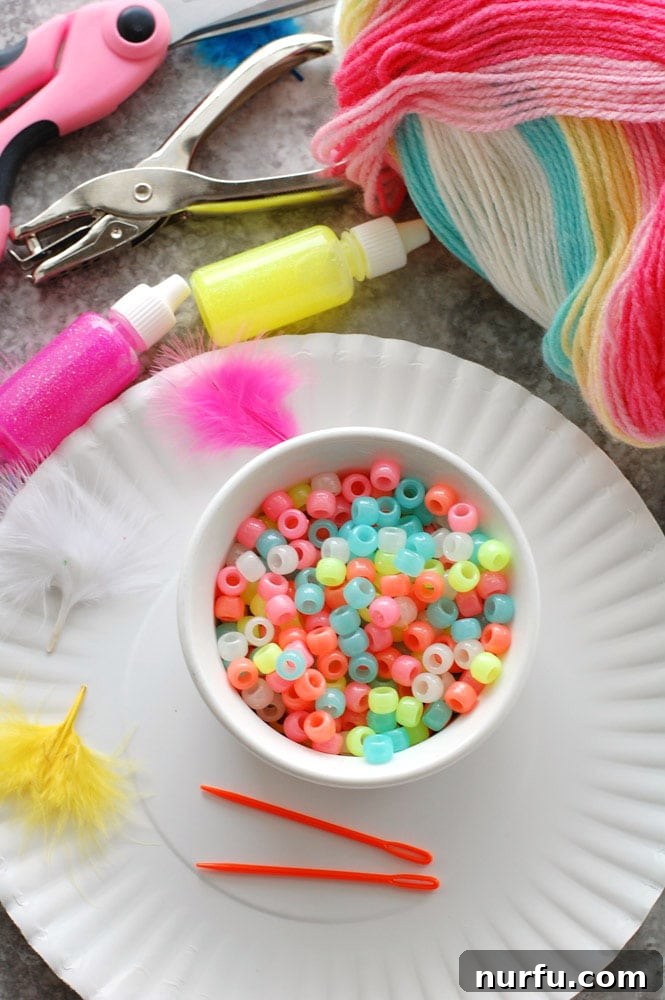
Essential Materials for Your DIY Paper Plate Dream Catcher:
Gathering your supplies is often the first exciting step in any creative craft project. For this charming and easy-to-make paper plate dream catcher, you’ll find that most items are likely already within your home or can be easily acquired from any local craft store. Before you begin, prepare a dedicated, clean workspace to ensure a smooth, organized, and thoroughly enjoyable crafting session for everyone involved.
- Scissors: Absolutely essential for accurately cutting out the center of your paper plates and for trimming yarn strands. For younger crafters, child-safe blunt-tipped scissors are highly recommended to ensure safety and ease of use.
- Hole Punch: A standard hole punch is crucial for creating the evenly spaced holes around the paper plate frame. These holes will form the foundational anchor points for your intricate yarn web.
- Paper Plates: Opt for sturdy, standard-sized paper plates (around 9-10 inches in diameter). Their robustness provides an excellent, firm frame for the dream catcher. Plates with a decent rim size are easier to cut and decorate effectively.
- Yarn (approximately 6-8 feet total): This versatile material will be used for both weaving the central web and creating the decorative hanging strands. Using a variety of colors, perhaps 2-3 feet of each chosen color, can significantly add visual interest, texture, and allow for truly creative and vibrant weaving patterns. Medium-weight cotton or acrylic yarn works best for easy handling.
- Tape: Standard clear adhesive tape is incredibly useful for securing yarn ends, particularly at the beginning and end of the weaving process, and for making it much easier to thread yarn through the eye of a needle without fraying.
- Large Sewing Needle: A blunt-tipped, large-eyed plastic or metal needle is ideal for small hands to safely maneuver the yarn through the punched holes. It minimizes frustration and ensures a safer crafting experience compared to sharp sewing needles.
- Decorative Elements: These are where the dream catcher truly comes to life and reflects individual personality!
- Glitter or Glitter Glue: To add a wonderful sparkle and shine, allowing children to personalize the painted paper plate frame with dazzling effects.
- Paint (Acrylic or Washable Craft Paint): Perfect for coloring the paper plate ring, providing a vibrant base for all other decorations. Offer a range of colors to spark creativity.
- Beads: An assortment of colorful beads in various shapes and sizes, ensuring they have holes large enough for your chosen yarn to pass through easily. These beads add delightful weight, texture, and visual appeal to the hanging strands.
- Feathers: Lightweight craft feathers in an array of sizes and colors are quintessential for dream catchers. They traditionally symbolize air, breath, and the gentle flight of good dreams.
- Optional Extras: Encourage further creativity by suggesting additional items like small charms, colorful ribbons, sequins, or even collected natural elements such as small dried leaves or tiny pebbles for unique, earthy touches.
Step-by-Step Guide: Crafting Your Own Magical Dream Catcher
Follow these simple, clear instructions to create your enchanting dream catcher. Remember, the true beauty of this craft lies in its personalization, so wholeheartedly encourage creativity and unique expression at every single stage!
- Step 1: Prepare Your Dream Catcher Frame
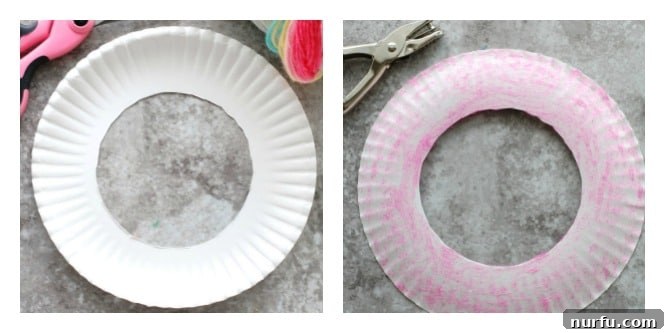
Begin by carefully cutting out the circular center of your paper plate. The goal is to leave a sturdy outer ring, approximately 1 to 1.5 inches wide, which will serve as the main, robust frame of your dream catcher. For a clean and neat cut, a helpful tip is to gently poke a small starter hole in the very center of the plate first. Then, insert your scissors into this hole and carefully cut outwards in a smooth, circular motion until the center piece is completely removed. Once the center is out, it’s time to unleash your artistic flair! Paint the entire outer ring using vibrant acrylic or washable craft paints in your favorite colors. Our glamping party girls absolutely adored using glitter glue, which added a wonderful, sparkling shimmer and interesting texture to their frames. Allow the paint or glitter glue ample time to dry completely before you move on to the next step; this crucial drying time ensures a neat, mess-free, and enjoyable crafting experience for everyone.
- Step 2: Create the Web Foundation with Punch Holes and Yarn
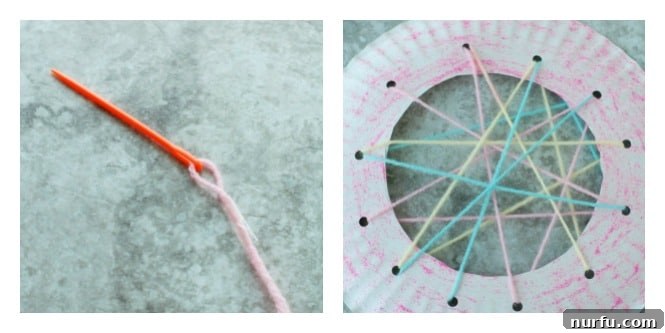
Once your beautifully painted frame is completely dry, take your hole punch and meticulously create approximately 12 to 15 evenly spaced holes around the inner edge of the paper plate ring. The more holes you create, the more intricate and detailed your dream catcher’s web can potentially become. For younger children, a great technique to achieve better spacing is to first guide them in marking small dots with a pencil around the rim before punching. Next, prepare your yarn for the exciting weaving process. Cut a piece of yarn about 2-3 feet long – remember, you can always easily add more later if needed. Thread one end of the yarn through the eye of your large, blunt-tipped needle. Here’s a quick and invaluable tip for easy, tangle-free weaving: once the yarn is securely looped through the needle’s eye, wrap a small piece of clear adhesive tape tightly around the yarn very close to the needle. This clever trick prevents the yarn from slipping out of the needle or fraying as the kids diligently work. Now, thread the needle through one of the punched holes, going from the colorful front of the plate to the back. Secure the starting end of the yarn to the back of the plate with a small piece of tape or by tying a firm, simple knot. You are now perfectly ready to begin building the magical web! Start by sewing through the holes around the plate. The classic dream catcher pattern often involves gracefully going across the ring, skipping a few holes, and then looping through another hole, effectively creating a criss-cross, star-like, or even spiral pattern in the center. Encourage children to fearlessly experiment with different patterns and tensions – there is truly no single “right” way to create the web, and unique designs are absolutely part of the charm and beauty. Varying the yarn tension slightly can also add wonderful character and depth to the finished web.
- Step 3: Add Decorative Dangling Elements
Once the intricate weaving of your dream catcher’s central web is complete to your full satisfaction, securely tape down the final end of the yarn to the back of the plate. This ensures the web remains taut and beautiful. Now, it’s time for the most exciting and personalized part: adding the beautiful dangling decorations that make each dream catcher so wonderfully unique! Take your hole punch and create three more holes evenly spaced along the bottom edge of the paper plate frame. These carefully placed holes will serve as the anchors for your charming hanging strands. Cut three separate pieces of yarn, each approximately 12-18 inches long, depending entirely on how long and flowing you wish your decorative tassels to be. Thread one piece of yarn through each of the newly punched holes, ensuring you secure the ends firmly to the back of the plate with either sturdy tape or a tight, reliable knot. This step is crucial to prevent them from accidentally pulling out once decorated. Now for the truly fun part: stringing beads! Encourage children to eagerly select their favorite beads, mix and match colors and textures, and thread them onto each yarn strand. To secure the beads perfectly in place along the yarn and prevent them from sliding off, tie a small, double knot directly below each last bead you add. For incorporating feathers, you have a few wonderfully creative options: you can gently insert the firm quill end of a feather directly into the center hole of a bead, allowing the bead to snugly hold it in place. Alternatively, you can tie the feather directly to the very end of a yarn strand with a small, secure knot, or even use a tiny dab of craft glue for extra reassurance and permanence. Feel absolutely free to mix and match various colors, sizes, and types of beads and feathers to create a truly personalized and eye-catching design that reflects each child’s unique vision. This final step is where each child’s individual artistic style truly shines through, transforming a simple craft into a cherished, one-of-a-kind piece of art designed to inspire sweet dreams.
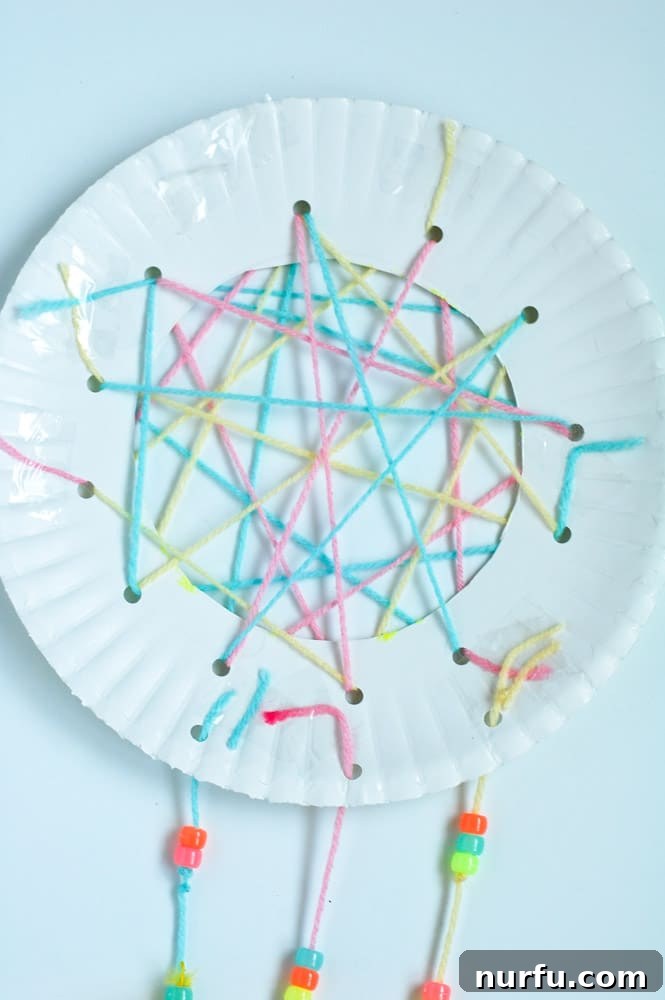
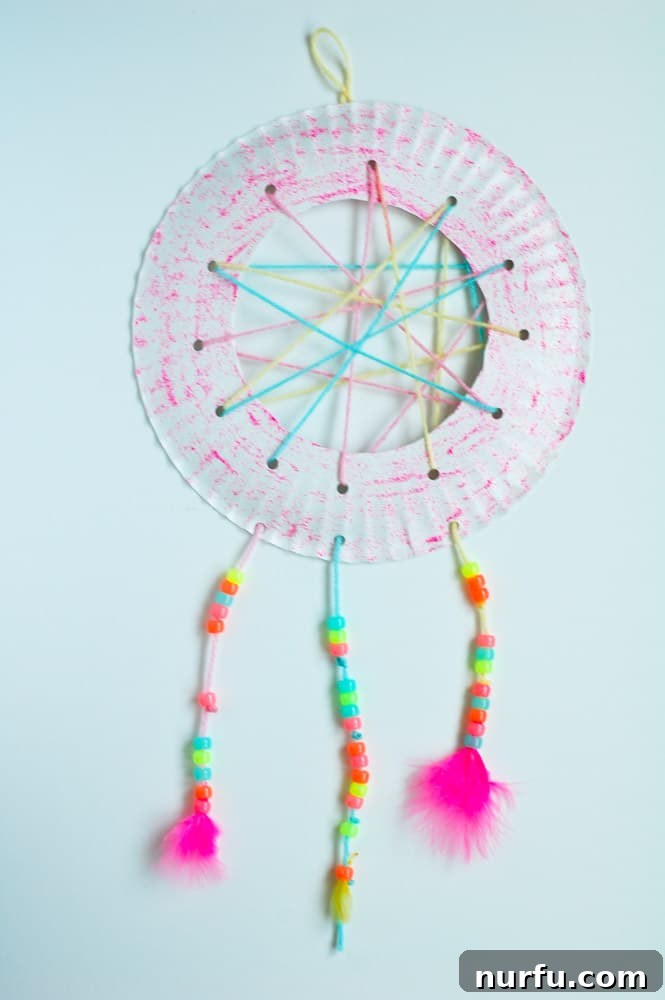
The pure joy and immense satisfaction reflected on the girls’ faces as they proudly completed their vibrant, personalized dream catchers were truly priceless and heartwarming. Beyond the beautiful and unique creations themselves, these craft sessions are fundamentally about fostering deeper connections, encouraging imaginative and screen-free play, and celebrating the simple yet profound pleasure of being together in a creative space. Sharing delicious ice cream and engaging stories while diligently working on a fun, hands-on project creates indelible memories that will far outlast the fleeting warmth of the summer sun. This DIY paper plate dream catcher isn’t just another craft; it’s a rich, multi-faceted experience that actively encourages the development of fine motor skills, nurtures boundless creative expression, and provides a delightful, accessible introduction to captivating cultural folklore. Hanging their very own handmade dream catchers in their bedrooms, each child now possesses a unique and comforting symbol of sweet dreams and happy memories, a tangible reminder of a truly wonderful summer glamping party filled with laughter, friendship, and inspiring creativity.
We sincerely hope this detailed guide inspires you to gather your little ones and embark on your very own dream catcher crafting adventure. Whether you’re planning a fun birthday party activity, seeking a engaging project for a rainy afternoon, or simply looking for a creative and enjoyable way to spend time together, this craft is guaranteed to spark immense joy, foster artistic expression, and create treasured moments. Plus, who wouldn’t want a charming, self-made guardian diligently filtering out unwanted bad dreams and ushering in only the sweetest, most peaceful slumber? Happy crafting, and may all your dreams be wonderfully sweet!