
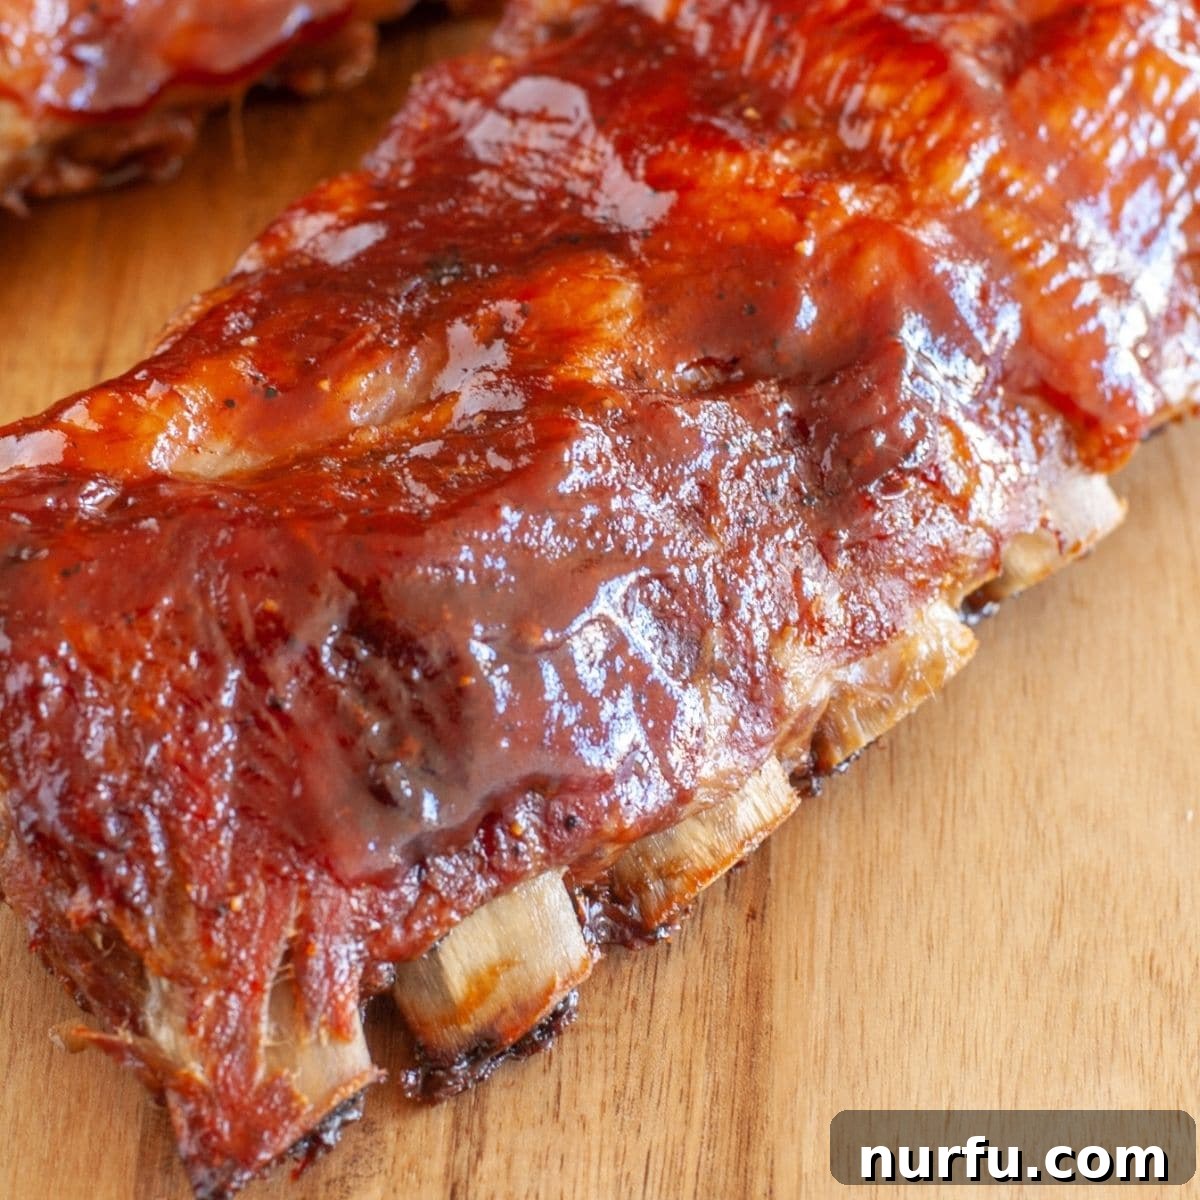
Prepare to discover the secret to truly unforgettable ribs right in your own kitchen! These are hands down some of the BEST baby back ribs you’ll ever taste, and they’re incredibly simple to achieve. Mastering the art of cooking baby back ribs in the oven is surprisingly straightforward, consistently delivering incredibly tender, fall-off-the-bone results every single time. This easy-to-follow recipe is destined to become a staple in your culinary repertoire.
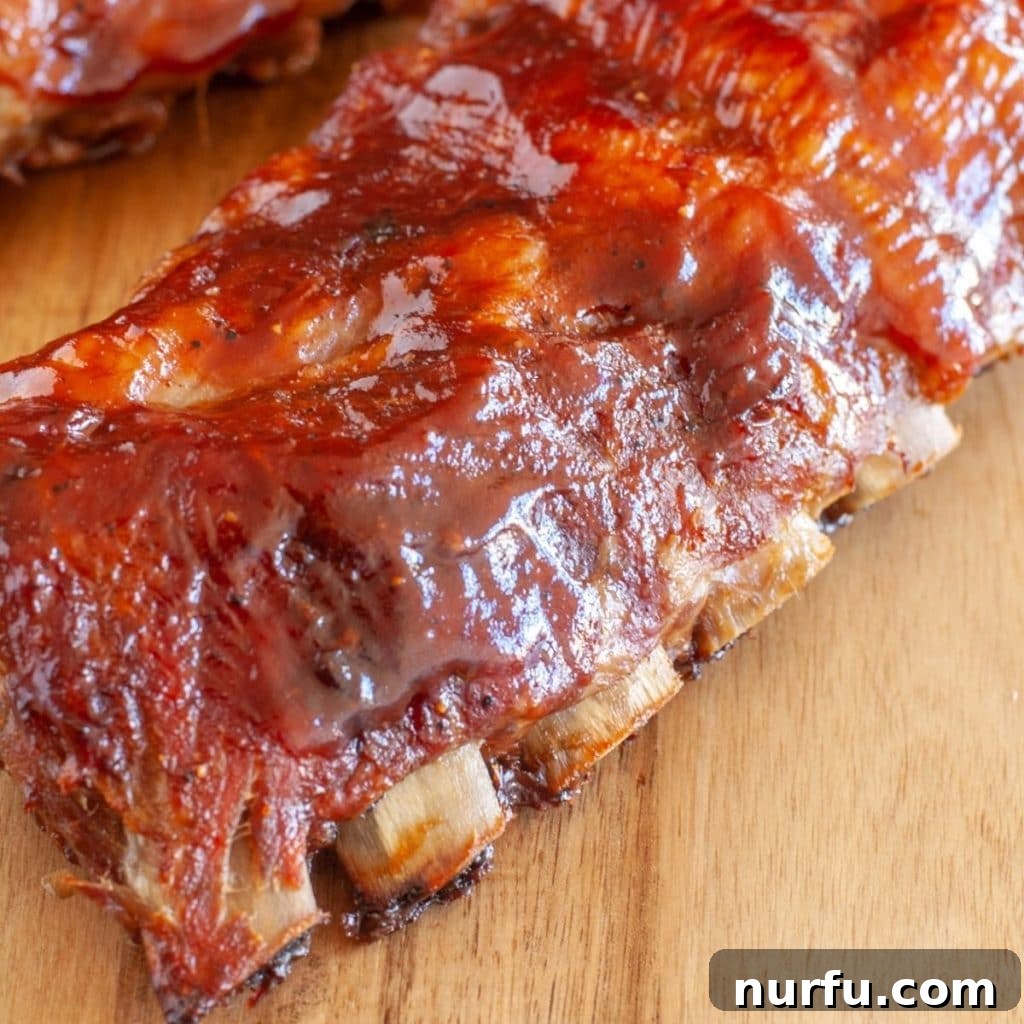
Forget the hassle of firing up the grill or constantly monitoring temperatures outdoors. You can effortlessly create succulent, juicy, and profoundly flavorful baby back ribs right in your oven. After meticulous testing and countless batches, I’ve perfected a truly foolproof method for producing exceptionally tender, irresistibly fall-off-the-bone ribs that will impress even the toughest critics.
While I certainly appreciate the smoky char and robust flavors that grilling imparts, there are times when simplicity and reliability are paramount. That’s precisely why I adore preparing ribs in the oven. They emerge consistently tender, infused with deep flavor, and utterly delicious, making them a stress-free option for any meal.
If you’re looking for more convenient and delicious oven-baked recipes, be sure to explore our guides on oven-baked pork tenderloin, juicy burgers in the oven, and crispy oven-baked turkey bacon for more culinary inspiration.
Why This Oven Baked Ribs Recipe Will Be Your Go-To
There are several compelling reasons why this particular recipe for oven baked baby back ribs stands out as a superior choice for achieving perfectly tender, flavorful results without the fuss. It’s designed for maximum flavor and minimal effort.
- Unmatched Tenderness Through “Low and Slow” Cooking: The cornerstone of this recipe is cooking pork ribs at a consistent, low temperature of 275 degrees Fahrenheit for 2-3 hours. This “low and slow” approach is crucial because it gently breaks down the tough connective tissues in the ribs, transforming them into melt-in-your-mouth gelatin. The result? Ribs that are incredibly tender and literally fall off the bone with the slightest nudge. This method ensures uniform cooking and prevents the meat from drying out, which can often happen with higher heat.
- Effortless & Hands-Off Preparation: Unlike grilling, which often demands constant attention and temperature adjustments, these oven baked ribs don’t need babysitting. Once you’ve seasoned and wrapped them, they go into the oven, allowing you to relax, prepare side dishes, or simply enjoy your time until it’s time for the final touch of BBQ sauce. This hands-off cooking makes it ideal for busy weeknights or when entertaining guests, freeing you up for other tasks.
- A Crowd-Pleasing & Easy Family Meal: This is truly an easy ribs recipe that the whole family will adore. The rich flavor and tender texture appeal to all ages, making it a guaranteed hit at the dinner table. Try serving these delicious ribs with a side of crispy fries or a fresh salad for a complete and satisfying meal that everyone will eagerly anticipate.
What Our Readers Are Saying
Briana, a home cook, shared her experience: “This recipe was incredibly easy and absolutely delicious! I had no prior experience cooking baby back ribs, but I chose this recipe because it looked simple and approachable. Best decision ever! The ribs came out so juicy and bursting with flavor. The meat practically melted off the bones. From now on, this will undoubtedly be my go-to recipe for perfect ribs.” Her glowing review is just one example of the consistent success home cooks have with this method.
Essential Ingredients for Tender Oven Ribs
You’ll be delighted to know that creating truly exceptional baby back ribs in the oven requires only a handful of readily available ingredients. The magic happens when these simple components combine to create a symphony of flavor and texture.
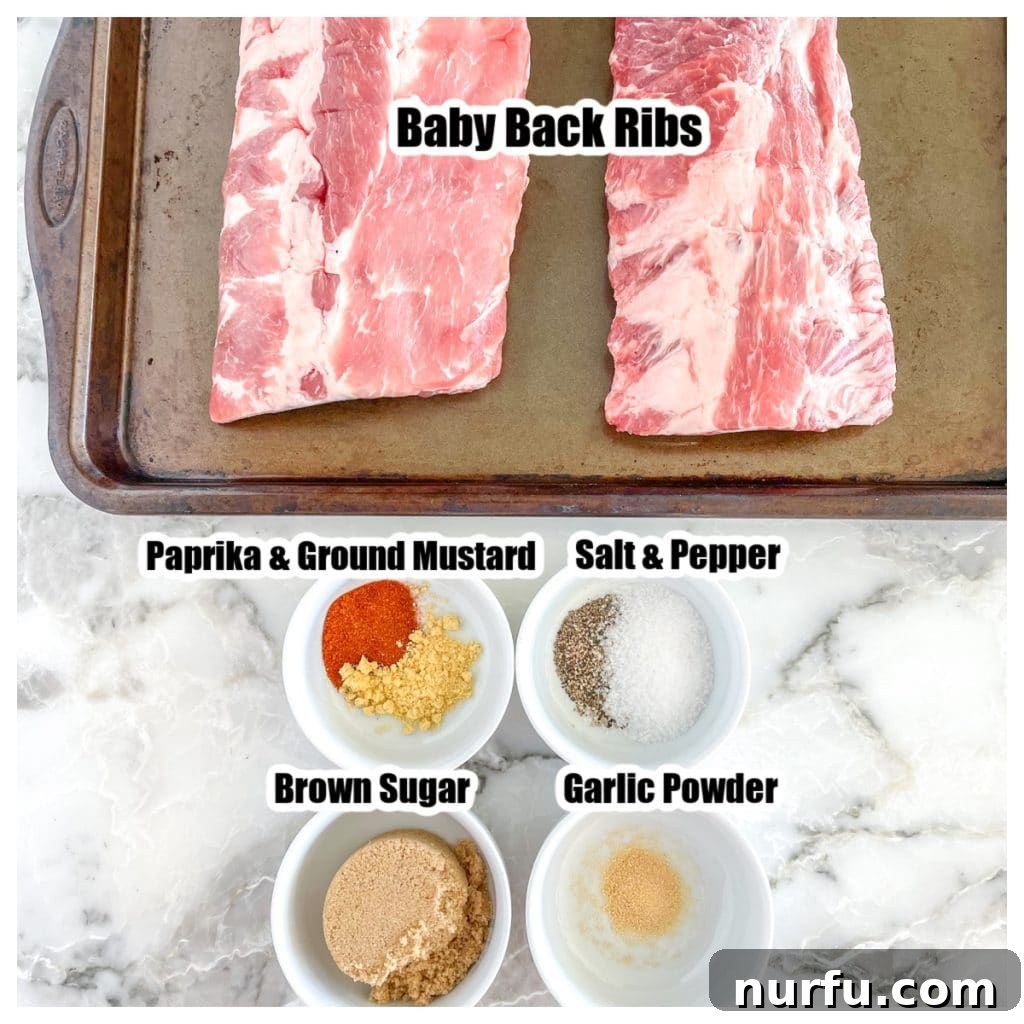
- Baby Back Ribs: These are the star of our dish. Pork baby back ribs, known for their lean meat and incredible tenderness, are typically found in the pork section of your local grocery store or butcher shop. They are cut from the top of the rib cage, near the loin, making them smaller and more curved than spare ribs. This cut results in a more delicate, flavorful meat that is perfect for achieving that signature “fall-off-the-bone” texture. Look for ribs with good meat coverage and a consistent thickness for even cooking.
- Your Favorite BBQ Sauce: The choice of BBQ sauce is highly personal and can greatly influence the final flavor profile. For this recipe, we achieved fantastic results with Sweet Baby Ray’s Original Sauce, a popular choice for its balanced sweet and tangy notes. However, feel free to use your absolute favorite brand, or elevate your ribs with a luscious homemade BBQ sauce. Whether you prefer smoky, spicy, sweet, or tangy, the right sauce will create a beautiful glaze and seal in moisture.
- Homemade Dry Rub: A well-balanced dry rub is essential for building a deep, complex flavor profile that penetrates the meat as it slowly cooks. Our recommended spice blend includes:
- Brown Sugar: Adds sweetness, helps create a beautiful caramelized crust, and balances savory notes.
- Paprika: Contributes a vibrant reddish hue and a mild, earthy, slightly sweet flavor. Smoked paprika can add an extra layer of depth.
- Garlic Powder: Provides an aromatic foundation, offering a savory depth that complements pork perfectly.
- Ground Dry Mustard: Adds a subtle tanginess and helps to tenderize the meat. It’s a classic ingredient in many rubs for its ability to enhance other flavors.
- Salt: Crucial for seasoning the meat, drawing out moisture initially, and then reabsorbing it for a juicier result. It’s the primary flavor enhancer.
- Ground Black Pepper: Offers a gentle heat and pungent aroma, rounding out the spice blend.
You can certainly use your own trusted store-bought or homemade spice rub if you have a favorite, but this blend provides a superb base for achieving perfectly seasoned ribs.
The Crucial Step: Removing the Silverskin Rib Membrane
One of the most important, yet often overlooked, steps when preparing ribs is removing the thin, silvery membrane found on the bone side of the ribs. This membrane, often referred to as “silverskin,” is tough and fibrous. It absolutely needs to be removed to ensure you get the most tender, succulent ribs possible, as it prevents the rub from penetrating and creates an unpleasant chewy texture. Without removing it, your ribs won’t achieve that desired fall-off-the-bone perfection.
For a visual guide, these helpful pictures provide an excellent demonstration of the process.
Here’s how to easily remove the silverskin:
- Locate the Membrane: Turn the rack of ribs bone-side up. Look for a thin, shiny, semi-transparent layer covering the bones. It usually runs the length of the rack.
- Lift an Edge: Using a small, sharp paring knife or the tip of a spoon, carefully slide it underneath the membrane on one end of the rack. Gently pry it up until you can get a good grip on it. Sometimes it helps to work from the corner.
- Grip and Pull: Once you have a loose edge, grasp it firmly with a paper towel. The paper towel provides excellent grip, preventing your fingers from slipping. Slowly and steadily pull the membrane away from the bones. It usually comes off in one large piece, much like peeling a sticker. If it tears, simply find another edge and continue pulling.
*** It’s worth noting that some butchers proactively remove this membrane before packaging. If you inspect your ribs and can’t find the silverskin, it has likely already been removed for your convenience, saving you a step!
Step-by-Step Guide: How to Make Baby Back Ribs in the Oven
Creating mouthwatering baby back ribs in your oven is an incredibly rewarding experience. Follow these simple steps for tender, juicy results every time:
Step one: Prepare Your Oven and Ribs
Preheat your oven to 275 degrees F (135 degrees C). This consistent low temperature is key to tender ribs. While the oven preheats, pat your ribs dry thoroughly with paper towels. Then, inspect the bone side of the ribs and carefully remove the silverskin membrane as described above. This is a critical step for tenderness, so don’t skip it unless your butcher has already done so.
Step two: Craft Your Flavorful Dry Rub
In a small bowl, combine the brown sugar, paprika, ground mustard, garlic powder, salt, and ground black pepper. Whisk or mix these ingredients thoroughly until they are well combined. This ensures an even distribution of flavor across your ribs.
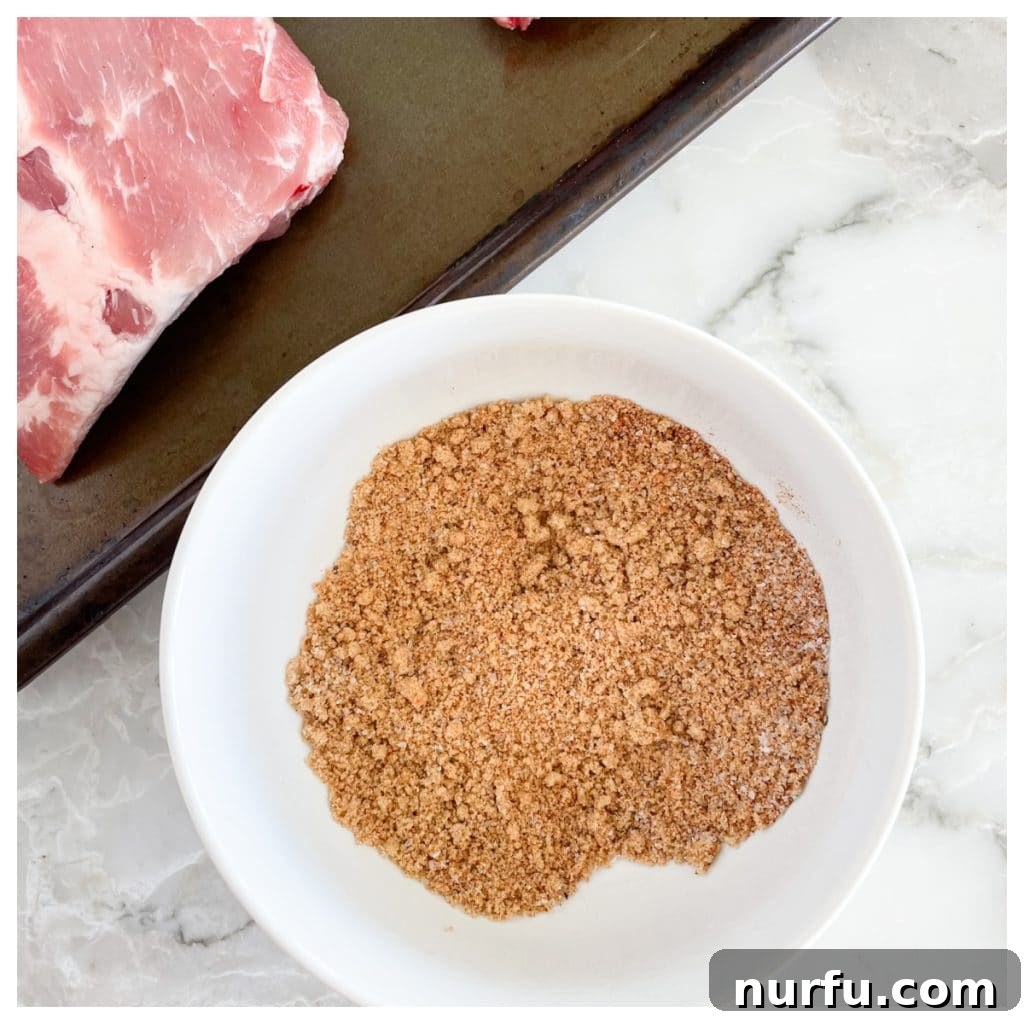
Step three: Generously Season the Ribs
Take your prepared dry rub and generously sprinkle it over all surfaces of the ribs – the top, bottom, and sides. Using your hands, gently massage the seasoning mixture into the meat, ensuring every crevice is coated. This helps the flavors penetrate deeply during the long cooking process.
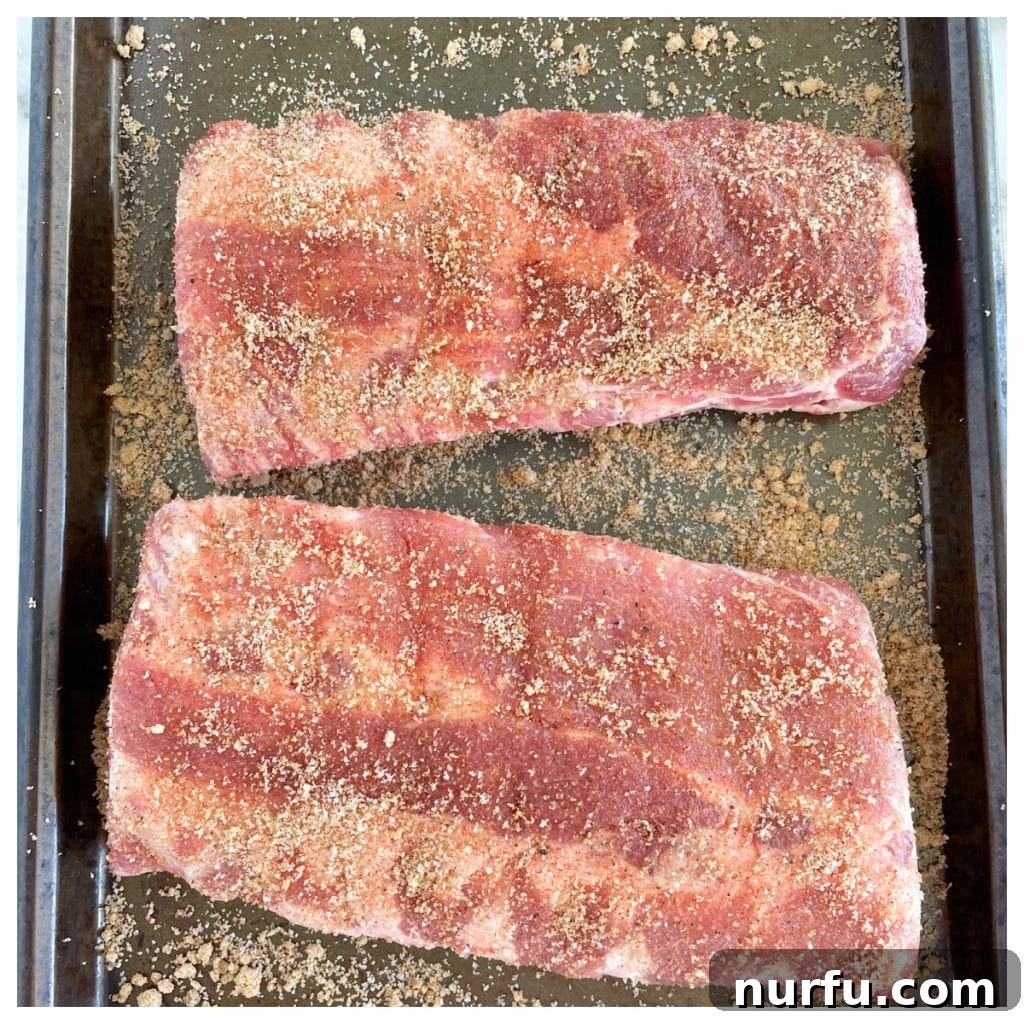
Step four: Seal in Moisture with Foil
Carefully wrap the seasoned ribs tightly in heavy-duty aluminum foil. You can use a double layer of foil for extra security, especially if your foil isn’t particularly thick. Place the foil-wrapped ribs on a sturdy baking sheet or in a large roasting pan. This creates a steamy environment that tenderizes the ribs without drying them out.
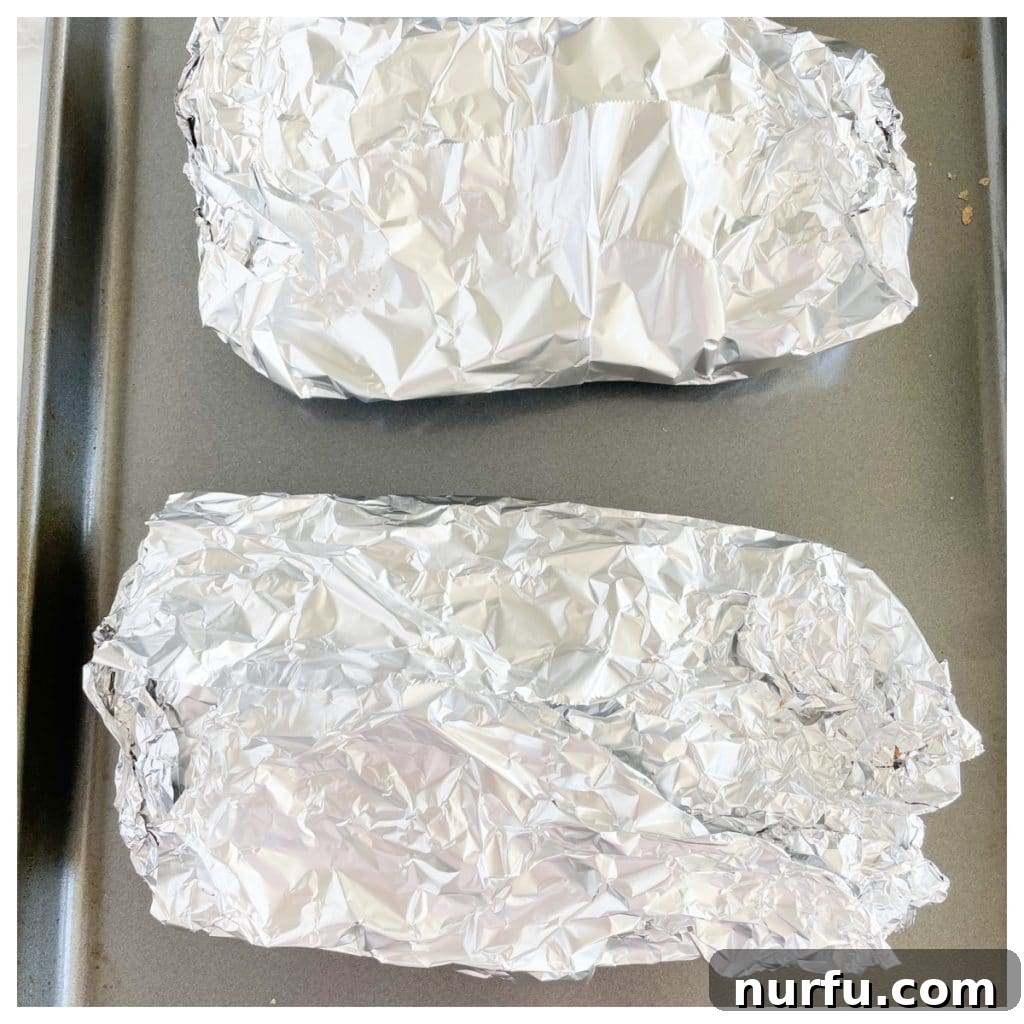
Step five: Bake, Sauce, and Finish
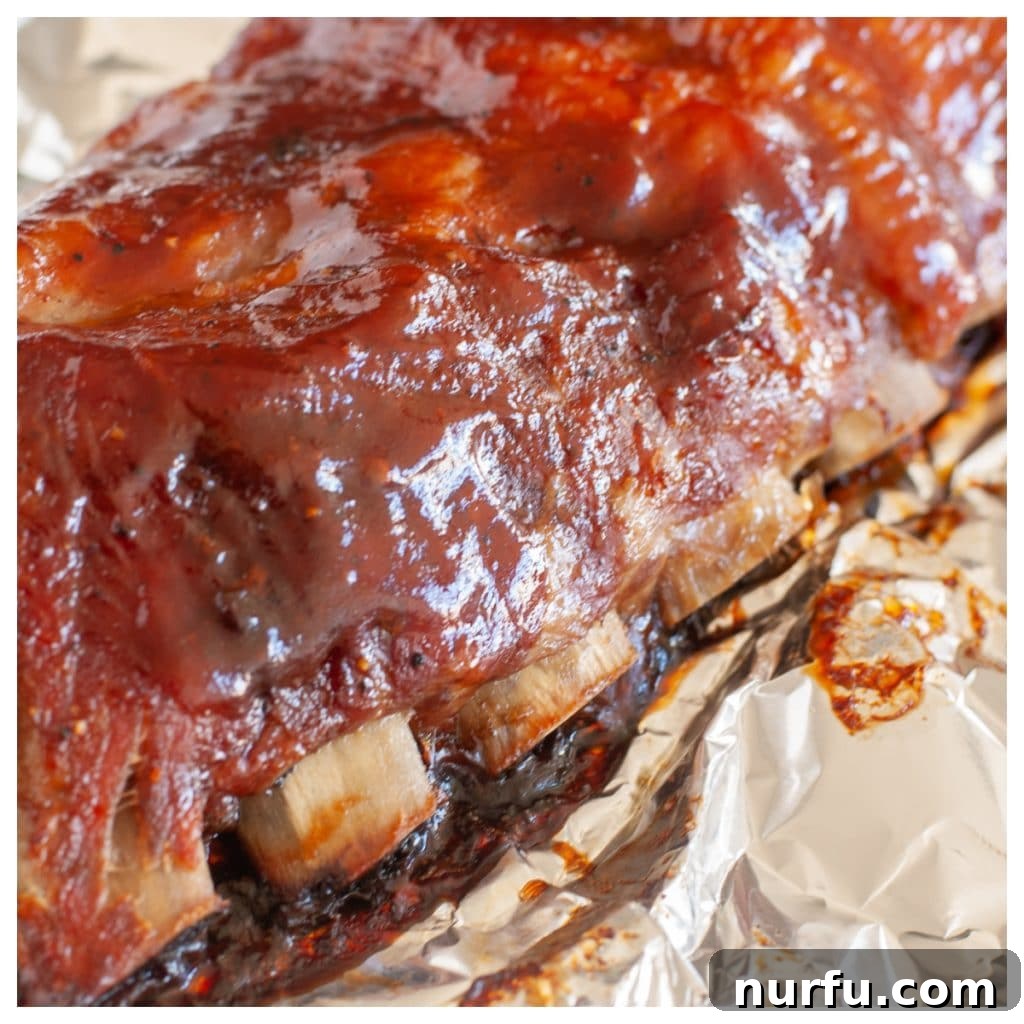
Bake the ribs in the preheated oven for 2 1/2 to 3 1/2 hours. The cooking time will vary slightly depending on the thickness of your ribs. After 2 1/2 hours, carefully unwrap a corner of the foil and check for tenderness – the meat should be pulling away from the bones. Once tender, carefully unwrap the ribs completely and generously coat them with your favorite BBQ sauce. You can serve them immediately, or for a perfect caramelized finish, broil them in a hot oven for several minutes (watching carefully to prevent burning) or transfer them to a hot grill for a few minutes per side to achieve a beautiful char and sticky glaze.
Heather’s Expert Tips for Perfect Oven Ribs
Achieving truly phenomenal oven baked ribs isn’t just about following the steps; it’s about understanding the nuances. Here are my top tips to ensure your ribs are nothing short of perfection:
- Prioritize Membrane Removal: I cannot stress this enough – don’t forget to remove the silverskin membrane! This single step is paramount for achieving truly tender, fall-apart baked ribs. Without it, the membrane acts as a barrier, preventing the meat from tenderizing properly and creating an unpleasantly chewy texture.
- Massage in the Seasoning: Don’t just sprinkle the rub; take a few moments to gently yet firmly rub and massage the seasoning mixture into all surfaces of the ribs. This ensures maximum flavor penetration, creating a deep, savory crust that will develop during cooking.
- Securely Wrap in Foil: Tightly wrapping the ribs in heavy-duty aluminum foil is a critical step. The foil acts like a mini steamer, locking in all the moisture and creating a humid environment that ensures the ribs remain incredibly juicy and tender as they slowly cook. A loose wrap can lead to dry spots.
- Allow for Resting Time: Once the ribs are out of the oven, resist the urge to cut into them immediately. Instead, let them rest for at least 10-15 minutes (even better if still loosely tented with foil). This crucial resting period allows the juices within the meat to redistribute, resulting in a significantly juicier and more flavorful end product.
- Don’t Overcrowd the Pan: If cooking multiple racks, ensure they have enough space on the baking sheet or roasting pan. Overcrowding can lead to uneven cooking and steaming instead of roasting, affecting the overall texture. Use multiple pans if necessary.
- Pat Dry for Better Crust: Before applying the rub, make sure the ribs are thoroughly patted dry with paper towels. A dry surface allows the rub to adhere better and promotes a superior crust and caramelization when you apply the BBQ sauce and finish them.
- Consider an Overnight Rub: For an even deeper flavor, apply the dry rub and refrigerate the ribs overnight (or for at least 4 hours) before cooking. This allows the salt and spices more time to penetrate the meat, enhancing tenderness and flavor.
- Monitor for Doneness: While timing is a guide, the best way to determine doneness is by checking the meat. When done, the meat will have pulled back from the ends of the bones by about ¼ to ½ inch, and when gently tugged, it should feel very tender and begin to pull away easily.
Perfect Pairings: What to Serve with Easy Baked Ribs
These easy oven baked ribs are incredibly versatile and pair beautifully with a wide array of side dishes. To inspire your meal planning, I’ve compiled a comprehensive list of 32 fantastic rib side dishes. Here are some of our top picks and favorite accompaniments to complement the rich flavor of your tender ribs:
Fresh & Flavorful Veggies: Vegetables provide a refreshing contrast to the richness of the ribs. Serve them alongside a crisp and easy green salad with a light vinaigrette, sweet and juicy corn on the cob (especially delicious when air-fried), or hearty roasted vegetables like perfectly charred broccoli florets or sweet, caramelized acorn squash. Coleslaw is another classic choice, offering a tangy crunch.
Hearty Potato Sides: Potatoes are a classic and comforting pairing for ribs, offering satisfying starchiness. Consider serving with crispy sweet potato fries, perfectly seasoned potato wedges, a vibrant and tangy German potato salad, or even a simple yet satisfying fluffy baked potato with all your favorite toppings.
Simple Pasta Options: For a quick and easy side, pasta can be a surprisingly good match. A dish of simple buttered noodles provides a neutral base, or a refreshing pasta salad with fresh vegetables and a light dressing can cut through the richness of the ribs beautifully.
Frequently Asked Questions About Oven Baked Ribs
Here are answers to some of the most common questions regarding how to cook pork ribs in the oven:
We highly recommend cooking ribs using a “low and slow” method in the oven. A low temperature of 275 degrees F (135 degrees C) is optimal. This temperature will typically cook a medium-sized rack of baby back ribs to perfection in about 3 hours. For larger or thicker racks, it could take up to 4 hours. This gentle, extended cooking method is crucial for breaking down collagen and achieving that incredibly tender, fall-off-the-bone meat without drying it out.
Absolutely, yes! It is essential to cover your ribs in the oven, specifically by wrapping them tightly in aluminum foil. This serves a vital purpose: it creates a sealed, steamy environment around the ribs, preventing them from drying out during their long cooking time. The moisture trapped by the foil helps to steam the ribs, contributing significantly to their tenderness and juiciness.
When baking ribs in the oven, you should always cook them with the meaty side facing up. This orientation helps to keep the meat moist and ensures that the fat on the top side renders down and bastes the meat below, enhancing flavor and tenderness. Cooking bone-side up can sometimes dry out the exposed meat.
Generally, yes, ribs do become more tender the longer they cook at a low temperature, as the connective tissues continue to break down. HOWEVER, there is a point of diminishing returns. You want to ensure they don’t overcook and become dry or mushy. The key is to find that sweet spot where they are incredibly tender but still moist. You can test for doneness by carefully tugging at the meat; if it starts to easily pull away from the bone, they are ready. The meat should be yielding but not completely disintegrating.
While this recipe specifically calls for baby back ribs due to their ideal lean-to-fat ratio and tenderness, other types of pork ribs will also work beautifully with this “low and slow” oven method. You can certainly use St. Louis style ribs, country-style ribs, or even spare ribs. The cooking time should be similar, but always be sure to check for tenderness regularly, as thicker or fattier cuts might require slightly more time to achieve that perfect fall-off-the-bone texture.
Yes, you can definitely do some prep work in advance. You can apply the dry rub to the ribs and refrigerate them, tightly covered, for up to 24 hours before baking. This step can even enhance the flavor. Once baked, you can refrigerate the cooked ribs and reheat them later, but for best results, we recommend baking and saucing them fresh.
A standard large baking sheet with a rim or a roasting pan will work perfectly. The main goal is to have enough space for your wrapped ribs to lie flat without being overly cramped. Ensure the pan is large enough to contain any potential drips from the foil wrap.
Storing and Reheating Your Delicious Leftover Ribs
If you’re lucky enough to have any leftover ribs (a rare occurrence with this recipe!), proper storage and reheating are key to maintaining their deliciousness and moisture. Don’t let those precious ribs go to waste!
Storing Leftovers: Allow the cooked ribs to cool completely to room temperature before storing. Once cooled, place them in an airtight container or a heavy-duty freezer bag. Stored this way, they will keep beautifully in the refrigerator for up to 3-4 days. For optimal flavor and texture, try to consume them within this timeframe.
Freezing Leftovers: For longer storage, ribs freeze exceptionally well. Wrap individual portions or full racks tightly in aluminum foil, then place them in a freezer-safe bag or an airtight container. This double layer of protection helps prevent freezer burn. Frozen ribs can be stored for up to 3 months, making them a fantastic make-ahead meal option.
When you’re ready to enjoy them again, check out this comprehensive post to learn how to reheat ribs without drying them out. We cover various methods, including the air fryer, oven, grill, slow cooker, and microwave, ensuring your leftovers are just as tender and flavorful as when they were first cooked.
Explore More Easy & Delicious Pork Recipes
If you’ve enjoyed the simplicity and deliciousness of these oven-baked ribs, you’ll love exploring our other easy-to-make pork recipes designed for home cooks. Expand your culinary horizons with these family-friendly options:
- Creative Leftover Pulled Pork Recipes
- Juicy Air Fryer Pork Loin
- Air Fryer Honey Mustard Pork Chops
- Flavorful Slow Cooker Pineapple Pork
Did you try this incredible oven-baked ribs recipe? We’d love to hear about your experience! Please let us know in the comments below and don’t forget to give it a star rating to share your feedback with other home cooks.
★
★
★
★
Perfect Oven Baked Baby Back Ribs
Heather Seeley
10
3
3
10
4
Rate Recipe
Print Recipe
Ingredients
- 1-2 racks baby back ribs
- 1/4 cup brown sugar
- 2 tablespoons paprika
- 1 tablespoon garlic powder
- 1/2 tablespoon ground mustard
- 2 tablespoons salt
- 1 tablespoon ground black pepper
- 1 cup BBQ sauce
Instructions
-
Preheat oven to 275 degrees F (135 C).
-
Pat ribs dry with a paper towel. Carefully remove the silverskin membrane from the back of the ribs, if present.
-
In a small bowl, combine brown sugar, paprika, ground mustard, garlic powder, salt, and pepper. Mix well to create your spice rub.
-
Generously sprinkle the rub on all surfaces of the ribs (top, bottom, and sides). Gently massage the rub into the meat.
-
Tightly wrap the seasoned ribs in heavy-duty aluminum foil and place them on a baking sheet. Bake for 2 1/2 – 3 1/2 hours. Begin checking for tenderness at 2 1/2 hours; the meat should be pulling away from the bone.
-
Carefully open the foil packs and evenly spread your favorite BBQ sauce over the ribs.
-
(Optional) For a caramelized glaze, broil the sauced ribs in the oven for 4-5 minutes (watch carefully to prevent burning) or place them on a hot grill for 4-5 minutes per side.
Nutrition
Carbohydrates: 47g |
Protein: 29g |
Fat: 24g |
Saturated Fat: 8g |
Polyunsaturated Fat: 4g |
Monounsaturated Fat: 10g |
Trans Fat: 1g |
Cholesterol: 98mg |
Sodium: 4354mg |
Potassium: 665mg |
Fiber: 3g |
Sugar: 38g |
Vitamin A: 1924IU |
Vitamin C: 1mg |
Calcium: 100mg |
Iron: 3mg
Nutrition information is automatically calculated, so should only be used as an approximation.
Additional Info
Main Course
American
Enjoyed this recipe? Leave a comment below!