
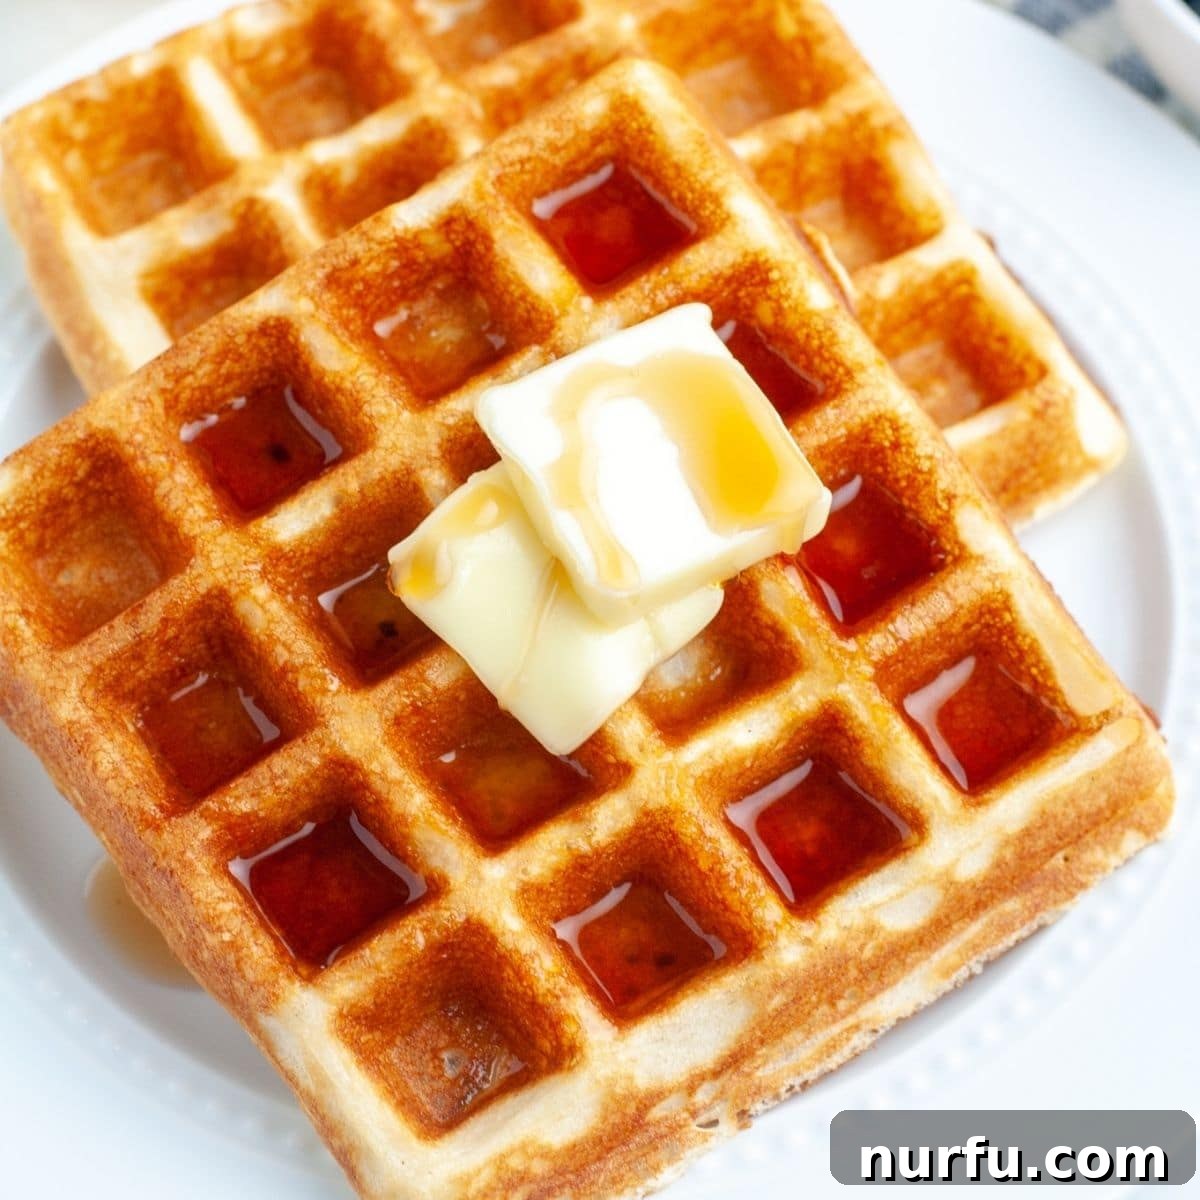
Bisquick waffles are the ultimate solution for a quick, effortless, and utterly delicious breakfast. Imagine sinking your teeth into a waffle that’s perfectly golden and crispy on the outside, yet wonderfully soft and tender on the inside. That’s exactly what you get with this simple Bisquick waffle recipe, which can be whipped up in a mere 10 minutes from start to finish. Forget complicated recipes and lengthy prep times – Bisquick makes achieving breakfast perfection incredibly accessible. Whether you prefer them adorned with a generous drizzle of maple syrup, bursting with fresh berries, or even topped with savory fried chicken for an unexpected twist, these homemade waffles promise a delightful meal that caters to every craving. They are an ideal choice for busy mornings, lazy weekends, or whenever you desire a comforting and satisfying treat.
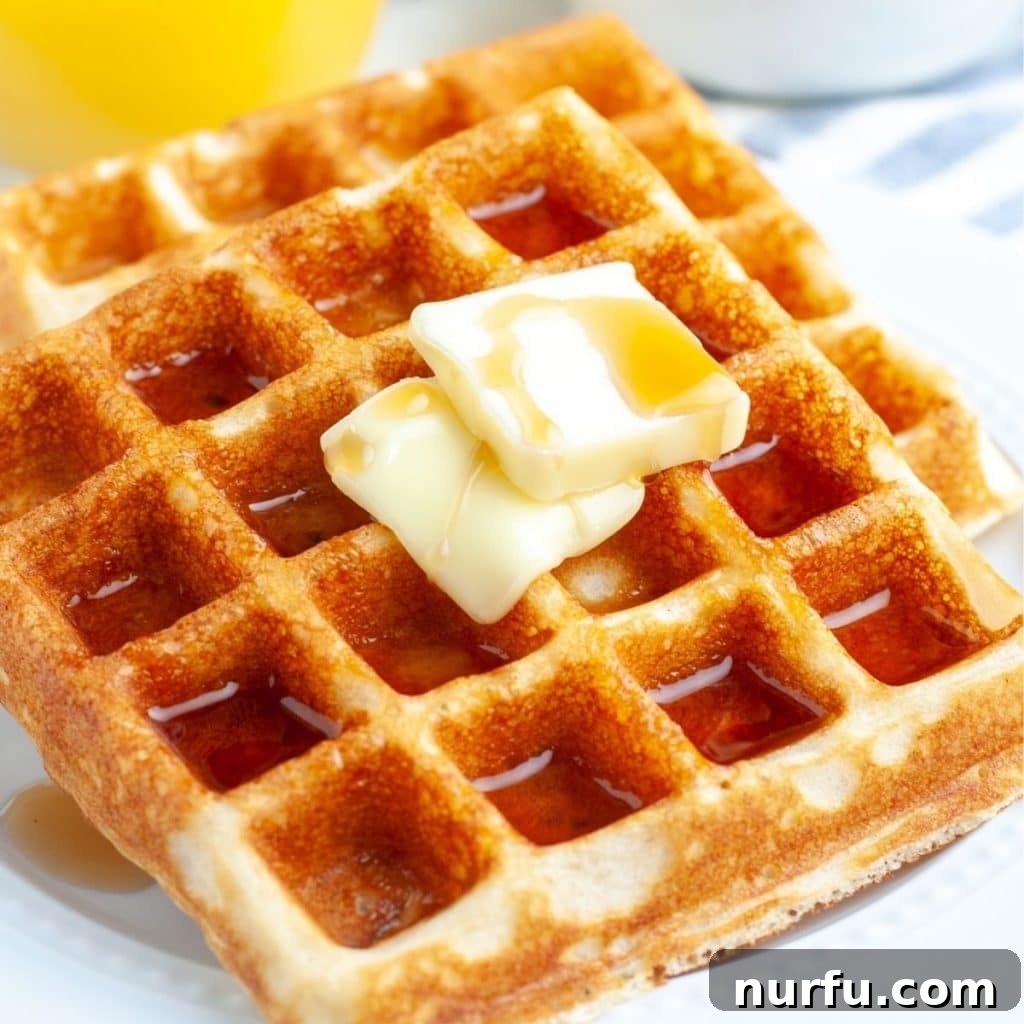
Why Bisquick is Our Go-To for Quick and Delicious Waffles
Bisquick is more than just a baking mix; it’s a culinary superpower in a box, a true kitchen staple that unlocks a world of effortless cooking and baking. This all-purpose mix is renowned for its incredible versatility, serving as the foundation for a multitude of dishes far beyond just pancakes and waffles. From savory pizza crusts and comforting dumplings to irresistible sausage balls, Bisquick consistently delivers outstanding results with minimal fuss. Its genius lies in its carefully formulated blend of essential baking ingredients: flour, cornstarch, leavening agents, oil, salt, and a touch of sugar. This pre-mixed combination eliminates the need to measure out individual dry ingredients, saving you valuable time and ensuring consistent quality every single time you cook.
For waffles, Bisquick is an absolute game-changer. It takes the guesswork out of achieving that ideal batter consistency and ensures your waffles will rise beautifully, yielding that sought-after light and airy interior. This particular waffle recipe stands out as one of the best and simplest ways to harness Bisquick’s convenience, allowing you to create homemade goodness faster than ever. Waffles themselves are a beloved breakfast classic, offering a delightful and interactive meal experience that the entire family will undoubtedly adore. To transform your Bisquick waffles into a truly complete and memorable spread, consider pairing them with perfectly crispy bacon or sausage, a vibrant assortment of fresh fruit, and perhaps a celebratory non-alcoholic mimosa for a touch of elegance. It’s an easy way to elevate a simple breakfast into an extraordinary culinary event that everyone will love.
Essential Ingredients for Fluffy Bisquick Waffles
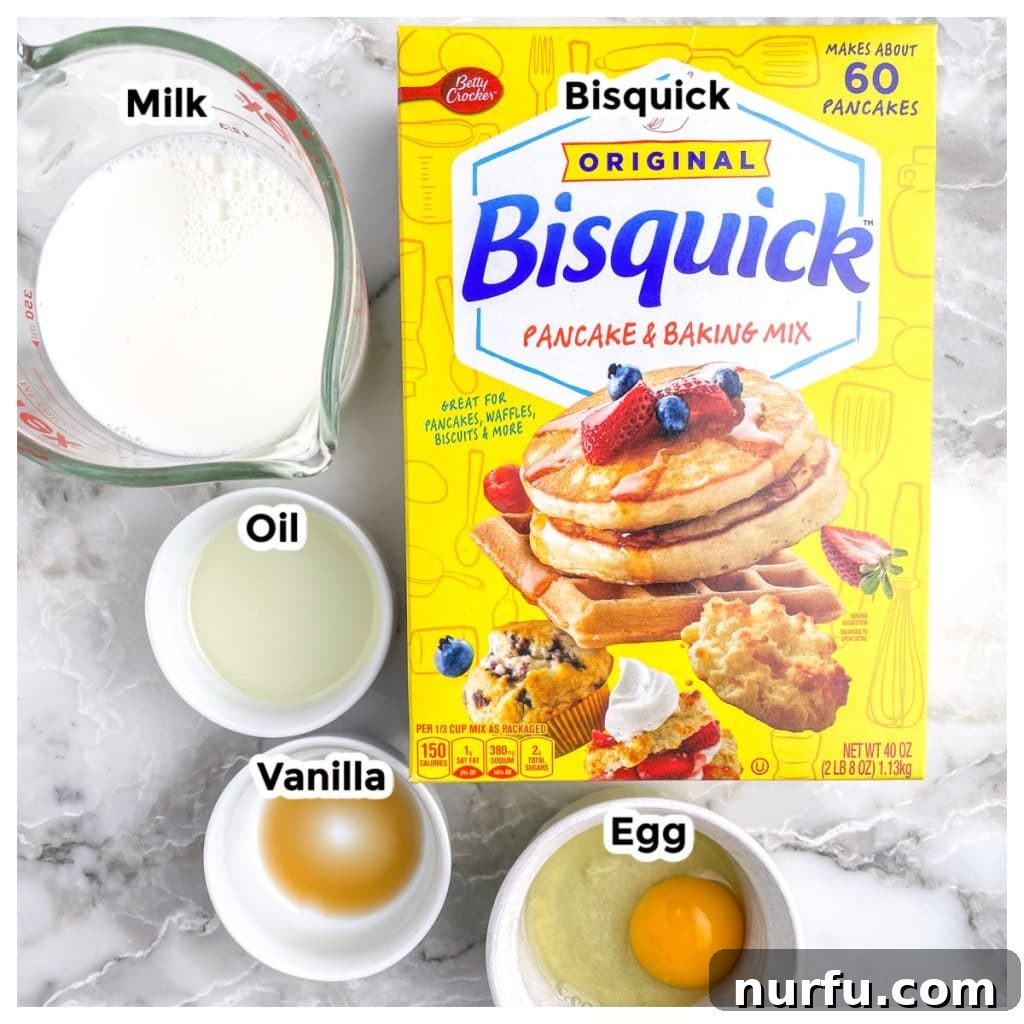
Crafting these delightful Bisquick waffles requires just a handful of common ingredients, making it an incredibly accessible recipe for home cooks of all skill levels. While this recipe provides the classic foundation for perfectly crispy and fluffy waffles, it’s also wonderfully adaptable, allowing for easy customization to suit your personal preferences. Here’s what you’ll need and a closer look at each component:
- Bisquick Mix: This is the star of our show! Bisquick provides the pre-measured blend of flour, leavening, and fat that makes this recipe so quick and foolproof. It ensures consistent results every time without the need for multiple ingredients. You can typically find it in the baking aisle or sometimes near the cereal section of your local grocery store. Opting for the original Bisquick mix will give you the most consistent results, though many store-brand “pancake and waffle mixes” might also work (always check the package instructions for waffle variations).
- Milk: The liquid component that brings our batter together, contributing significantly to the richness and tenderness of the waffles. While 2% or whole milk offers a superior flavor and texture, feel free to substitute with your preferred dairy or non-dairy alternatives. Almond milk, soy milk, oat milk, or coconut milk all work well and can subtly alter the flavor profile. The key is to use enough liquid to create a pourable, yet not overly thin, batter that will cook evenly.
- Egg: A crucial binding agent, the egg helps to hold the waffle mixture together, providing essential structure and contributing to that desirable golden-brown exterior. It also adds a touch of richness and helps with the overall fluffiness and rise of the waffle. A large egg is generally recommended for this recipe.
- Vegetable Oil: Essential for achieving that signature crispy exterior that everyone loves in a good waffle. The oil also adds moisture and tenderness to the inside, preventing the waffles from becoming dry and ensuring a pleasant mouthfeel. Canola oil is an excellent alternative due to its neutral flavor and high smoke point, or you can even experiment with melted unsalted butter for a richer, buttery flavor profile.
- Vanilla Extract (Optional but Recommended): While not strictly necessary for the structure, a teaspoon of pure vanilla extract elevates the flavor of your waffles significantly. It imparts a warm, aromatic, and subtly sweet note that transforms them from good to truly exceptional. Don’t skip it if you have it on hand, as it adds a touch of gourmet flavor.
- Optional Flavor Enhancements: This is where you can truly make the recipe your own and unleash your creativity! For an added layer of warmth and spice, try mixing in 1 teaspoon of ground cinnamon, a sprinkle of pumpkin pie spice during the fall, or a dash of apple pie spice. A tablespoon of granulated sugar or brown sugar can enhance the sweetness and promote better browning. For a surprisingly savory twist, a small handful of shredded cheddar cheese mixed into the batter yields a unique and delicious result, perfect for pairing with fried chicken or bacon for a more adventurous meal.
Step-by-Step Guide to Making Perfect Bisquick Waffles
Making delicious Bisquick waffles is surprisingly simple and straightforward. Follow these easy steps, and you’ll be enjoying warm, crispy, and fluffy waffles in no time! The beauty of this recipe is its efficiency, delivering gourmet taste with minimal effort.
Step One: Prepare Your Waffle Iron. Begin by preheating your waffle iron to medium heat. This initial step is absolutely crucial for achieving an even cook and that desired crispy texture on your waffles. Allowing the iron to fully heat up before adding batter also helps prevent sticking and ensures a consistent golden-brown finish. Most modern waffle irons have an indicator light that signals when they are ready for use.
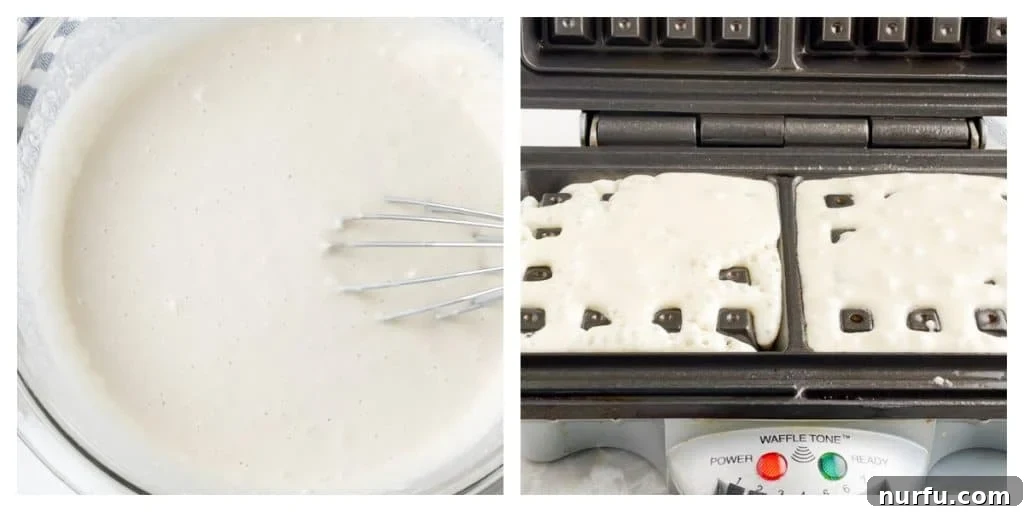
Step Two: Combine the Batter Ingredients. In a large mixing bowl, combine the Bisquick mix, milk, egg, vegetable oil, and vanilla extract (if you’re using it for that extra flavor boost). Using a whisk or a spoon, gently stir the ingredients together until they are just combined. It’s important not to over-stir the batter; a few small lumps are perfectly fine and actually preferable for a tender, light waffle. Overmixing can develop the gluten in the flour, which will result in tough, dense waffles rather than the light and airy texture we’re aiming for.
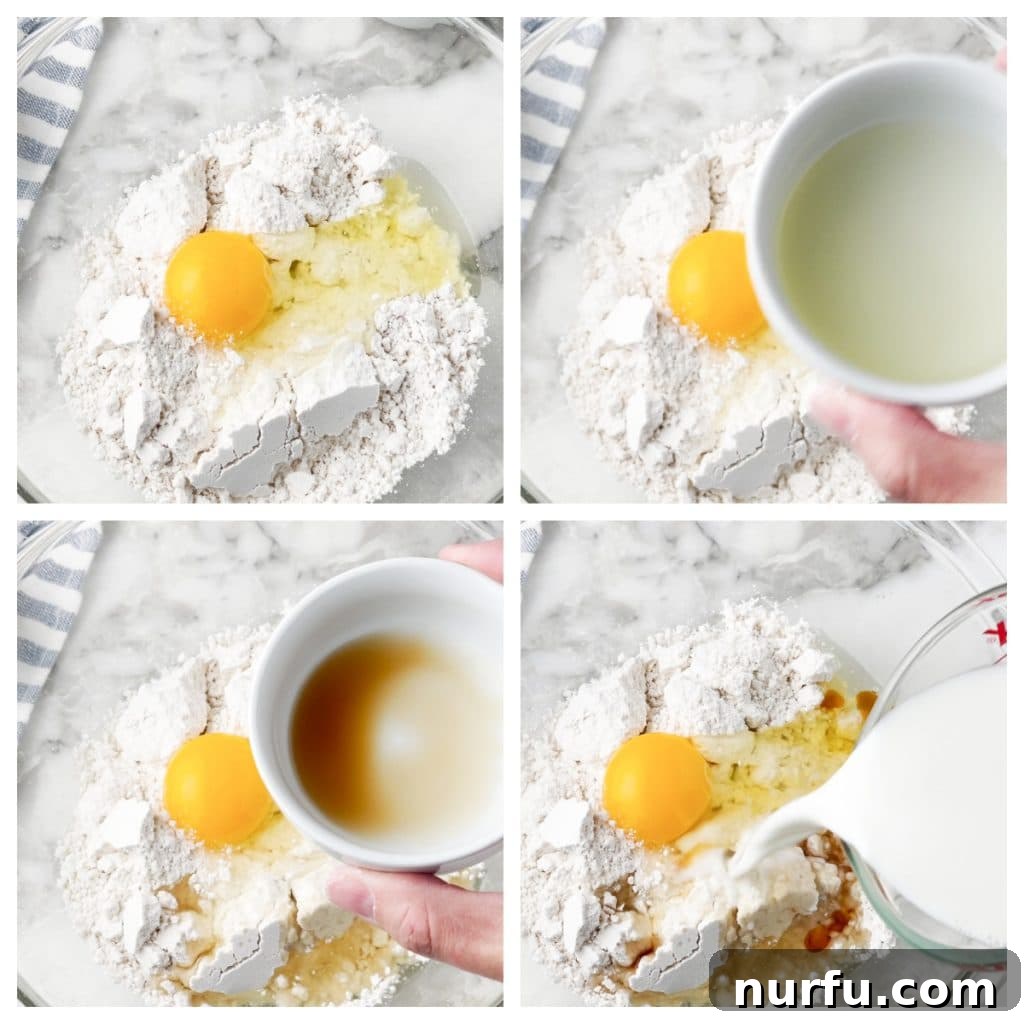
Step Three: Cook Your Waffles. Once your waffle iron is fully preheated and ready, lightly spray the cooking plates with a non-stick cooking spray or brush them with a small amount of vegetable oil. This extra step ensures easy release of your cooked waffles and helps create a beautifully golden and crispy crust. Carefully pour the prepared batter onto the center of the hot waffle iron. Refer to your waffle iron’s manufacturer instructions for the recommended amount of batter, as this can vary significantly by model. Generally, you want enough to cover most of the surface without overflowing, usually filling about two-thirds of the grid.
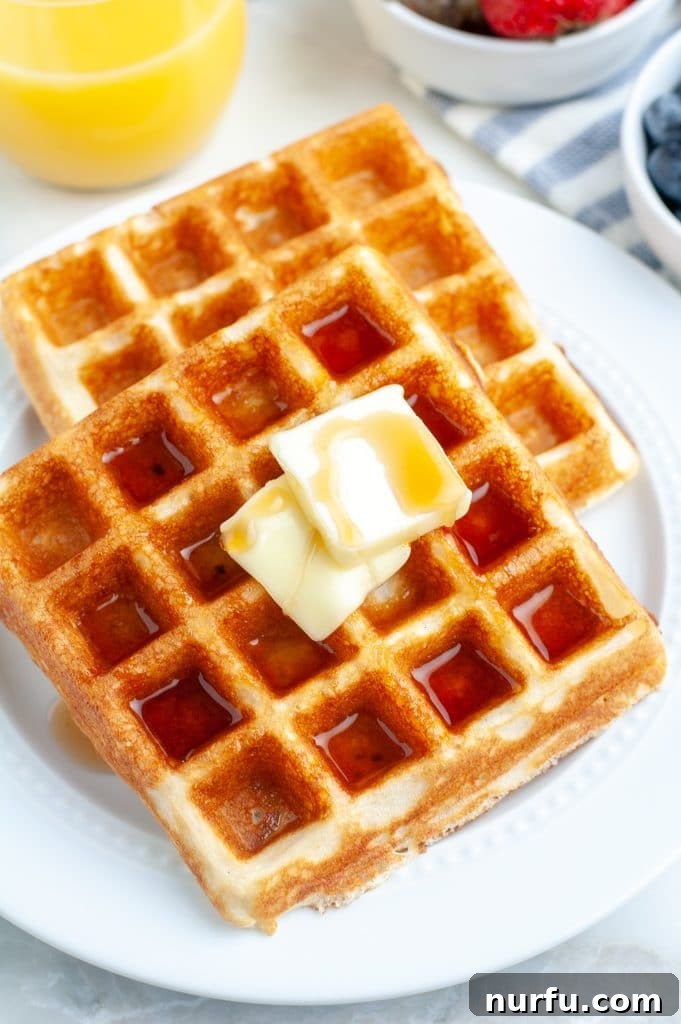
Step Four: Golden Perfection. Close the lid of the waffle iron and cook for approximately 3-5 minutes, or until the waffle is golden brown and steam is no longer visibly escaping from the sides of the iron (or until your iron’s indicator light signals it’s done). The exact cooking time can vary based on your specific waffle iron and your personal preference for crispiness. Carefully remove the cooked waffle using a fork or non-scratch tongs, and serve immediately while warm. Repeat this process with the remaining batter until all your delicious waffles are cooked and ready to enjoy.
Pro Tips for Flawless Bisquick Waffles Every Time
While making Bisquick waffles is inherently simple, a few key tips can elevate your results from good to absolutely perfect. Keep these pointers in mind for consistently delicious, restaurant-quality waffles that will impress everyone at the breakfast table:
- Avoid Overmixing the Batter at All Costs: This is perhaps the most crucial tip for waffle success! Overmixing develops gluten in the flour, leading to tough, chewy waffles instead of the desired light and fluffy ones. Stir the ingredients just until they are moistened and mostly combined. Small lumps are completely normal and will not affect the final texture; in fact, they’ll often cook out. Think of it as mixing a muffin batter – a gentle hand yields superior results.
- Ensure Proper Waffle Iron Heat: Always ensure your waffle iron is fully preheated to medium heat before adding any batter. An iron that isn’t hot enough will result in pale, soggy waffles that lack that appealing golden crispness. Medium heat strikes the perfect balance, ensuring a beautifully crispy, golden-brown exterior without burning, while allowing the inside to cook thoroughly and evenly.
- Grease the Iron Adequately: Even if your waffle iron claims to be “non-stick,” a light spray of cooking spray or a brush of vegetable oil before each waffle (or every few waffles, depending on your iron) is highly recommended. This guarantees easy release, prevents sticking, and contributes significantly to the waffle’s crispy texture and appealing golden color.
- Master the Batter Amount – Don’t Overfill or Underfill: The right amount of batter is essential for a well-formed, perfectly sized waffle. Overfilling will cause batter to ooze out from the sides, creating a messy cleanup and unevenly cooked waffles. Conversely, underfilling will result in incomplete, smaller waffles. Consult your waffle iron’s instruction manual for the recommended amount of batter for your specific model. A good general rule of thumb is to fill about two-thirds of the cooking surface.
- Maintain Warmth for a Crowd: If you’re cooking for several people and want to serve everyone warm, crispy waffles simultaneously, preheat your oven to a low temperature (around 200°F or 95°C). As each waffle cooks, transfer it to a wire rack placed on a baking sheet in the warm oven. The rack allows air to circulate, keeping the waffles crispy, while the low heat prevents them from getting cold before serving.
- Allow Batter to Rest (Optional but Recommended): While not strictly necessary for Bisquick waffles due to the mix’s convenience, letting the batter rest for 5-10 minutes after mixing can further hydrate the dry ingredients and lead to a slightly more tender and uniformly textured waffle. This is a bonus step if you have a moment, but if you’re in a rush, feel free to skip it.
Elevate Your Breakfast with Bisquick Belgian Waffles
Craving those wonderfully deep, airy pockets characteristic of traditional Belgian waffles? Good news! You can easily adapt this classic Bisquick waffle recipe to create magnificent Belgian-style waffles right in your own kitchen. The secret lies in one simple addition to the batter and, of course, the right equipment. To achieve that signature fluffiness and extra lift that sets Belgian waffles apart, simply add an extra 1/2 teaspoon of baking soda to your prepared Bisquick waffle batter. The increased leavening agent will work wonders, creating a lighter, more voluminous texture.
Beyond the batter adjustment, the key to authentic Belgian waffles is using a dedicated Belgian waffle maker. These specialized irons are designed with much deeper grids compared to standard waffle makers, which are essential for creating those pronounced pockets that can hold an abundance of delicious toppings like fruit, syrup, and whipped cream. The deeper pockets not only enhance the visual appeal but also allow for a superior crispy exterior and a supremely light and airy interior, offering a delightful textural contrast with every single bite. So, if you own a Belgian waffle maker, don’t hesitate to give this simple tweak a try for a breakfast that feels truly special, gourmet, and incredibly satisfying.
Endless Topping Ideas for Your Bisquick Waffles
The beauty of a fresh, warm Bisquick waffle lies not only in its delightful texture but also in its incredible versatility as a canvas for a myriad of toppings. Don’t be afraid to get creative and experiment with flavors and textures! Here are some fantastic suggestions to inspire your next waffle creation, ranging from classic to delightfully decadent, ensuring there’s something for every palate:
- Classic Sweetness: A timeless combination of a dusting of powdered sugar and a generous pour of your favorite maple syrup (real maple syrup, if possible, truly makes a huge difference!).
- Buttery Bliss: Elevate your waffles with a dollop of homemade cinnamon butter. The spiced sweetness melts beautifully into the warm crevices of the waffle.
- Fresh and Fruity: Brighten your breakfast with an assortment of fresh berries (strawberries, blueberries, raspberries are always a hit), sliced bananas, or seasonal peaches, crowned with a cloud of freshly whipped cream.
- Savory Indulgence: For the ultimate breakfast-for-dinner or indulgent brunch experience, top your crispy waffles with perfectly fried chicken and a drizzle of maple syrup or hot honey. This sweet and savory combination is a beloved Southern classic.
- Dessert Dream: Transform your waffles into an irresistible dessert by adding a scoop of your favorite ice cream, such as a refreshing strawberry ice cream or classic vanilla, perhaps with a touch of chocolate sauce or sprinkles.
- Chocolate Lover’s Delight: Spread warm Nutella or a rich chocolate sauce across your waffle for a comforting, hazelnut-infused treat that’s perfect for a sweet tooth.
- Nutty & Sweet Combo: A creamy spread of peanut butter adorned with chocolate chips creates a satisfyingly rich and textural topping that kids and adults alike will love.
- Hearty & Homestyle: For a truly comforting and filling meal, pour warm white gravy over your waffles and pair with cooked breakfast sausage or crispy bacon.
- Gourmet Breakfast: A perfectly fried or poached egg, a sprinkle of fresh chives or parsley, and a dash of freshly ground black pepper makes for a sophisticated and protein-packed savory waffle.
- Seasonal Fruit Compote: Homemade fruit compotes (like apple cinnamon, mixed berry, or peach) are fantastic for using seasonal fruits and add a lovely warmth, sweetness, and texture.
- Caramel or Chocolate Chips: For bursts of flavor, mix these directly into the batter before cooking, or sprinkle them on top of the cooked waffles.
- Yogurt and Granola: For a lighter, healthier option, swirl Greek yogurt over your waffle and top with crunchy granola for an added layer of texture and nutrition.
Can You Prepare Bisquick Waffle Mix Ahead of Time?
Absolutely! One of the fantastic advantages of this Bisquick waffle recipe is its flexibility when it comes to preparation. If you’re looking to streamline your morning routine or plan for a larger brunch gathering, you can certainly make the waffle batter ahead of time. Simply prepare the mix as directed in the instructions, ensuring all ingredients are just combined without overmixing. Once prepared, transfer the batter to an airtight container or cover your mixing bowl tightly with plastic wrap. Store it in the refrigerator. The batter will stay fresh and ready to use for up to 2 days. When you’re ready to cook, give the batter a gentle stir, as some settling may occur, and you might need to add a splash more milk if it has thickened too much in the fridge.
How to Store and Reheat Leftover Bisquick Waffles
Don’t let any delicious Bisquick waffles go to waste! These waffles are fantastic for making ahead in larger batches or simply enjoying later as quick snacks or breakfasts. Storing and reheating them properly ensures they retain their wonderful flavor and texture, almost as good as fresh off the iron.
To Store in the Refrigerator: Allow your cooked waffles to cool completely to room temperature on a wire rack. This is a crucial step; if you store them while warm, condensation will form inside the container, leading to undesirable soggy waffles. Once fully cooled, place them in an airtight container, such as a zip-top bag or a sealed plastic container. Stored this way, they will remain fresh for 2-3 days in the refrigerator, ready for a quick and easy breakfast throughout the week.
To Freeze for Longer Storage: Freezing waffles is an excellent meal prep hack and a fantastic way to ensure you always have a delicious breakfast option on hand! Again, ensure the waffles are completely cooled to prevent ice crystals. To prevent them from sticking together in the freezer, first place the cooled waffles in a single layer on a baking sheet. Freeze them for about 1-2 hours, or until they are solid. This “flash freezing” step prevents them from clumping together. Once frozen solid, transfer the waffles to a heavy-duty zip-top freezer bag or an airtight freezer-safe container. They will last beautifully for up to 3 months, making them perfect for quick breakfasts on demand without any fuss.
To Reheat for Optimal Crispy Perfection: The best way to revive leftover waffles and bring back their warm, crispy texture is by using either an oven or an air fryer. Avoid the microwave, as it will make them soft and chewy rather than crispy.
- In the Oven: Preheat your oven to 375°F (190°C). Place the frozen or refrigerated waffles directly on a baking sheet (no need to thaw if frozen). Heat for 5-7 minutes for refrigerated waffles, or 8-10 minutes for frozen waffles, or until they are heated through and crispy to your liking.
- In the Air Fryer: For an even quicker and supremely crispy result, preheat your air fryer to 380°F (195°C). Place 1-2 waffles in the air fryer basket in a single layer, ensuring they are not overlapping. Cook for 2-4 minutes for refrigerated waffles, or 4-6 minutes for frozen waffles, or until warm and delightfully crispy. Watch them closely to prevent over-browning, as air fryers can cook quickly.
You can also use a toaster or toaster oven for reheating individual waffles, especially if they are smaller. This method works very well for bringing back that desirable crispiness.
Frequently Asked Questions About Bisquick Waffles
While both waffle and pancake batters often utilize Bisquick mix as a base, they are not entirely identical in formulation. Waffle batter is typically a bit thicker and contains a higher fat content, usually from additional oil, compared to pancake batter. This difference in consistency and fat content is crucial for achieving the characteristic crispy exterior of a waffle, whereas pancakes are designed to be softer and fluffier throughout. While you can sometimes use pancake mix for waffles (by adding a bit more oil and milk for thickness), a dedicated waffle recipe or mix is always best for optimal results in texture and crispiness.
For the richest flavor and best texture in your waffles, milk is undeniably the preferred ingredient over water. Milk adds a creamy richness and contributes to a more tender, moist, and flavorful waffle. It helps create a beautifully golden-brown crust and a softer interior. The fats and sugars in milk also aid in browning and crisping. While water can certainly be used in a pinch if you’re out of milk, it will result in a less flavorful and slightly chewier waffle. If using water, consider adding a tablespoon of melted butter or an extra splash of vanilla to compensate for some of the lost richness and flavor.
Yes, you absolutely can! Bisquick offers a gluten-free pancake and waffle mix variant that works wonderfully for this recipe. Simply substitute the regular Bisquick mix with the gluten-free version in this recipe, following the same proportions for milk, egg, oil, and vanilla. Always check the specific instructions on the gluten-free Bisquick package, as liquid ratios can sometimes vary slightly for optimal results with different gluten-free flour blends.
Cleaning your waffle iron after each use ensures its longevity and prevents old residue from affecting the taste and appearance of new waffles. First, unplug the iron and allow it to cool completely before cleaning. Never immerse an electric waffle iron in water, as this can damage the electrical components. For sticky bits of batter, dampen a soft cloth or paper towel with warm soapy water and gently wipe the plates. For tougher, baked-on spots, you can make a paste of baking soda and water, apply it, let it sit for a few minutes to soften, then gently scrub with a soft brush or non-abrasive sponge. Finish by wiping with a clean, damp cloth and then drying thoroughly. For non-stick surfaces, always avoid abrasive scrubbers or metal utensils that could scratch and damage the coating.
More Simple and Delicious Breakfast Recipes to Try
If you loved how easy and satisfying these Bisquick waffles were, you’re in for a treat! We have a host of other simple yet incredibly delicious breakfast recipes that are perfect for any day of the week, from quick weekday meals to leisurely weekend brunches. Expand your morning menu with these tried-and-true favorites, all designed to make your breakfast routine effortless and enjoyable:
- Fluffy Pancakes: Master the art of the classic pancake for another quick and versatile breakfast option that’s perfect for a stack of sweetness.
- Air Fryer Fried Eggs: Discover how to achieve perfectly cooked fried eggs with minimal effort and cleanup using your air fryer.
- Air Fryer Scrambled Eggs: A surprisingly simple and efficient way to get perfectly fluffy scrambled eggs without constant stirring.
- Quick Air Fryer Sausage: Get perfectly cooked breakfast sausage patties with the ultimate convenience of an air fryer – crispy on the outside, juicy on the inside.
- Decadent Pecan Praline Pancakes: For a truly special breakfast, indulge in these sweet, nutty, and irresistible pancakes that feel like a dessert.
- Homemade French Toast Sticks: A fun, kid-friendly breakfast that’s perfect for dipping into syrup or your favorite sauces.

Classic Bisquick Waffles
Heather Seeley
5 minutes
5 minutes
10 minutes
4
View Recipe Card
Pin Recipe
Read More
Print Recipe
Equipment
-
Waffle Iron
-
Large Mixing Bowl
-
Whisk or Spoon
Ingredients
1x
2x
3x
1x
2x
3x
- 2 cups Bisquick mix
- 1 1/3 cups milk
- 1 large egg
- 2 tablespoons vegetable oil
- 1 teaspoon vanilla extract (optional, but recommended)
Instructions
-
Step 1: Preheat Waffle Iron. Heat your waffle iron to medium heat, ensuring it’s fully warmed up before proceeding to make the batter.
-
Step 2: Mix Batter. In a large mixing bowl, combine the Bisquick mix, milk, egg, vegetable oil, and vanilla extract. Stir gently with a whisk or spoon until just combined. A few small lumps are perfectly normal – avoid overmixing.
-
Step 3: Cook Waffles. Lightly spray the hot waffle iron with non-stick cooking spray or brush with a thin layer of vegetable oil. Pour the prepared batter onto the center of the waffle iron (refer to your iron’s manual for the specific amount, typically filling about 2/3 of the surface).
-
Step 4: Serve Warm. Close the lid and cook for about 3-5 minutes, or until the waffle is golden brown and crispy. Carefully remove the cooked waffle and serve immediately with your favorite toppings. Repeat with any remaining batter.
Video
A video demonstration for making Bisquick waffles would typically appear here. (Requires external video player script)
Notes for Perfect Waffles
- Do Not Overmix: Stir the batter until just combined; a few lumps are fine. Overmixing will lead to tough, chewy waffles.
- Medium Heat is Key: Ensure your waffle iron is at medium heat for crispy, golden results without burning, and for even cooking.
- Proper Filling: Avoid overfilling or underfilling the waffle iron. Consult your appliance’s manual for precise measurements, but generally, fill about two-thirds of the cooking surface.
- Keep Warm: If serving a crowd, place cooked waffles on a wire rack set over a baking sheet in an oven preheated to 200°F (95°C) to keep them warm and crispy while you finish cooking the batch.
- Customization: Feel free to add optional ingredients like ground cinnamon, pumpkin pie spice, a dash of apple pie spice, or a touch more sugar to the batter for enhanced flavor.
- Rest the Batter (Optional): For a slightly more tender waffle, let the batter rest for 5-10 minutes before cooking to allow the dry ingredients to fully hydrate.
Nutrition Information (Per Serving)
Carbohydrates: 42g |
Protein: 9g |
Fat: 20g |
Saturated Fat: 10g |
Polyunsaturated Fat: 2g |
Monounsaturated Fat: 7g |
Trans Fat: 1g |
Cholesterol: 50mg |
Sodium: 816mg |
Potassium: 222mg |
Fiber: 1g |
Sugar: 11g |
Vitamin A: 194IU |
Vitamin C: 1mg |
Calcium: 206mg |
Iron: 2mg
Nutrition information is automatically calculated and should be used as an approximation. Actual values may vary based on specific ingredients, portion sizes, and preparation methods.
Additional Information
Breakfast, Brunch
American
Bisquick waffles, easy waffle recipe, homemade waffles, quick breakfast, crispy waffles, fluffy waffles, 10 minute waffles
Loved this recipe? Share your thoughts below!
Your feedback helps us create more delicious content for you.