
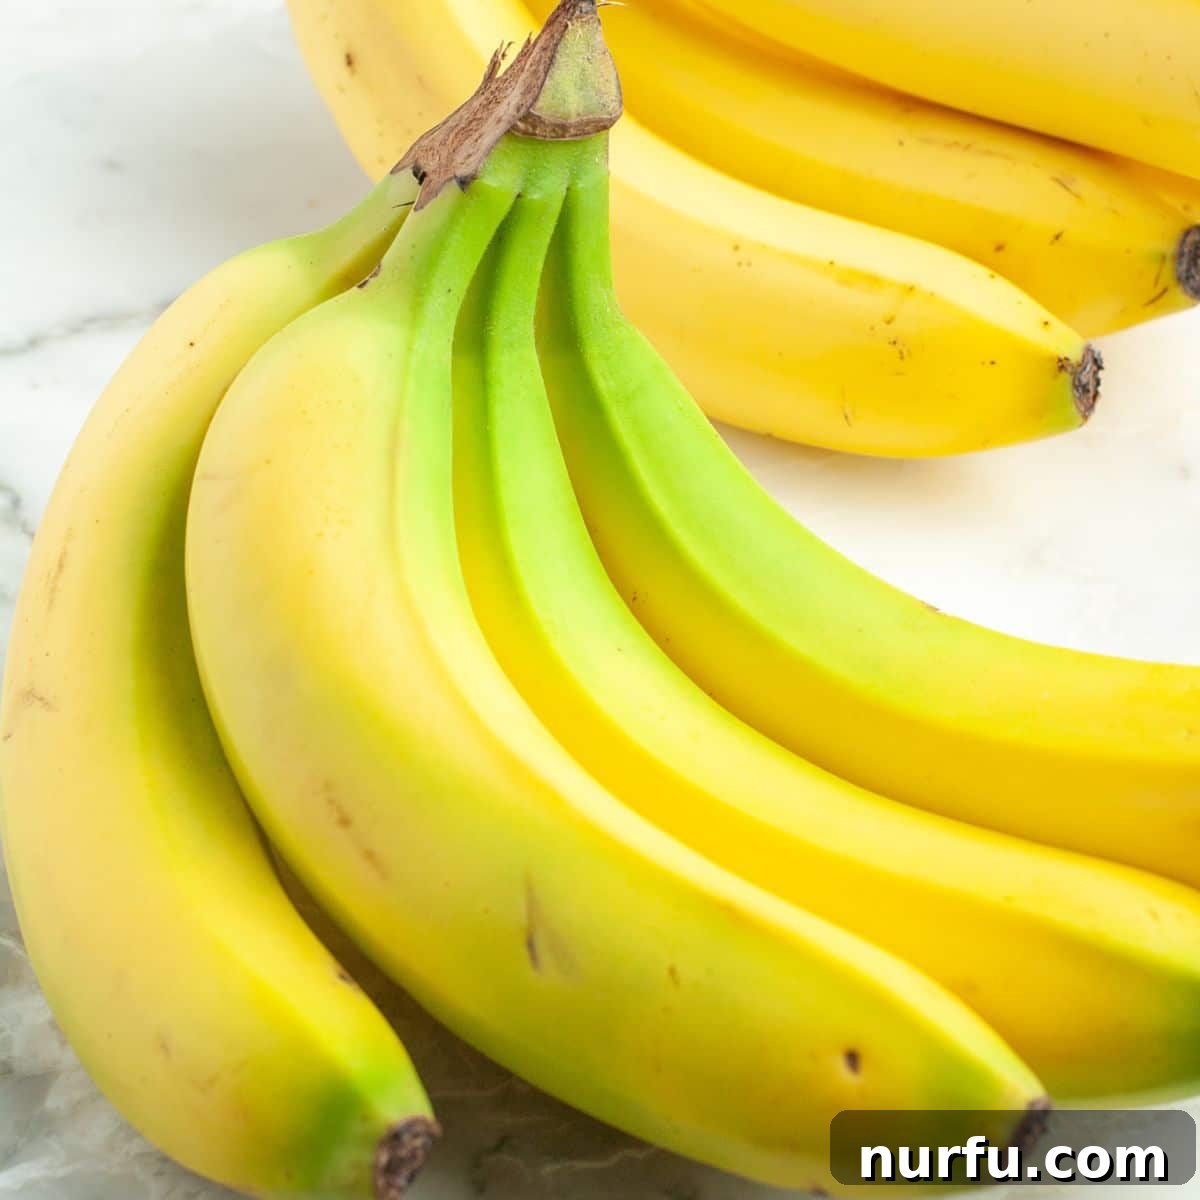
Ever found yourself with a sudden craving for banana bread or a smoothie, only to discover your bananas are stubbornly green? It’s a common culinary dilemma, but thankfully, not an insurmountable one. Whether you’re a seasoned baker or just looking for a healthy snack, ripe bananas are often the secret ingredient that unlocks richer flavors and better textures. This comprehensive guide will show you four effective methods to ripen bananas quickly, transforming them from firm and flavorless to perfectly sweet and soft, ready for all your favorite recipes.
Bananas are incredibly versatile, featuring prominently in everything from energizing breakfast options and satisfying snacks to decadent desserts and even savory dishes. Their natural sweetness, distinct flavor, and ability to add moisture make them a staple in kitchens worldwide. For many recipes, like the 32 ripe banana recipes we’ve compiled, achieving that ideal ripeness is crucial. But what happens when the grocery store shelves are bare of perfectly yellow, spotty bananas, leaving you with only unripe green ones?
That’s where these clever ripening hacks come in handy. We’re about to explore the best techniques to accelerate nature’s process, ensuring you always have perfectly ripe bananas on hand, exactly when you need them. From ultra-fast oven methods to a slightly more patient paper bag approach, you’ll discover how to get those bananas ready for baking, mashing, or simply enjoying.
The Science Behind Banana Ripening
Before diving into quick ripening methods, it’s helpful to understand how bananas ripen naturally. Bananas are a climacteric fruit, meaning they continue to ripen after being harvested. This process is primarily driven by a natural plant hormone called ethylene gas. As a banana matures, it produces and releases ethylene gas, which signals the fruit to convert its starches into sugars. This conversion is what makes bananas sweeter, softer, and changes their skin from green to yellow, eventually developing those desirable brown spots.
The rate of natural ripening is influenced by several factors, including temperature and exposure to ethylene. Keeping bananas in a warm environment, ideally around room temperature (68-72°F or 20-22°C), helps speed up this natural conversion process. Additionally, keeping bananas in a bunch can concentrate the ethylene gas they release, encouraging faster ripening compared to separating individual fruits. Left undisturbed at room temperature, green bananas typically take anywhere from 3 to 7 days to reach peak ripeness, depending on their initial greenness.
Understanding this natural mechanism is key to manipulating the ripening process when you’re in a hurry. The accelerated methods we’ll discuss essentially leverage or amplify the effects of heat and ethylene gas to deliver ripe bananas much faster than nature intended.
Why Ripe Bananas are Ideal for Baking
While a firm, slightly green banana is perfect for slicing onto cereal or enjoying as a grab-and-go snack, extremely ripe bananas are culinary gold, especially for baking. The reason lies in the significant changes that occur as the fruit matures:
- Increased Sweetness: As bananas ripen, their complex starches break down into simple sugars. This transformation dramatically enhances their natural sweetness, making them an excellent natural sweetener for baked goods. Using ripe bananas means you often need less added sugar in your recipes.
- Enhanced Flavor Profile: Beyond just sweetness, ripe bananas develop a more intense, complex, and aromatic banana flavor. This rich, concentrated taste truly shines through in dishes like banana bread, muffins, and cookies, giving them a depth that unripe bananas simply can’t match.
- Softer, Malleable Texture: Ripe bananas become incredibly soft and easy to mash, which is essential for incorporating them smoothly into batters. Their high moisture content also contributes to the tenderness and moistness of baked goods, preventing them from drying out.
- Natural Binding Agent: The sticky, soft consistency of mashed ripe bananas acts as a natural binder, helping to hold ingredients together in recipes and contributing to a desirable crumb structure.
In essence, choosing ripe bananas for your baking ensures a superior product – sweeter, more flavorful, and wonderfully moist. That’s why mastering quick ripening techniques is such a valuable skill for any home baker.
How to Ripen Bananas in the Oven: The Fastest Way
When time is of the essence and you need ripe bananas for a recipe like moist banana muffins or an irresistible banana bread within minutes, the oven method is your best friend. This technique rapidly accelerates the ripening process, making green bananas soft and sweet enough for baking in about 10-15 minutes.
Instructions for Oven Ripening:
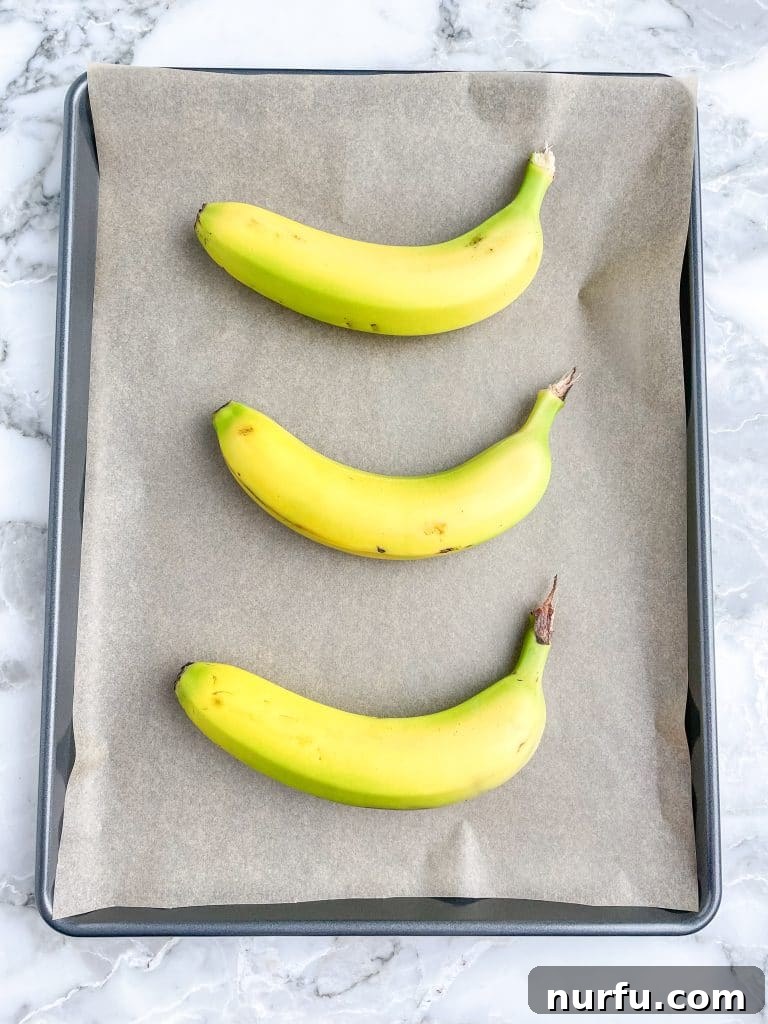
- Prepare Your Baking Sheet: Line a baking sheet with parchment paper or aluminum foil. This step is crucial to prevent any sticky residue from leaking bananas from adhering to your pan, making cleanup much easier.
- Place Bananas on the Sheet: Arrange your unripe, unpeeled bananas on the prepared baking sheet. Ensure there’s a little space between each banana to allow for even heating. Keep the peels on; they will protect the fruit inside and help steam the banana, contributing to its softness.
- Preheat and Bake: Preheat your oven to a moderate temperature of 350°F (175°C). Once preheated, place the baking sheet with bananas into the oven. Bake for approximately 10-15 minutes.
- Monitor for Doneness: The bananas are ready when their peels have turned completely black. This dark coloration indicates that the starches inside have converted to sugars, and the fruit is soft. If after 10-15 minutes they haven’t achieved this color, let them bake for another few minutes, checking frequently.
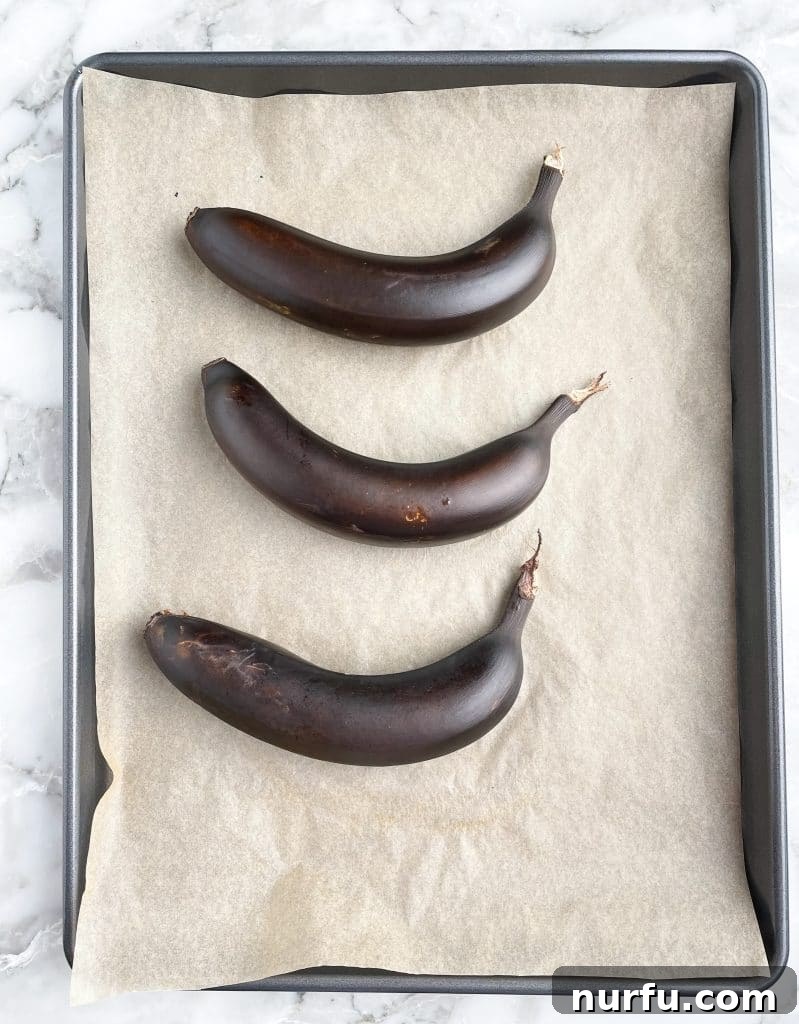
- Cool and Use: Carefully remove the baking sheet from the oven. Allow the bananas to cool down completely. This step is important as they will be extremely hot inside. Once cool enough to handle, simply slice them open, and scoop out the soft, sweet flesh with a spoon or fork. They’ll be perfectly mashed and ready for your recipe.
Pro Tip: This method is highly effective for immediate baking needs. While the texture becomes wonderfully soft and sweet, the flavor might not be as deeply complex as naturally ripened bananas. However, for most banana bread or muffin recipes, the difference is negligible and perfectly acceptable.
How to Ripen Bananas in the Air Fryer
The air fryer, a popular kitchen gadget known for its speed and efficiency, can also be used as a fantastic alternative to the oven for ripening bananas quickly, especially if you’re only dealing with a small batch. This method offers similar results to oven ripening in terms of speed and effectiveness, typically taking around 8-10 minutes.
Instructions for Air Fryer Ripening:
- Prepare the Air Fryer: For easier cleanup and to prevent any potential mess from overly ripe or bursting bananas, consider lining your air fryer basket with perforated parchment paper. This allows for proper air circulation while catching any drips.
- Place Bananas in Basket: Place 1 to 3 unripe, unpeeled bananas directly into the air fryer basket. Avoid overcrowding to ensure even cooking and airflow around each banana.
- Cook and Check: Set your air fryer to 300°F (150°C). Cook for 8-9 minutes. As with the oven method, the goal is for the banana peels to turn uniformly black. If they haven’t darkened sufficiently after the initial cooking time, continue for another minute or two, checking frequently.
- Cool and Mash: Once the bananas are completely black, carefully remove them from the air fryer. Allow them to cool down thoroughly before peeling. The inside will be incredibly soft and sweet, ideal for mashing and incorporating into your recipes.
The air fryer method is particularly convenient for small quantities, saving energy compared to preheating a full-sized oven. It’s a quick and efficient way to achieve that soft, sweet, mashed banana texture perfect for baking.
How to Ripen Bananas in the Microwave: For Softening, Not Sweetening
The microwave offers the quickest solution for softening bananas, but it’s important to understand its limitations. While it can make a banana easier to mash in mere seconds, it does not significantly improve the sweetness or complex flavor profile in the same way that heat from an oven or natural ripening does. This method is best for partially ripe bananas that need a little push towards mashing consistency, rather than hard green bananas where sweetness development is key.
Instructions for Microwave Softening:
- Peel the Banana: Unlike the oven or air fryer methods, you should peel the banana before microwaving. This prevents any potential mess from an expanding peel.
- Place in a Microwave-Safe Bowl: Put the peeled banana into a microwave-safe bowl. You can lightly prick it with a fork a few times, although this isn’t strictly necessary for a peeled banana.
- Heat in Intervals: Microwave the banana in short bursts, typically 30-second intervals. After each interval, check the banana’s softness. The total time needed will vary depending on the banana’s initial ripeness and your microwave’s wattage, but it usually takes about 1 minute to achieve the desired softness. Continue until the banana is soft enough to easily mash with a fork.
When to Use the Microwave Method: This technique is ideal when you have bananas that are already mostly yellow but still a bit too firm to mash easily for recipes like banana pancakes or baby food. It’s also a quick fix if you only need to soften a single banana. However, if your goal is to dramatically increase the banana’s sweetness from a very green state for a rich banana bread, other methods will yield better results.
How to Ripen Bananas in a Paper Bag: The Natural Accelerator
For those who have a little more time (about a day or two) but still want to speed up the natural ripening process beyond simply leaving bananas on the counter, the paper bag method is an excellent choice. This technique works by concentrating the ethylene gas released by the fruit, creating an ideal environment for faster ripening.
Instructions for Paper Bag Ripening:
- Gather Your Bananas and Companion Fruit: Place your unripe bananas inside a brown paper bag. For maximum effectiveness, add an already ripe banana, an apple, an avocado, or a pear into the bag with the unripe bananas. These fruits are also prolific producers of ethylene gas, which will significantly accelerate the ripening of your green bananas.
- Seal the Bag: Fold the top of the paper bag over securely to trap the ethylene gas inside. The enclosed environment allows the gas to accumulate around the bananas, signaling them to ripen more quickly.
- Store and Wait: Leave the sealed paper bag at room temperature. Depending on how green your bananas were to start, they should be noticeably riper within 12 to 24 hours, often becoming perfectly spotty and soft within 1 to 2 days. Check them periodically to avoid over-ripening.
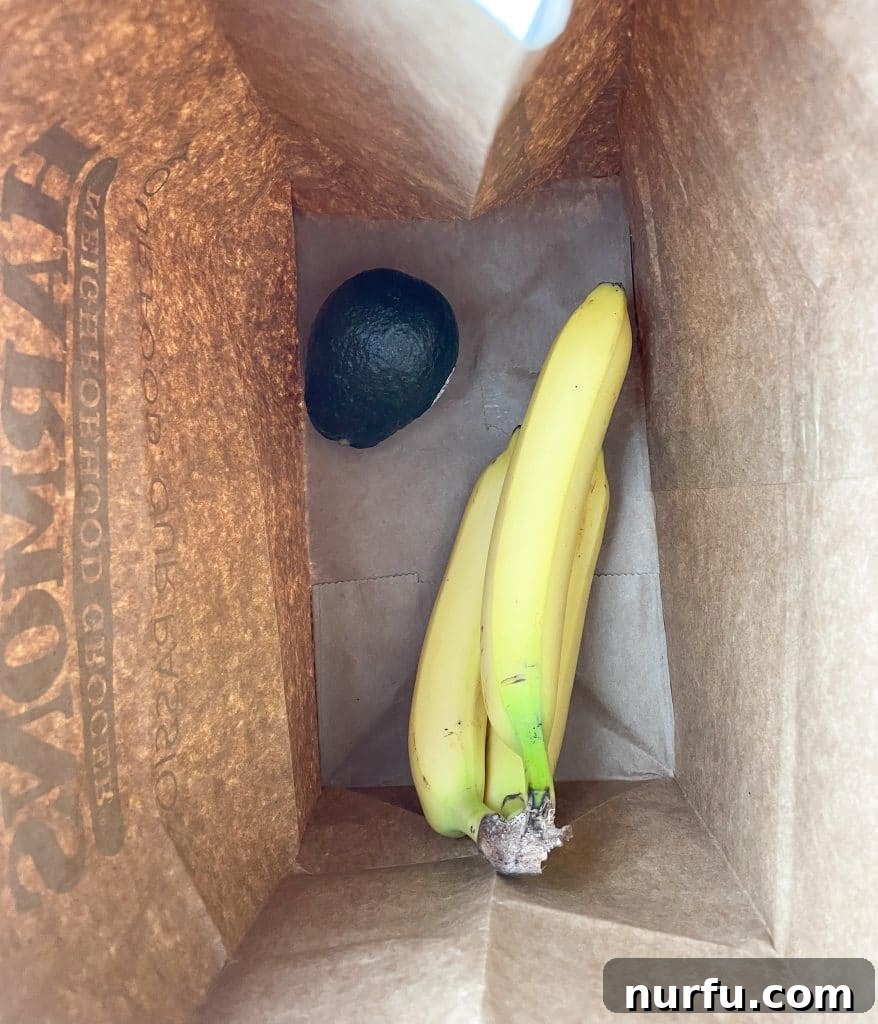
Why a Paper Bag and Not Plastic? It’s crucial to use a paper bag, not a plastic one. Paper bags are porous, allowing for some airflow while still trapping enough ethylene to be effective. A plastic bag, on the other hand, creates a completely sealed, oxygen-deprived environment. This lack of oxygen, combined with moisture trapped inside, can lead to fermentation and spoilage, causing your bananas to rot rather than ripen beautifully.
This method is perfect when you can plan ahead a little and prefer a more natural approach to achieving that deep, rich sweetness that comes with gradual ripening.
How to Store Ripened Bananas for Future Use
Congratulations, you’ve successfully ripened your bananas! But what if you have more ripe bananas than you can use immediately, or they’re starting to get past their prime? Don’t let them go to waste! Properly storing ripened bananas is simple and ensures you always have that sweet, creamy goodness ready for your next culinary adventure.
Freezing Ripe Bananas:
The best way to preserve extra ripe bananas is to freeze them. Freezing not only extends their shelf life for several months but also makes them incredibly convenient for smoothies, “nice cream,” or future baking projects.
- Peel the Bananas: Always peel your ripe bananas before freezing. Trying to peel a frozen banana is a frustrating task!
- Choose Your Method:
- Whole or Halved: For easy portioning for smoothies, you can freeze them whole or cut them into halves.
- Sliced: If you plan to use them in smaller quantities or for snacks, slice them into rounds.
- Mashed: For baking, you can mash the bananas first, measure them into desired portions (e.g., 1 cup per bag), and then freeze the mashed portions. This saves a step when you’re ready to bake.
- Prevent Sticking (Optional but Recommended): If freezing whole or sliced bananas, spread them in a single layer on a parchment-lined baking sheet and freeze for 1-2 hours until solid. This prevents them from clumping together, allowing you to easily take out individual pieces later.
- Store in an Airtight Container or Freezer Bag: Once solid (or if freezing mashed), transfer the bananas to an airtight freezer-safe container or a heavy-duty freezer bag. Squeeze out as much air as possible from the bag to prevent freezer burn.
- Label and Freeze: Label the container or bag with the date. Frozen bananas will keep beautifully in the freezer for up to 6 months, or even longer if properly sealed.
Using Frozen Bananas:
- For Baking: Thaw frozen bananas in the refrigerator overnight or on the counter for a few hours. They will release some liquid during thawing, which is normal; simply drain it off or include it in your recipe. Mash them as usual.
- For Smoothies and Nice Cream: Use frozen banana chunks directly from the freezer. They add a wonderful cold, creamy texture without needing ice.
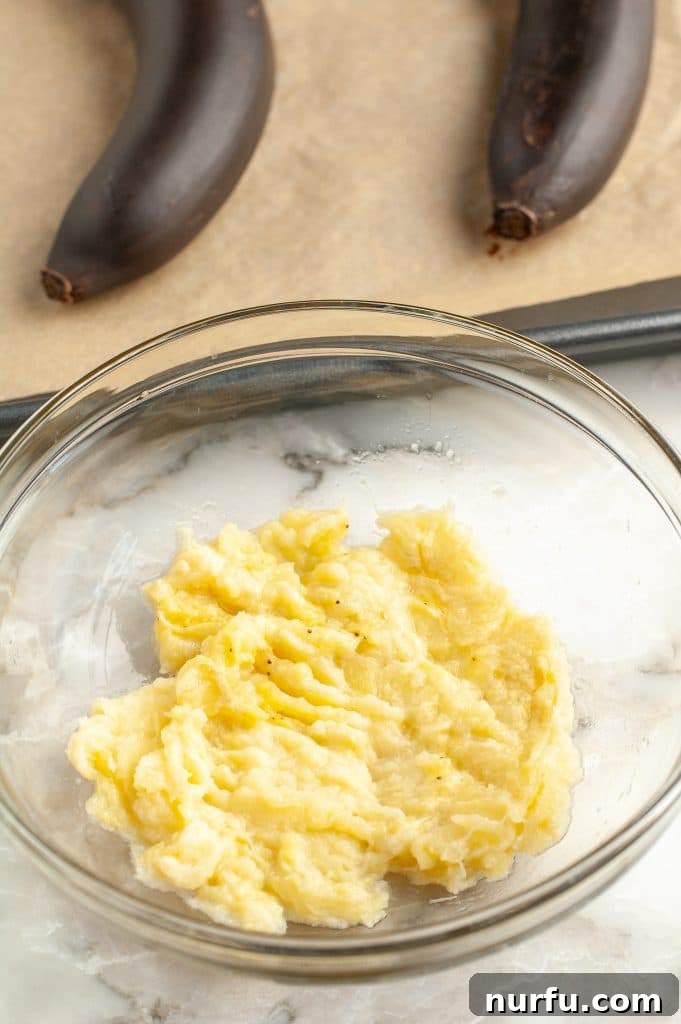
By following these storage tips, you’ll never have to worry about wasting overripe bananas again, and you’ll always have a supply of perfectly sweet fruit ready for your next culinary creation.
Tips and Tricks for Ripening Bananas
- Best for Baking, Not Raw Eating: While these accelerated ripening methods make bananas excellent for baking, smoothies, or mashing, they generally don’t yield the same firm texture and nuanced flavor as naturally ripened bananas that are perfect for eating raw. The quick heat methods, in particular, produce a very soft, almost cooked texture, which is ideal for recipes but less appealing for fresh consumption.
- Don’t Refrigerate Unripe Bananas: Cold temperatures slow down the ripening process significantly and can even cause chilling injury, preventing the bananas from ever fully ripening once removed from the fridge. Only store bananas in the refrigerator once they have reached your desired level of ripeness to extend their shelf life.
- Look for Spots: The presence of brown or black spots on the banana peel is the ultimate visual cue for ripeness, indicating maximum sweetness and softness. Don’t be afraid of very spotty or even mostly black bananas for baking – these are often the best!
Delicious Banana Recipes to Try
Now that you’re a pro at ripening bananas, it’s time to put your skills to good use! Here are some fantastic recipes that truly shine with perfectly ripe bananas:
- Easy Cake Mix Banana Bread
- Fluffy Banana Bread Muffins
- Classic Southern Banana Pudding
- Chewy Banana Oatmeal Cookies
- Rich Banana Brownies
How To Ripen Bananas
Heather Seeley
Learn to ripen bananas quickly using oven, paper bag, and microwave methods.
5 mins
10 mins
15 mins
1 batch of ripe bananas
Rate Recipe
Print Recipe
Ingredients
- 1 bunch under-ripe bananas or individual bananas
Instructions
Oven Method
- Place unpeeled bananas on a parchment or foil-lined baking sheet.
- Bake at 350°F (175°C) for 10-15 minutes or until their peels turn completely black.
- Remove from oven and let cool completely. Scoop out the soft flesh and mash to use for recipes.
Brown Bag Method
- Place under-ripe bananas in a brown paper bag. Add an already ripe avocado, apple, or ripe banana to the bag.
- Fold the bag closed and let it sit at room temperature for 1-2 days to ripen. Check periodically.
Microwave Method
- To soften (not ripen for sweetness) bananas quickly, place a peeled banana in a microwave-safe bowl.
- Microwave in 30-second intervals until the desired softness is achieved, typically around 1 minute.
Video
Refer to the original source for the instructional video.
Nutrition
Nutrition information is automatically calculated and should only be used as an approximation.
- Calories: 1 kcal
- Carbohydrates: 1g
- Protein: 1g
- Sodium: 1mg
- Potassium: 4mg
- Fiber: 1g
- Sugar: 1g
- Vitamin A: 1IU
- Vitamin C: 1mg
- Calcium: 1mg
Additional Info
Like this guide? Leave a comment below!