
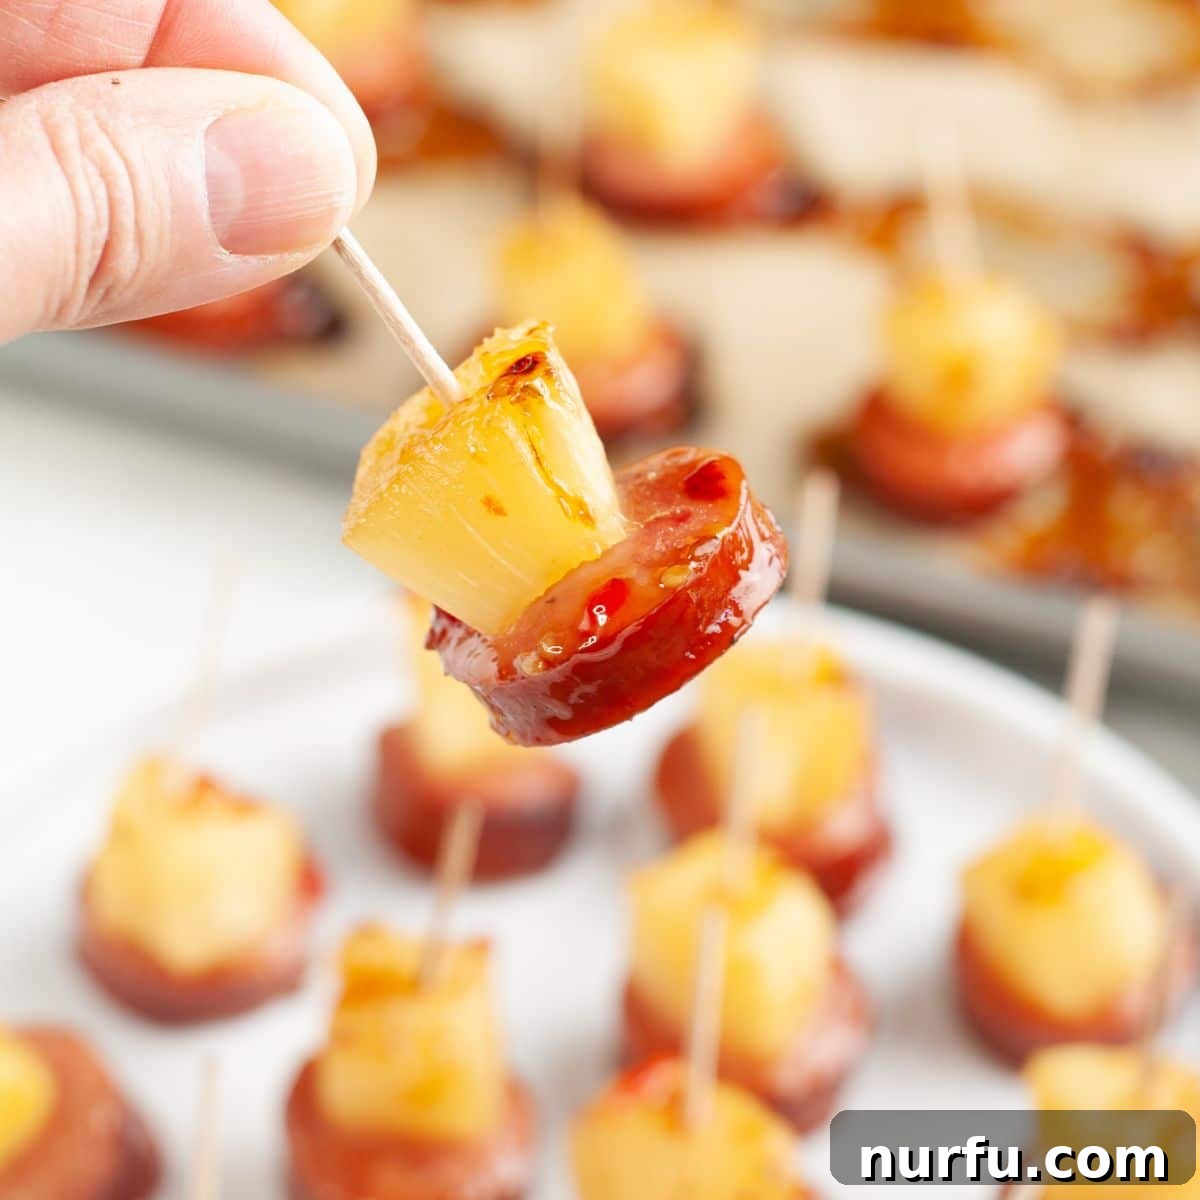
Prepare to tantalize your taste buds with our incredible Pineapple Kielbasa Bites – the ultimate fusion of sweet and savory in every delectable morsel. Imagine succulent, smoky kielbasa sausage harmoniously paired with bright, juicy pineapple, all coated in an irresistible, sticky glaze. This appetizer isn’t just easy to make; it’s a guaranteed crowd-pleaser that will have your guests reaching for more. Perfect for any gathering, from casual backyard BBQs to elegant holiday parties, these glazed kielbasa bites promise a burst of flavor that’s simply unforgettable.
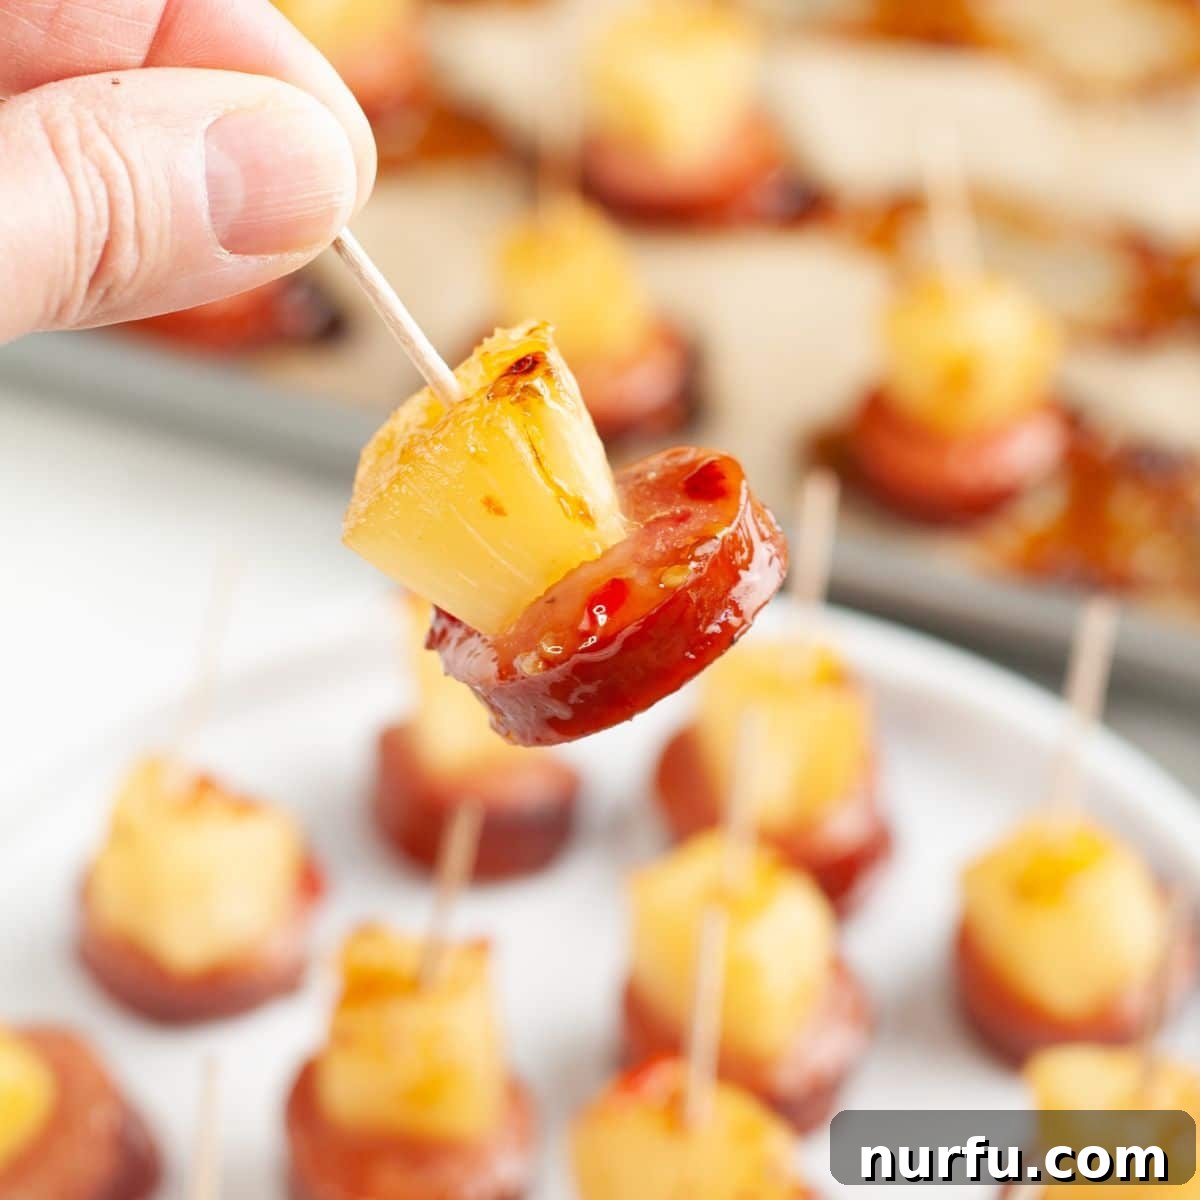
If you’re searching for an appetizer that effortlessly combines simplicity with spectacular taste, look no further than these mouth-watering pineapple kielbasa bites. They are the kind of snack that vanishes from the platter almost as quickly as you can prepare them, making them a staple for game days, potlucks, and any festive occasion. The delightful contrast between the savory sausage and the sweet pineapple creates a truly addictive experience, elevated by a glaze that’s both tangy and subtly spicy.
My culinary journey with these sausage bites began with a cherished family tradition. Growing up, my mom often served a version made with a classic BBQ glaze. It was always a hit, but a few years ago, a friend introduced me to her unique twist: a vibrant teriyaki and sweet chili sauce glaze. From the very first bite, I was completely captivated. This new glaze transformed the simple appetizer into something extraordinary – a sticky, flavorful coating with just the right hint of warmth. It quickly became my go-to recipe for everything from festive holiday gatherings to relaxed summer cookouts. These bite-sized morsels are not only incredibly easy to assemble but also consistently delicious, ensuring they’re a favorite at every event.
My top recommendation for anyone making these is to always double the recipe. Seriously, these glazed sausage bites have a magical way of disappearing at an alarming rate! You’ll thank yourself later when there are plenty to go around, or even some leftovers to enjoy.
Looking for more tantalizing bites to complement your spread? Be sure to explore these other fantastic recipes: our bacon-wrapped water chestnuts, the ever-popular BBQ sausage bites, and the delightful air fryer bacon-wrapped pineapple. Each offers a unique flavor profile that pairs beautifully with the sweet and savory goodness of the kielbasa and pineapple.
Why You’ll Adore These Pineapple Kielbasa Bites
These pineapple kielbasa bites aren’t just another appetizer; they’re a revelation! Here are the compelling reasons why this recipe will quickly become a favorite in your kitchen:
- Quick and Effortless Preparation: From start to finish, this recipe comes together in under 30 minutes. It’s the perfect solution when you need a fantastic appetizer in a hurry, requiring minimal fuss and simple steps. You’ll be amazed at how such a delicious dish can be so easy to create.
- Irresistible Flavor Fusion: The genius of this recipe lies in its balanced flavor profile. The smoky, savory depth of the kielbasa perfectly contrasts with the bright, sweet tang of the pineapple. When enveloped in the luscious teriyaki and sweet chili glaze, these bites achieve a complex, mouth-watering taste that keeps everyone coming back for more.
- Guaranteed Crowd-Pleaser: Whether you’re hosting a casual get-together or a more formal celebration, these sweet and savory kielbasa bites are always a hit. Their universal appeal makes them suitable for any age group and any occasion, ensuring your guests will rave about your culinary skills!
Understanding Kielbasa: Your Perfect Sausage Choice
Before diving into the recipe, let’s talk about the star ingredient: kielbasa. Understanding this versatile sausage will help you select the best type for your bites and appreciate its unique contribution to the dish.
What is Kielbasa?
Kielbasa, also known as Polish sausage, is a staple in Eastern European cuisine, though it’s widely popular globally. Traditionally, it’s a smoked sausage made from a blend of pork or a combination of pork and beef, seasoned with garlic, salt, pepper, and sometimes marjoram. The smoking process gives kielbasa its characteristic smoky flavor and aroma, which is a key element in these appetizer bites. Most kielbasa found in American supermarkets is already pre-cooked, making it incredibly convenient for quick meals and appetizers.
Choosing Your Kielbasa
When selecting kielbasa for this recipe, you have a few excellent options:
- Traditional Smoked Kielbasa: This is the most common and recommended choice. Its robust smoky flavor stands up beautifully to the sweetness of the pineapple and the richness of the glaze.
- Turkey Kielbasa: For a lighter alternative, turkey kielbasa works wonderfully. It offers a similar texture and spice profile with less fat, making it a great option for those seeking a healthier twist without sacrificing flavor.
- Andouille Sausage: If you enjoy a bit of a spicy kick, andouille sausage can be a fantastic substitute. Its Cajun-inspired flavors will introduce a new dimension to the bites, complementing the sweet chili glaze exceptionally well. Ensure you choose a pre-cooked variety for ease of preparation.
- Unsmoked/Fresh Kielbasa: While typically used for grilling or pan-frying, if you have access to fresh kielbasa, you can pre-cook it according to package directions before slicing and glazing. However, for maximum convenience, pre-cooked smoked kielbasa is highly recommended.
Regardless of your choice, ensure the kielbasa is firm and has a pleasant aroma. The quality of your sausage will significantly impact the overall taste of your pineapple kielbasa bites.
Essential Ingredients for Your Glazed Perfection
You’ll be amazed at how just a handful of simple ingredients come together to create these incredibly flavorful pineapple kielbasa bites. Each component plays a crucial role in building the perfect balance of sweet, savory, and tangy notes.
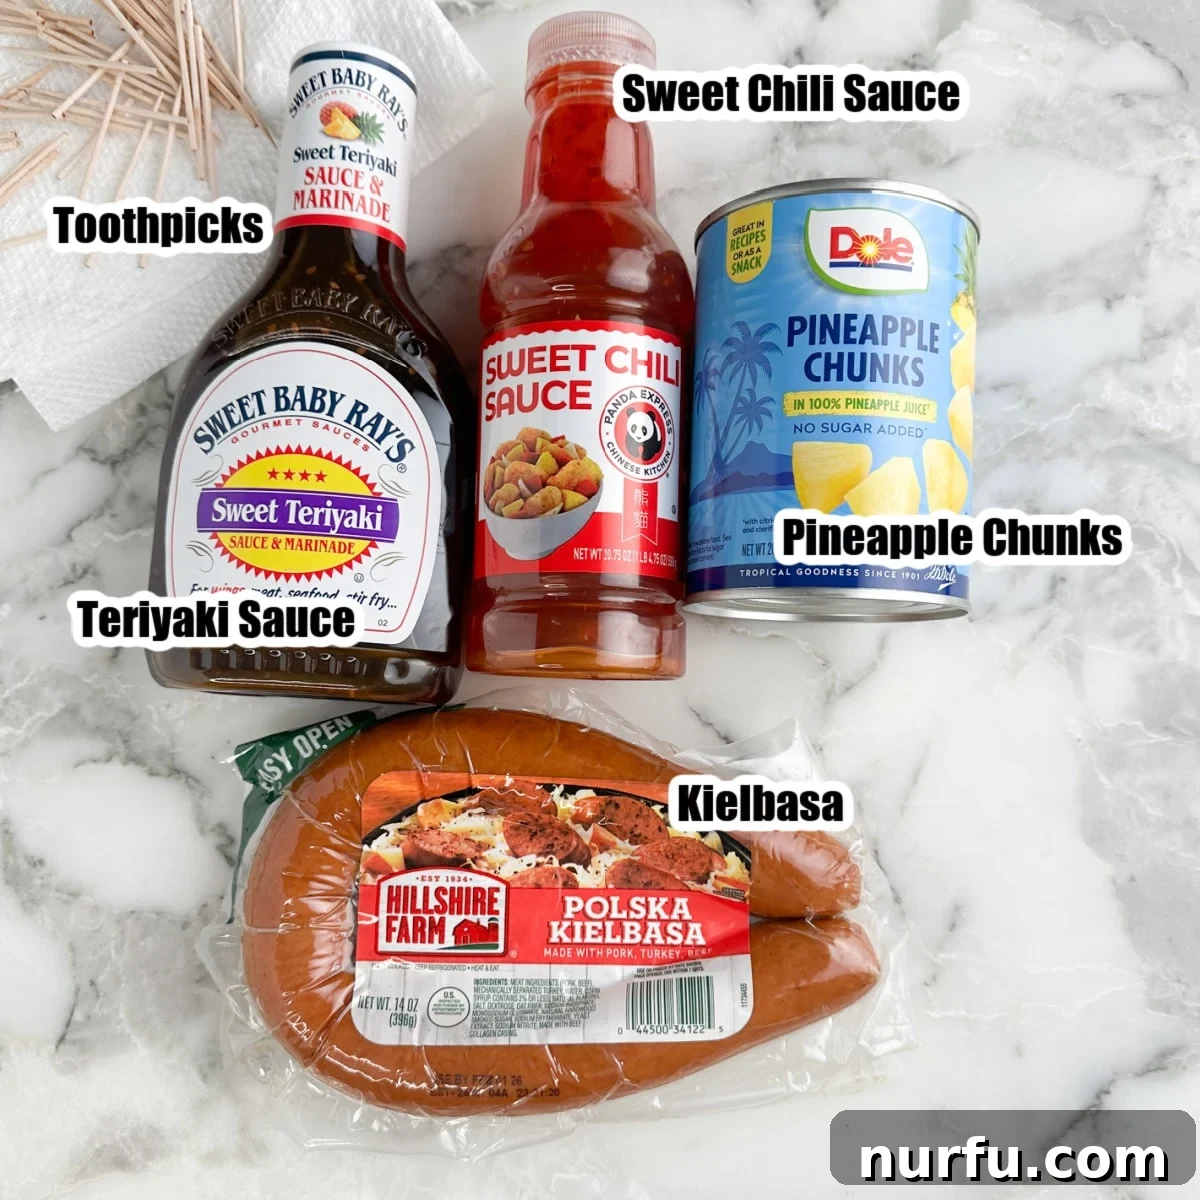
- Kielbasa Sausage: The foundation of our bites! As discussed, you can use your favorite brand of pre-cooked kielbasa sausage. Whether it’s traditional pork, a lighter turkey kielbasa, or even a spicier andouille sausage, the smoky, savory flavor is essential. Look for a good quality sausage that’s firm and flavorful.
- Pineapple Chunks: Canned pineapple chunks are a true convenience and work perfectly here. They are consistently sweet and readily available. Opt for pineapple packed in its own juice, not heavy syrup, to avoid excessive sweetness. If you have fresh pineapple on hand, feel free to use it! Just be sure to cut it into similarly sized chunks for even cooking and easy skewering.
- Pineapple Juice: Don’t discard the juice from your canned pineapple! Reserving a couple of tablespoons is key. This juice forms the sweet and tangy base of our glaze, adding an extra layer of tropical flavor that beautifully complements the other sauces.
- Teriyaki Sauce: This sweet and savory Japanese sauce is a powerhouse of flavor. It brings umami, a touch of sweetness, and a lovely glossy finish to our glaze. You can use your preferred store-bought brand – many varieties offer different levels of thickness and saltiness, so choose one you enjoy.
- Sweet Chili Sauce: A vibrant sauce that delivers the “sweet heat” element to the glaze. It offers a fantastic balance of sweetness, tanginess, and a mild, pleasant chili kick. This is what truly elevates the glaze from good to extraordinary, providing that addictive zing.
- Optional Garnishes: While optional, a sprinkle of toasted sesame seeds or finely chopped fresh green onions (scallions) just before serving can add a beautiful visual appeal and an extra layer of fresh flavor.
Crafting Your Pineapple Kielbasa Bites: Step-by-Step Guide
Making these irresistible pineapple kielbasa bites is surprisingly simple, ensuring you can whip up a batch for any occasion without stress. Follow these easy steps to create a truly impressive appetizer.
Preparation Is Key
- Preheat Your Oven: Begin by preheating your oven to 400°F (200°C). This ensures the oven is at the correct temperature when you’re ready to bake, leading to perfectly cooked bites.
- Line Your Baking Sheet: Line a large baking sheet with parchment paper. This crucial step prevents the sticky glaze from adhering to the pan, making cleanup an absolute breeze.
- Soak Your Toothpicks: Place your wooden toothpicks in a small bowl of water and let them soak for at least 15-30 minutes. This prevents them from burning or charring in the hot oven, ensuring they remain sturdy and intact. After soaking, gently pat them dry before use.
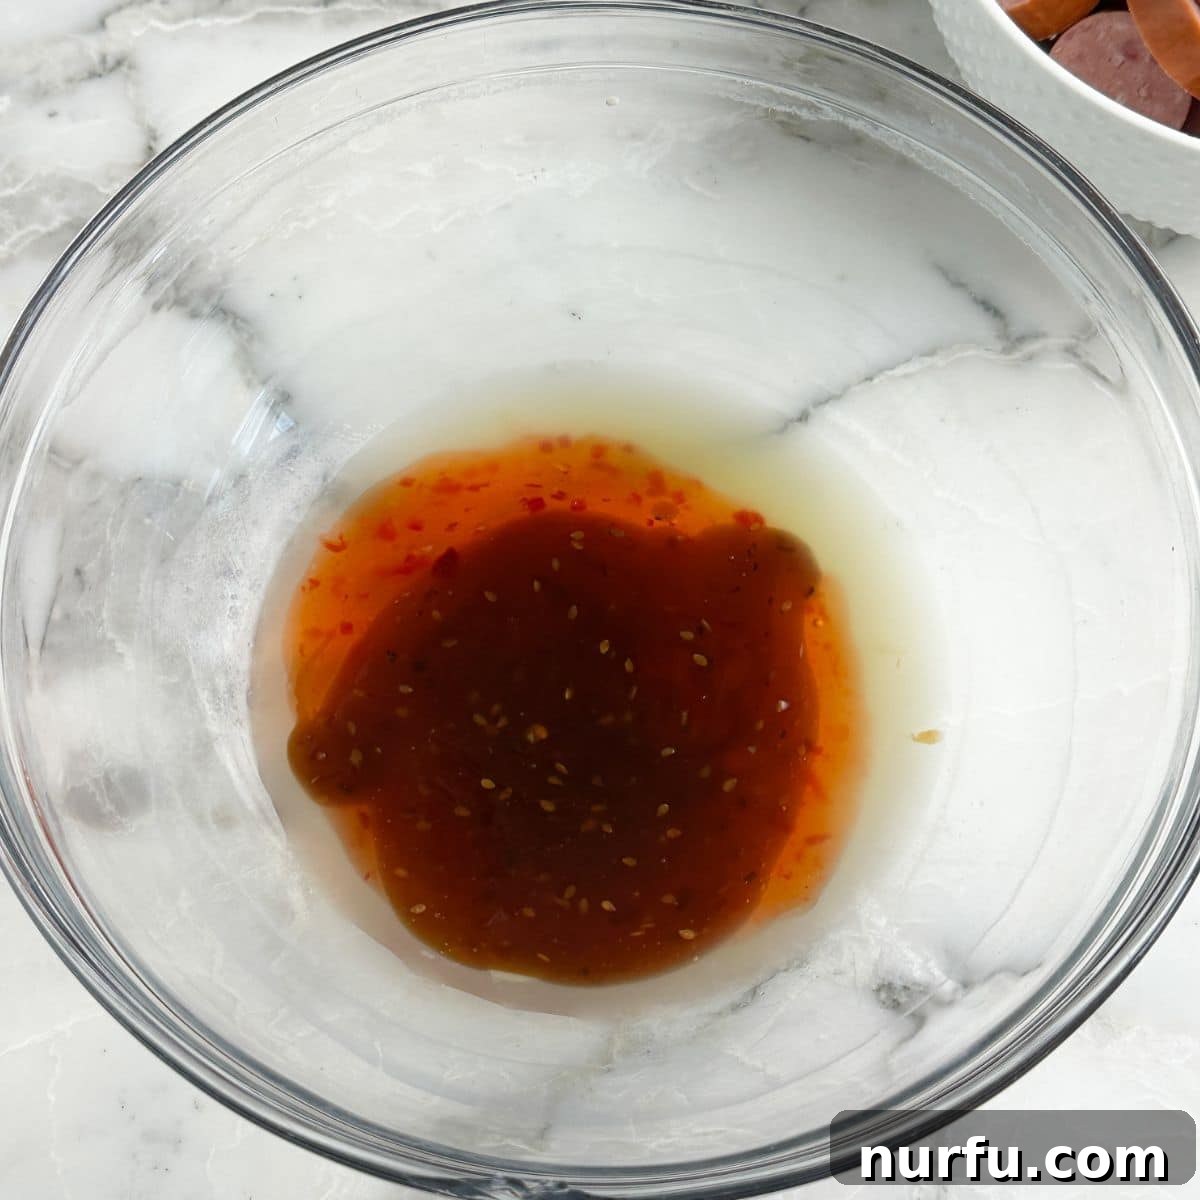
- Prepare the Glaze: In a medium bowl, combine the reserved pineapple juice, teriyaki sauce, and sweet chili sauce. Whisk them together thoroughly until well combined and smooth. This creates the incredible sticky glaze that will coat your kielbasa and pineapple, infusing them with flavor.
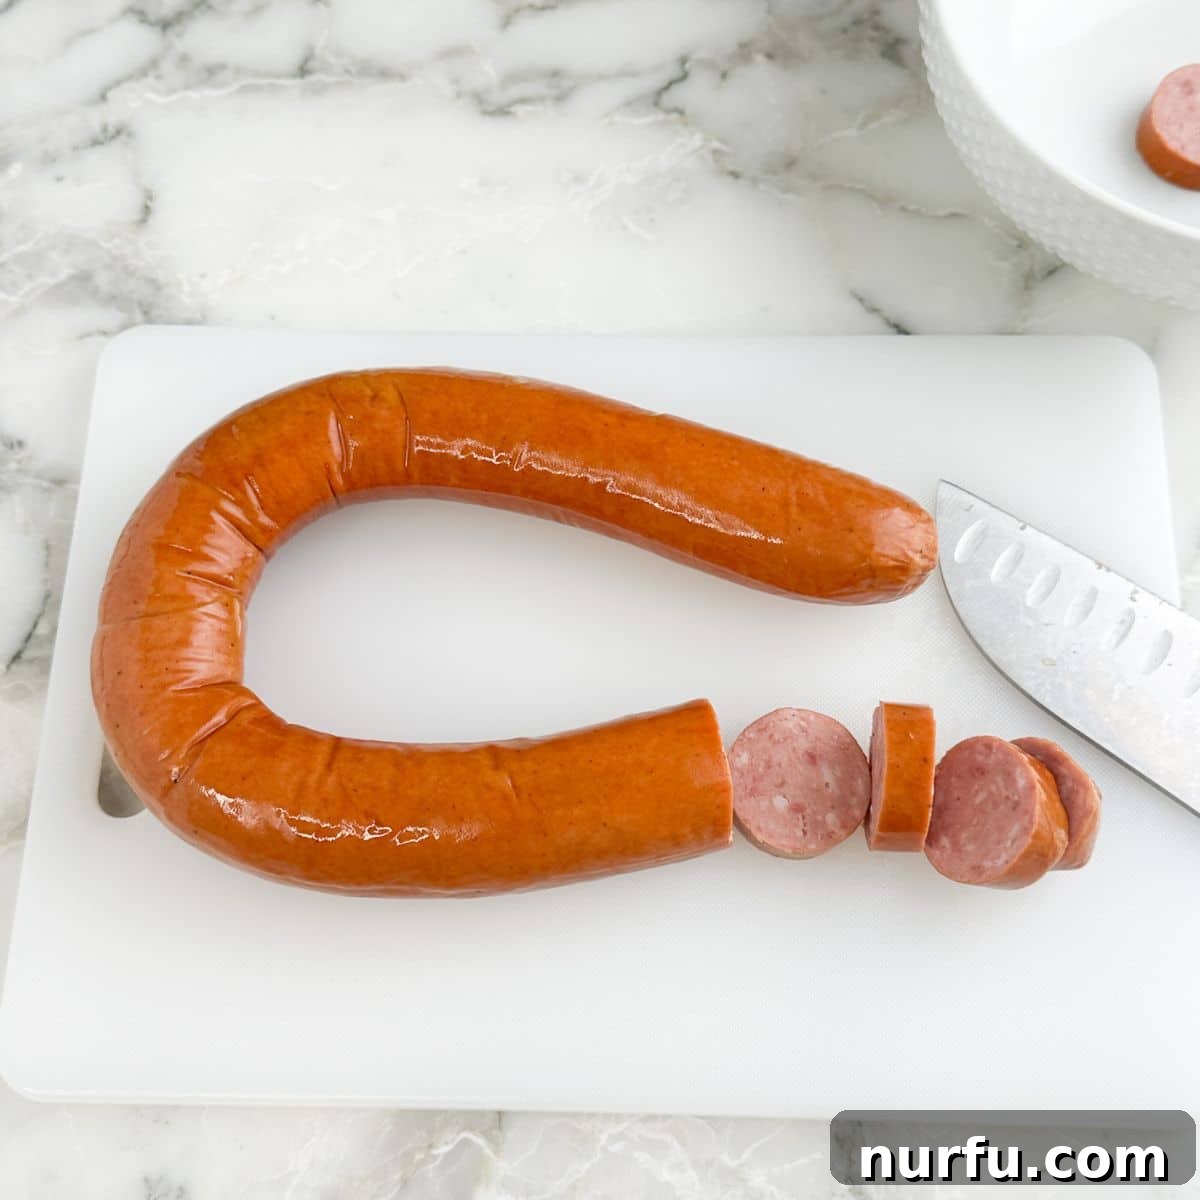
- Slice the Kielbasa: Using a sharp knife, slice your kielbasa sausage into approximately ½-inch thick rounds. Aim for even thickness to ensure uniform cooking.
- Drain the Pineapple: Ensure your pineapple chunks are well-drained. You can even pat them gently with a paper towel to remove any excess moisture. This prevents the glaze from becoming watery and helps it adhere better to the pineapple.
Assembling the Bites
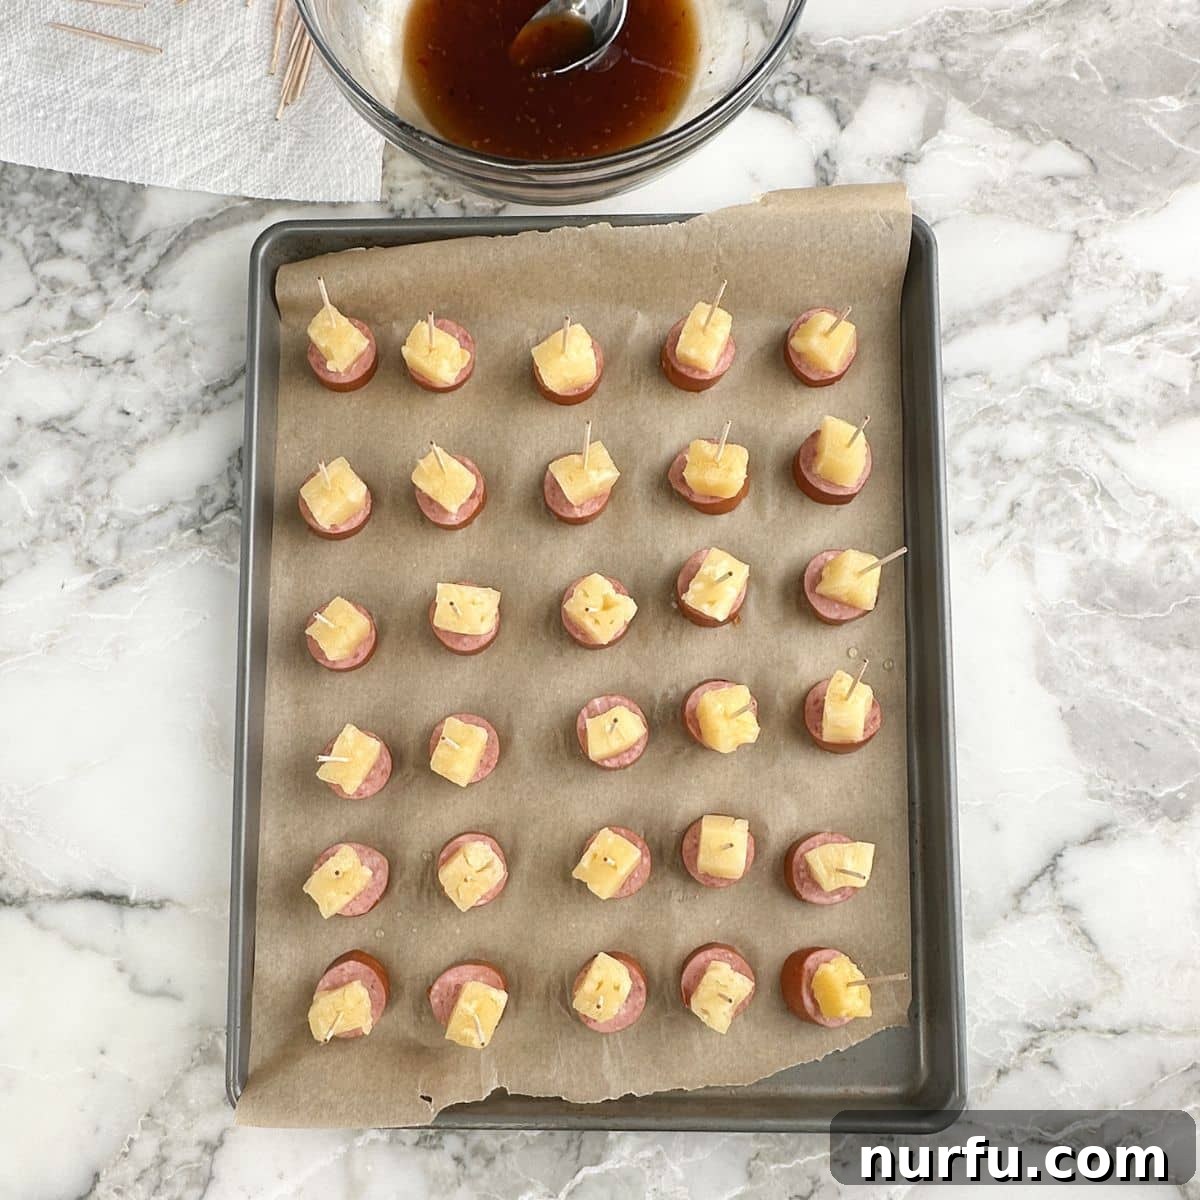
- Skewer the Ingredients: Take a soaked toothpick and thread one pineapple chunk onto it, followed by one slice of kielbasa. You can adjust the order, but pineapple first often helps secure the sausage better. Arrange the assembled bites in a single layer on your prepared baking sheet, leaving a small space between each one to ensure even cooking and glazing. Continue this process until you’ve used all your kielbasa and pineapple.
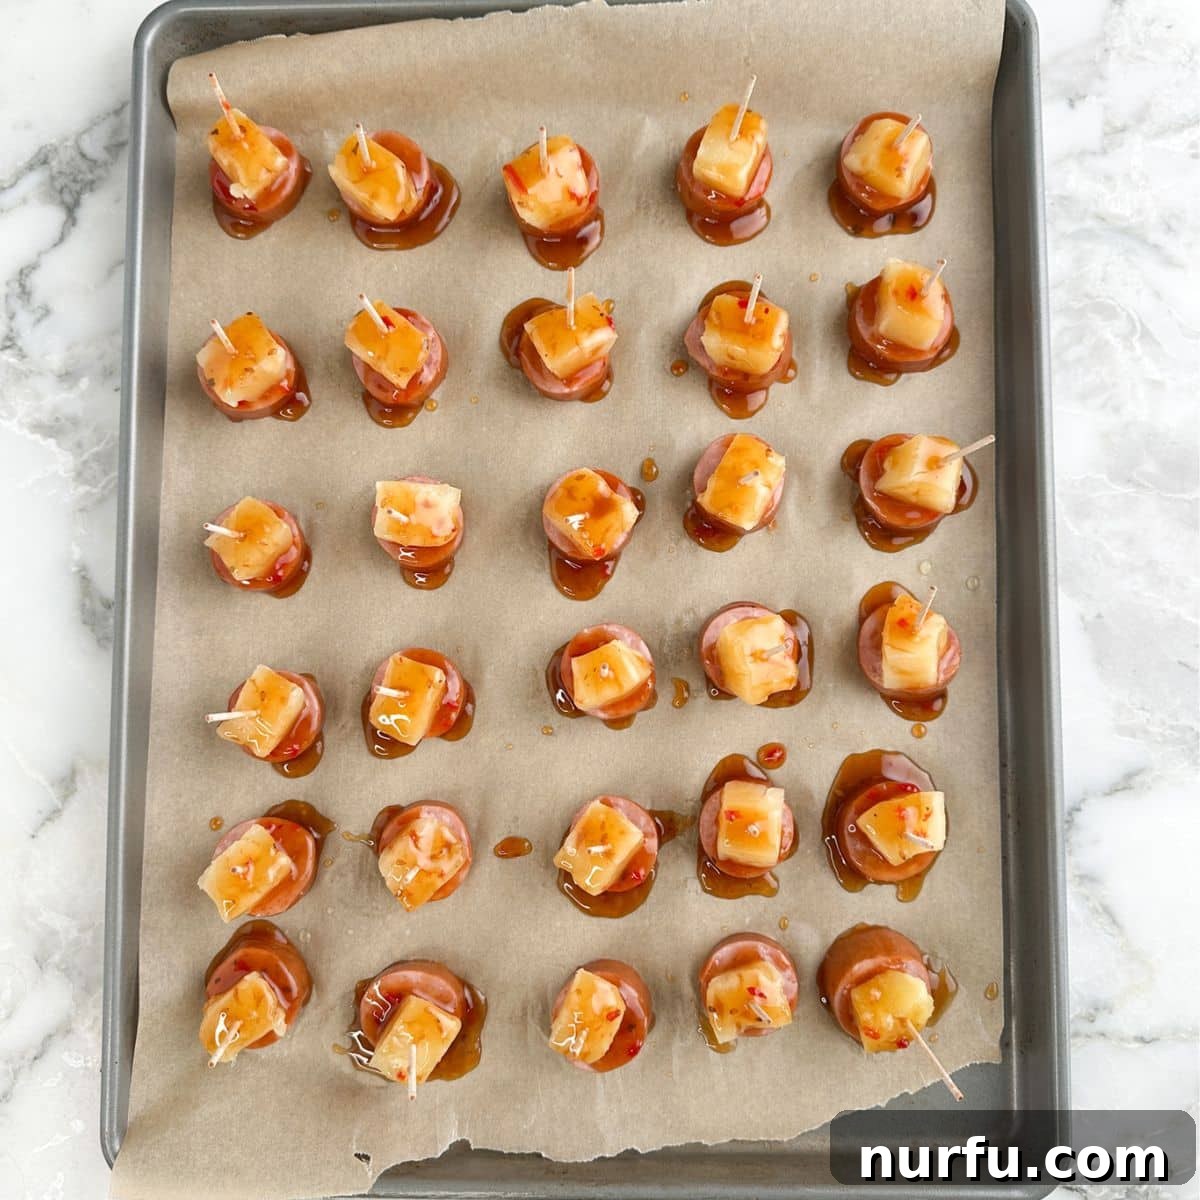
- Glaze Generously: Using a spoon or a pastry brush, generously spoon or brush a bit of the prepared glaze mixture over each pineapple kielbasa bite. Ensure they are well coated to achieve that beautiful shine and rich flavor once baked.
Baking to Perfection
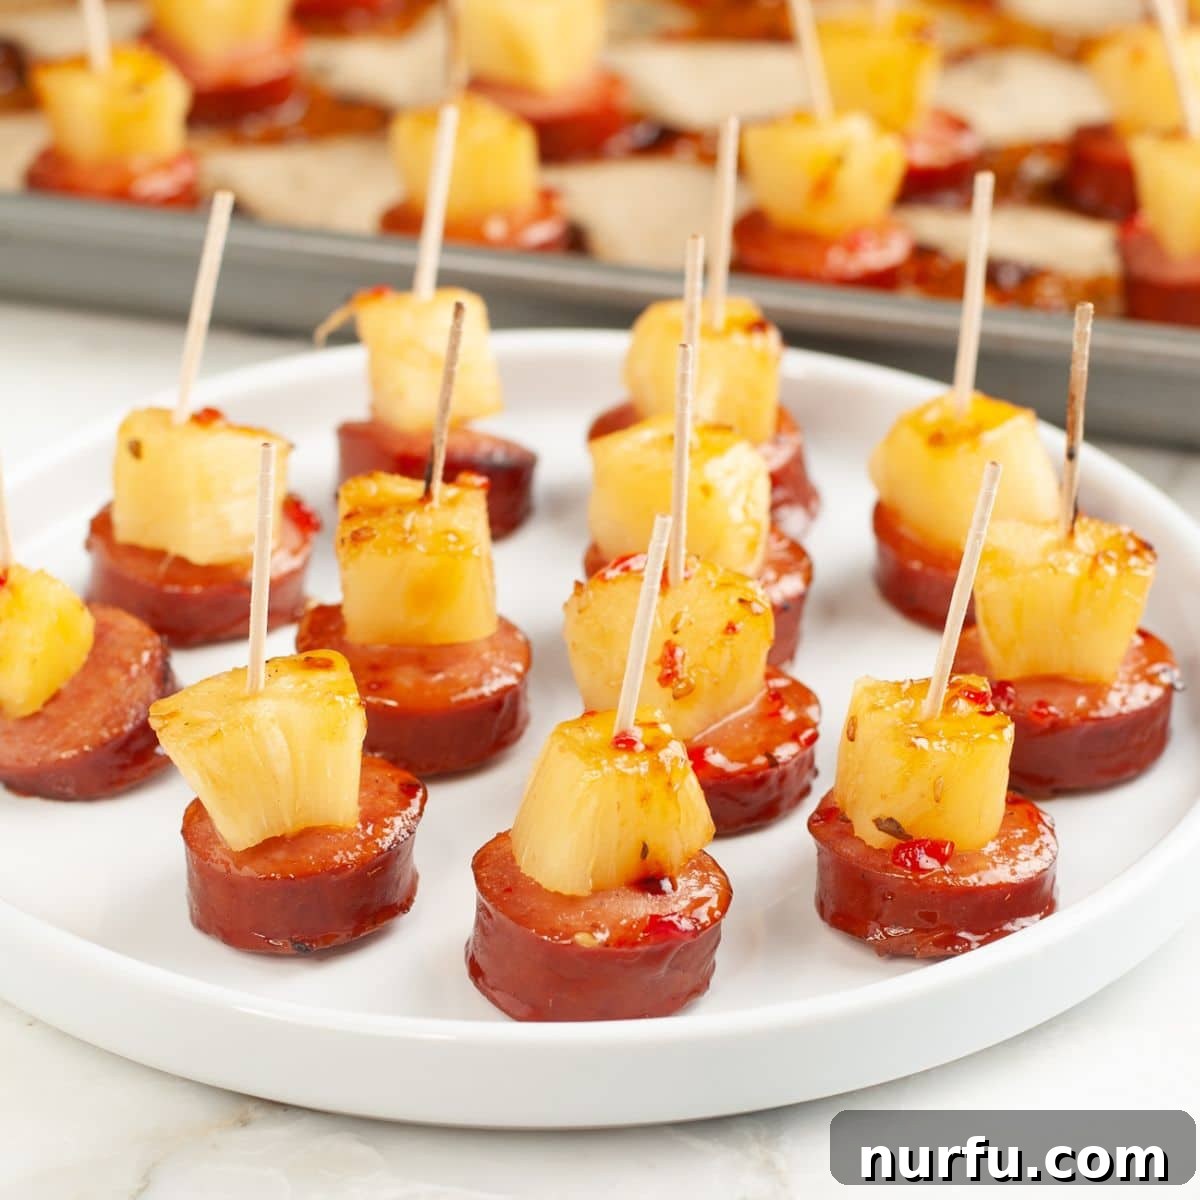
- Bake Until Golden: Place the baking sheet in the preheated oven and bake for 15-20 minutes. Keep a close eye on them, especially towards the end of the baking time. You’re looking for the kielbasa to be slightly browned and the glaze to be sticky and caramelized, not burnt. The pineapple should also be lightly warmed and tender.
- Serve Warm and Savor: Once baked to perfection, remove the baking sheet from the oven. Allow the bites to cool for a few minutes before transferring them to a serving platter. Serve these delightful bites warm, garnished with sesame seeds or green onions if desired, and watch them disappear!
Expert Tips for Flawless Pineapple Kielbasa Bites
Achieving perfectly glazed, tender, and incredibly flavorful pineapple kielbasa bites is easy with a few expert tricks. These tips will help ensure your appetizer turns out perfectly every time:
- Try Slicing the Kielbasa Evenly: Consistency is key for even cooking. Slicing your kielbasa into uniform ½-inch thick rounds ensures that each piece cooks at the same rate, preventing some from drying out while others are still warming up. This also makes for a more appealing presentation.
- The Parchment Paper Secret: Always line your baking sheet with parchment paper. The glaze, while delicious, becomes incredibly sticky when baked. Parchment paper creates a non-stick surface, preventing the bites from sticking to the pan and making cleanup an absolute breeze. Aluminum foil can also work, but parchment paper is generally preferred for sticky glazes.
- Drain the Pineapple Chunks Well: Excess moisture from the pineapple can dilute your beautiful glaze. After draining the canned pineapple, consider patting the chunks gently with a paper towel. This extra step helps the glaze adhere better to the pineapple and prevents it from becoming too watery, ensuring a rich, concentrated flavor.
- Pre-Soaking Toothpicks: Wooden toothpicks can easily burn in a hot oven. To prevent this, soak them in water for 15-30 minutes before assembling your bites. This simple step saturates the wood with moisture, making it less likely to char or break during baking.
- Watchful Baking for Optimal Texture: While the suggested baking time is 15-20 minutes, oven temperatures can vary. Start checking your bites around the 15-minute mark. You want the kielbasa to be heated through and slightly browned, and the glaze to be caramelized and bubbly, but not burnt. Overcooking can make the kielbasa dry, so keep a close eye on them for that perfect golden glow.
Exciting Variations to Explore
One of the best things about these glazed kielbasa pineapple bites is their versatility. With a few simple tweaks, you can easily customize them to suit different tastes or occasions. Get creative and make them uniquely your own!
- Bold BBQ Bites: For a classic, comforting flavor, substitute the teriyaki and sweet chili sauce with your favorite barbecue sauce. A smoky or slightly sweet BBQ sauce will create a familiar yet equally delicious profile that’s perfect for casual gatherings.
- A Touch of Spice: If you love heat, there are several ways to amp up the spice. Add a dash of your favorite hot sauce or a pinch of red pepper flakes directly into the glaze mixture. For an extra kick and a tangy crunch, top each bite with a thin slice of pickled jalapeño before baking.
- Veggie Additions: Introduce more texture and flavor by adding a vegetable to the skewer. A small square of red bell pepper adds a vibrant color and a fresh, crisp bite. Alternatively, a whole or halved water chestnut offers a unique crunchy element that contrasts nicely with the soft pineapple and sausage.
- Different Glaze Combinations: Experiment with other sauce pairings! Try a honey-mustard glaze, a sweet and sour sauce, or even a apricot-ginger blend for different flavor adventures.
- Skewer Alternatives: For larger gatherings or if you prefer a different presentation, consider using small bamboo skewers instead of toothpicks. These can accommodate more pieces and are often easier for guests to handle.
Serving Suggestions for Your Kielbasa Bites
These pineapple kielbasa bites are incredibly versatile and can be served in many ways to suit your event:
Perfect Party Appetizer: Arrange them artfully on a large platter, perhaps with a garnish of chopped fresh parsley or green onions for a pop of color. They are ideal for mingling, as they are easy to pick up and enjoy.
Game Day Snack: Serve them alongside other finger foods like mini quiches, spring rolls, or sliders. Their sweet and savory profile makes them a satisfying snack for cheering on your favorite team.
Brunch or Dinner Side: While primarily an appetizer, these bites can also complement a brunch spread or a light dinner. Pair them with a fresh green salad or some roasted vegetables for a balanced meal.
Storage and Reheating Guidelines
Proper storage ensures you can enjoy any leftover pineapple kielbasa bites later, or even prepare some components in advance. Here’s how to handle them:
Storing Leftovers: Place any leftover pineapple kielbasa bites in an airtight container and store them in the refrigerator for up to 2-3 days. This helps maintain their freshness and prevents them from drying out.
Can You Freeze Them?: While technically possible, freezing cooked kielbasa and pineapple bites might alter the texture of the pineapple, making it a bit mushier upon thawing. If you choose to freeze, store them in a single layer in an airtight, freezer-safe container for up to 1 month. Thaw overnight in the refrigerator before reheating.
Reheating: For best results, reheat the bites in an oven or air fryer.
- Oven: Preheat your oven to 300°F (150°C). Arrange the bites on a parchment-lined baking sheet and heat for 10-15 minutes, or until warmed through and the glaze is slightly bubbly again.
- Air Fryer: Place the bites in a single layer in your air fryer basket. Cook at 300°F (150°C) for 5-8 minutes, checking periodically, until heated through.
- Microwave: While convenient, the microwave may soften the texture of the kielbasa and pineapple. Heat in short bursts (30-60 seconds) until warmed, but be aware the glaze might not be as sticky or caramelized.
Frequently Asked Questions About Pineapple Kielbasa Bites
Yes, absolutely! You can assemble the kielbasa and pineapple on toothpicks and store them in an airtight container in the refrigerator for up to 24 hours. Prepare the glaze separately and store it in a sealed container in the fridge as well. When you’re ready to bake, simply brush the glaze over the assembled bites and bake as directed. This makes party preparation incredibly easy.
Yes, a slow cooker is a fantastic alternative, especially for keeping them warm at a party! After browning the kielbasa slightly (optional, but adds flavor), combine the kielbasa and pineapple with the glaze in a slow cooker. Cook on low for 2-3 hours or on high for 1-1.5 hours, stirring occasionally, until everything is heated through and the glaze has thickened slightly. I recommend spraying the slow cooker insert with non-stick cooking spray to prevent sticking.
For the absolute best flavor and texture, I highly recommend serving these pineapple kielbasa bites warm, straight from the oven or slow cooker. The warmth helps the flavors meld and keeps the glaze beautifully sticky. However, they can certainly be served at room temperature for a party setting if needed. They are still quite delicious, though perhaps not as vibrant as when warm.
Pre-cooked smoked kielbasa is generally the best choice for its robust flavor and ease of preparation. You can opt for traditional pork kielbasa or a lighter turkey kielbasa. If you enjoy a spicier kick, andouille sausage can also be a delicious substitute.
Absolutely! Fresh pineapple works wonderfully and can even offer a brighter, more intense pineapple flavor. Just be sure to cut it into uniform chunks, roughly the same size as canned pineapple, and drain any excess juice well before assembling to ensure the glaze adheres properly.
More Delicious Kielbasa Recipes to Try
If you’ve fallen in love with kielbasa through these irresistible bites, you’ll be thrilled to discover how versatile this sausage can be. Here are some more fantastic kielbasa recipes to add to your culinary repertoire:
- Air Fryer Kielbasa: Quick, easy, and perfectly crispy kielbasa in minutes – ideal for a weeknight meal or quick snack.
- Kielbasa Pasta: A hearty and flavorful pasta dish featuring savory kielbasa, perfect for a satisfying family dinner.
- Kielbasa and Potatoes: A comforting and classic combination, this dish is simple to prepare and packed with rustic flavors.
- Sausage Green Bean Potato Casserole: A delightful one-pan meal that combines savory sausage with tender green beans and potatoes in a creamy sauce.
I genuinely hope you try these delectable glazed pineapple kielbasa bites for your next gathering or simply as a delightful snack. They are truly a testament to how simple ingredients can create extraordinary flavors. Please share your thoughts and experiences in the comments below – I’d love to hear how they turned out for you!
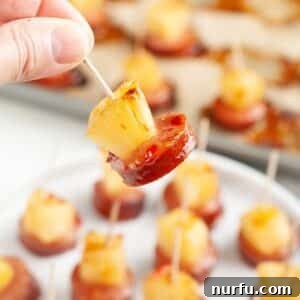
Pineapple Kielbasa Bites
By Heather Seeley
These easy pineapple kielbasa bites can be made in about 30 minutes with just four ingredients. A delicious appetizer or snack that is packed full of flavor.
Cook: 15 mins
Total: 25 mins
Servings: 30 bites
Ingredients
- 1 (14 ounce) kielbasa
- 1 (20 ounce) can pineapple chunks
- 2 tablespoons pineapple juice (reserved from the can)
- ¼ cup teriyaki sauce
- ¼ cup sweet chili sauce
Instructions
- Preheat the oven to 400°F (200°C). Line a baking sheet with parchment paper. Place wooden toothpicks in a bowl of water and let soak for 15-30 minutes. Remove and pat dry.
- In a medium bowl, combine the reserved pineapple juice, teriyaki sauce, and sweet chili sauce. Stir together to combine.
- Cut the kielbasa sausage into ½-inch thick rounds. Drain the pineapple chunks well, patting them dry if necessary.
- Thread one pineapple chunk onto a soaked toothpick, then follow with one kielbasa round. Arrange on the prepared baking sheet in a single layer. Continue until all kielbasa and pineapple are used.
- Spoon the glaze mixture generously over each pineapple kielbasa bite, ensuring they are well coated.
- Bake for 15-20 minutes, or until the kielbasa is slightly browned and the glaze is sticky and caramelized. Check them after 15 minutes to prevent overcooking.
- Serve warm and enjoy your delicious sweet and savory bites!
Notes
- Try slicing the kielbasa evenly. This will help them cook uniformly.
- Line your baking sheet with parchment paper. This helps for easy clean-up.
- Drain the pineapple chunks well. You can even pat them with a paper towel before assembling. This will help prevent the glaze from becoming too watery.
- Soak toothpicks. I recommend soaking your toothpicks in water before baking. This helps to prevent them from burning in the oven.
- Check on them while baking. To help prevent overcooking, make sure to check the bites after 15 minutes of cooking. This will help prevent them from burning.
Nutrition
Nutrition information is automatically calculated and should only be used as an approximation.
Calories: 7kcal | Carbohydrates: 2g | Protein: 0.2g | Fat: 0.02g | Saturated Fat: 0.003g | Polyunsaturated Fat: 0.001g | Monounsaturated Fat: 0.005g | Cholesterol: 0.02mg | Sodium: 113mg | Potassium: 7mg | Fiber: 0.02g | Sugar: 1g | Vitamin A: 0.1IU | Vitamin C: 0.1mg | Calcium: 1mg | Iron: 0.04mg
Additional Info
Cuisine: American
Enjoyed this recipe? Leave a comment below!
We’d love to hear your feedback on these delightful Pineapple Kielbasa Bites.