
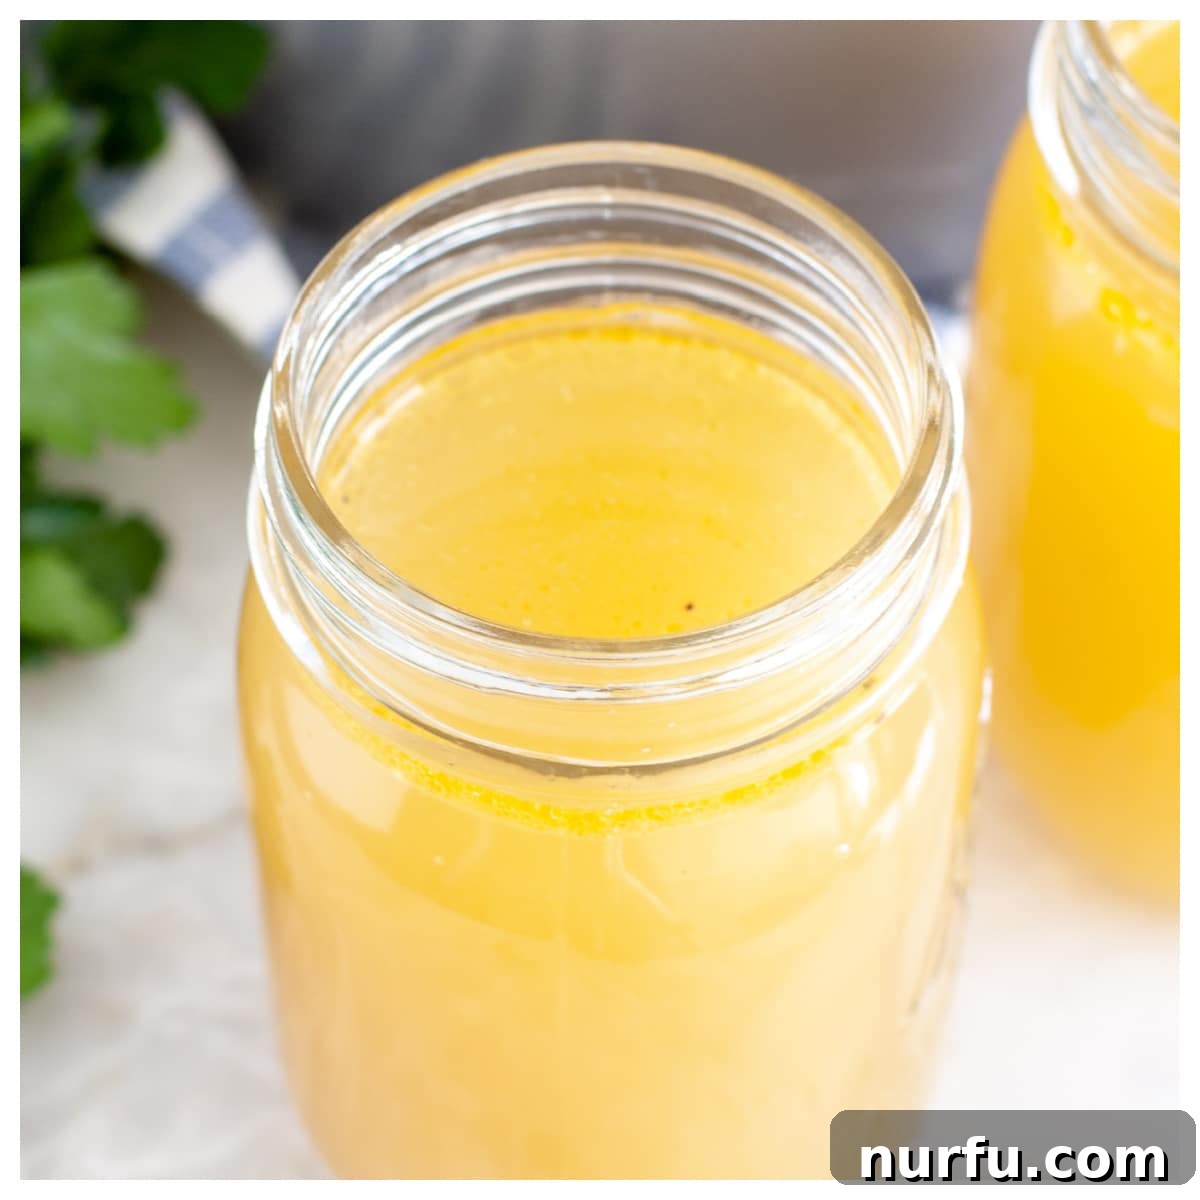
Making homemade chicken stock from a leftover rotisserie chicken carcass is one of the simplest yet most rewarding kitchen hacks. This easy recipe transforms what might otherwise be discarded into a rich, flavorful liquid gold that forms the foundation for countless delicious meals. Beyond its incredible taste, crafting your own stock is a fantastic way to minimize food waste and save money, ensuring you get the absolute most from your store-bought rotisserie chicken.
A pre-cooked rotisserie chicken, whether from your local grocery store or a warehouse like Costco, is a true lifesaver for busy weeknights. It’s already cooked, surprisingly inexpensive, and incredibly versatile. Once you’ve enjoyed the delicious meat in dishes like savory chicken croquettes, refreshing chicken salad, or hearty sandwiches, don’t throw away the bones! The carcass is the star ingredient for making a deeply flavored, nutritious homemade chicken stock that far surpasses anything you can buy in a carton.
Table of Contents
- Why You’ll Love This Homemade Rotisserie Chicken Stock
- Gathering Your Essential Ingredients
- How to Make Rotisserie Chicken Stock: A Simple Guide
- Choose Your Cooking Method: Stovetop, Instant Pot, or Slow Cooker
- Storage and Freezing for Future Culinary Creations
- Expert Tips for the Best Chicken Stock
- Understanding the Difference: Stock, Broth, and Bone Broth
- More Delicious Chicken Recipes to Explore
- Rotisserie Chicken Stock Recipe Card
Why You’ll Love This Homemade Rotisserie Chicken Stock
There are countless reasons why making your own chicken stock from a rotisserie chicken carcass is a game-changer in the kitchen. It’s not just about cooking; it’s about smart, flavorful, and economical living.
- Unbelievably Easy to Make: Forget complicated culinary processes. This rotisserie chicken stock recipe is designed for simplicity. It’s essentially a “dump and simmer” method. You gather a few basic ingredients, toss them into a single pot or appliance, and let time and heat work their magic. Whether you prefer the traditional stovetop method or the convenience of a pressure cooker or slow cooker, the process is straightforward, requiring minimal hands-on effort. It’s perfect for beginners and seasoned cooks alike.
- Remarkably Cost-Effective: One of the biggest advantages of making homemade stock is its cost-efficiency. Store-bought chicken stock and broth can be surprisingly expensive, especially if you use it frequently. By utilizing the leftover bones and scraps from a rotisserie chicken that might otherwise be discarded, you transform potential waste into a valuable ingredient. This practice maximizes the value of your initial chicken purchase, drastically reducing your grocery bill over time and embracing a truly zero-waste approach to cooking.
- Superior, Rich Flavor: There’s simply no comparison between homemade chicken stock and its store-bought counterparts. The long, gentle simmering of real chicken bones, along with fresh aromatic vegetables and herbs, extracts a depth of flavor and a rich, gelatinous texture that commercial products can rarely replicate. This homemade goodness provides a robust and smooth base that will elevate any dish, from comforting soups and hearty stews to flavorful risottos and sauces, adding an authentic gourmet touch without extra effort.
- Healthier and Customizable: When you make your own stock, you control exactly what goes into it. This means no artificial flavors, excessive sodium, or preservatives often found in commercial brands. You can adjust the seasoning to your preference, add extra vegetables for more nutrients, or incorporate specific herbs to tailor the flavor profile to your culinary needs. It’s a clean, wholesome foundation for healthier cooking.
Gathering Your Essential Ingredients for the Best Homemade Stock
Crafting exceptional rotisserie chicken stock requires only a handful of readily available ingredients, most of which you likely already have on hand. The beauty lies in their collective ability to create a deep, savory liquid.
- Rotisserie Chicken Carcass: This is the hero of our recipe! Once you’ve carved all the meat off your purchased rotisserie chicken, save the entire skeletal structure. Don’t discard any leftover drippings, fat, or gelatin that has collected at the bottom of the chicken container; these add immense flavor and body to your stock. The roasted nature of the rotisserie chicken bones already imparts a depth that raw bones might not, making your stock incredibly rich from the start. If you don’t plan to make stock immediately, the carcass can be frozen for up to 3 months, ready for when you are.
- Celery: A foundational aromatic, celery contributes a subtle, earthy freshness. Wash your celery stalks thoroughly and then roughly chop them into 3 or 4 large pieces. There’s no need for fine dicing, as the goal is flavor extraction, not texture. Even the leaves can be included for extra essence.
- Onions: One medium onion is all you need. Peel the outer layers, cut it into large chunks or quarters. For an even deeper golden hue and added flavor, you can leave the skin on – just ensure it’s clean. The onion provides a sweet and savory base that is indispensable to any good stock.
- Carrots: Sweet and vibrant, carrots add a touch of sweetness and beautiful color to the stock. Use 2-3 medium carrots. A quick wash is sufficient; there’s no need to peel them as the skin contributes flavor and nutrients during the long simmer. Rough cut them into 2-3 inch pieces.
- Parsley: A small bunch of fresh parsley (stems and all) offers a clean, herbaceous note that brightens the overall flavor of your stock. While dried parsley can be used, fresh parsley provides a much more vibrant and aromatic contribution.
- Bay Leaves: These classic aromatics impart a subtle, almost floral bitterness that rounds out the savory profile of the stock. Two or three dried or fresh bay leaves are usually sufficient. Remember to remove them before serving or storing, as they can become quite bitter if left in too long.
- Salt and Pepper: Essential for seasoning. Start with about 1 tablespoon of coarse salt and ½ tablespoon of ground black pepper, then adjust to taste after the stock has cooked. For a clearer stock without specks of pepper, opt for whole peppercorns instead of ground pepper. The seasoning brings all the flavors together.
- Water: You’ll need enough water to completely cover the chicken carcass and vegetables, typically around 10-12 cups. For the cleanest, purest tasting stock, I highly recommend using filtered water if possible. This ensures that no undesirable tap water flavors interfere with the delicate notes of your homemade stock.
- Optional Flavor Boosters: Don’t hesitate to experiment!
- Garlic Cloves: 3-4 smashed garlic cloves add a pungent, savory depth.
- Thyme or Rosemary: A few sprigs of fresh thyme or rosemary can introduce wonderful aromatic complexities.
- Leeks: The white and light green parts of leeks (cleaned very well to remove any grit) offer a mild, sweet onion-like flavor.
- Turnips or Parsnips: These root vegetables can add an additional layer of earthy sweetness.
- Apple Cider Vinegar: A tablespoon or two can help extract more minerals and collagen from the bones, though it’s more crucial for bone broth.
How to Make Rotisserie Chicken Stock: A Simple Guide
Making delicious, nutritious chicken stock is an incredibly straightforward process. Follow these simple steps to transform your leftover rotisserie chicken into a culinary asset.
- Prepare Your Carcass: Begin by placing your fully stripped rotisserie chicken carcass into your chosen cooking vessel—a large stock pot, a slow cooker, or an Instant Pot. Ensure you scrape in any and all leftover drippings, fat, and gelatin that may have collected in the original chicken container. These succulent bits are packed with flavor and contribute significantly to the richness and mouthfeel of your finished stock.
- Add the Aromatics and Seasonings: Next, generously layer your roughly chopped aromatic vegetables: celery, onions, and carrots around and on top of the chicken carcass. Distribute the bay leaves and fresh parsley evenly. Finally, season with salt and pepper. Remember, you can always add more seasoning later, so start with the recommended amounts.
- Cover with Water: Pour filtered water over all the ingredients until the carcass and vegetables are completely submerged. The goal is to cover everything without overflowing your pot. Typically, this will require around 10-12 cups of water, depending on the size of your chicken and pot. Using filtered water helps ensure a clean, pure flavor profile for your stock.
- Cook to Perfection: Now comes the waiting game, which varies depending on your chosen cooking method. Refer to the “Choose Your Cooking Method” section below for detailed instructions on using your stovetop, Instant Pot, or slow cooker. The key is a gentle, sustained cook time to extract maximum flavor and nutrients.
- Strain for Clarity: Once your stock has finished cooking, carefully remove the large bones and chicken carcass from the pot. Then, using a fine-mesh strainer or colander lined with cheesecloth, strain the entire contents of the pot into a large clean bowl or another pot. This step is crucial for achieving a clear, smooth stock, free from vegetable bits and small bone fragments. Press down on the solids to extract any remaining liquid, but avoid squeezing too hard, as this can make your stock cloudy.
- Cool and Store: Allow the strained homemade chicken stock to cool completely before storing. Once cooled, it can be used immediately in your recipes or transferred to airtight containers for refrigeration or freezing. Proper cooling prevents bacterial growth and ensures the longevity of your delicious creation.
Choose Your Cooking Method: Stovetop, Instant Pot, or Slow Cooker
Depending on your schedule and preferred kitchen appliances, you have three excellent options for cooking your rotisserie chicken stock. Each method yields fantastic results, but offers different levels of speed and convenience.
- Traditional Stovetop Method:
This classic approach is perfect for those who enjoy the ritual of simmering and have a couple of hours to dedicate to the process. After adding all ingredients to a large stock pot, heat it over medium heat until the water comes to a rolling boil. Once boiling, immediately reduce the heat to a low simmer. The goal is a gentle bubble, not a vigorous boil, which can make your stock cloudy. Cover the pot with a lid, leaving it slightly ajar to allow some steam to escape. Let it cook for a minimum of 2 hours, or up to 4 hours for a more concentrated flavor. The longer and slower the simmer, the more flavor and gelatin will be extracted from the bones, resulting in a richer, more robust stock.
- Speedy Instant Pot (Pressure Cooker) Method:
For those short on time but unwilling to compromise on flavor, the Instant Pot is a true marvel. Place all your ingredients into the Instant Pot insert. Important: Ensure you do not fill the pot past its maximum fill line, as pressure cookers require head space. Secure the lid, set the Instant Pot to the “Soup” or “Manual” (High Pressure) setting, and set the timer for 30 minutes. Once the 30 minutes of high-pressure cooking is complete and the buzzer sounds, allow the Instant Pot to perform a natural pressure release. This means letting the pressure dissipate on its own, which can take 15-20 minutes. A natural release helps to keep the stock clear and prevents it from forcefully spewing out of the valve. Once the float valve drops, you can safely remove the lid.
- Convenient Slow Cooker Method:
The slow cooker offers unparalleled convenience, allowing you to set it and virtually forget it. This method is ideal for hands-off cooking, letting the flavors meld beautifully over an extended period. Simply place the chicken carcass, vegetables, herbs, salt, and pepper into your slow cooker, then cover with water. Cook on the LOW setting for 4-6 hours. If you’re in a bit more of a rush, you can switch to the HIGH setting and cook for 2-3 hours. The slow, gentle heat of the slow cooker excels at extracting every last drop of flavor from the ingredients, producing a deeply aromatic and savory stock with minimal effort.
Storage and Freezing for Future Culinary Creations
Properly storing your homemade rotisserie chicken stock is essential to preserve its freshness and ensure you always have a flavorful base on hand for your cooking needs.
- Refrigeration: Once your stock has finished cooking, it’s crucial to let it cool down completely before storing it. You can speed up this process by placing the pot in an ice bath in your sink or by transferring it to smaller containers. Once cool, pour the stock into clean, airtight containers, such as glass jars with lids. It will keep beautifully in the refrigerator for 4-5 days. You might notice a layer of fat solidify on top; this acts as a natural seal, further preserving the stock. You can skim this fat off before using, or leave it for added richness.
- Freezing: For longer-term storage, freezing is your best friend. This stock freezes exceptionally well and can be stored for 2-3 months.
- Jars or Freezer-Safe Containers: Fill freezer-safe jars or plastic containers, leaving about an inch of headspace at the top to account for expansion during freezing.
- Freezer Bags: For space-saving storage, pour cooled stock into freezer-safe bags, seal them, and lay them flat on a baking sheet in your freezer until solid. Once frozen, you can stack them vertically, saving valuable freezer space.
- Ice Cube Trays: For smaller portions perfect for sautéing vegetables, deglazing a pan, or adding a quick flavor boost, pour the stock into ice cube trays and freeze until solid. Once frozen, pop the cubes out and transfer them to a larger freezer bag. Each cube typically measures about 1-2 tablespoons, making portioning effortless.
Expert Tips for the Best Chicken Stock
Elevate your homemade rotisserie chicken stock from good to absolutely outstanding with these simple yet effective tips.
- Don’t Rush the Cool Down: After cooking, it’s vital to cool your stock rapidly but safely before refrigerating or freezing. Divide it into smaller containers or place the pot in an ice bath to bring the temperature down quickly, preventing bacterial growth. Never put hot stock directly into the refrigerator, as it can raise the internal temperature of your fridge and spoil other foods.
- Skim the Fat (Optional): Once chilled, a layer of solidified fat will form on top of your stock. You can easily skim this off if you prefer a leaner stock. While some fat adds flavor and mouthfeel, removing excess fat can make the stock lighter and more versatile for various recipes. Save the fat for roasting vegetables or making roux!
- Roast the Carcass (If Not Rotisserie): If you’re not starting with a rotisserie chicken but a raw carcass, consider roasting it first at 400°F (200°C) for 30-45 minutes until golden brown. This step significantly deepens the flavor and color of your homemade stock, giving it a richer, more complex profile.
- Use Kitchen Scraps: Keep a freezer bag designated for vegetable scraps like onion peels, carrot tops and ends, and celery trimmings. When it’s stock-making time, you’ll have a ready supply of free, flavorful additions. Just ensure they are clean and free of mold.
- Season Thoughtfully: While the recipe provides a starting point for salt and pepper, remember that the stock will reduce as it cooks. It’s often best to under-salt initially and adjust the seasoning to taste at the end, especially if you plan to reduce it further for sauces or gravies.
- Reduce for Intensity: For an even more concentrated and intensely flavorful stock, known as a glace or demiglace, after straining, return the liquid to a clean pot and simmer it gently until it reduces by half or more. This creates a powerful flavor enhancer for sauces and gourmet dishes.
- Freezing Carcass for Later: Don’t have time to make stock immediately after dinner? No problem! Simply place the cleaned rotisserie chicken carcass in a freezer-safe bag and freeze it for up to 3 months. This ensures you can make fresh stock whenever it’s convenient for you.
Understanding the Difference: Stock, Broth, and Bone Broth
The terms “stock,” “broth,” and “bone broth” are often used interchangeably, but there are subtle yet significant distinctions in their preparation, ingredients, and culinary applications.
- Chicken Stock: Typically made from leftover bones (often roasted for deeper flavor), a mirepoix (carrots, celery, onion), and aromatics like bay leaves and parsley, simmered in water for a moderate amount of time (2-6 hours). Most of the meat has usually been removed from the bones. The longer simmering time allows collagen and gelatin from the bones and connective tissues to dissolve into the liquid, giving stock a thicker, more gelatinous texture when chilled. This makes it an excellent base for sauces, gravies, and anything where body and richness are desired.
- Chicken Broth: Generally made with more meat (sometimes with bones, but less emphasis on them) along with vegetables and herbs, simmered for a shorter period (1-2 hours). Broth tends to be lighter in flavor and thinner in consistency than stock, as less collagen is extracted. It’s often seasoned more aggressively during cooking and is commonly consumed on its own as a comforting drink or used as a light cooking liquid for grains and vegetables.
- Bone Broth: This is where the cooking time significantly extends. Bone broth is essentially a stock that has been simmered for a very long duration—anywhere from 12 to 24 hours, or even longer. The primary goal of bone broth is to extract as much collagen, gelatin, minerals, and amino acids as possible from the bones, connective tissues, and marrow. Often, a splash of apple cider vinegar is added to help draw out these beneficial compounds. The resulting liquid is incredibly rich, often very gelatinous, and highly prized for its purported health benefits, making it popular for sipping or as a deeply nourishing base for healing dishes.
In essence, while all three are flavorful liquids, chicken stock sits comfortably in the middle, offering a balanced richness and versatility for everyday cooking, born from the bones and scraps of your delicious rotisserie chicken.
More Delicious Chicken Recipes to Explore
Now that you’ve mastered homemade chicken stock, put your culinary skills to good use with these other fantastic chicken recipes:
- The Best Crockpot Chicken Cheesy Spaghetti
- Flavorful Instant Pot Pulled Chicken
- Spicy Buffalo Chicken Pasta
- Comforting Easy Chicken Lasagna
- Vibrant Jerk Chicken Meal Prep Bowls
Rotisserie Chicken Stock Recipe Card
A simple and delicious recipe for making rich, homemade chicken stock from your leftover rotisserie chicken carcass. Perfect for soups, stews, and sauces.

By: Heather Seeley
Summary: Learn how to make incredibly flavorful rotisserie chicken stock using your stovetop, Instant Pot, or slow cooker. A fantastic way to utilize every part of your chicken!
Prep Time: 10 minutes
Cook Time: 2 hours
Total Time: 2 hours 10 minutes
Yields: Approximately 4 servings (or 10-12 cups of stock)
Ingredients
- 1 rotisserie chicken carcass (with any drippings/gelatin)
- 2-3 carrots, roughly chopped (no need to peel)
- 4 celery stalks, roughly chopped
- 1 large onion, quartered (skin on is fine)
- 2 bay leaves
- 1/2 cup fresh parsley, roughly chopped (stems included)
- 1 tablespoon salt (or to taste)
- 1/2 tablespoon ground black pepper (or whole peppercorns for clearer stock)
- 10-12 cups filtered water (enough to cover ingredients)
Instructions
- Place the rotisserie chicken carcass (including any drippings or gelatin from its container) into a large stock pot, slow cooker, or Instant Pot.
- Add the roughly chopped carrots, celery, onion, bay leaves, fresh parsley, salt, and pepper to the pot.
- Pour filtered water over all the ingredients until the chicken carcass and vegetables are completely submerged.
- Cook using one of the methods described below until the stock is rich and flavorful.
- Once cooking is complete, carefully remove the large chicken bones and carcass from the pot.
- Strain the stock through a fine-mesh strainer (or a colander lined with cheesecloth) into a clean bowl or container to remove all solid ingredients. Discard the solids.
- Allow the stock to cool completely before using immediately or storing in the refrigerator or freezer.
Stovetop Method
- Bring the pot to a boil over medium-high heat.
- Once boiling, reduce the heat to a low simmer. Cover the pot with a lid (slightly ajar) and let it simmer for at least 2 hours, or up to 4 hours for a deeper flavor.
Instant Pot (Pressure Cooker) Method
- Important: Do not fill the Instant Pot past its maximum fill line.
- Secure the lid and set the Instant Pot to “Soup” or “Manual” (High Pressure) for 30 minutes.
- Once the cooking cycle is complete, allow for a natural pressure release (this can take 15-20 minutes) before safely opening the lid.
Slow Cooker Method
- Place all ingredients in the slow cooker.
- Cook on the LOW setting for 4-6 hours, or on the HIGH setting for 2-3 hours.
Video Tutorial
Nutrition Information (Approximate per Serving)
Calories: 29kcal |
Carbohydrates: 7g |
Protein: 1g |
Fat: 1g |
Saturated Fat: 1g |
Sodium: 1803mg |
Potassium: 200mg |
Fiber: 2g |
Sugar: 3g |
Vitamin A: 5753IU |
Vitamin C: 14mg |
Calcium: 51mg |
Iron: 1mg
Nutrition information is automatically calculated and should be used as an approximation. It can vary based on specific ingredients and preparation methods.
Additional Information
Course: Main Course (or Base for other dishes)
Cuisine: American