
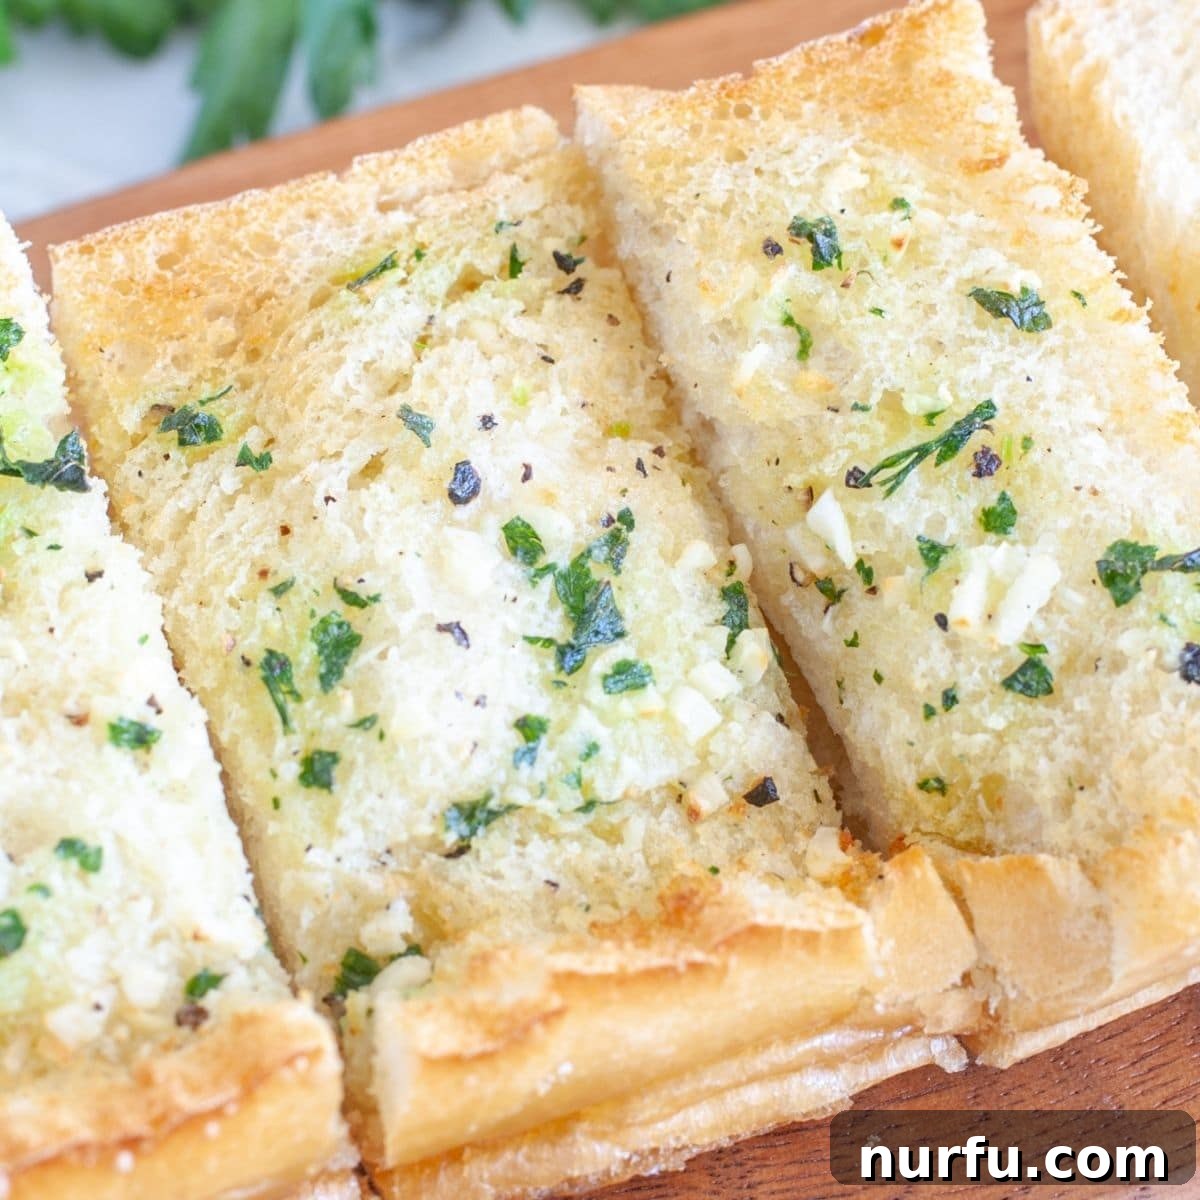
My air fryer garlic bread can be made in minutes and is a great side dish to many meals. Make it homemade and fresh with a few simple ingredients or cook premade frozen bread.
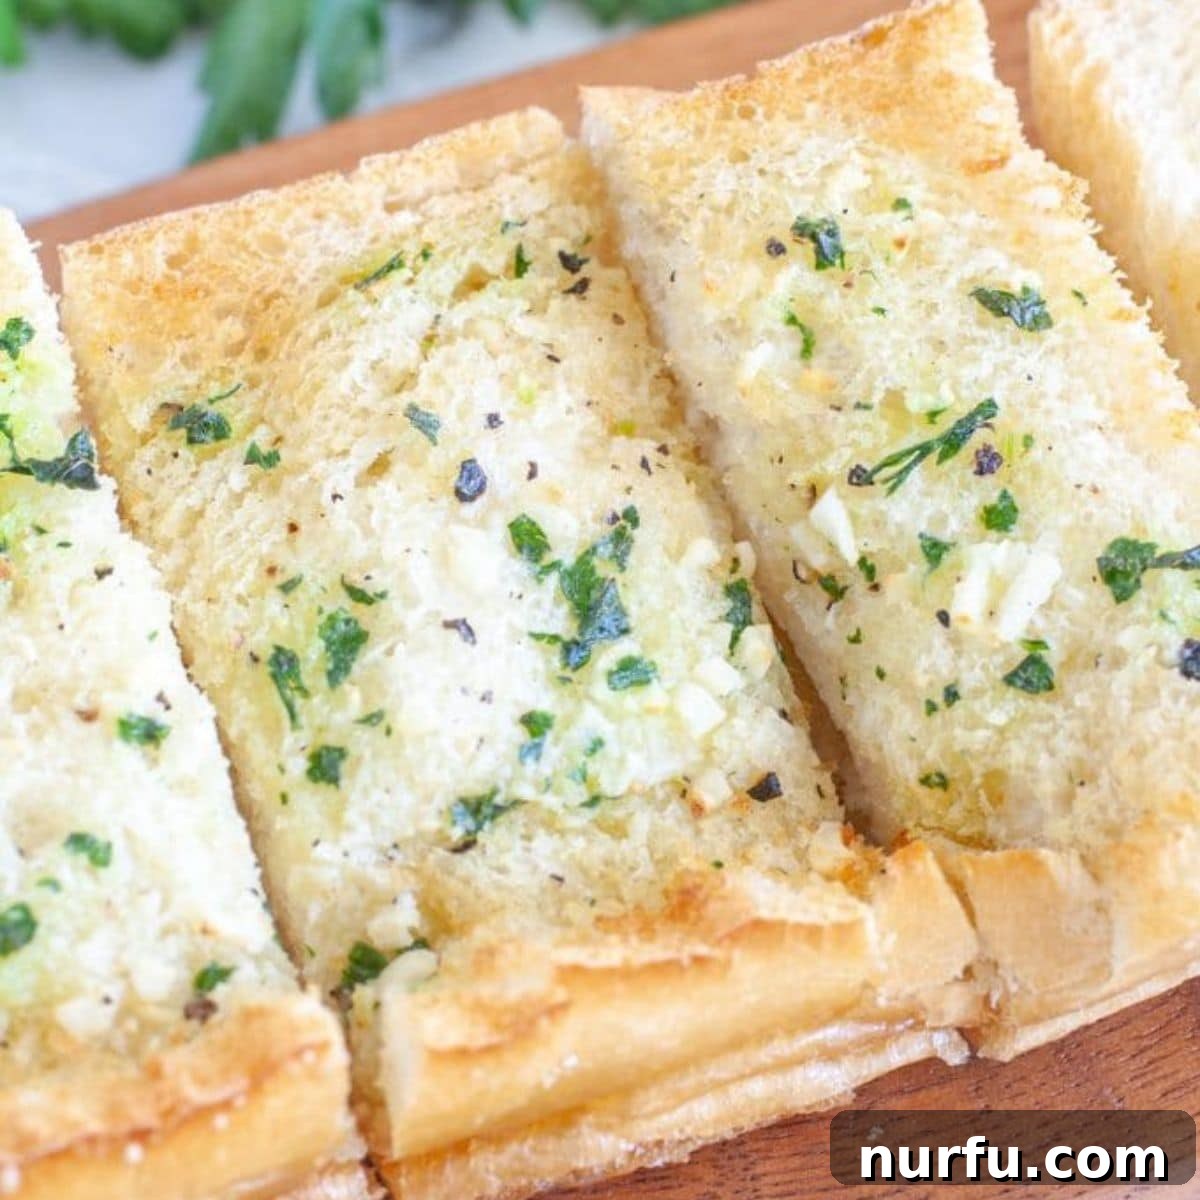
Effortlessly Delicious: The Ultimate Air Fryer Garlic Bread Recipe (Homemade & Frozen)
Garlic bread is a universally loved culinary delight, a side dish that possesses the remarkable ability to enhance almost any meal. Whether gracing the table alongside a hearty pasta dinner, a comforting bowl of soup, or serving as a delightful accompaniment to grilled meats, its aromatic fragrance and irresistible crispy-chewy texture are always a welcome addition. Imagine achieving that perfect golden-brown crust and soft, intensely flavorful interior, not just effortlessly, but in mere minutes. This is precisely what the air fryer delivers, transforming the way you experience garlic bread, whether you’re whipping up a batch from scratch or quickly preparing a frozen loaf.
The inspiration for this recipe arose from a familiar kitchen conundrum: a bustling oven, already fully occupied with multiple pasta dishes, left no room for the essential garlic bread. The need for a swift and effective solution led straight to the air fryer – a decision that proved to be nothing short of a culinary revelation. Not only did the air fryer cook the bread to absolute perfection, achieving an ideal balance of exterior crispness and interior tenderness, but it did so with unparalleled speed and ease. This method isn’t just a convenient alternative; it’s a superior approach that promises consistently delicious results, eradicating the common issues of soggy centers or burnt edges often encountered with traditional baking. Prepare to say goodbye to mediocre garlic bread and embrace a new era of air-fried perfection.
The air fryer has rapidly ascended to the status of a kitchen essential, celebrated for its remarkable capacity to produce quick, delicious, and uniformly cooked food. It particularly excels in delivering tantalizingly crispy textures with significantly less oil, making it an ideal choice for a diverse range of dishes. From popular recipes like air fryer Texas toast and air fryer grilled cheese, the air fryer consistently proves its efficiency and versatility. Building on this success, we’re thrilled to present a recipe for traditional garlic bread that harnesses the same air fryer advantages, offering both convenience and exceptional flavor.
Table of Contents
- Why Choose Air Fryer Garlic Bread?
- Essential Ingredients for Homemade Garlic Bread
- Mastering Homemade Air Fryer Garlic Bread
- Pro Tips for Perfect Air Fryer Garlic Bread
- Delicious Variations to Try
- What to Serve with Air Fryer Garlic Bread
- How to Cook Frozen Garlic Bread in the Air Fryer
- Storage and Reheating Guide
- More Easy Air Fryer Recipes to Explore
- Air Fryer Garlic Bread Recipe Card
Why Choose Air Fryer Garlic Bread?
The air fryer has quickly become the preferred method for many home cooks when it comes to preparing garlic bread, and for excellent reasons. The primary advantage is undoubtedly its incredible speed. Unlike conventional ovens that demand extensive preheating and can take 10 to 15 minutes or even longer to properly toast garlic bread, an air fryer typically preheats in just a couple of minutes. The actual cooking process then takes a mere 4 to 6 minutes, making it an ideal solution for impromptu dinners, busy weeknights, or when you need a last-minute side dish without any fuss.
Beyond its remarkable speed, the air fryer truly shines in its ability to create that highly sought-after crispy crust while ensuring the interior remains wonderfully soft and moist. The appliance’s core mechanism involves rapidly circulating hot air, which cooks the bread uniformly and efficiently. This results in every slice being perfectly toasted on the outside, developing a delightful crunch that contrasts beautifully with the tender, flavorful inside. This precise and consistent cooking capability often surpasses what a conventional oven can achieve, effectively preventing common mishaps such as uneven browning, burnt edges, or an undesirable soggy middle. Furthermore, opting for the air fryer means you won’t needlessly heat your entire kitchen, a significant benefit, particularly during warmer months when keeping your home cool is a priority.
Essential Ingredients for Homemade Garlic Bread
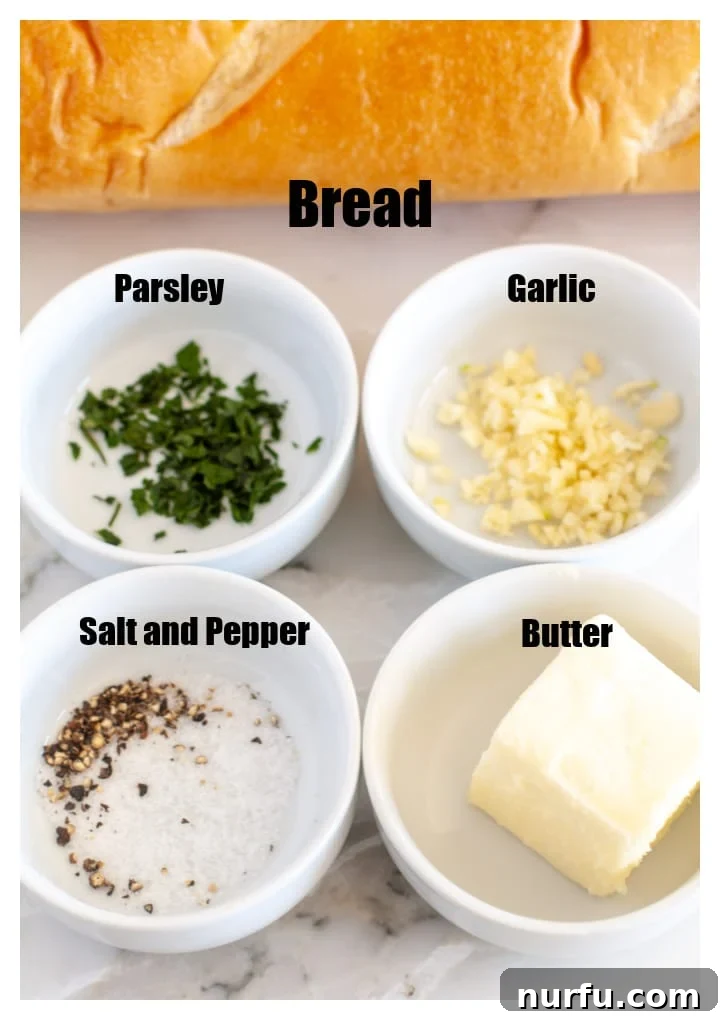
The journey to crafting truly phenomenal garlic bread begins with selecting high-quality, fresh ingredients. Each component plays a vital role in building the rich flavor and satisfying texture. Here’s a detailed look at what you’ll need and some expert considerations for each element:
- Bread: The foundation of your garlic bread, selecting the right loaf is crucial. For superior results, opt for a sturdy, rustic bread such as a French baguette or an Italian loaf. A fresh baguette, with its characteristic crisp crust and soft crumb, provides an excellent base for that satisfying crunch. An Italian loaf, typically wider and softer, offers a chewier texture. Don’t hesitate to explore other varieties like sourdough, which lends a delightful tangy note; ciabatta, with its airy structure and irregular holes perfect for trapping garlic butter; or even thick-cut Texas toast slices for a more substantial and indulgent bite. The overarching goal is a bread that can robustly hold the butter mixture without becoming overly dense or crumbling during preparation and cooking.
- Butter: This is where the magic truly begins, infusing the bread with richness and flavor. It is absolutely essential to use softened butter. Cold butter will be difficult to combine smoothly with other ingredients and can cause the bread to tear when spread. To quickly soften butter, you can microwave it in very short 10-second bursts until it’s pliable but not melted, or simply leave it at room temperature for approximately 30 minutes. You have the choice between salted or unsalted butter. Many culinary enthusiasts, myself included, prefer unsalted butter as it grants precise control over the overall sodium content of the dish. If you choose salted butter, be mindful to reduce or omit any additional salt specified in the recipe.
- Garlic: The undisputed star of garlic bread! Freshly minced garlic is highly recommended as it imparts the most vibrant, pungent, and authentic flavor. Typically, about 3 medium-sized cloves provide a robust and satisfying garlic punch without overwhelming the other flavors. However, personal preference varies wildly, so feel free to adjust this amount—garlic aficionados might opt for an extra clove or two for an intensified experience. If fresh garlic is not readily available, jarred chopped garlic can be a convenient substitute; approximately 2-3 teaspoons usually equate to 3 fresh cloves. In a pinch, garlic powder can be used, though for the finest taste, fresh garlic truly makes all the difference.
- Herbs: While often considered optional, the inclusion of fresh or dried herbs can beautifully elevate the flavor profile of your garlic bread. Fresh parsley, finely chopped, contributes a bright, verdant color and a distinctly fresh, herbaceous note that harmonizes perfectly with the rich garlic and butter. If substituting with dried parsley, remember that its flavor is more concentrated, so use roughly half the quantity. Chives offer another delightful alternative, providing a milder, delicate oniony essence. For those seeking a deeper, more complex Italian-inspired flavor, consider incorporating a subtle pinch of dried oregano, basil, or a pre-mixed Italian seasoning blend into your butter mixture.
- Salt and Black Pepper: These fundamental seasonings are critical for balancing and enhancing all the flavors. A touch of salt brings out the best in the garlic and butter, while freshly ground black pepper introduces a subtle warmth and a nuanced depth. Always adjust these seasonings to suit your individual taste preferences, ensuring a perfectly seasoned final product.
Mastering Homemade Air Fryer Garlic Bread
Crafting exquisite homemade garlic bread in your air fryer is surprisingly straightforward, yielding results so consistently superior that you might find yourself permanently eschewing store-bought alternatives. Follow these detailed steps to achieve a perfectly golden, fragrant, and utterly delicious side dish:
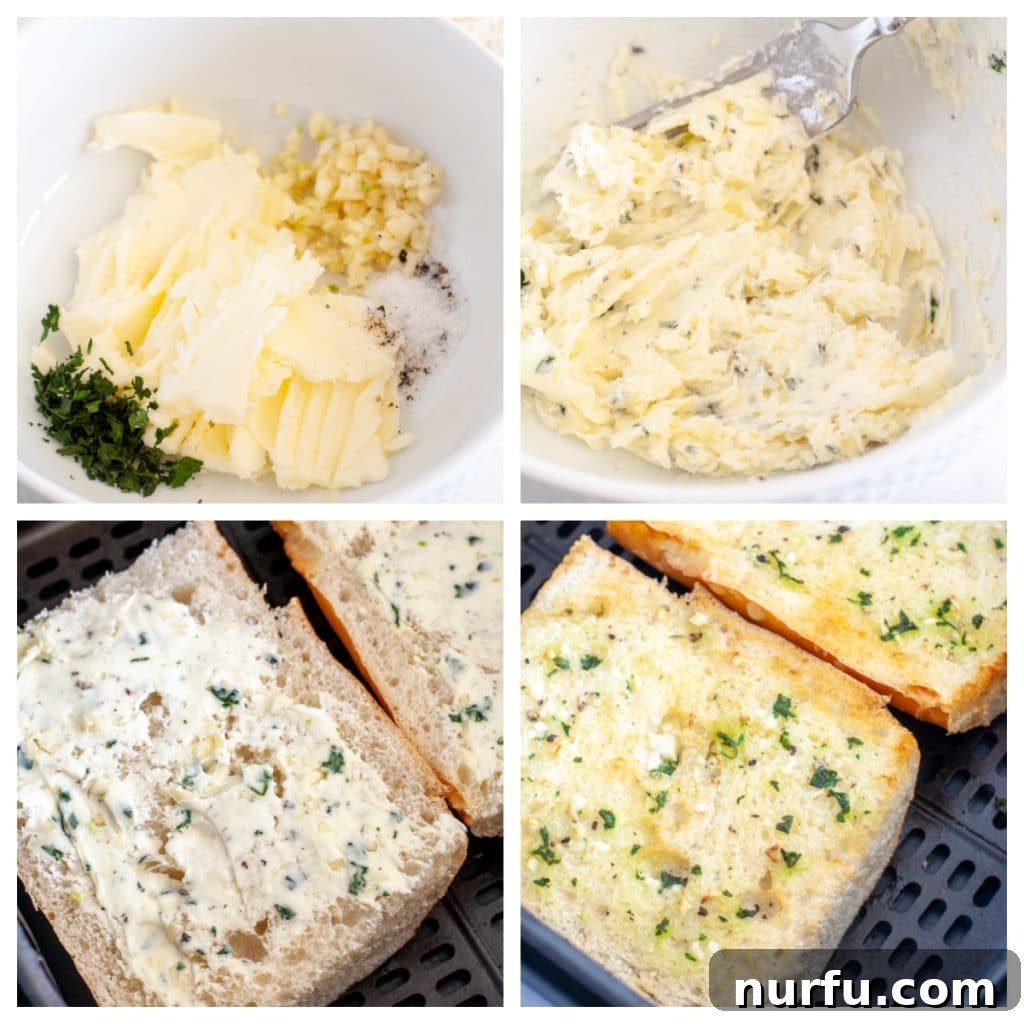
- Prepare the Bread: Begin by taking your chosen loaf of bread and cutting it into manageable sections. For most standard loaves, dividing it into thirds or fourths is ideal, depending on its original length. Next, carefully slice each of these sections in half lengthwise. This methodical approach creates two flat, even surfaces on each piece, which are perfect for generously spreading the garlic butter mixture and ensuring uniform cooking. For crusty loaves, a serrated knife is your best friend, allowing for clean cuts without squashing the bread. Aim for slices roughly 1 to 1.5 inches thick to provide a good base for the butter.
- Create the Garlic Butter Mixture: In a medium-sized mixing bowl, combine your softened butter with the finely minced fresh garlic, the vibrant chopped parsley (or your preferred fresh/dried herb), a dash of salt, and a sprinkle of freshly ground black pepper. The key here is the butter’s consistency; it should be soft enough to integrate smoothly with the other ingredients, creating a creamy texture without any hard clumps.
- Mix Thoroughly: Utilize the back of a fork or a small spatula to thoroughly blend all the ingredients until they are completely combined and form a uniform, aromatic paste. It’s crucial to ensure that the garlic and herbs are evenly distributed throughout the butter, guaranteeing a consistent burst of flavor in every single bite of bread.
- Spread Generously: With your perfectly blended garlic butter ready, take each piece of sliced bread and generously spread the mixture onto one side. Do not be timid with the application – a good, ample layer of this flavorful butter is fundamental not only for maximizing taste but also for achieving that coveted crispy texture during air frying. Make sure to spread the butter all the way to the edges for full flavor saturation.
- Air Fry to Perfection: Preheat your air fryer to 350°F (175°C) for a quick 2-3 minutes. Once preheated, carefully arrange the buttered bread slices in a single layer within the air fryer basket, ensuring the buttered side faces upwards. It is absolutely vital to avoid overcrowding the basket; adequate space between each piece allows the hot air to circulate freely and effectively, which is essential for even crisping. Depending on the size and capacity of your air fryer, you may need to cook the bread in multiple batches. Air fry for an initial period of 4-5 minutes. Begin checking for doneness at the 4-minute mark, looking for a beautiful golden-brown color and your desired level of crispiness. If you prefer it even more crusty, you can add another 1-2 minutes, continuing to monitor closely to prevent burning.
Once cooked to your liking, carefully remove the hot garlic bread from the air fryer. Serve it immediately to fully savor the warm, fragrant, and perfectly crispy delight that you’ve created.
Pro Tips for Perfect Air Fryer Garlic Bread
While making air fryer garlic bread is relatively simple, incorporating a few expert tips can elevate your results from good to absolutely phenomenal. These small but significant adjustments will help you achieve consistently perfect texture and flavor every single time:
- Ensure Your Butter is Perfectly Softened: This tip is paramount. Butter that is too cold will resist blending smoothly with the garlic and herbs, resulting in a lumpy mixture that’s difficult to spread evenly. Furthermore, cold, hard butter can tear delicate bread slices during application. If you’ve forgotten to take your butter out in advance, a quick zap in the microwave for 10-15 seconds (be extremely careful not to melt it fully) can quickly bring it to the ideal pliable consistency. Softened butter ensures a smooth, uniform spread that adheres beautifully to the bread, leading to even flavoring and crisping.
- Utilize a Serrated Knife for Clean Cuts: When preparing your bread, especially if you’re working with a loaf that has a crusty exterior, a serrated knife is an invaluable tool. Its saw-like edge glides through the bread without crushing it, ensuring clean, even slices. This not only makes for a more aesthetically pleasing presentation but also creates consistent surface areas, which are crucial for the garlic butter application and uniform air frying. Aim for slices that are approximately 1 to 1.5 inches thick – substantial enough to hold up to the butter and heat, but not so thick that they become overly dense.
- Prevent Overlapping in the Air Fryer Basket: The air fryer’s efficacy relies heavily on the unobstructed circulation of hot air around the food. If you overcrowd the basket or allow bread slices to overlap, the hot air cannot reach all surfaces evenly. This inevitably leads to inconsistent cooking, resulting in some parts being perfectly crispy while others remain soft or even soggy. Always arrange the bread in a single layer, ensuring there’s a small gap between each piece. If you have a larger quantity of bread to cook, it is always preferable to work in two or more smaller batches to guarantee every piece achieves optimal crispiness. Most standard air fryers can comfortably accommodate 2-4 average-sized slices at a time.
- Monitor Cooking Times Closely: Air fryers can vary significantly in their wattage and overall cooking efficiency. What might take 5 minutes to cook in one model could require 4 or even 6 minutes in another. It’s imperative to stay vigilant and closely monitor your garlic bread, particularly during your first few attempts with a new recipe or appliance. Keep an eye out for tell-tale signs of doneness: a rich golden-brown color and a visibly crispy texture. Some individuals even appreciate a slight charring on the edges for an extra layer of crunch and flavor.
- Serve Warm for the Ultimate Experience: Like most freshly baked goods, garlic bread is undeniably at its peak when served warm. At this temperature, the butter is still slightly melted, the aromatic garlic scent is most potent, and the crust retains its perfect crispness. If you’re preparing multiple batches, you can keep earlier batches warm by loosely tenting them with aluminum foil, or by placing them in a conventional oven preheated to a very low temperature (around 200°F / 95°C).
- Consider a Light Brush of Olive Oil: For an extra boost of flavor and to encourage an even crispier exterior, you can lightly brush the unbuttered side of your bread slices with a touch of good quality olive oil before placing them in the air fryer. While entirely optional, this step can add a subtle depth and enhance the overall texture.
- Taste and Adjust Seasoning: Before spreading your garlic butter mixture onto the bread, take a tiny taste. This allows you to adjust the levels of salt, pepper, or garlic as needed to perfectly suit your personal palate. A quick taste test can make all the difference in achieving perfectly seasoned garlic bread.
Delicious Variations to Try
While the classic air fryer garlic bread is a culinary triumph in itself, it also serves as a wonderfully versatile foundation for endless creative twists. Don’t shy away from experimenting with these delightful variations to discover your next favorite garlic bread sensation:
- The Cheesy Garlic Bread Extravaganza: Elevate your garlic bread to a new realm of indulgence with the addition of cheese. After generously spreading the garlic butter, simply sprinkle your favorite shredded cheese over the bread before air frying. Classic mozzarella offers a wonderfully gooey, stretchy melt; Colby Jack provides a mild, creamy flavor that’s universally appealing. For a sharper, saltier kick, a generous dusting of freshly grated Parmesan cheese works absolute wonders. For optimal results, add the cheese during the last 2-3 minutes of air frying to ensure it melts and bubbles beautifully without burning.
- Explore Different Bread Bases: Expand your horizons beyond traditional French or Italian loaves. Sourdough slices introduce a delightful tanginess that remarkably complements the rich garlic and butter. Thick-cut Texas toast, known for its soft, fluffy interior, provides a more substantial and indulgent base. Ciabatta, with its characteristic open, airy texture and irregular holes, creates fantastic pockets for the garlic butter to seep into, resulting in intensely flavorful bites. Even a simple, rustic whole wheat bread can be transformed into a gourmet delight using this quick air fryer method.
- Amplify with a Symphony of Herbs: Beyond the refreshing notes of parsley and chives, a vast world of herbaceous flavors awaits your exploration. A sprinkle of a dried Italian seasoning blend instantly imparts a Mediterranean flair. Fresh basil, finely chopped, adds a sweet, peppery, and aromatic quality. Minced fresh rosemary offers a deep, earthy, and highly fragrant dimension. Feel free to mix and match your preferred herbs – perhaps a blend of thyme and oregano – to concoct a truly unique and personalized flavor profile.
- Spicy Garlic Bread Kick: For those who crave a bit of heat, infuse your garlic bread with a spicy sensation. Stir a generous pinch of red pepper flakes directly into your garlic butter mixture. A dash of cayenne pepper or a tiny amount of finely minced jalapeño (seeds removed for milder heat) can also introduce a delightful warmth. Always adjust the quantity of spice to match your personal heat tolerance.
- Garlic Bread Pizza Bites: This is a fantastically fun and highly customizable variation, perfect as an appetizer for gatherings or a quick, satisfying snack. Once your garlic bread is cooked to perfection and still warm, spread a thin, even layer of your favorite marinara sauce over each slice. Top with shredded mozzarella cheese and any miniature toppings you desire, such as mini pepperonis, finely diced bell peppers, black olives, or even a sprinkle of cooked sausage. Return the loaded bread to the air fryer for an additional 2-3 minutes at 325°F (160°C), just until the cheese is melted, bubbly, and slightly golden.
- A Hint of Lemon-Herb Brightness: For a wonderfully zesty and refreshing twist, incorporate a tiny amount of finely grated lemon zest into your garlic butter mixture. The bright, citrusy notes will elegantly cut through the richness of the butter and provide a beautiful counterpoint to the robust garlic, making it an especially delightful accompaniment to seafood dishes or lighter, vegetable-based pastas.
What to Serve with Air Fryer Garlic Bread
Garlic bread’s unparalleled versatility ensures it’s a perfect companion to an incredible array of dishes. Its savory, garlicky essence and satisfying crunch have the power to elevate nearly any meal, transforming a simple dinner into a memorable feast. Here are some fantastic pairings to inspire your next culinary creation:
- Classic Pasta Dishes: This is, without a doubt, the quintessential pairing. Garlic bread is expertly designed for soaking up the delectable sauces from an array of pasta dishes. It’s an ideal partner for creamy green pasta, a hearty baked mostaccioli, or a rich baked ravioli lasagna. Beyond these, it also pairs wonderfully with timeless classics like simple spaghetti and meatballs, a luxurious creamy alfredo, or a robust bolognese sauce, ensuring every drop of flavor is savored.
- Comforting Soups and Stews: There’s a special kind of comfort derived from dipping a warm, crusty piece of garlic bread into a steamy bowl of soup or stew. It’s an exquisite addition to a hearty minestrone, a velvety tomato soup, a rich French onion soup, or a substantial beef stew. The bread not only introduces a delightful textural contrast but also absorbs all the savory, flavorful broth, creating a truly satisfying experience.
- Fresh and Crisp Salads: A vibrant, crisp salad can find its perfect savory counterbalance in a side of warm garlic bread. Imagine it alongside a classic Caesar salad, a simple yet elegant garden salad, or a refreshing caprese salad. The bread adds a welcome layer of substance and a savory contrast that beautifully complements the fresh greens and tangy vinaigrette.
- Hearty Meat and Poultry Dishes: Garlic bread makes an excellent accompaniment to a variety of main courses featuring meat and poultry. It pairs exceptionally well with succulent grilled chicken, tender roasted pork loin, or a perfectly seared steak. Its robust flavors meld harmoniously with savory meats, adding another delicious dimension to your plate. Consider serving it with a comforting chicken spaghetti for a complete, satisfying, and deeply flavorful meal.
- Delicate Seafood Creations: Lighter seafood dishes, such as flaky baked salmon, zesty shrimp scampi, or perfectly pan-seared scallops, can be beautifully elevated by the inclusion of garlic bread. The nuanced garlic and butter flavors are a superb complement to the delicate taste of the ocean, enhancing the overall dining experience.
- Unexpected Brunch or Breakfast Addition: While perhaps less conventional, garlic bread can certainly make a delightful appearance at brunch! Think of it served alongside fluffy scrambled eggs, a savory frittata, or even as an interesting base for an open-faced sandwich, offering a unique twist to your morning or midday meal.
How to Cook Frozen Garlic Bread in the Air Fryer
While the joy of homemade garlic bread is undeniable, there are inevitably times when speed and convenience are paramount. In such instances, frozen garlic bread emerges as a fantastic, effortless alternative, and the air fryer stands out as the ultimate tool for cooking it to perfection, often surpassing the results of a traditional oven. Here’s your straightforward guide to achieving crispy, warm, and delicious frozen garlic bread every single time:
- Preheat Your Air Fryer Properly: For the absolute best results, it’s crucial to preheat your air fryer. Set the temperature to 350°F (175°C) and allow it to preheat for a quick 2-3 minutes. This ensures that the air fryer reaches and maintains the optimal cooking temperature from the very start, which is key to achieving that desirable crispy exterior without drying out the inside.
- Arrange Bread in the Basket: Take the frozen garlic bread slices directly from your freezer – there’s absolutely no need for thawing beforehand! Carefully arrange the slices in a single layer within the air fryer basket. As with homemade garlic bread, preventing overcrowding is essential. Adequate space between each piece allows the hot air to circulate freely and evenly, ensuring consistent crisping and thorough heating. If your air fryer has a smaller capacity, plan to cook the bread in multiple batches to maintain optimal airflow.
- Determine the Optimal Cook Time: Air fry the frozen garlic bread at 350°F (175°C) for an initial period of 5-6 minutes. The precise cooking time can fluctuate slightly based on several factors, including the thickness of the bread slices, the specific brand you are using, and the wattage of your particular air fryer model.
- Check for Doneness: After the initial 5 minutes, take a moment to check on the bread. It should exhibit a lovely golden-brown hue and be thoroughly heated through to the center. If you are cooking thinner slices of frozen garlic bread, 5 minutes might be the perfect duration. For thicker slices, or if your personal preference leans towards an extra crispy finish, you may need to add an additional 1-2 minutes to the cooking time. Always monitor closely to avoid overcooking.
- Handling Cheese-Topped Frozen Garlic Bread: If your chosen frozen garlic bread comes pre-topped with cheese (like many Texas toast varieties), you might need to slightly extend the cooking time. An extra 1-2 minutes is typically sufficient to ensure the cheese is perfectly melted and bubbling, without risking the bread itself becoming burnt. Keep a watchful eye on it during these final moments to achieve that ideal gooey cheese layer.
The air fryer truly revolutionizes the way frozen garlic bread is prepared, imparting a superior texture and enhanced flavor that often surpasses results achieved through conventional oven baking. You’ll be treated to that delightful crispiness on the outside and a warm, soft interior, all accomplished in record time.
Storage and Reheating Guide
Ensuring your delicious air fryer garlic bread remains as enjoyable as possible for a longer duration involves proper storage and effective reheating techniques. Whether you’ve prepared an extra-large batch or simply have a few slices left over, these guidelines will help preserve its quality and bring back its fresh-baked appeal.
- Storing Leftovers: After your air fryer garlic bread has cooled completely to room temperature, it’s time for storage. Place any remaining slices in an airtight zip-top bag or a well-sealed container. If kept at room temperature, the bread will retain its freshness and best quality for approximately one day. For slightly extended storage, you can refrigerate it for up to 3 days. Be mindful that refrigeration can sometimes alter the texture slightly, making the bread a little firmer, but it will still be perfectly good.
- Freezing for Future Enjoyment: Air fryer garlic bread is an excellent candidate for freezing, making it a convenient option for future meal planning or having a quick, delicious side ready at a moment’s notice. To freeze homemade garlic bread, first, follow the recipe instructions to cook it, then allow it to cool entirely. Once completely cool, wrap each piece individually in plastic wrap, then wrap again tightly with aluminum foil. This double-layer protection is crucial for preventing freezer burn and maintaining flavor. Properly wrapped, your garlic bread can be stored in the freezer for up to 2 months. When you’re ready to enjoy it, you can either thaw the frozen garlic bread in the refrigerator overnight or, for a quicker option, place it directly into the air fryer from frozen, adjusting the cooking time slightly to account for its frozen state.
- Reheating for Optimal Freshness: Without a doubt, the absolute best method to revive leftover garlic bread and restore its irresistible crispiness is by using the air fryer. To reheat, preheat your air fryer to 350°F (175°C). Arrange the cooled garlic bread slices in a single layer within the air fryer basket and cook for 2-3 minutes, or until the bread is thoroughly heated through and has regained its delightful crispy texture. It is strongly advised to avoid reheating garlic bread in the microwave, as this appliance tends to make the bread soft and chewy, rather than bringing back its desired golden crunch.
More Easy Air Fryer Recipes to Explore
If you’ve been captivated by the sheer convenience and consistently delicious results offered by air frying, then prepare to be delighted by an expansive world of quick and easy recipes awaiting your exploration. Expand your culinary repertoire and harness the full potential of your air fryer with these fantastic and diverse ideas:
- Crispy Air Fryer Quesadillas
- Air Fryer Frozen Pretzels
- Quick Air Fryer Frozen Chicken Patties
- Perfect Air Fryer Egg Rolls
- Tender Air Fryer BBQ Chicken Breast
- Crispy Checkers Fries in the Air Fryer
- Ultimate Air Fryer Chicken Wings
- Healthy Air Fryer Broccoli
We sincerely hope you thoroughly enjoy trying out these convenient and wonderfully delicious air fryer creations. We’d love to hear about your experience! Don’t hesitate to share your thoughts and feedback on this air fryer garlic bread recipe in the comments section below. Enjoy!
Air Fryer Garlic Bread Recipe Card
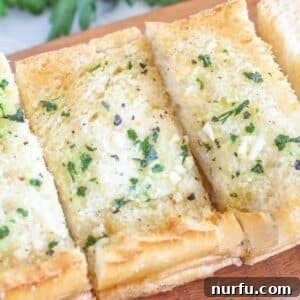
Garlic Bread In Air Fryer
By: Heather Seeley
Make delicious homemade garlic bread in the air fryer in minutes.
Prep Time: 5 mins
Cook Time: 5 mins
Total Time: 10 mins
Servings: 4
Rating: Rated 5 out of 5 stars based on 8 votes
Equipment
- 1 Air Fryer
Ingredients
- 1 loaf bread (Italian or French)
- 1/4 cup butter, softened
- 3 cloves garlic, minced
- 1/4 teaspoon salt
- 1/4 teaspoon ground black pepper
- 1/2 teaspoon fresh parsley, chopped (Use 1/4 teaspoon if using dried parsley.)
Instructions
- Cut bread loaf into thirds or fourths. Slice each section in half.
- Place softened butter, chopped garlic, parsley, salt and pepper into a bowl.
- Mix the ingredients until combined. Spread butter mixture on each piece of bread.
- Place bread in the air fryer basket, butter side up.
- Cook at 350 degrees F for 5 minutes. Check to see if any additional time is needed. If so, add 1-2 minutes or until it reaches desired crustiness.
Nutrition Information (Approximate)
Calories: 105kcal | Carbohydrates: 1g | Protein: 1g | Fat: 12g | Saturated Fat: 7g | Trans Fat: 1g | Cholesterol: 31mg | Sodium: 247mg | Potassium: 14mg | Fiber: 1g | Sugar: 1g | Vitamin A: 355IU | Vitamin C: 1mg | Calcium: 8mg | Iron: 1mg
Nutrition information is automatically calculated, so should only be used as an approximation.
Additional Info
Course: Appetizer, Side Dish
Cuisine: American