
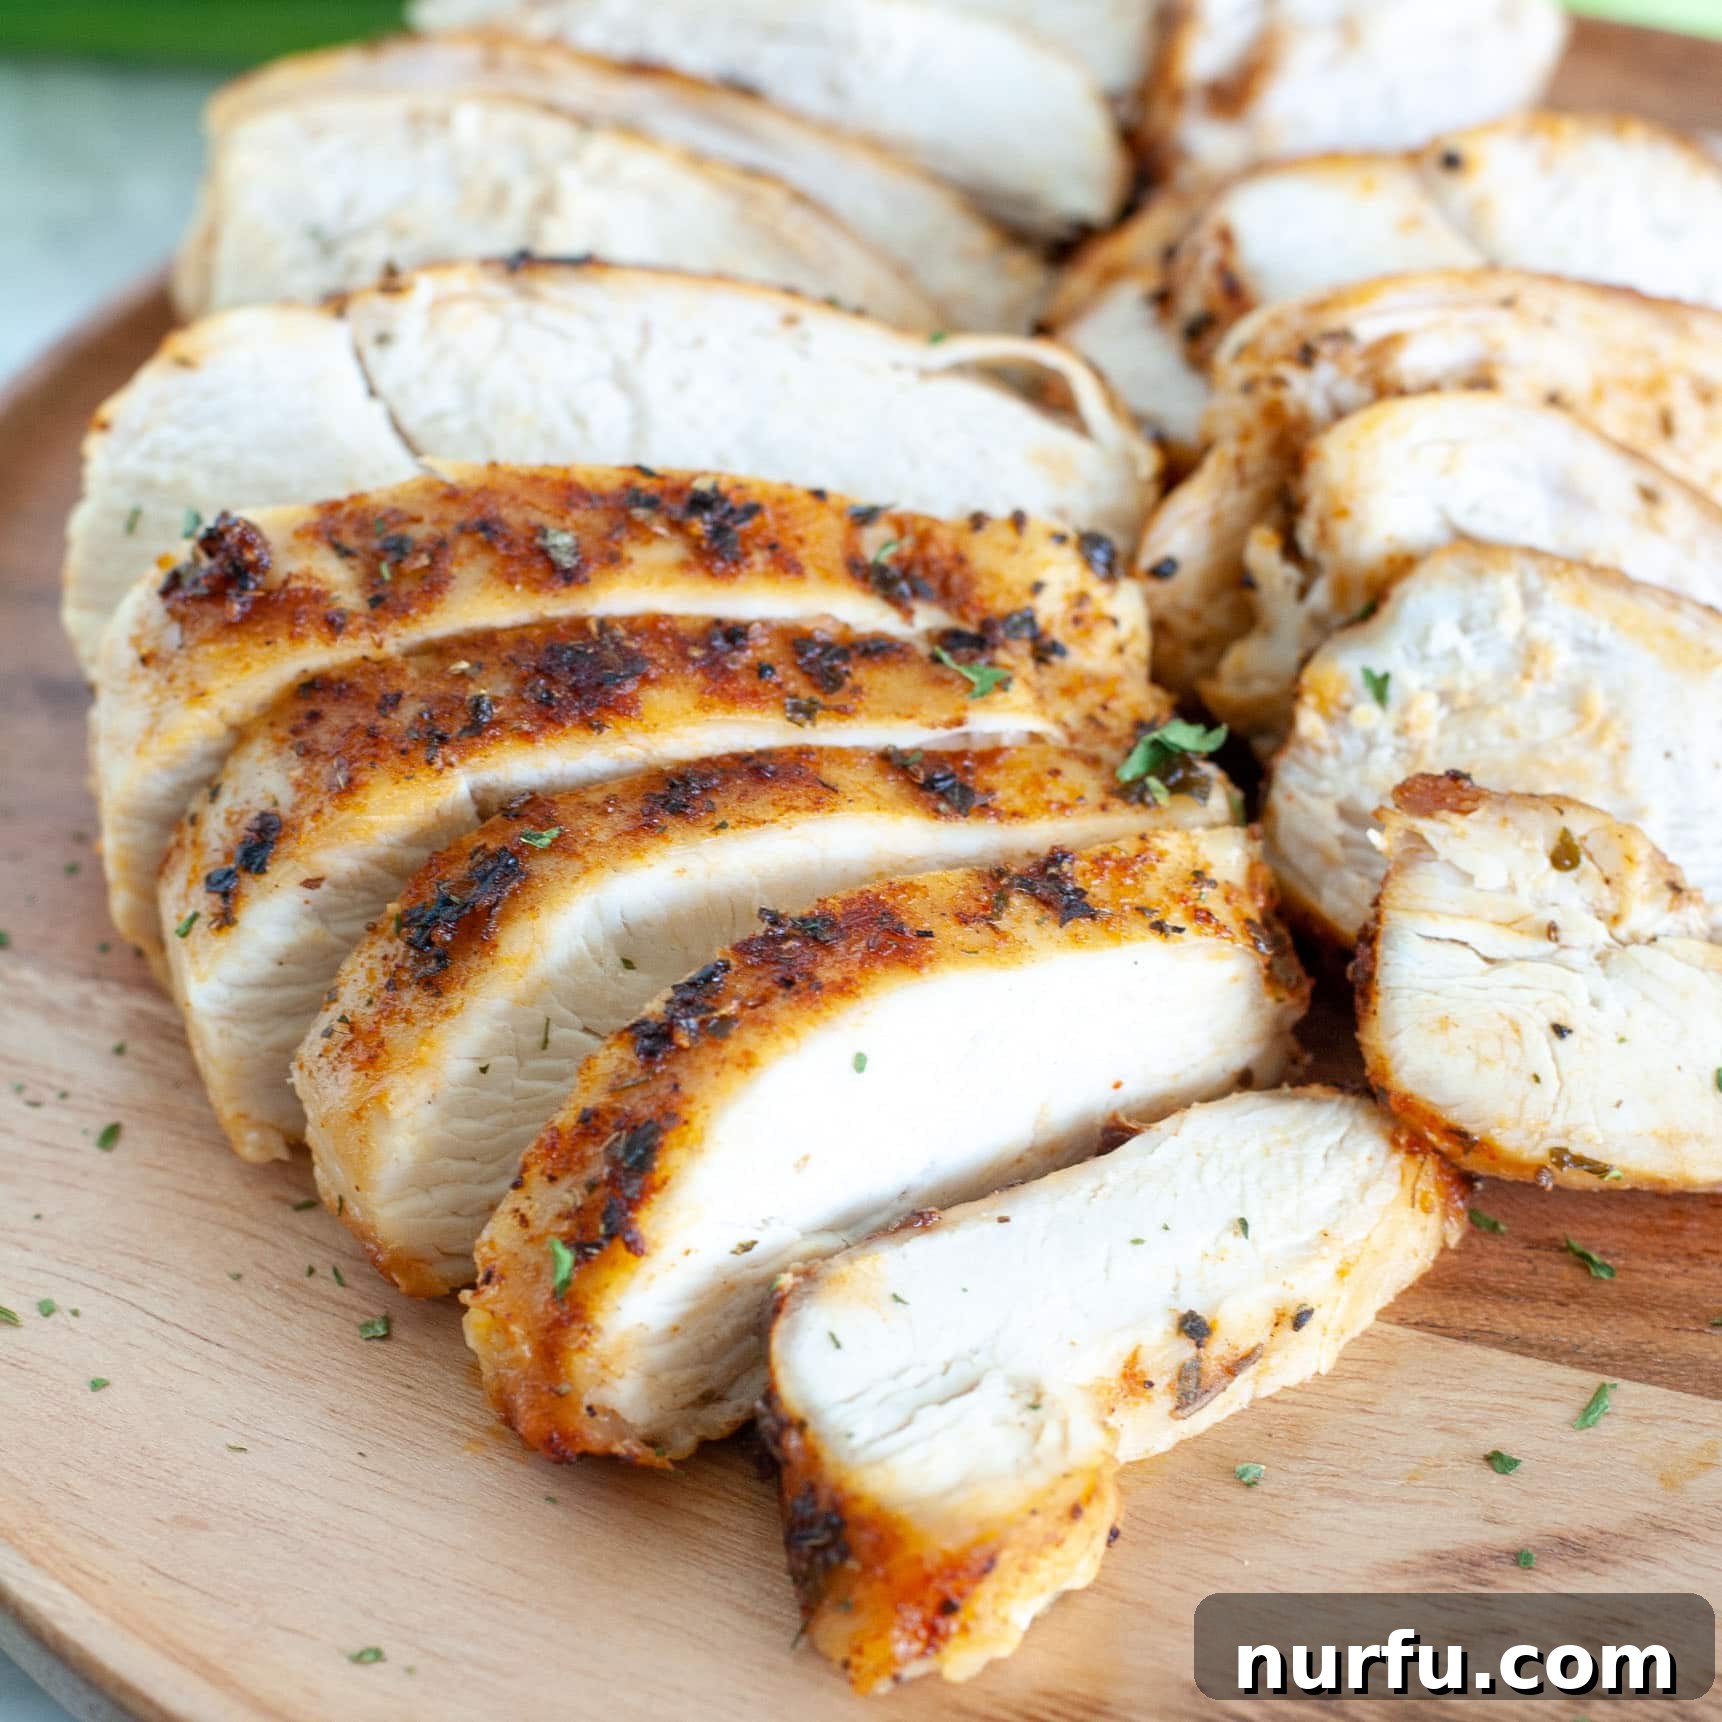
Transform your weeknight dinners and meal prep with the ultimate guide to Air Fryer Chicken Breast! This quick, easy, and incredibly versatile recipe ensures juicy, flavorful chicken every time, making it a staple for healthy and convenient eating. Whether you’re a seasoned air fryer enthusiast or new to this kitchen marvel, you’ll discover how simple it is to achieve perfectly cooked chicken breasts with minimal effort and oil.
The air fryer has revolutionized my cooking, quickly becoming one of my most cherished kitchen appliances. Its ability to cook food rapidly and with significantly less oil is a game-changer, especially for lean proteins like chicken. From crispy air fryer chicken legs to tender air fryer chicken thighs, and even a succulent whole chicken, the air fryer consistently delivers outstanding results. For boneless, skinless chicken breasts, it’s simply unbeatable.
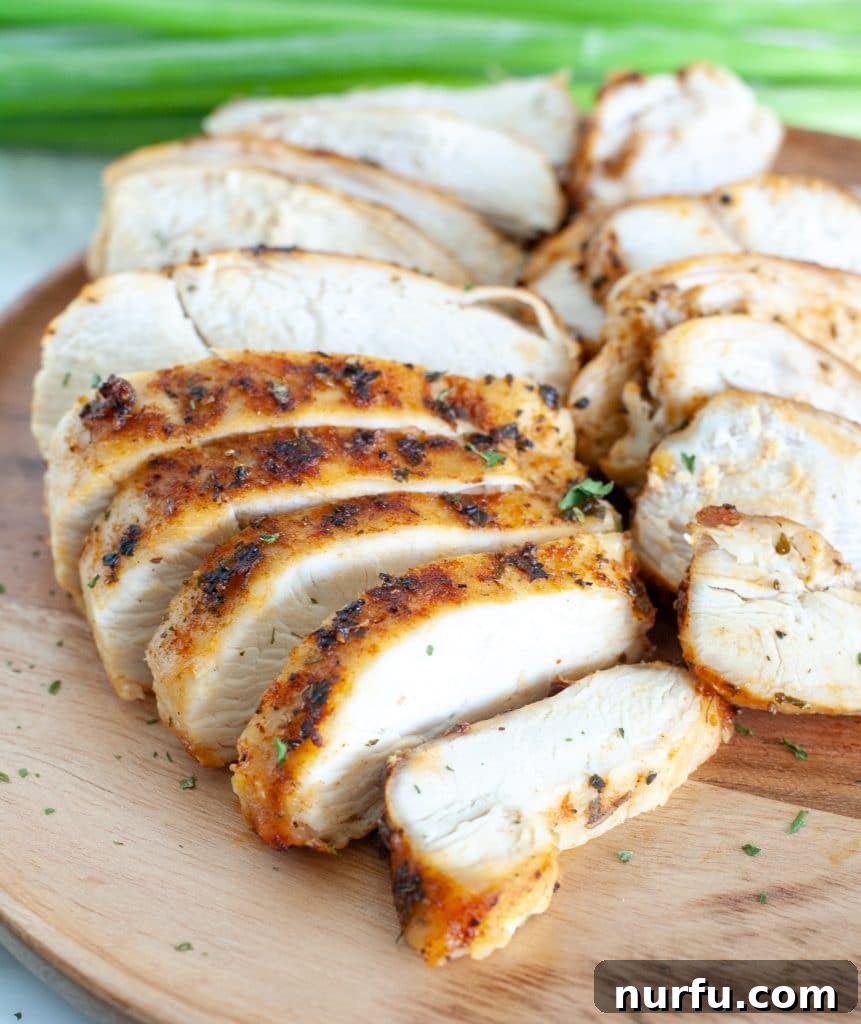
I always keep a pack of boneless, skinless chicken breasts in my refrigerator, and for good reason. They are incredibly versatile, serving as the perfect protein foundation for countless dishes. With the air fryer, preparing these chicken breasts has become not just fast and easy, but also exceptionally efficient. I often cook extra to streamline my meal prep for the entire week, incorporating them into diverse recipes such as vibrant Jamaican jerk bowls or simple salads.
This guide will walk you through everything you need to know to make the best air fryer chicken breast possible, ensuring it’s always juicy on the inside and perfectly seasoned on the outside. Get ready to elevate your cooking game and enjoy healthier, more convenient meals!
Why Air Fryer Chicken Breast is a Game Changer
Discover why cooking chicken breasts in the air fryer is not just a trend, but a smart choice for busy individuals and health-conscious families alike. This method stands out for several compelling reasons:
- Unmatched Speed – Forget long preheating times and extended baking. Boneless, skinless chicken breasts cook significantly faster in the air fryer compared to a conventional oven, making it ideal for last-minute meals.
- Effortless Preparation – With just a handful of common spices and a touch of oil, you can create a perfectly seasoned protein that requires minimal fuss. It’s a simple “set it and forget it” process that yields impressive results.
- Superior Meal Prep Potential – The consistently juicy and tender texture of air-fried chicken breast makes it an excellent component for meal prepping. Cook a larger batch and use it throughout the week in salads, sandwiches, pasta dishes, or grain bowls.
- Healthier Cooking – The air fryer circulates hot air to crisp food, requiring only a fraction of the oil used in traditional frying methods. This means you can enjoy delicious, guilt-free chicken that’s lower in fat without sacrificing flavor.
- Consistently Juicy Results – The intense, circulating heat of the air fryer locks in moisture, preventing the chicken from drying out, a common pitfall with other cooking methods. The result is consistently tender and succulent chicken.
- Easy Cleanup – Most air fryer baskets are non-stick and dishwasher-safe, simplifying post-meal cleanup. Less grease means less scrubbing, giving you more time to enjoy your evening.
Essential Ingredients for Perfect Air Fryer Chicken Breast
Crafting delicious air fryer chicken breast starts with a few simple, high-quality ingredients. Here’s what you’ll need to achieve maximum flavor and tenderness:
- Boneless, Skinless Chicken Breast – This recipe shines with boneless, skinless chicken breasts. For quicker cooking and more even results, I highly recommend using chicken cutlets or pounding larger chicken breasts to an even ½ to ¾-inch thickness. Thicker breasts will simply require a longer cooking time, so adjust accordingly.
- Olive Oil – A small amount of olive oil is crucial for two reasons: it helps the seasonings adhere to the chicken and contributes to a beautifully golden-brown exterior. You can also use other high-smoke-point oils like avocado oil or grapeseed oil if preferred.
- Your Favorite Chicken Seasoning Blend – This is where the flavor magic happens! A robust homemade blend, like my signature chicken seasoning, adds incredible depth. However, feel free to get creative. Excellent substitutes include:
- Classic Salt and Black Pepper: For a simple, pure chicken flavor.
- Jamaican Jerk Seasoning: For a bold, spicy, and aromatic kick.
- Italian Seasoning: Infuses the chicken with Mediterranean herbs like oregano, basil, and thyme.
- Smoked Paprika & Garlic Powder: For a warm, smoky, and savory profile.
- Cajun Seasoning: If you love a zesty, slightly spicy, and robust flavor.
Choose a seasoning that complements your meal plans for the week!
Exciting Variations to Elevate Your Air Fryer Chicken Breast
The beauty of this basic air fryer chicken breast recipe lies in its incredible adaptability. It serves as a blank canvas, ready to take on a myriad of flavors to suit any palate or cuisine. While a simple coating of oil, salt, and pepper is wonderfully delicious, don’t hesitate to experiment with these exciting variations:
- Marinades for Maximum Flavor: Before air frying, immerse your chicken breasts in your favorite marinade for at least 30 minutes, or even better, a few hours in the refrigerator. Try:
- Lemon Herb Marinade: A mix of lemon juice, olive oil, minced garlic, rosemary, and thyme.
- Garlic Parmesan Marinade: Olive oil, plenty of minced garlic, grated Parmesan cheese, and a dash of Italian herbs.
- Spicy Sriracha Lime: Sriracha, lime juice, soy sauce, and a touch of honey for a sweet and spicy kick.
- Yogurt-Based Marinade: Plain yogurt, ginger, garlic, and Indian spices for incredibly tender and flavorful chicken.
Remember to pat the chicken dry before cooking to ensure proper crisping.
- Post-Cooking Sauce Perfection: For sticky, sweet, or BBQ chicken, it’s best to cook the chicken with a basic oil and seasoning blend first. Once the chicken is fully cooked and resting, brush it generously with your favorite sauce, such as:
- Tangy BBQ Sauce: For classic barbecue flavor.
- Sweet & Sour Sauce: For an Asian-inspired twist.
- Buffalo Sauce: For a spicy kick, perfect for wraps and salads.
- Pesto: A vibrant and fresh herbaceous option.
- Crusted Chicken: For an extra layer of texture, after applying oil, dredge the chicken in a mixture of panko breadcrumbs, Parmesan cheese, and herbs for a delightful crispy crust.
- Mediterranean Twist: Season with oregano, dried mint, garlic powder, and a squeeze of lemon juice after cooking.
- Mexican Fiesta: Use chili powder, cumin, smoked paprika, and a pinch of cayenne for taco or fajita night.
Step-by-Step Guide: How to Cook Chicken Breast in an Air Fryer
For a full printable recipe with precise measurements and nutritional information, please scroll to the bottom of this page.
Achieving perfectly juicy and flavorful chicken breast in your air fryer is incredibly simple. Follow these steps for a consistently delicious meal every time, using your favorite chicken seasoning blend as outlined in this recipe:
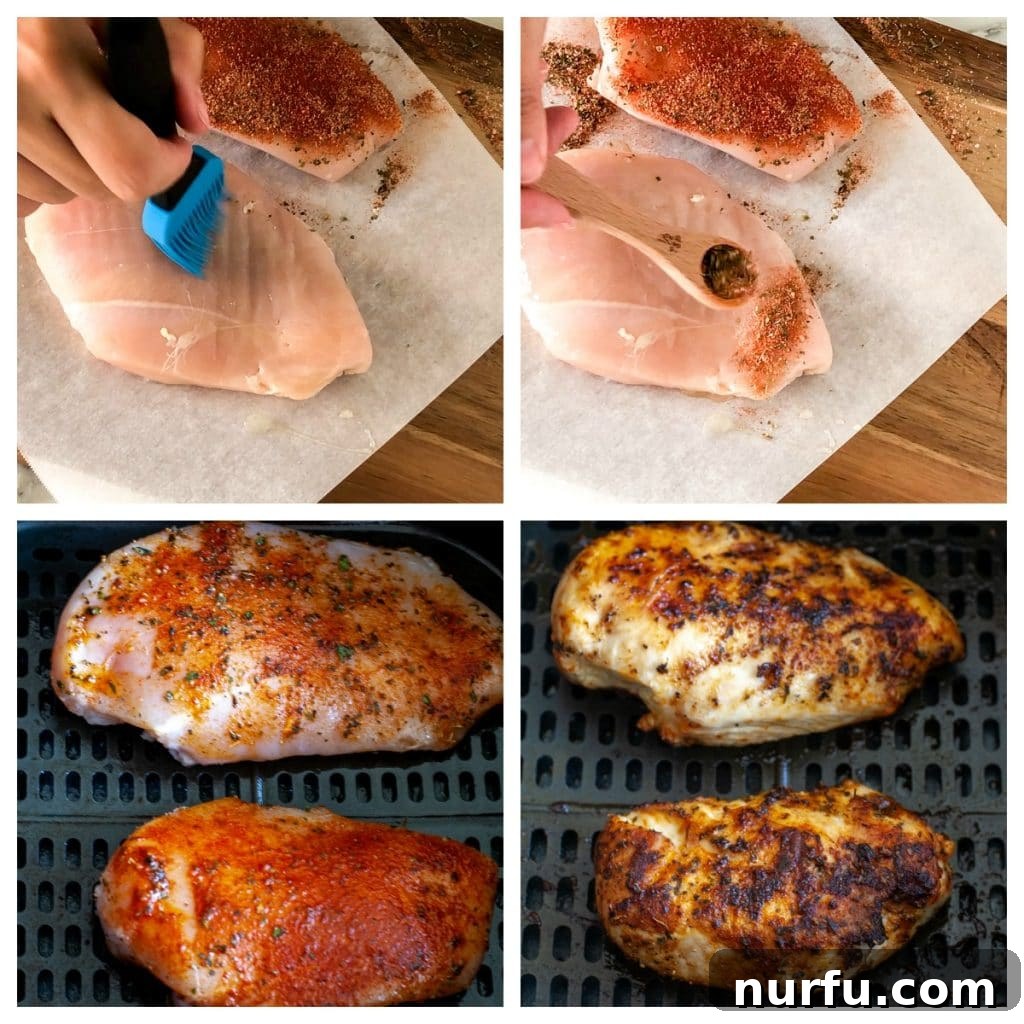
- Prepare the Chicken: Start by patting your chicken breasts dry with paper towels. This crucial step helps the oil and seasoning adhere better and promotes a crispier exterior. Lightly brush both sides of each chicken breast with olive oil. Then, generously sprinkle and rub your chosen seasoning mixture evenly over the top and bottom surfaces of the chicken. Ensure every inch is covered for maximum flavor.
- Preheat and Arrange: If your air fryer has a preheat function, preheat it to 370°F (185°C) for 3-5 minutes. While preheating, lightly spritz the air fryer basket with a bit more olive oil (or your preferred cooking spray) to prevent sticking. Arrange the seasoned chicken breasts in a single layer within the basket. It is vital not to overcrowd the basket, as this restricts air circulation and prevents even cooking and crisping. If you’re cooking more than two breasts, do so in batches.
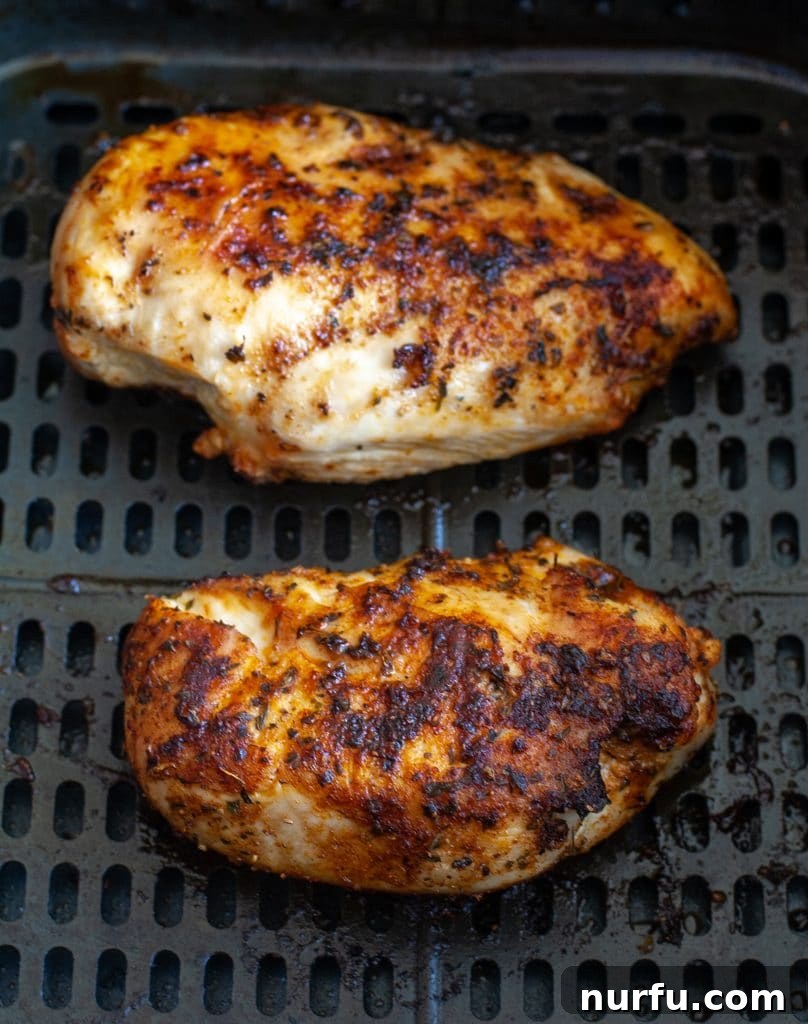
- Cook to Perfection: Place the basket into the preheated air fryer. Cook at 370°F (185°C) for an initial 8 minutes. After this time, carefully flip the chicken breasts over using tongs. Continue to cook for another 6-8 minutes, or until the internal temperature of the thickest part of the chicken reaches at least 165°F (74°C) when measured with an instant-read meat thermometer. The exact time will depend on the thickness of your chicken.
- Rest for Juiciness: Once cooked, immediately remove the chicken breasts from the air fryer basket and transfer them to a clean cutting board or plate. Tent them loosely with foil and allow them to rest for 3-5 minutes before slicing or serving. This resting period is essential; it allows the juices to redistribute throughout the meat, ensuring a tender and exceptionally juicy final product. Skipping this step can result in dry chicken.
Mastering Air Fryer Chicken Breast Cook Times
The cooking duration for chicken breast in an air fryer is primarily dependent on its weight and thickness. Achieving the perfect result means not only cooking it thoroughly but also preventing it from becoming dry. Always use a meat thermometer to ensure food safety and optimal texture; the internal temperature must reach 165°F (74°C) at its thickest point.
Here’s a general guideline for cooking boneless, skinless chicken breasts at 370°F (185°C):
- 6 oz (approximately ½-inch thick cutlet): Cook for 10-12 minutes, flipping halfway.
- 8 oz (standard chicken breast, about ¾-inch thick): Cook for about 14-16 minutes, flipping halfway.
- 10 oz (larger chicken breast, 1-inch thick or more): Cook for approximately 17-20 minutes, flipping halfway.
These times are estimates. Always use a meat thermometer to verify doneness. Chicken will continue to cook slightly after removal due to carryover heat, especially if left in the hot basket, so pulling it right at 165°F is ideal for maximum juiciness.
Pro Tips for the Best Air Fryer Chicken Breast
Unlock the secrets to consistently perfect air fryer chicken breast with these expert tips:
- Uniform Thickness is Key: For even and consistent cooking, aim for chicken breasts of similar size and thickness. I often prefer using pre-cut chicken cutlets, which are typically thinner. If you have larger or thicker breasts, you can easily slice them horizontally into thinner cutlets or pound them gently with a meat mallet to a uniform ½ to ¾-inch thickness. This prevents some parts from drying out while others are still undercooked.
- Never Overcrowd the Basket: The air fryer works by circulating hot air around the food. If you overcrowd the basket, the air cannot circulate effectively, leading to steamed rather than crispy chicken. Always arrange chicken breasts in a single layer, ensuring there’s space between each piece. This usually means cooking in batches, typically 2 chicken breasts at a time, depending on the size of your air fryer.
- Crucial Resting Time: Once your chicken reaches 165°F (74°C) internally, remove it from the air fryer and let it rest on a cutting board, loosely tented with foil, for 3-5 minutes before slicing. This allows the juices to redistribute throughout the meat, resulting in incredibly moist and tender chicken. Skipping this step can lead to dry chicken as the juices escape when you cut into it too soon.
- Preheat Your Air Fryer: Just like a conventional oven, preheating your air fryer ensures that the chicken starts cooking immediately at the correct temperature, leading to better searing and more consistent results. Most air fryers only need 3-5 minutes to preheat.
- Pat Chicken Dry: Before applying oil and seasoning, always pat your chicken breasts thoroughly dry with paper towels. This removes surface moisture, which is essential for achieving a crispy exterior.
- Don’t Over-Oil: While a little oil helps with browning and seasoning adherence, too much oil can lead to smoke and a greasy rather than crispy texture. A light brush or spritz is usually all you need.
- Check Internal Temperature: An instant-read meat thermometer is your best friend for perfectly cooked chicken. It eliminates guesswork and ensures your chicken is safe to eat without being overcooked.
What to Serve with Air Fryer Chicken Breast
Air fryer chicken breast is a remarkably versatile protein that pairs beautifully with a wide array of side dishes and can be incorporated into countless meal types. Its simple yet delicious flavor makes it a perfect complement to almost anything.
- Classic Side Dishes:
- Roasted Vegetables: Easily air-fry or roast a medley of broccoli, asparagus, bell peppers, or zucchini for a healthy and flavorful side.
- Potatoes Done Right: Serve with crispy air fryer roasted potatoes, mashed potatoes, or sweet potato fries.
- Grains & Rice: A simple side of fluffy white rice, brown rice, quinoa, or couscous provides a great base.
- Comfort Food Sides: Pair with hearty sides like stove-top stuffing or creamy baked mac and cheese for a more indulgent meal.
- Fresh Salads: A crisp green salad with a light vinaigrette offers a refreshing contrast.
- On Top of Fresh Salads: For a light and healthy lunch or dinner, slice the cooked chicken breast and arrange it over a vibrant salad. Load up a bowl with your favorite greens, cucumbers, tomatoes, bell peppers, avocado, and a dressing of your choice for a satisfying meal.
- Delicious Pasta Dishes:
- Creamy Pastas: Cube the chicken and toss it into your favorite pasta, such as a rich Alfredo, a zesty lemon-garlic sauce, or even a unique cream cheese pasta.
- Spicy & Flavorful: It’s perfect with buffalo chicken pasta or mixed into a vibrant green pasta sauce made with pesto or spinach.
- Versatile Wraps and Sandwiches:
- Quick Wraps: Slice or shred the chicken and tuck it into a tortilla with fresh lettuce, cucumber, tomato, and a drizzle of ranch or Caesar dressing for an effortless and portable meal. Try it in a spicy buffalo chicken wrap!
- Hearty Sandwiches: Use it as the main protein in a chicken sandwich, slider, or panini.
- Soups and Stews: Shredded air fryer chicken breast can be added to soups or stews for extra protein and flavor.
Frequently Asked Questions About Air Fryer Chicken Breast
Yes, absolutely! While fresh is ideal, you can cook frozen boneless, skinless chicken breasts in the air fryer. You will need to increase the cooking time by approximately 6-10 minutes. Ensure the internal temperature reaches at least 165°F (74°C) using a meat thermometer.
No, it is crucial to avoid stacking chicken breasts in the air fryer. The air fryer cooks by circulating hot air around the food. Stacking or overcrowding the basket obstructs this airflow, leading to uneven cooking and less crispy results. Always cook chicken in a single layer, even if it means cooking in multiple batches.
Yes, you can and should put raw chicken in the air fryer. It’s designed to cook raw meats efficiently. Just make sure to handle it safely to prevent cross-contamination and cook it until the internal temperature reaches a safe 165°F (74°C).
While some recipes might suggest skipping it, preheating your air fryer for 3-5 minutes to 370°F (185°C) is highly recommended. It helps the chicken cook more evenly, achieve a better sear on the outside, and reach the desired crispness faster.
For boneless, skinless chicken breasts, 370°F (185°C) is generally considered the optimal temperature. This temperature allows the chicken to cook through quickly while developing a nice exterior without drying out the inside.
How to Store and Reheat Air Fryer Chicken Breast
Proper storage and reheating are key to enjoying your delicious air fryer chicken breast for days to come, whether for quick lunches or easy dinners.
- Storing Leftovers (Refrigerator): Allow the cooked chicken breast to cool completely to room temperature before storing. Transfer it to an airtight container and place it in the refrigerator. It will stay fresh and delicious for up to 3 days.
- Freezing Leftovers: For longer storage, freeze cooled chicken breasts in a freezer-safe bag or airtight container for up to 3 months. To prevent freezer burn, ensure as much air as possible is removed from the bag. Thaw frozen chicken in the refrigerator overnight before reheating.
- Reheating Instructions:
- Air Fryer (Recommended): For best results, reheat chicken breast in the air fryer at 350°F (175°C) for 3-5 minutes, or until warmed through. This method helps maintain its juicy interior and can restore some crispness to the exterior.
- Microwave: Place chicken on a microwave-safe plate, cover loosely, and heat in 30-second intervals until warmed through. Be careful not to overheat, as this can dry out the chicken.
- Oven: Place chicken on a baking sheet, cover with foil, and reheat in a preheated oven at 300°F (150°C) for 10-15 minutes, or until thoroughly heated.
More Delicious Air Fryer & Chicken Recipes to Try
If you loved how easy and delicious this air fryer chicken breast recipe was, you’re in for a treat! Explore more fantastic chicken recipes, many of which leverage the convenience of your air fryer or offer other simple cooking methods:
- Crockpot Chicken Tacos – An incredibly easy three-ingredient recipe for flavorful chicken tacos that practically cook themselves.
- Boiled Chicken Thighs – A straightforward and efficient method for cooking chicken thighs that results in tender, shreddable meat, perfect for meal prep.
- Baked Chicken Breast – Master the art of baking juicy chicken breasts in the oven, a classic method for versatile chicken meals.
- Air Fryer Chicken Tenders – Learn how to make perfectly crispy and easy chicken tenders from scratch or from frozen in your air fryer.
- Air Fryer Salmon: A quick and healthy way to cook flaky, delicious salmon fillets.
- Air Fryer Whole Roasted Chicken: Impress your family with a perfectly cooked, golden-brown whole chicken, made simple in your air fryer.
*** If you have made this air fryer chicken breast recipe, please leave a comment and a star rating below to share your experience!
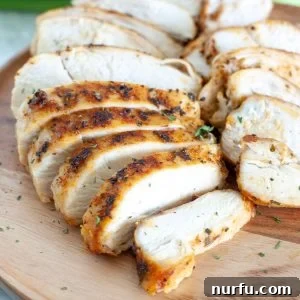
Air Fryer Chicken Breasts (Boneless & Skinless)
Pin Recipe
Rate Recipe
Print Recipe
Ingredients for 4 servings
Instructions
-
Brush olive oil over top and bottom of chicken breasts. Sprinkle both sides with chicken seasoning.
-
Spritz the air fryer basket with olive oil. Set air fryer to 370 degrees F and cook for 8 minutes on one side, then flip chicken over and cook an additional 6-8 minutes, or until the internal temperature reaches 165 degrees F.
-
Let the chicken rest 3-4 minutes before slicing for maximum juiciness.
Video
Notes
Make sure internal temperature reaches 165 degrees F.
Nutrition
Nutrition information is automatically calculated and should only be used as an approximation. Actual values may vary based on specific ingredients and preparation methods.