

Craving a warm, cheesy, and utterly satisfying appetizer that comes together in mere minutes? You’ve landed in the perfect spot! This incredibly easy chili cheese dip recipe is designed for maximum flavor with minimal effort, making it your go-to dish for any gathering. Whether you’re hosting a lively game day party, celebrating during the holidays, or simply in need of a comforting snack, this crowd-pleasing dip is guaranteed to be a hit. So, grab your favorite tortilla chips and get ready to dive into a warm, gooey, and irresistibly savory experience that will have everyone reaching for more!

There’s something truly special about a hot dip that transforms simple ingredients into an extraordinary treat. This creamy chili cheese dip is no exception. Imagine the mouthwatering flavors of a classic chili cheese hot dog, but in a dippable, shareable form – a warm, hearty blend of seasoned chili enveloped in rich, melted cheese. It’s the ultimate comfort food appetizer, perfect for sharing (or not sharing, we won’t tell!).
I recall making this recipe for a group of friends during a football game, and it disappeared so quickly that I had to whip up a second batch to keep the party going! Its hot, savory, and incredibly satisfying profile ensures that every dip is packed with flavor, leaving everyone eager for another scoop. If you’re on the hunt for an appetizer that promises to impress your guests and deliver on deliciousness every single time, you absolutely must give this fantastic recipe a try. It’s an effortless culinary triumph!
Why This Easy Chili Cheese Dip Will Become Your Favorite Appetizer
This quick and delicious chili cheese dip isn’t just a recipe; it’s a solution for effortless entertaining and satisfying cravings. Here’s why it’s destined to become a staple in your appetizer repertoire:
- Effortless Preparation: When you need a show-stopping appetizer without spending hours in the kitchen, this is your answer. With minimal ingredients and simple steps, you can create a dip that tastes like you put in all the effort, but in reality, it comes together in minutes. It’s perfect for last-minute gatherings or when you just want a quick, indulgent snack.
- Perfect for Any Occasion: Whether it’s the excitement of game day, a festive holiday gathering, a casual weekend get-together, or simply a craving for something warm and cheesy, this dip fits every scenario. Its universal appeal makes it a guaranteed crowd-pleaser, ensuring smiles all around.
- Fantastic Make-Ahead Option: Hosting can be stressful, but your appetizers don’t have to be. This chili cheese dip can be assembled ahead of time, covered, and stored in the refrigerator. When you’re ready to serve, simply pop it in the oven, bake until bubbly and melted, and serve hot. This flexibility allows you to focus on other preparations or enjoy more time with your guests.
- Clever Use for Leftover Chili: Have some leftover homemade chili from dinner? This dip is a brilliant and delicious way to repurpose it! It transforms yesterday’s meal into a completely new, exciting appetizer, preventing food waste and adding an extra layer of rich flavor that only well-developed chili can provide.
- Only 4 Simple Ingredients: You read that right! You only need four core ingredients to create this incredibly flavorful dip. This means fewer trips to the grocery store, a simpler shopping list, and a budget-friendly option for your entertaining needs. These accessible ingredients combine to create a truly irresistible taste sensation.
- Warm & Comforting: There’s nothing quite like a warm, gooey dip to bring comfort and joy. This chili cheese dip, served hot from the oven, offers a satisfying warmth and richness that makes it incredibly inviting, especially on cooler days or evenings.
Essential Ingredients for Your Cream Cheese Chili Cheese Dip
The beauty of this recipe lies in its simplicity. With just four main ingredients, you’re on your way to a dip that tastes complex and rich. Here’s a closer look at what you’ll need and some tips for each:
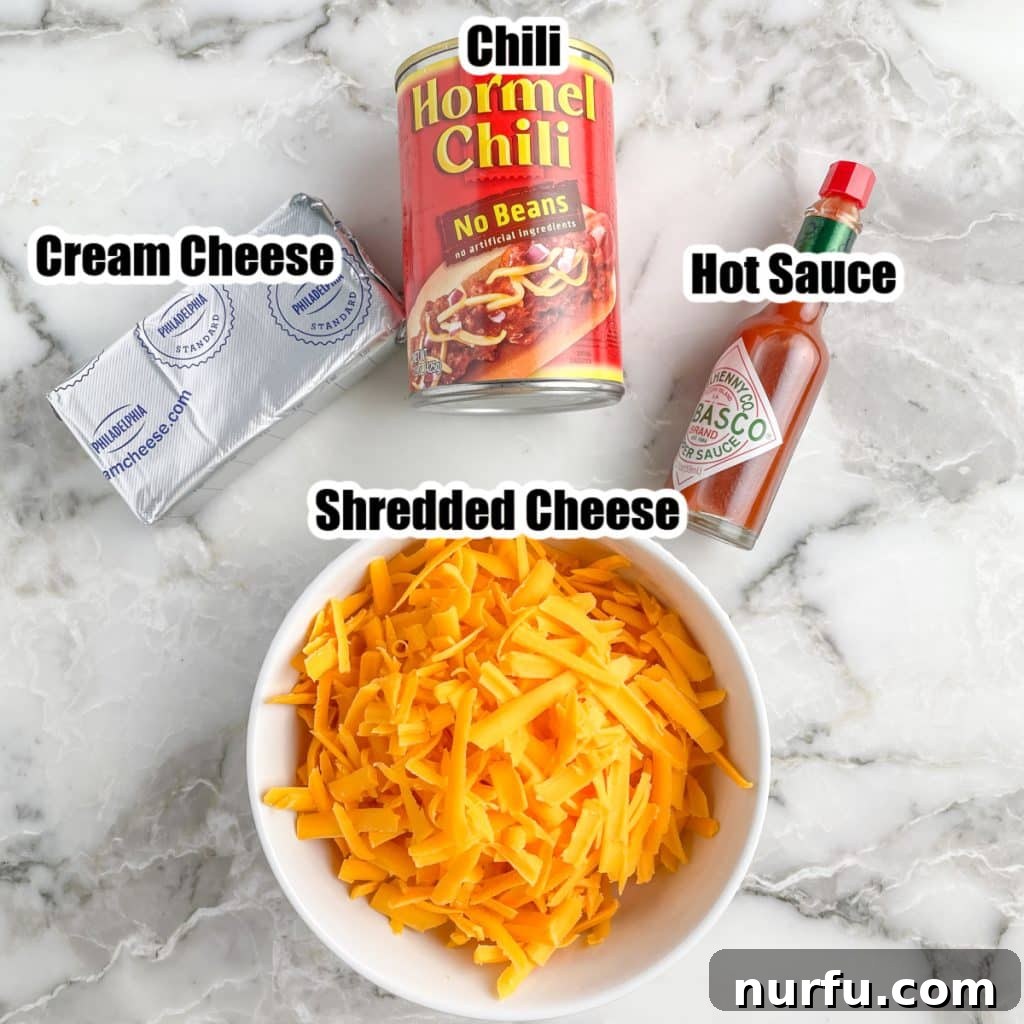
- Cream Cheese: You’ll need one 8-ounce block of full-fat cream cheese for this recipe. It’s essential to allow the cream cheese to soften at room temperature for at least 30 minutes before spreading. This ensures a smooth, even base layer for your dip, preventing lumps and making it far easier to work with. The creaminess of the softened cream cheese is key to the dip’s luxurious texture.
- Chili: The star of the show! Feel free to use your favorite canned chili. Brands like Hormel chili are a popular choice for their robust flavor and convenient packaging. Alternatively, if you have a cherished homemade chili recipe, this is an excellent opportunity to feature it. Whether you prefer chili with or without beans, the choice is entirely yours and won’t affect the overall success of the dip. Just ensure it’s a chili you love!
- Hot Sauce: This ingredient is optional but highly recommended if you enjoy a little kick! A few dashes of your preferred hot sauce (like Tabasco or Frank’s RedHot) stirred into the chili layer will add a wonderful depth of flavor and a subtle warmth that complements the richness of the cheese. Adjust the amount to your personal spice preference – a little goes a long way.
- Shredded Cheese: For the ultimate gooey topping, 1 ½ cups of shredded cheese is perfect. While shredded cheddar cheese is a classic and reliable choice, don’t hesitate to experiment! Pepper jack will add extra spice, Monterey Jack offers a mild creaminess, and a Mexican blend cheese will bring a complex, savory profile. Freshly shredded cheese often melts more smoothly than pre-shredded varieties, but either will work beautifully.
- Optional Garnishes: To add a touch of freshness, color, and an extra layer of flavor, consider garnishing your finished dip. Finely chopped fresh parsley or cilantro provides a vibrant green hue and herbaceous notes, while thinly sliced green onions offer a mild oniony bite and visual appeal. These small additions can elevate your dip from great to gourmet!
Crafting Your Irresistible Chili Cheese Dip with Cream Cheese: Step-by-Step Guide
Creating this delicious hot dip is incredibly straightforward. Follow these simple steps to assemble a mouthwatering appetizer that’s ready in no time. For a full, printable recipe with precise measurements, please refer to the detailed recipe card at the bottom of this page.
Step One: Prepare the Cream Cheese Base
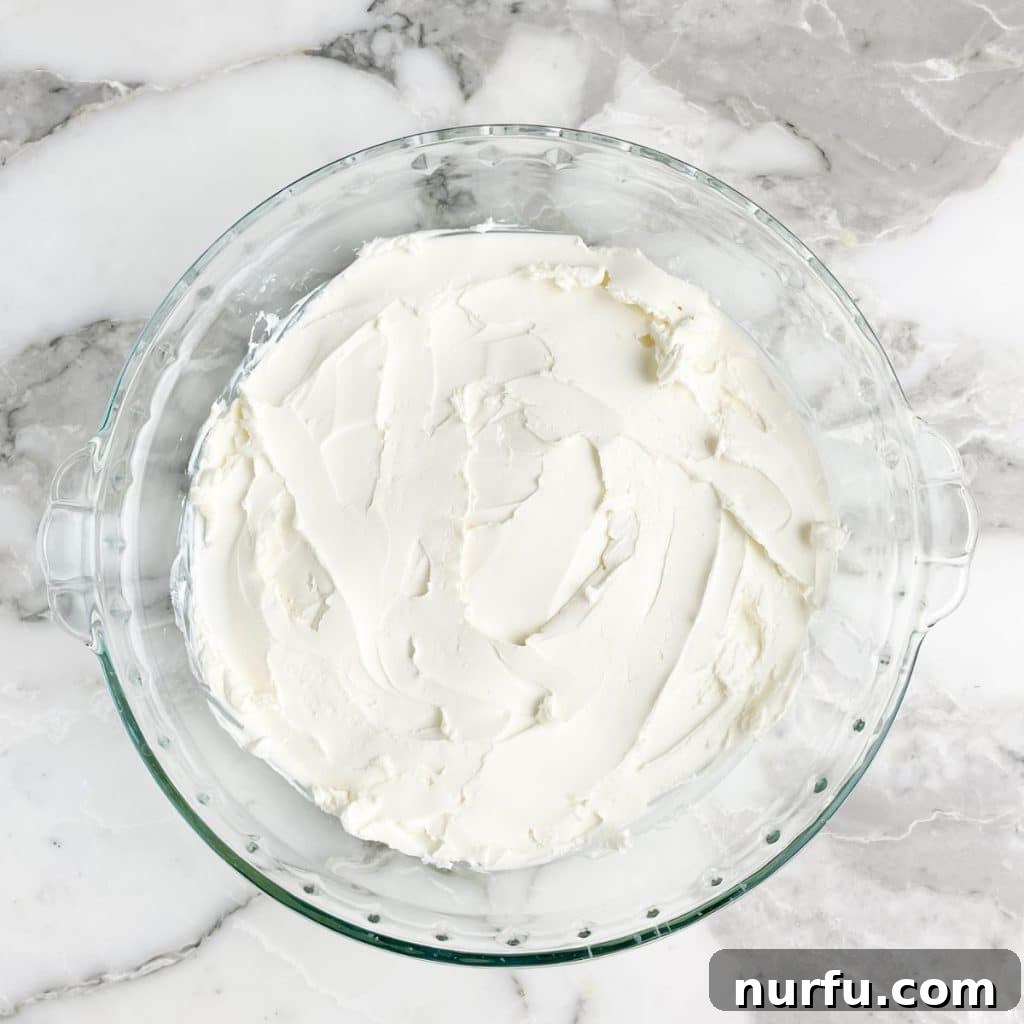
Begin by preheating your oven to 350°F (175°C). While the oven heats, take your softened 8-ounce block of cream cheese and spread it evenly across the bottom of a shallow oven-safe serving dish. A pie plate, an 8×8 inch baking dish, or a small cast-iron skillet works wonderfully for this. Ensure the cream cheese forms a smooth, consistent layer – this will be the creamy foundation of your dip.
Step Two: Layer with Flavorful Chili
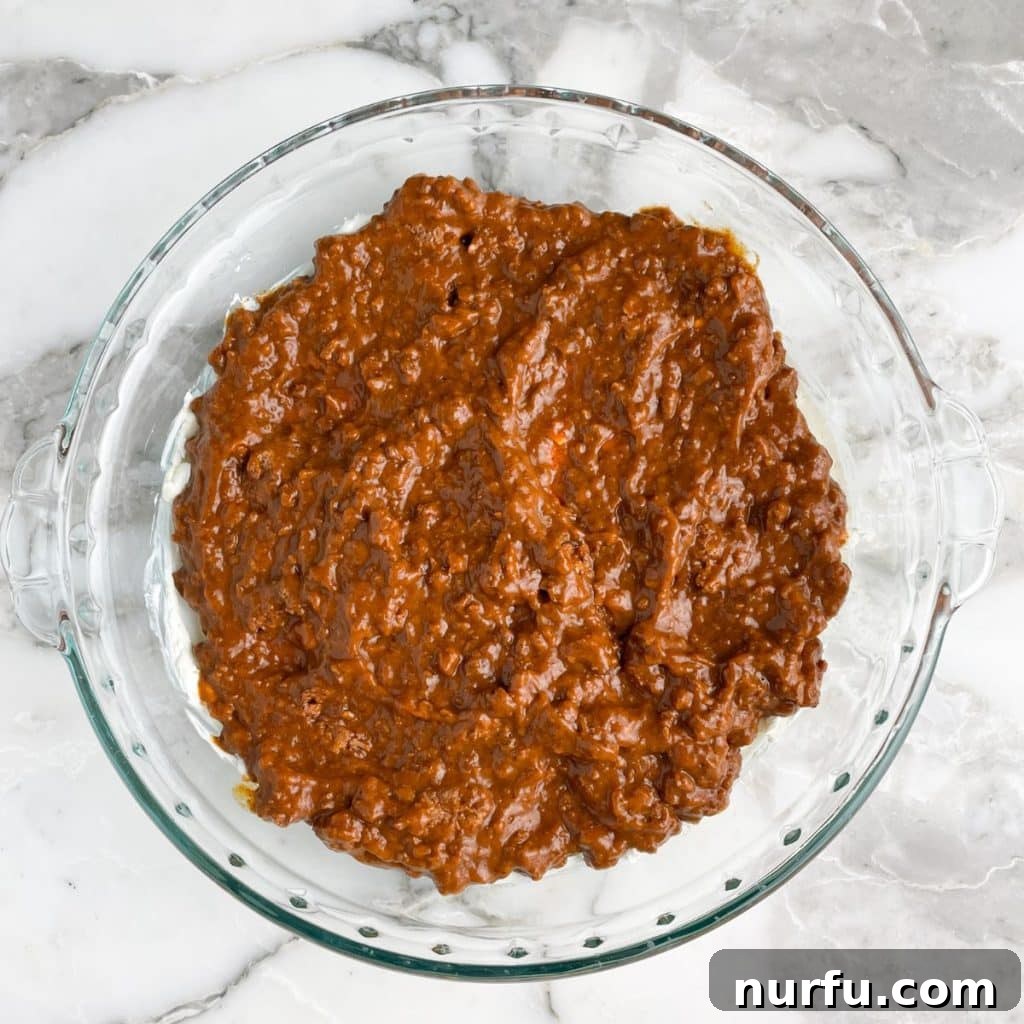
In a separate bowl, combine your chosen chili with 2-4 dashes of hot sauce, if using. Stir well to ensure the hot sauce is evenly distributed throughout the chili. Then, carefully spoon this seasoned chili mixture over the cream cheese layer in your baking dish, spreading it out gently to create an even topping. Take care not to disturb the cream cheese layer underneath too much.
Step Three: Crown with Cheese and Bake to Perfection
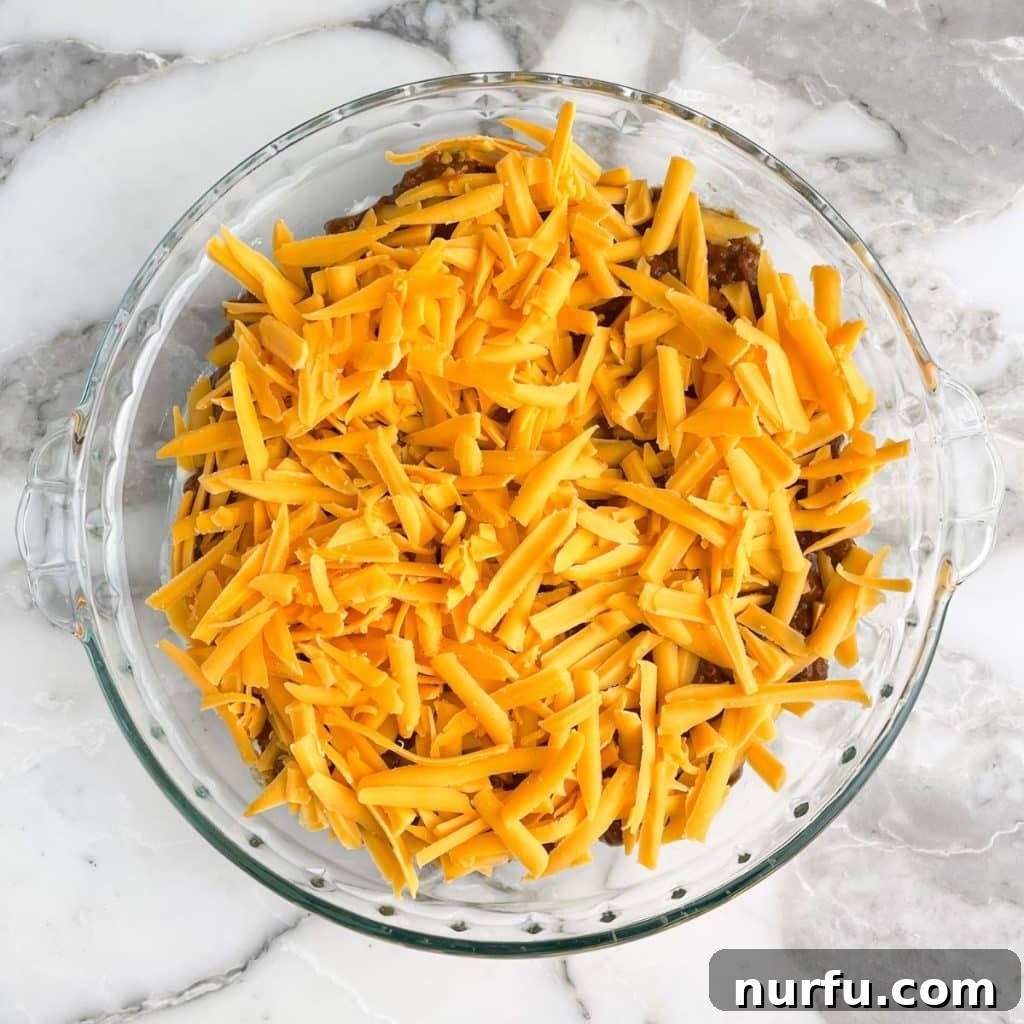
Generously sprinkle the 1 ½ cups of shredded cheese over the chili layer, ensuring it covers the entire surface. Place the dish in your preheated oven and bake for approximately 15 minutes. The dip is ready when the cheese is beautifully melted, golden, and bubbly, and the entire dip is heated through. Carefully remove from the oven and, if desired, garnish with fresh parsley, cilantro, or green onions before serving immediately with your favorite dippers.
Exciting Recipe Variations to Customize Your Chili Cheese Dip
One of the best aspects of this chili cheese dip is its versatility. You can easily adjust the flavors and ingredients to suit your taste or what you have on hand. Here are some fantastic ideas to elevate or change up your dip:
- Salsa Boost: For an extra layer of vibrant flavor and a little tang, consider adding about ½ cup of your favorite salsa. Spread it over the cream cheese layer before adding the chili. A mild pico de gallo or a spicy roasted salsa can both add wonderful dimensions to the dip.
- Green Chili Infusion: Stir in a small can (about 4 ounces) of diced green chilis (mild or hot, depending on preference) directly into the chili layer. This adds a subtle smoky flavor and a touch of heat without overpowering the other ingredients, complementing the chili beautifully.
- Cheese Exploration: While cheddar is classic, don’t limit yourself! Experiment with different types of shredded cheese that melt well. Colby Jack offers a mild, creamy flavor; Monterey Jack is incredibly smooth; pepper jack cheese provides a spicier kick; and even mozzarella can contribute a fantastic stringy, gooey texture. A blend of cheeses can also create a more complex flavor profile.
- Meat Lovers’ Twist: If you’re using plain canned chili or want to amp up the heartiness, consider browning some ground beef or sausage beforehand. Drain any excess fat, season well, and then stir it into your chili before layering. Crumbled cooked bacon on top also makes a decadent addition.
- Spicy Kick: For those who love extra heat, besides hot sauce, you can add a pinch of cayenne pepper, a dash of chili powder, or finely diced fresh jalapeños (remove seeds for less heat) to the chili layer. Roasting the jalapeños first can add a smoky depth.
- Onion & Pepper Sauté: Sauté finely diced onions and bell peppers (any color) until softened, then stir them into your chili before baking. This adds a lovely texture, sweetness, and aromatic depth to the dip.
Perfect Pairings: What to Serve with Chili Cream Cheese Dip
The beauty of this creamy, hearty dip is how wonderfully it pairs with a variety of dippers. Whether you prefer crunchy, soft, or healthy options, there’s something for everyone to scoop up this deliciousness:
- Classic Crunchy Dippers:
- Tortilla Chips: The absolute quintessential pairing. Their salty crunch and sturdy build are perfect for scooping up generous amounts of hot, cheesy chili.
- Corn Chips (like Fritos): These offer a distinct corn flavor and a slightly different texture, holding up exceptionally well to the dip’s richness.
- Crackers: A variety of crackers, from butter crackers to hearty whole-wheat options, provide a diverse texture and flavor palette for dipping.
- Hearty Bread & Carb Options:
- Small Toasted Bread Slices: Baguette slices, toasted pita bread, or even small pieces of garlic bread make fantastic, substantial dippers.
- Pretzel Crisps: For a salty, satisfying crunch that’s a bit lighter than traditional pretzels.
- Bread Bowl: For an impressive presentation, hollow out a round loaf of sourdough or pumpernickel bread and serve the dip right inside. The bread acts as both a serving vessel and a delicious dipper!
- Fresh & Healthy Options:
- Cut-Up Vegetables: Offer a refreshing contrast to the warm dip. Bell pepper strips (red, yellow, orange), celery sticks, carrot sticks, cucumber slices, and broccoli florets are all excellent choices.
- Mini Sweet Peppers: Their natural cup-like shape makes them ideal for holding a good amount of dip, offering a sweet crunch.
Storing and Reheating Your Delicious Hormel Chili Dip
While it’s rare to have leftovers of this incredibly popular dip, if you do, storing and reheating it properly ensures you can enjoy it again later.
- Storage: To store any leftover chili cheese dip, simply cover the serving dish tightly with plastic wrap or aluminum foil and place it in the refrigerator. Alternatively, you can scoop the cooled leftovers into an airtight container. When stored correctly, the dip will remain fresh and delicious for up to 2 days.
- Reheating:
- Oven Method: If your dip is still in its original oven-safe baking dish, you can reheat it in a preheated oven at 350°F (175°C) for 10-15 minutes, or until it’s thoroughly heated through and the cheese is melted and bubbly again. Covering it loosely with foil for the first part of reheating can help prevent the cheese from browning too quickly.
- Microwave Method: For a quicker reheat, scoop individual portions into a microwave-safe bowl. Microwave on medium power for 1-2 minutes, stirring halfway through, until heated to your desired temperature. Be careful not to overheat, as it can separate the ingredients.
- Freezing Not Recommended: Unfortunately, this dip does not freeze well. The cream cheese and shredded cheese components can separate and become grainy or watery upon thawing, affecting the smooth, creamy texture that makes this dip so enjoyable. It’s best to enjoy it fresh or within a couple of days from the refrigerator.
Can This Chili Cheese Dip Be Made on the Stovetop for a Quick Queso Style?
Absolutely! If you’re looking for a faster method or prefer a more “queso-like” consistency, this chili cheese dip can easily be prepared on the stovetop. This method is perfect for a quick snack or when you want to keep the dip warm throughout your gathering without needing an oven.
To make it on the stovetop: Combine the softened cream cheese, your favorite chili, hot sauce (if using), and 1 to 1½ cups of shredded cheese in a medium saucepan. Place the saucepan over medium-low heat. Stir constantly, breaking down the cream cheese as it softens and melts into the chili. Continue to stir until all the ingredients are thoroughly combined, and the cheese has completely melted into a smooth, creamy, and bubbly consistency. Be mindful not to let it scorch at the bottom. Once hot and fully integrated, remove from heat and serve immediately. This stovetop version offers a wonderfully gooey, blendable texture that is fantastic for dipping.
Frequently Asked Questions About Chili Cheese Dip
Here are answers to some common questions about making this delightful chili cheese dip:
Can you make this chili cheese dip with or without beans?
Yes, absolutely! The beauty of this recipe is its flexibility. You can use your favorite chili, whether it’s a hearty bean-filled variety or a smooth, no-bean chili. Both versions will yield a delicious and satisfying dip.
Can you make vegetarian chili cheese dip?
Yes, you certainly can! To make a delicious vegetarian version of this dip, simply substitute traditional chili with a high-quality vegetarian chili. There are many excellent canned vegetarian chilis available, or you can use your own homemade vegetarian chili recipe. The preparation steps remain exactly the same.
What kind of dish should I bake this dip in?
A shallow oven-safe dish like a pie plate, an 8×8 inch baking dish, or a small cast-iron skillet (around 6-8 inches) works perfectly. The key is a dish that allows the ingredients to spread evenly and heat through without being too deep.
Can I prepare this dip in a slow cooker?
While the recipe is designed for the oven, you can adapt it for a slow cooker. Spread the softened cream cheese at the bottom of the slow cooker insert, then layer with chili and cheese. Cook on low for 1-2 hours, or until heated through and cheese is melted, stirring occasionally. This is great for keeping the dip warm at a party.

Explore More Irresistible Dip Recipes
If you’re a true dip enthusiast, then your culinary adventure shouldn’t stop here! Dips are the heart of any party, offering endless possibilities for flavor and fun. Be sure to check out our extensive list of 35 party dips for even more inspiration to tantalize your taste buds.
- Hearty Ground Beef Taco Dip
- Classic Chipped Beef Dip
- Creamy Velveeta Sausage Dip
- Spicy Hot Sausage Beer Cheese Dip
- Addictive Million Dollar Crack Dip
Chili Cheese Dip Recipe
An incredibly easy and delicious chili cheese dip perfect for any occasion. This hearty, filling dip comes together in just minutes with minimal ingredients, making it ideal for game day, parties, or a simple craving.
Yields: 6 servings
Prep time: 5 minutes
Cook time: 15 minutes
Total time: 20 minutes
Ingredients
- 8 ounces cream cheese, softened
- 15 ounce can chili (or your favorite homemade chili)
- 2-4 dashes hot sauce (optional, adjust to taste)
- 1 ½ cups shredded cheese (cheddar, Monterey Jack, or a blend)
Instructions
- Preheat your oven to 350°F (175°C). Spread the softened cream cheese evenly into the bottom of an oven-safe serving dish (e.g., a pie plate or an 8×8 inch baking dish).
- In a small bowl, combine the canned or homemade chili with the hot sauce (if using), stirring thoroughly. Carefully spoon and spread this chili mixture over the cream cheese layer.
- Generously top the chili layer with the shredded cheese.
- Bake in the preheated oven for 15 minutes, or until the cheese is melted and bubbly, and the dip is heated through.
- Remove from oven, garnish if desired (with fresh parsley, cilantro, or green onions), and serve immediately with your favorite dippers.
Nutrition (Approximate per serving)
- Calories: 104 kcal
- Carbohydrates: 4g
- Protein: 7g
- Fat: 7g
- Saturated Fat: 4g
- Polyunsaturated Fat: 0.3g
- Monounsaturated Fat: 2g
- Cholesterol: 23mg
- Sodium: 462mg
- Potassium: 103mg
- Fiber: 1g
- Sugar: 0.3g
- Vitamin A: 297 IU
- Vitamin C: 24mg
- Calcium: 168mg
- Iron: 1mg
Nutrition information is automatically calculated and should be used as an approximation.
Additional Information
- Course: Appetizer
- Cuisine: American
We hope you thoroughly enjoy this incredibly easy and delicious chili cheese dip! Please let us know in the comments if you tried this cheesy dip recipe and what your favorite dippers were. Your feedback brightens our day!