
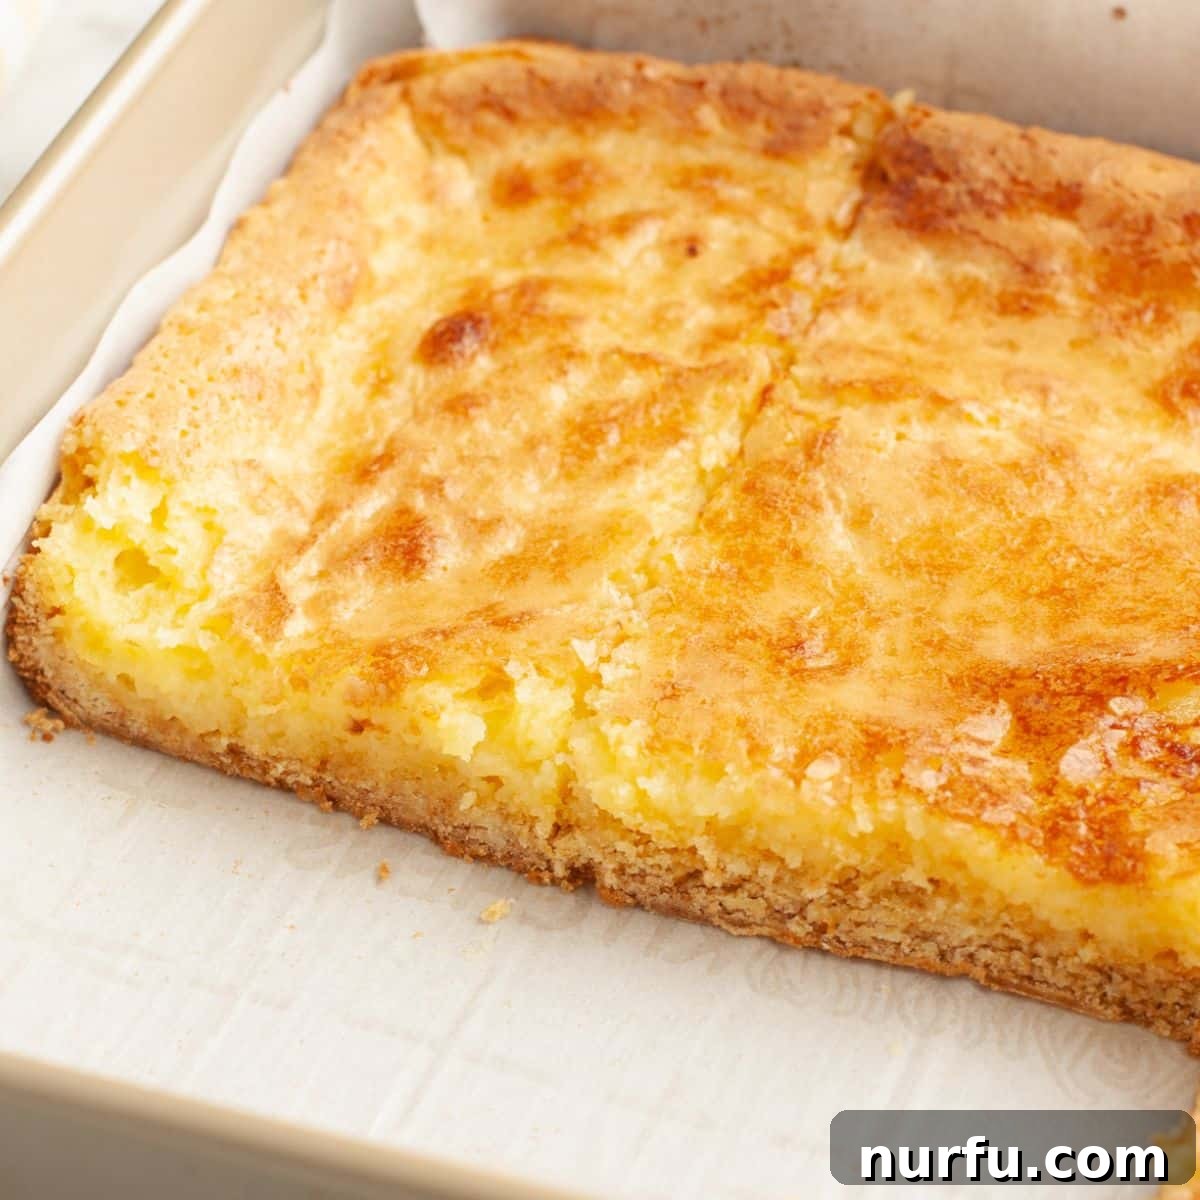
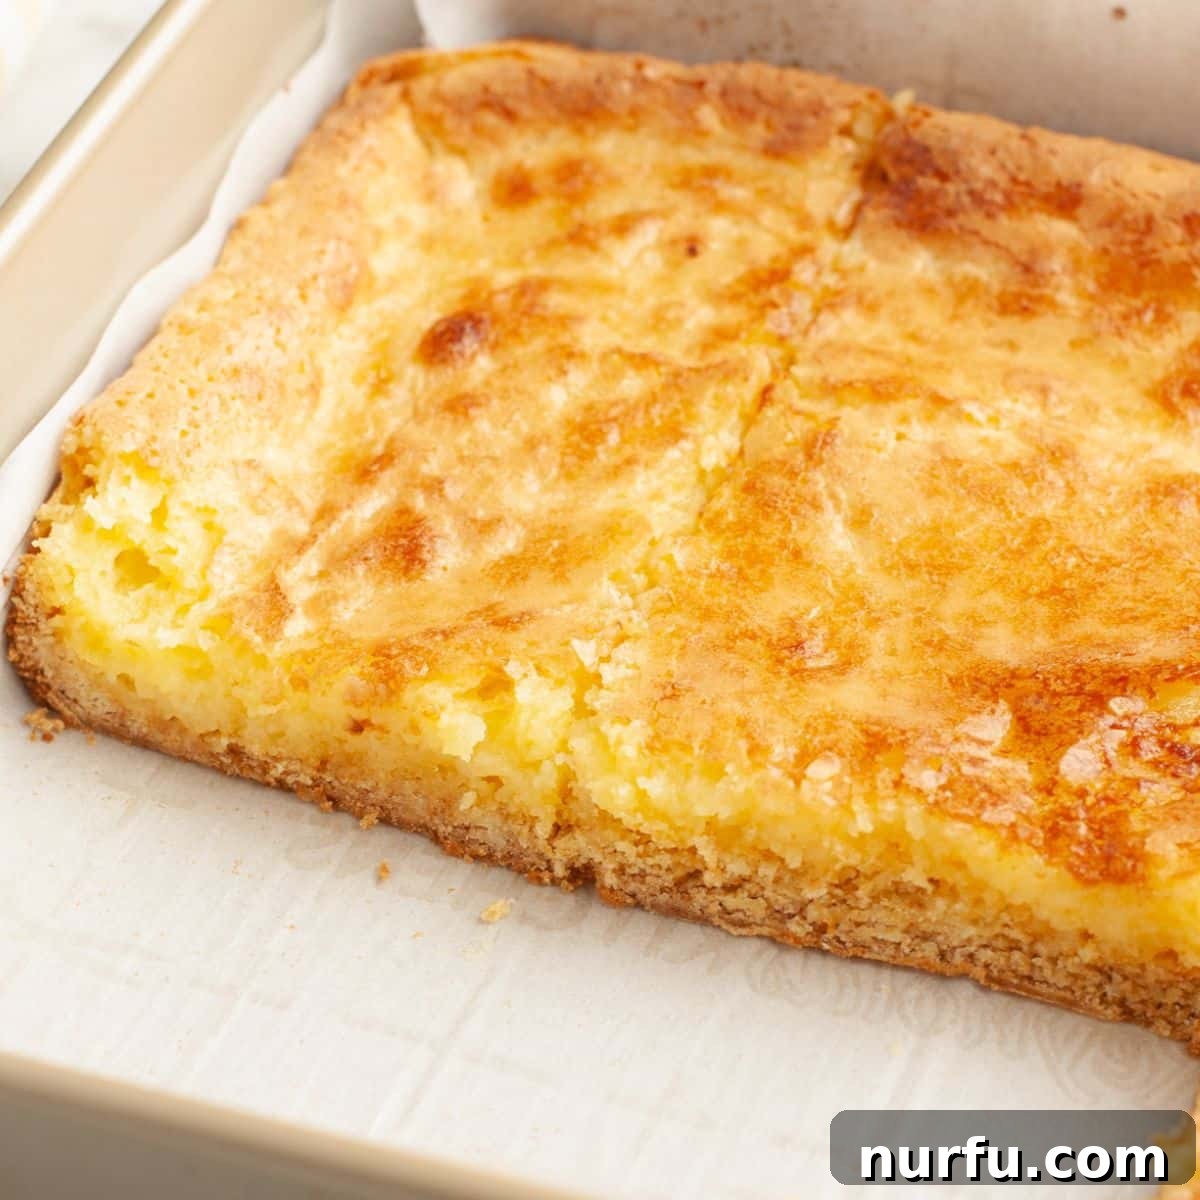
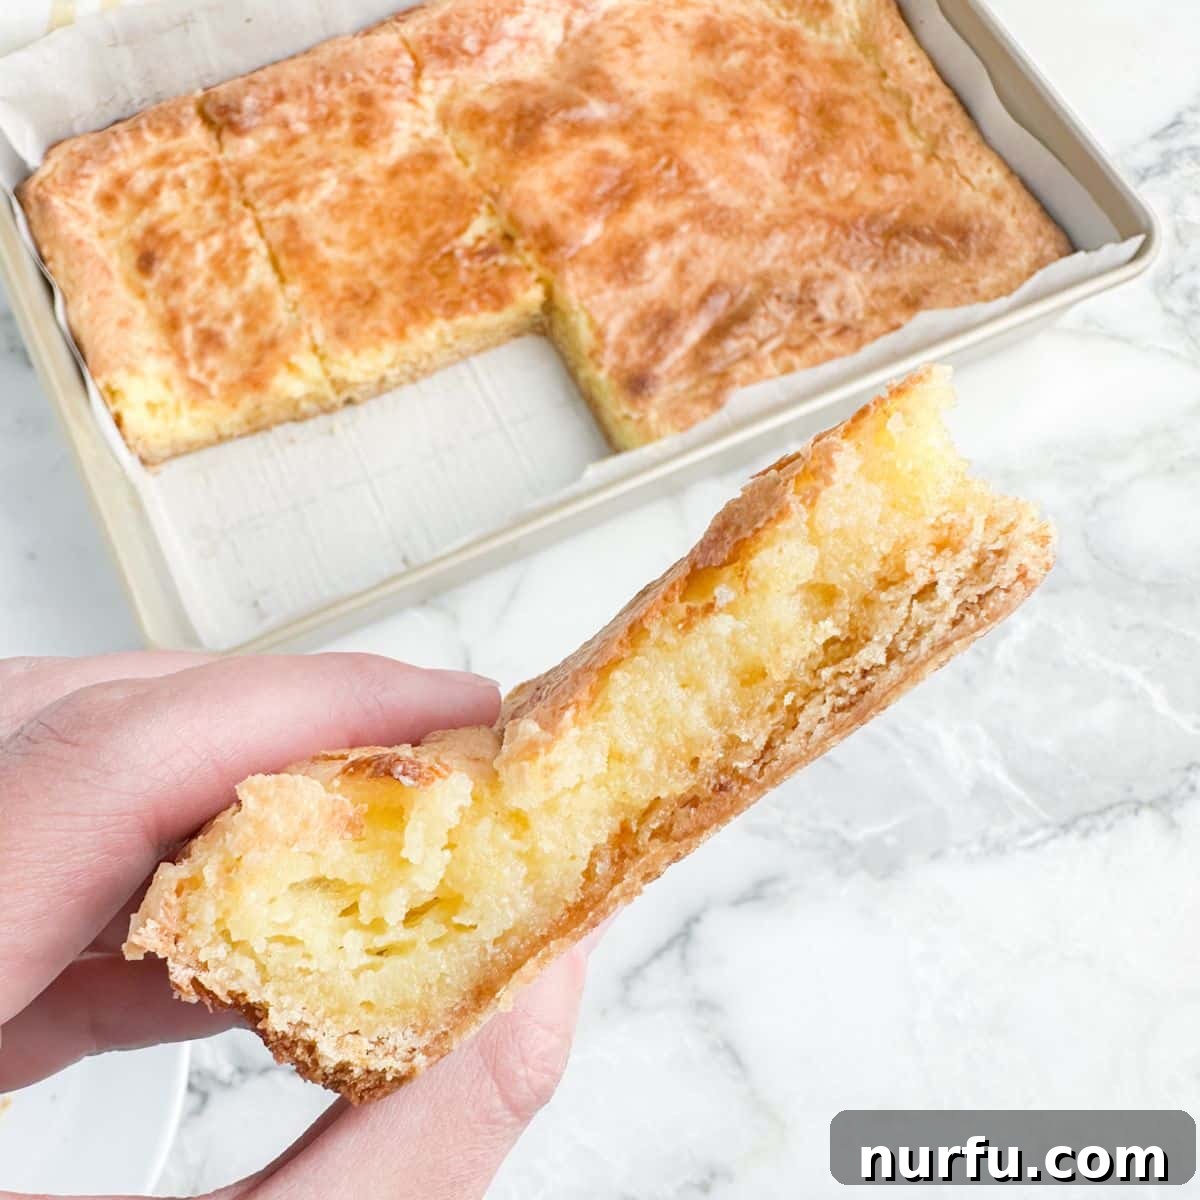
If you’re seeking a truly unforgettable dessert that combines effortless preparation with an incredibly satisfying taste, then you’re about to discover a new favorite: Chess Squares. Often celebrated under delightful aliases like Gooey Butter Cake or Chess Bars, this classic treat is more than just a recipe; it’s an experience in pure indulgence. Imagine a rich, buttery cake crust providing the perfect foundation for a lusciously soft, ooey-gooey cream cheese center, all crowned with a delicately golden, slightly crackled top. Every single bite delivers a harmonious blend of sweet, creamy, and buttery goodness that simply melts in your mouth, leaving you craving more.
For years, these irresistible bars have been a cornerstone of family gatherings and celebrations in my home, consistently earning rave reviews. Their widespread appeal isn’t just a coincidence; it’s a testament to their simple yet profound deliciousness. This is a dessert that looks impressive but hides a secret: it’s incredibly easy to make, relying on just a handful of readily available ingredients, including a convenient box of cake mix. Whether you’re a seasoned baker or just starting your culinary journey, these Chess Squares promise a rewarding and utterly delectable outcome. Get ready to add this keeper to your repertoire, because it’s guaranteed to be a crowd-pleaser for any occasion, all year round!
Why You’ll Adore This Easy Chess Squares Recipe
There are countless reasons why Chess Squares have become a beloved staple in countless kitchens, and why they’re destined to become one of your go-to dessert recipes. Their charm lies not just in their exquisite taste but also in their incredible versatility and straightforward preparation.
- Universal Appeal: This dessert is a guaranteed hit with everyone who tries it. The unique combination of a tender, buttery cake crust paired with a rich, custard-like cream cheese filling creates a flavor and texture profile that is simply irresistible. It’s the ideal dish to bring to holiday parties, casual potlucks, birthday celebrations, or simply to enjoy as a comforting treat at home. Expect compliments and requests for the recipe every time!
- Effortless Preparation: Don’t let the sophisticated taste fool you; this Chess Squares recipe is remarkably simple to prepare. With minimal steps and common pantry ingredients, you can whip up a batch in no time. It’s perfect for busy schedules when you need a show-stopping dessert without spending hours in the kitchen. The use of a boxed cake mix as a base simplifies the process even further, making it accessible for bakers of all skill levels.
- Infinitely Customizable: One of the most enjoyable aspects of this recipe is its adaptability. While a classic yellow or golden butter cake mix provides a wonderful foundation, you can easily experiment with different cake mix flavors to create exciting variations. Imagine zesty lemon Chess Squares for a summer treat, festive red velvet ones for the holidays, or even chocolate for the ultimate indulgence. The possibilities are endless, allowing you to tailor this dessert to any craving or occasion.
- Comforting & Nostalgic: For many, Chess Squares evoke a sense of Southern comfort and nostalgic charm. They are reminiscent of homemade goodness and simpler times, offering a warm and inviting dessert experience that feels both familiar and special.
- Perfect Texture Contrast: The magic of Chess Squares lies in their distinct layers. The slightly firm, golden crust provides a delightful contrast to the incredibly soft, gooey, and almost pudding-like center. This textural interplay ensures every bite is an exciting culinary adventure.
Simple Ingredients for Irresistible Chess Squares
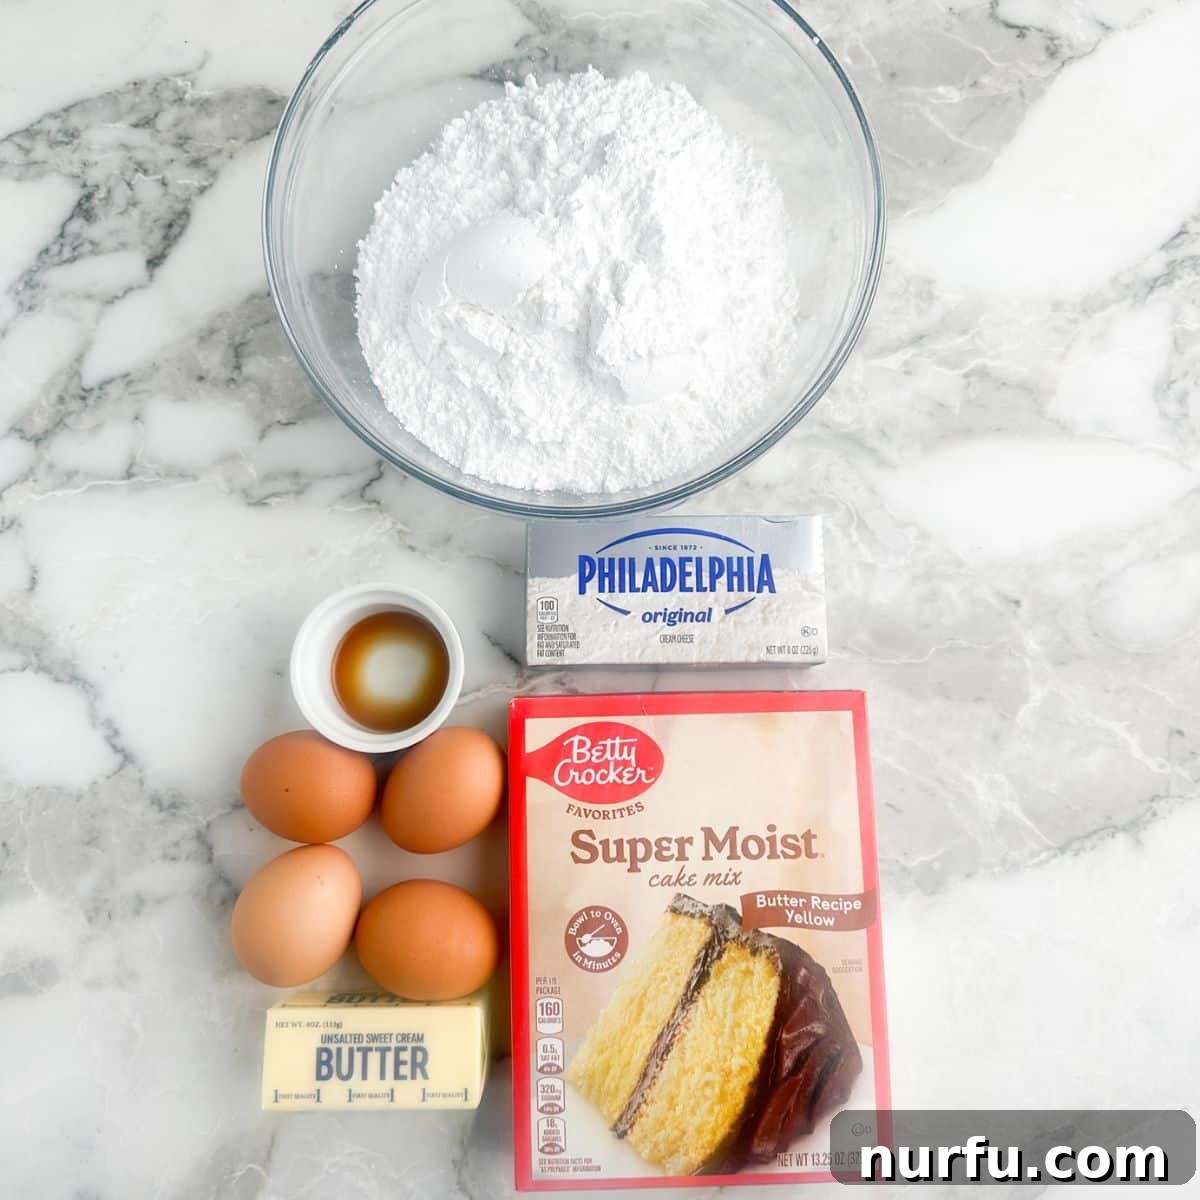
One of the many beauties of this Chess Squares recipe is its reliance on a short list of accessible ingredients. You likely have most of these staples in your pantry and refrigerator already, making it easy to whip up this decadent dessert on a whim. Each ingredient plays a crucial role in achieving that signature gooey texture and rich flavor.
- Boxed Cake Mix: This is the secret shortcut that makes the crust incredibly easy and consistent. A golden butter cake mix or a classic yellow cake mix works wonderfully, providing a rich, tender base. Feel free to explore other flavors for customized bars!
- Unsalted Butter: Essential for both the crust and the filling, butter contributes to the rich, moist texture and deepens the overall flavor profile. Using unsalted butter allows you to control the total sodium content in your dessert.
- Cream Cheese: The star of the gooey topping, cream cheese is what gives these bars their signature tang, richness, and unbelievably creamy texture. Ensure it’s softened to room temperature for a smooth, lump-free filling.
- Eggs: Eggs act as a binder, providing structure to the crust and richness and stability to the cream cheese layer. They help create that perfect custard-like consistency in the gooey center.
- Vanilla Extract: A splash of good quality vanilla extract enhances all the other flavors, adding warmth and depth to both the crust and the sweet cream cheese topping.
- Powdered Sugar (Confectioners’ Sugar): This finely milled sugar is key for creating a silky-smooth, sweet cream cheese filling without any graininess. It also provides the perfect finishing touch as a dusting on top of the cooled squares.
Crafting Your Irresistible Chess Squares: A Step-by-Step Guide
Making these delightful Chess Squares is a straightforward process, broken down into a few simple steps. Follow these instructions carefully to achieve the perfect balance of a buttery crust and a luscious, gooey center.
Step One: Prepare the Dreamy Crust
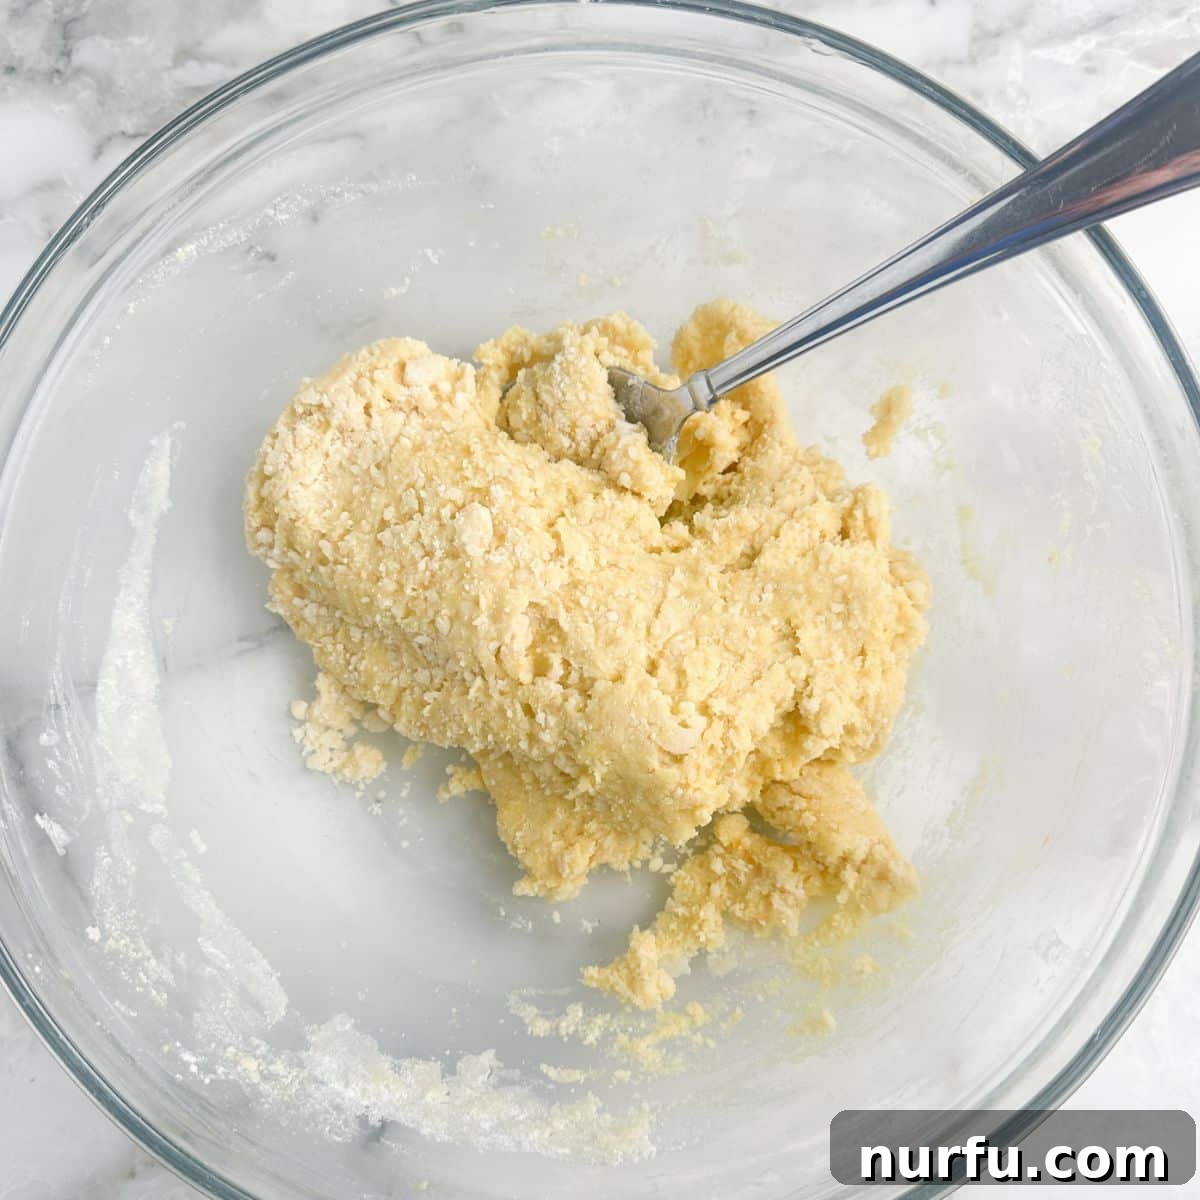
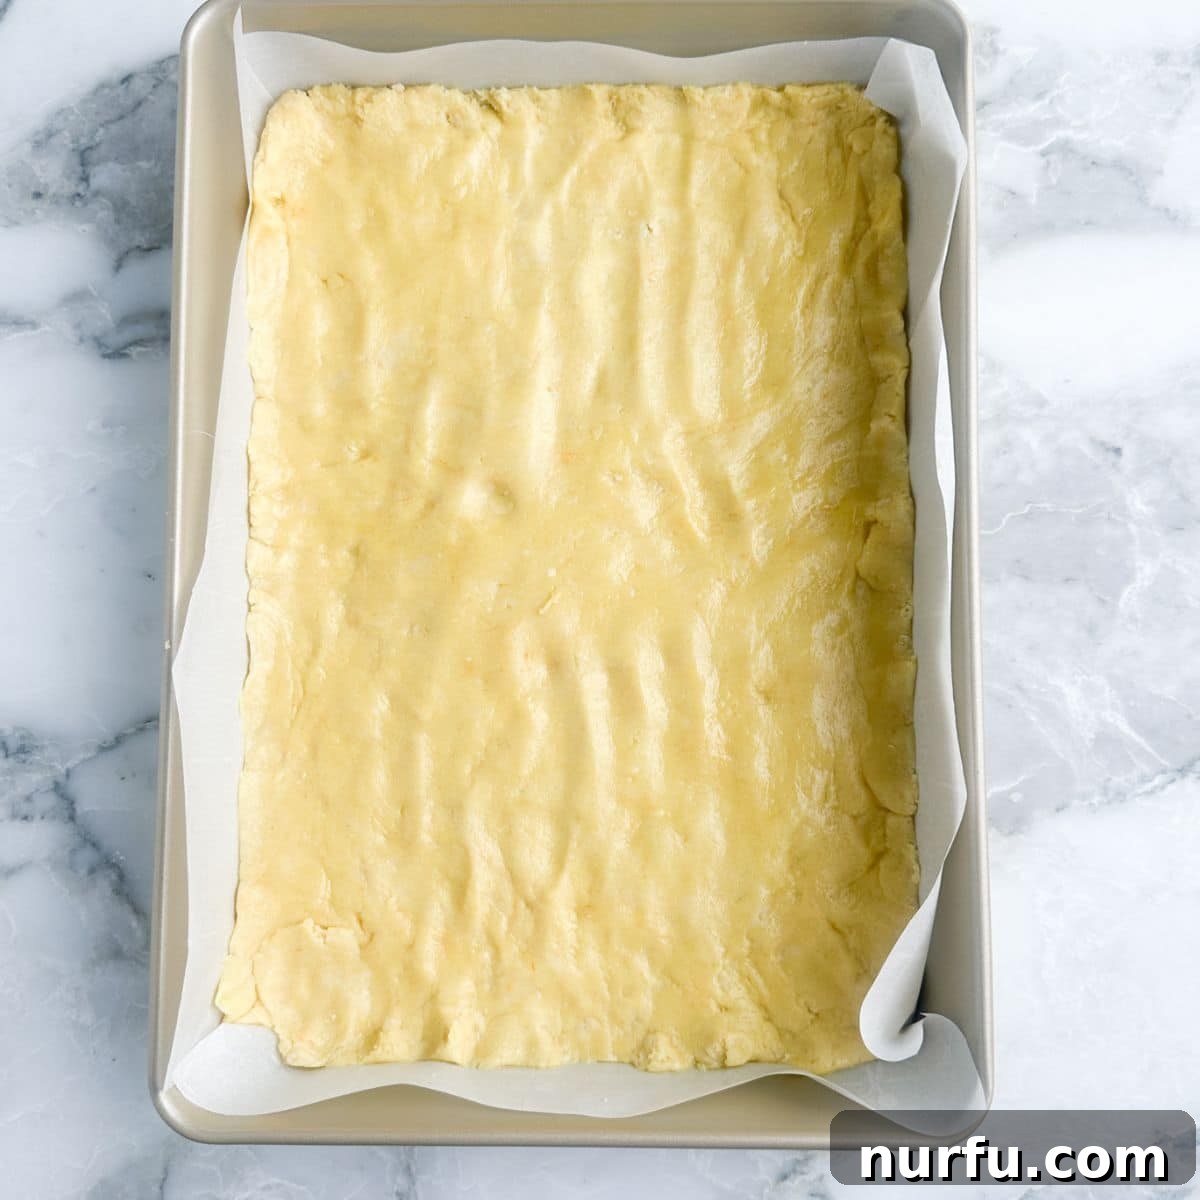
Start by preheating your oven to 350°F (175°C). This ensures your oven is at the correct temperature when your pan is ready to go in. Next, prepare your 9×13 inch baking pan. For easy removal and cleanup, I highly recommend lining the pan with parchment paper, leaving an overhang on the sides to create “handles.” Then, lightly spray the parchment paper or grease the pan directly with non-stick cooking spray or a thin layer of butter. In a medium mixing bowl, combine the box of cake mix, half a cup of melted unsalted butter, and one of your eggs. Mix these ingredients together until they form a soft, crumbly dough. This dough will be relatively thick. Press this mixture evenly into the bottom of your prepared 9×13 inch baking pan. You can use your greased hands or the back of a spatula to ensure a uniform layer, pushing it right up to the edges.
Step Two: Prepare the Gooey Topping
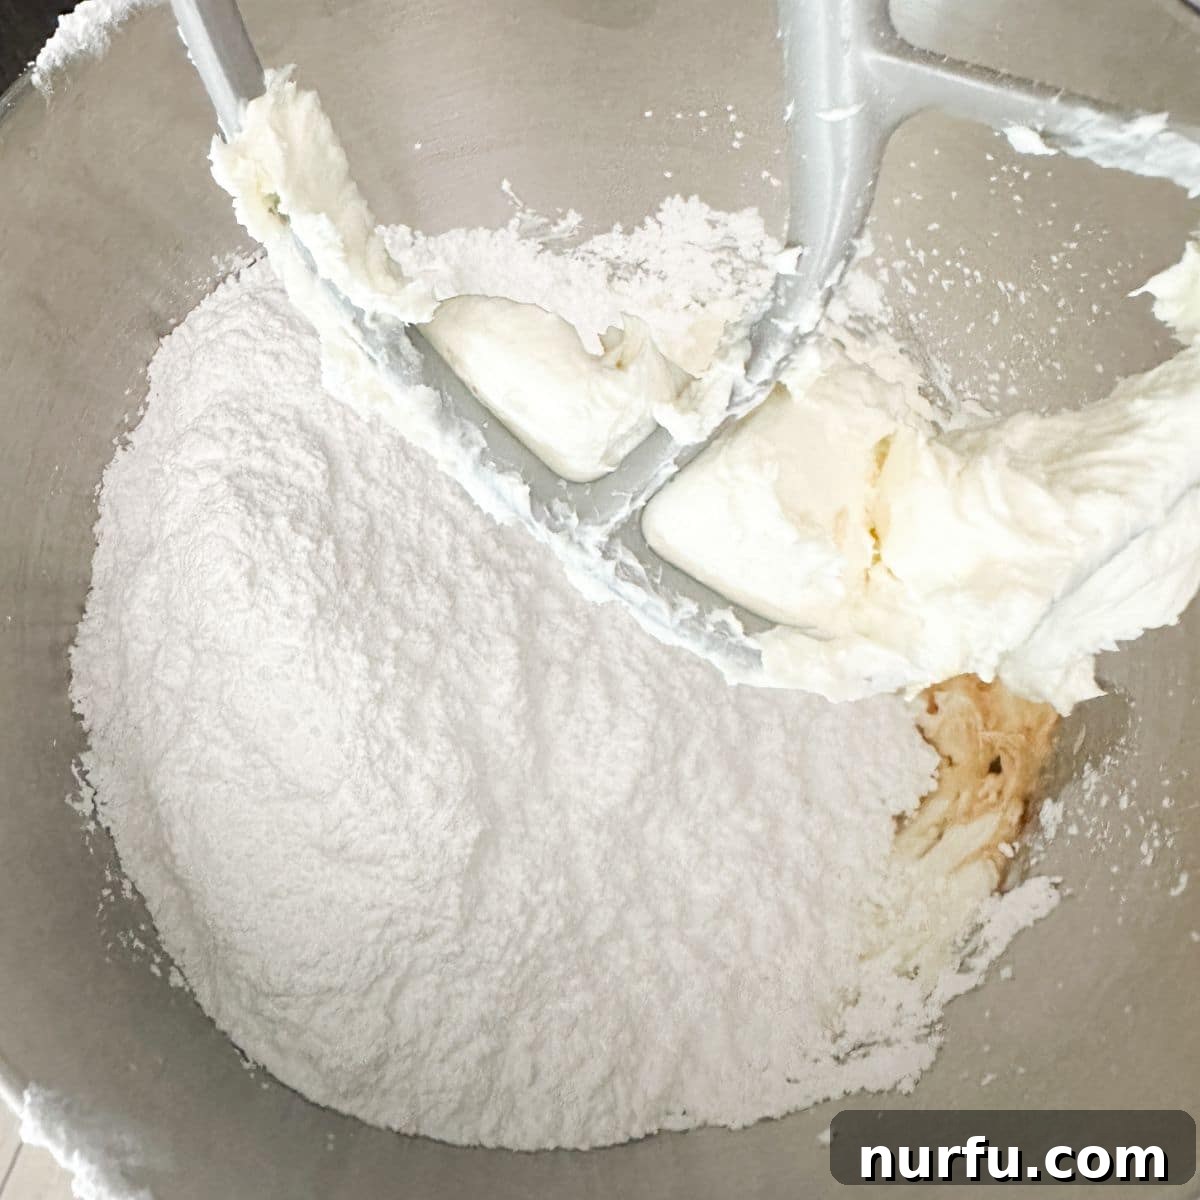
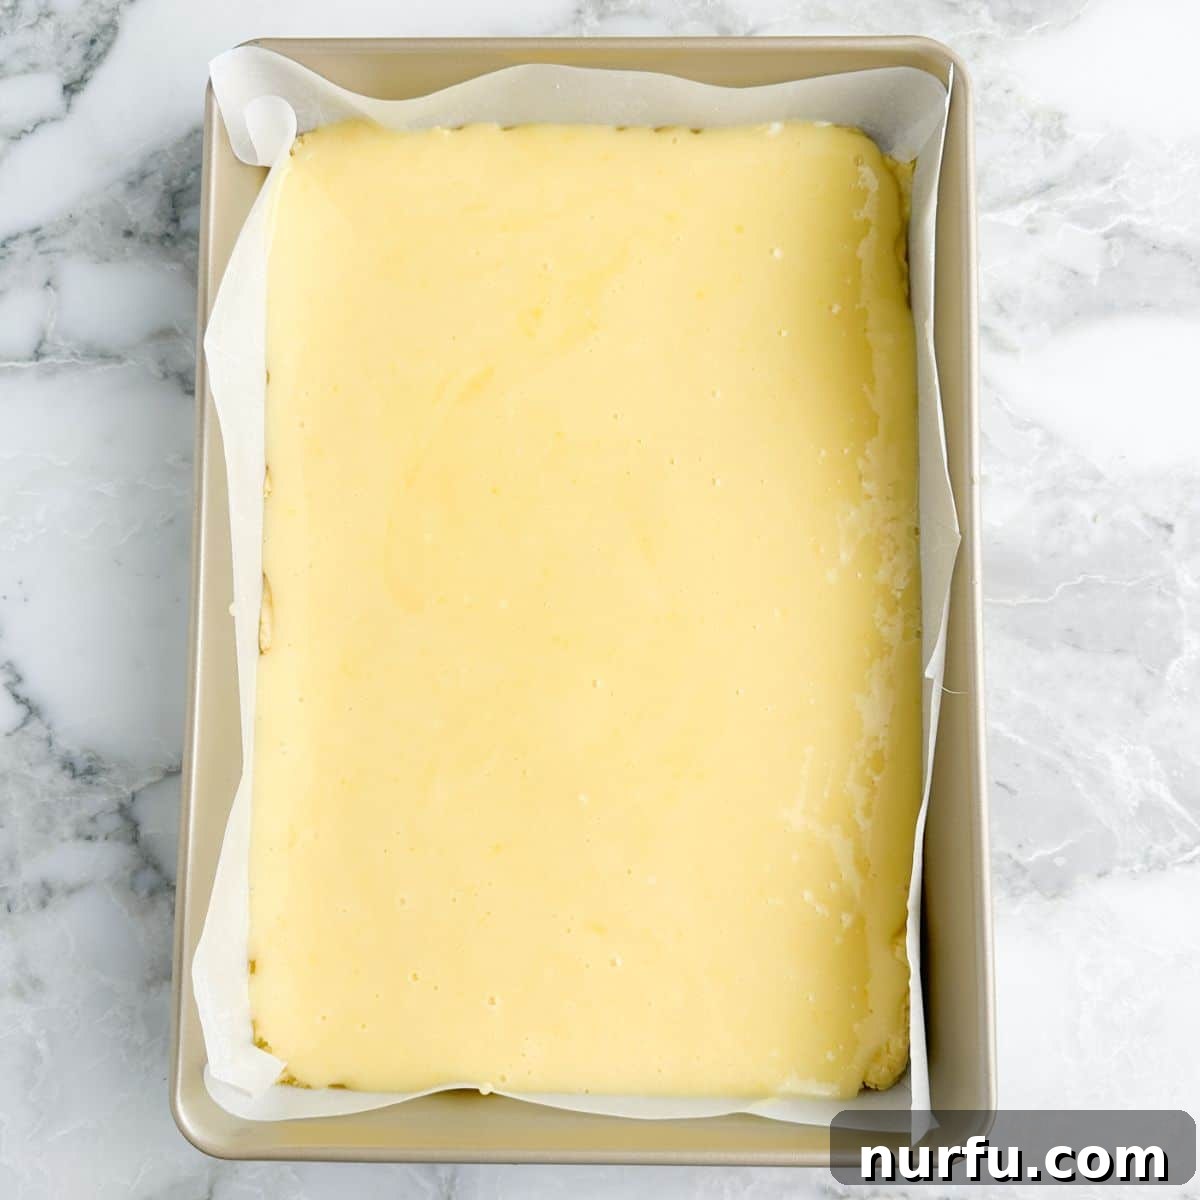
Now, it’s time to create the star of the show: the incredibly gooey and delicious cream cheese topping. In a separate large mixing bowl, combine the softened cream cheese, all four cups of powdered sugar, the vanilla extract, and the remaining three eggs. Using an electric mixer is highly recommended for this step, as it will help you achieve a perfectly smooth and creamy consistency, free from any lumps. Beat the mixture on medium speed until all the ingredients are well incorporated, light, and fluffy, typically for 2-3 minutes. Once thoroughly combined, carefully pour this luscious cream cheese mixture evenly over the prepared cake mix crust in your baking pan. Gently spread it out with a spatula to ensure it forms an even layer that covers the entire surface of the crust.
Step Three: Bake to Golden Perfection
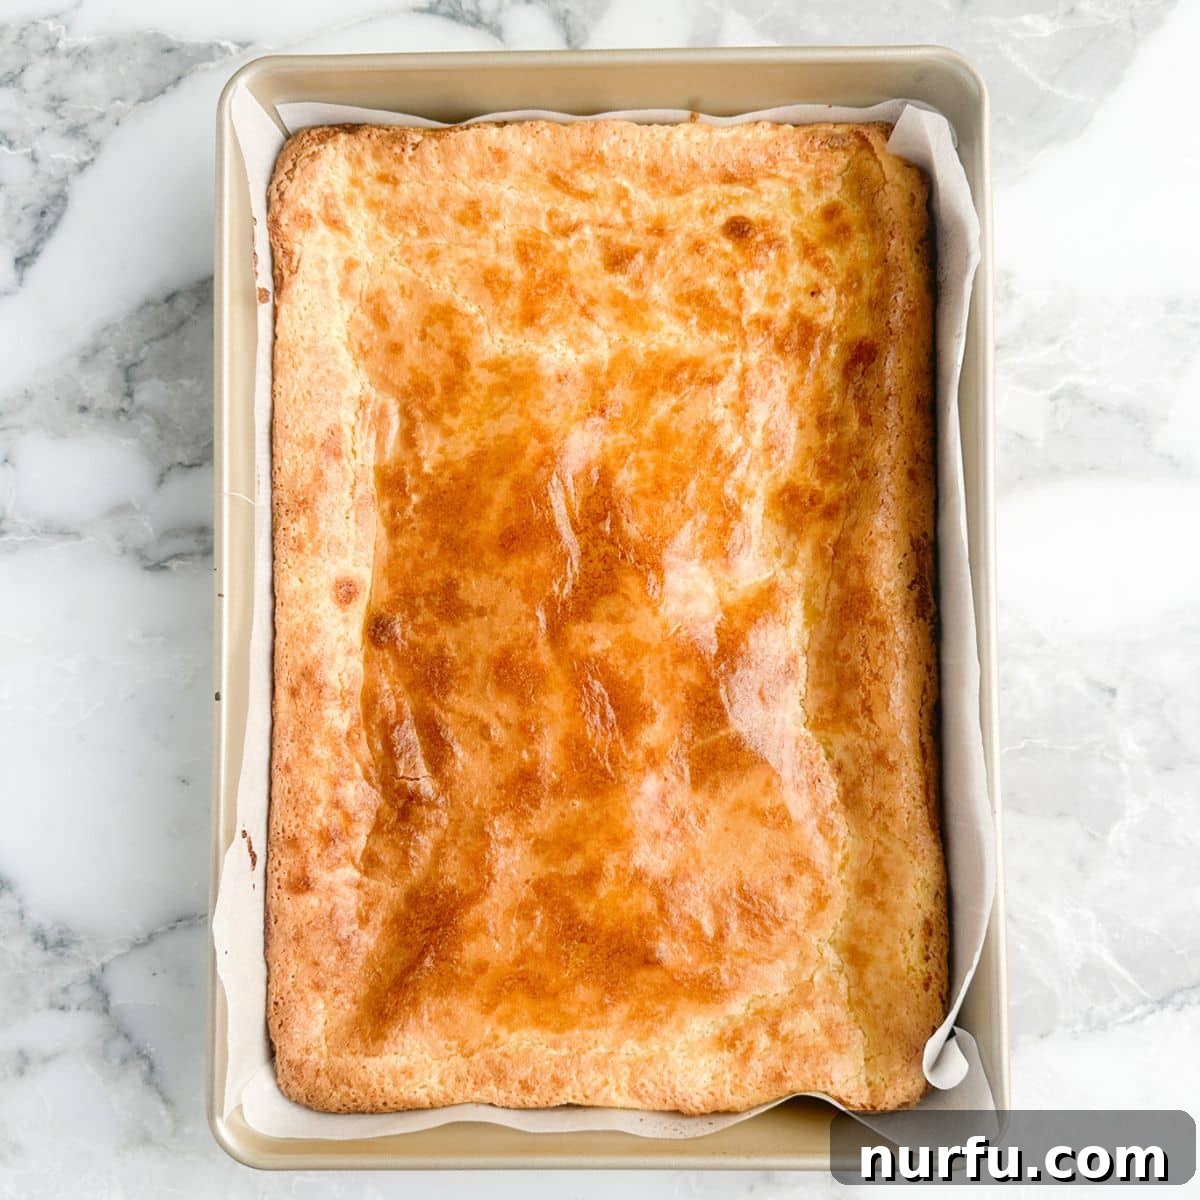
Carefully place your baking pan into the preheated oven. Bake for approximately 35-40 minutes. You’ll know the Chess Squares are done when the edges begin to turn a light golden brown. The center might still appear slightly soft and jiggly, and this is perfectly normal and desired! It will firm up as the squares cool. It’s crucial not to overbake them, as this can lead to a tough crust rather than the tender, buttery base we’re aiming for. Once baked, remove the pan from the oven and place it on a wire rack to cool completely. This cooling step is paramount for the squares to set properly, so resist the temptation to cut into them too soon. Allow them to cool for at least an hour, or ideally, until they reach room temperature. After cooling, you can enhance their presentation and sweetness by dusting the top with an additional sprinkle of powdered sugar, if desired, before cutting them into neat squares. Serve and enjoy!
Baking Tip: When checking for doneness, don’t be alarmed if the center of your Chess Squares looks a bit sunken or wobbly. This is the hallmark of their signature gooey texture! The edges should be lightly golden, but the middle should retain a soft, custardy consistency. Overbaking will make the crust too tough and could dry out the decadent center, so keep a close eye on them during the last few minutes.
Once your magnificent Chess Squares have cooled sufficiently, you can elevate their appeal with a final dusting of powdered sugar. Then, using a sharp knife, carefully cut them into uniform squares. They are now ready to be served and savored! If you’re eager to explore more delightful dessert bar recipes, be sure to try these classic Congo Bars, refreshing Strawberry Cake Bars, and comforting Oatmeal Fudge Bars.
Expert Tips for Perfect Chess Squares Every Time
Achieving bakery-quality Chess Squares is simple when you keep a few key tips in mind. These small details can make a big difference in the texture, flavor, and overall success of your dessert.
- Soften the Cream Cheese Properly: This is a non-negotiable step! Cold cream cheese will result in a lumpy filling, no matter how much you beat it. To soften, simply leave it at room temperature for at least 30-60 minutes before you start baking. If you’re short on time, you can carefully microwave it on low power for 10-15 second intervals until just soft, but be careful not to melt it. Softened cream cheese ensures a wonderfully creamy and smooth filling.
- Utilize an Electric Mixer: While you can technically mix the ingredients by hand, an electric mixer (either a stand mixer or a handheld mixer) is your best friend for this recipe. It’s particularly effective for combining the cream cheese mixture, ensuring it becomes light, airy, and exceptionally creamy without any undesirable lumps. Beat until it’s visibly smooth and well-aerated.
- Prepare Your Baking Pan Thoughtfully: To guarantee your Chess Squares come out cleanly and beautifully, always prepare your baking pan. Lining it with parchment paper is an excellent trick; allow the paper to extend over the edges of the pan to create convenient handles for lifting the baked squares out easily. After lining, or if not using parchment, spray the pan generously with non-stick cooking spray or grease it with butter. This prevents sticking and makes cutting and serving a breeze.
- Grease Your Hands or Use a Spatula for the Crust: The cake mix crust can be a bit sticky. To effortlessly press it into an even layer in the pan, lightly grease your hands with butter or cooking spray. Alternatively, use the back of a greased spatula. This prevents the dough from sticking to you and helps create a smooth, uniform base for your gooey topping.
- Patience is Key: Cool Before Cutting: This might be the hardest tip to follow because the aroma of freshly baked Chess Squares is so tempting! However, it is absolutely essential to let the squares cool completely before attempting to cut them. If you cut them while warm, the gooey center will be too soft and might fall apart. Cooling allows the filling to set properly, resulting in clean, perfect squares that hold their shape. For best results, cool at room temperature for at least an hour, or even chill in the refrigerator for 30 minutes to an hour for extra firmness.
- Don’t Overmix the Crust: Once the crust ingredients are just combined, stop mixing. Overmixing can develop the gluten in the flour, leading to a tougher crust. We want a tender, buttery base.
- Freshness of Ingredients Matters: While this recipe uses simple ingredients, using fresh cream cheese and eggs will always yield the best flavor and texture.
Storing Your Delicious Chess Squares
Proper storage ensures your Chess Squares remain fresh, delicious, and maintain their perfect gooey texture for as long as possible.
To Store: Keep any leftover Chess Bars in an airtight container. Because they contain cream cheese, refrigeration is highly recommended to maintain their consistency and extend their shelf life. Stored in the refrigerator, these delectable squares will remain fresh and delightful for up to 1 week. Bring them to room temperature for about 15-20 minutes before serving for the best texture, or enjoy them chilled.
To Freeze: Chess Squares freeze beautifully, making them an excellent make-ahead dessert! To freeze, first ensure the squares are completely cooled. Then, wrap individual squares or small portions tightly in plastic wrap. For added protection against freezer burn, place the wrapped squares into a freezer-safe bag or an airtight container. They can be frozen for 2-3 months. When you’re ready to enjoy them, thaw them overnight in the refrigerator or for a few hours at room temperature.
Frequently Asked Questions About Chess Squares
Got questions about making, baking, or storing your Chess Squares? Here are answers to some of the most common inquiries to help you achieve perfect results every time.
You’ll know your Chess Bars are perfectly baked when the edges of the crust and the topping start to turn a light golden brown. The center, however, will likely still look a little soft, jiggly, and possibly even slightly undone. This is exactly what you want! The gooey center will continue to set and firm up considerably as the bars cool. Resist the urge to bake them until the center is completely firm, as this will result in a dry, overbaked dessert.
While Chess Squares can technically be left at room temperature for 1-2 days, it’s highly recommended to refrigerate them. Because the gooey filling is made with cream cheese, it becomes very soft and almost liquid-like at warmer temperatures, which can affect the overall texture and stability of the bars. Refrigerating not only helps the bars firm up to their ideal consistency but also significantly extends their freshness and shelf life. Chilled Chess Squares often have a delightful fudge-like texture that many prefer.
Absolutely! One of the best aspects of this recipe is how easily it adapts to different flavors by simply switching out the cake mix. This allows for endless creative variations! Popular choices include using a lemon cake mix for a bright, tangy twist, a strawberry cake mix for a fruity and colorful dessert, or even a rich red velvet cake mix for a decadent and festive option. Don’t be afraid to experiment with chocolate, spice, or even funfetti cake mixes to find your new favorite combination!
Yes, Chess Squares are an excellent dessert to prepare in advance! They often taste even better the next day after the flavors have had more time to meld and the filling has fully set. You can bake them a day or two before serving and store them in an airtight container in the refrigerator. This makes them perfect for parties, potlucks, or holiday gatherings, allowing you to focus on other preparations closer to the event.
The origin of the name “Chess Squares” is a bit debated, but it’s widely believed to be a Southern term. Some theories suggest it comes from “cheese pie,” which evolved into “chess pie,” and then “chess squares” as a bar version. Another theory is that it refers to a “chest” or “special” pie/dessert, or that they are simply “just pie” in Southern dialect. Regardless of the exact etymology, the name is now synonymous with this wonderfully gooey, buttery, and classic Southern dessert.
Classic Chess Squares
Simple, delicious Chess Squares are a classic dessert that can be made with just a few ingredients. These Chess Bars are a beloved Southern dessert that are made with a box of cake mix for ultimate ease and irresistible flavor.
Ingredients
- 1 box golden butter cake mix or yellow cake mix
- 4 large eggs
- 1 (8 ounce) block cream cheese, softened to room temperature
- ½ cup unsalted butter, melted
- 4 cups powdered sugar
- 1 teaspoon vanilla extract
Instructions
- Preheat your oven to 350°F (175°C). Lightly spray a 9×13 inch baking pan with non-stick cooking spray, or grease it with butter. For easier removal, you can also line the pan with parchment paper, leaving an overhang on the sides.
- In a medium bowl, combine the cake mix, melted butter, and 1 egg. Mix until a dough forms. Press this cake batter mixture evenly into the bottom of the prepared pan. You can use greased hands or a spatula for this.
- In a large mixing bowl, using an electric mixer, beat together the softened cream cheese, the remaining 3 eggs, vanilla extract, and powdered sugar until smooth and creamy (about 2-3 minutes).
- Carefully spread this cream cheese mixture evenly over the cake mix crust in the baking pan.
- Bake for 35-40 minutes. The edges should be lightly golden, and the center may still appear soft and jiggly; this is normal. Do not overbake.
- Remove from oven and let the Chess Squares cool completely on a wire rack for at least 1 hour before cutting into squares and serving.
Notes
- Soften the cream cheese: This is a crucial step for a creamy, lump-free filling. Ensure it’s at room temperature before mixing.
- Use an electric mixer: An electric mixer helps achieve a smooth, airy, and creamy consistency for the topping.
- Grease or line the baking pan: For easy removal, line your baking pan with parchment paper and spray with non-stick cooking spray, or simply grease thoroughly with butter.
- Use a spatula or grease your hand: The crust can be sticky; a greased hand or spatula helps press it evenly into the pan.
- Cool before cutting: Allow the Chess Squares to cool completely. This ensures the gooey center sets, allowing for clean, perfect squares.
Nutrition
Calories: 404kcal | Carbohydrates: 76g | Protein: 4g | Fat: 10g | Saturated Fat: 6g | Polyunsaturated Fat: 1g | Monounsaturated Fat: 3g | Trans Fat: 0.4g | Cholesterol: 75mg | Sodium: 337mg | Potassium: 44mg | Fiber: 1g | Sugar: 58g | Vitamin A: 317IU | Calcium: 102mg | Iron: 1mg
Nutrition information is automatically calculated and should only be used as an approximation.
Additional Info
There’s a special magic in baking, especially when the outcome is as consistently delightful as these Chess Squares. They are more than just a dessert; they are a celebration of simple ingredients coming together to create something truly extraordinary. With their buttery crust, luscious cream cheese filling, and perfect balance of sweetness, they embody comfort and joy in every square.
Whether you’re making them for a special gathering or simply to treat yourself and your loved ones, this recipe promises an easy and rewarding baking experience. So go ahead, preheat your oven, gather your ingredients, and embark on a delicious journey to create these unforgettable Chess Squares. You’ll quickly understand why they’re a timeless favorite and a true testament to the simple pleasures of homemade desserts. We hope you enjoy every last bite!