
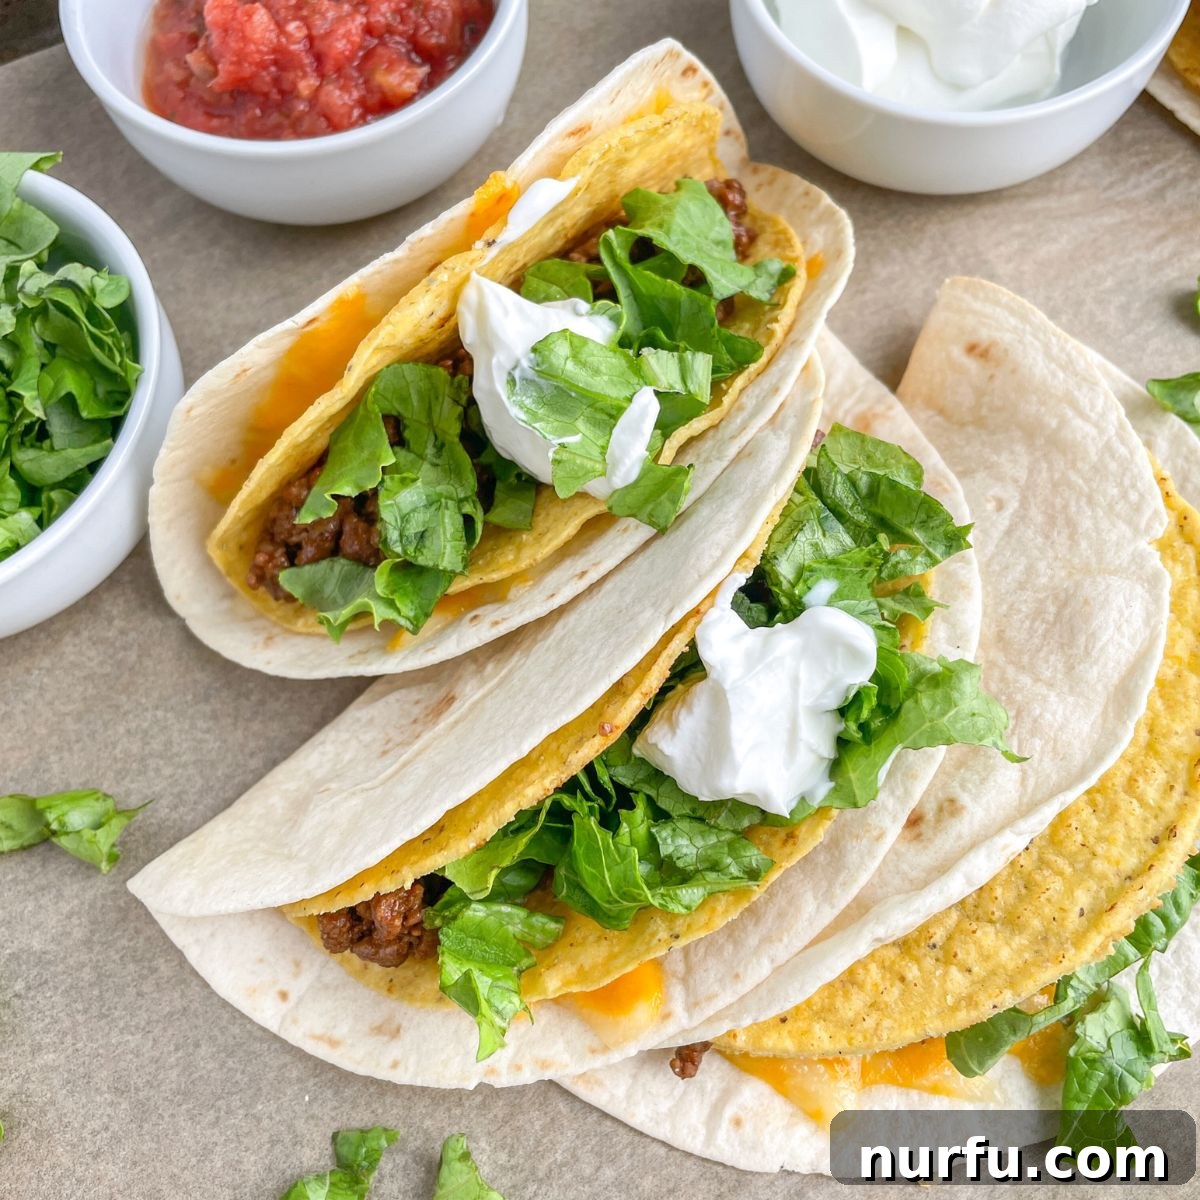
Craving the iconic taste of Taco Bell’s Cheesy Gordita Crunch but prefer the comfort and quality of a homemade meal? You’re in luck! This comprehensive copycat recipe allows you to recreate this beloved fast-food favorite right in your own kitchen, often in under 30 minutes. Forget the drive-thru lines and questionable ingredients; with a few simple staples, you can assemble a quick, delicious dinner that rivals the original and might even surpass it.
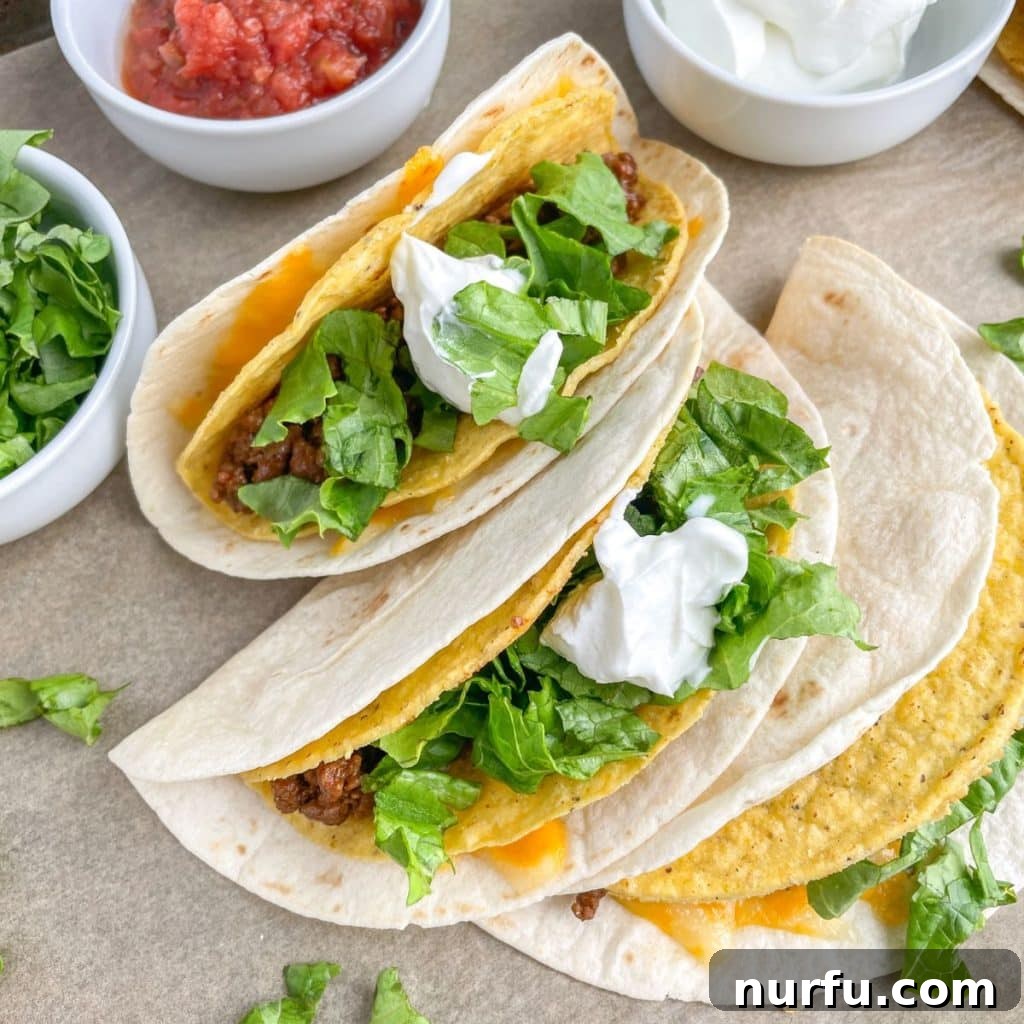
There was a time when weekly visits to fast-food drive-thrus were a regular occurrence for my family. The cumulative cost and the time spent driving to and from these establishments eventually inspired me to seek out a more convenient and economical solution. Thus began my culinary adventure into creating homemade copycat versions of our most cherished restaurant meals. The satisfaction of crafting these dishes at home, knowing exactly what ingredients went into them, quickly became a rewarding pursuit.
This journey led directly to the development of this fantastic copycat Cheesy Gordita Crunch recipe. It’s an absolute must-have for my daughter, who ranks it as one of her top menu items from Taco Bell. The challenge was to replicate that unique combination of soft, chewy, and crunchy textures with savory, cheesy goodness. As it turns out, recreating this culinary masterpiece at home is not only surprisingly easy but also incredibly satisfying. Get ready to ditch the takeout menu and dive into the world of homemade Taco Bell magic!
Why You’ll Love This Homemade Cheesy Gordita Crunch Recipe
If you’re still on the fence about making your own Cheesy Gordita Crunch, consider these compelling reasons:
- Speed and Simplicity: This recipe is a weeknight warrior’s dream, coming together in less than 30 minutes from start to finish. It’s perfect for those busy evenings when you need a satisfying meal without the fuss.
- Superior Flavor and Quality: Many argue that homemade versions often taste better than their fast-food counterparts, and this Cheesy Gordita Crunch is no exception. You have full control over the freshness and quality of your ingredients, allowing for a truly delicious and wholesome experience. Say goodbye to preservatives and hello to fresh, vibrant flavors!
- The Ultimate Taco Bell Copycat Experience: For devoted fans of Taco Bell, mastering this copycat recipe opens up a world of possibilities. It’s an ideal complement to other DIY Taco Bell favorites. Be sure to explore our copycat Taco Bell nacho cheese dip and our irresistible Taco Bell chicken quesadilla recipes to complete your at-home fast-food feast.
- Cost-Effective: Preparing these gorditas at home significantly cuts down on dining-out expenses, making it a budget-friendly option for families.
- Customization at Your Fingertips: Tailor every aspect of your Cheesy Gordita Crunch to your exact preferences. Adjust the spice level, choose your favorite cheeses, or experiment with various toppings to create your perfect personalized meal.
Essential Ingredients for Your Homemade Cheesy Gordita Crunch
Crafting the perfect copycat Cheesy Gordita Crunch requires a balance of textures and flavors, all achievable with a straightforward list of ingredients. Here’s a closer look at what you’ll need and some tips for selecting the best components:
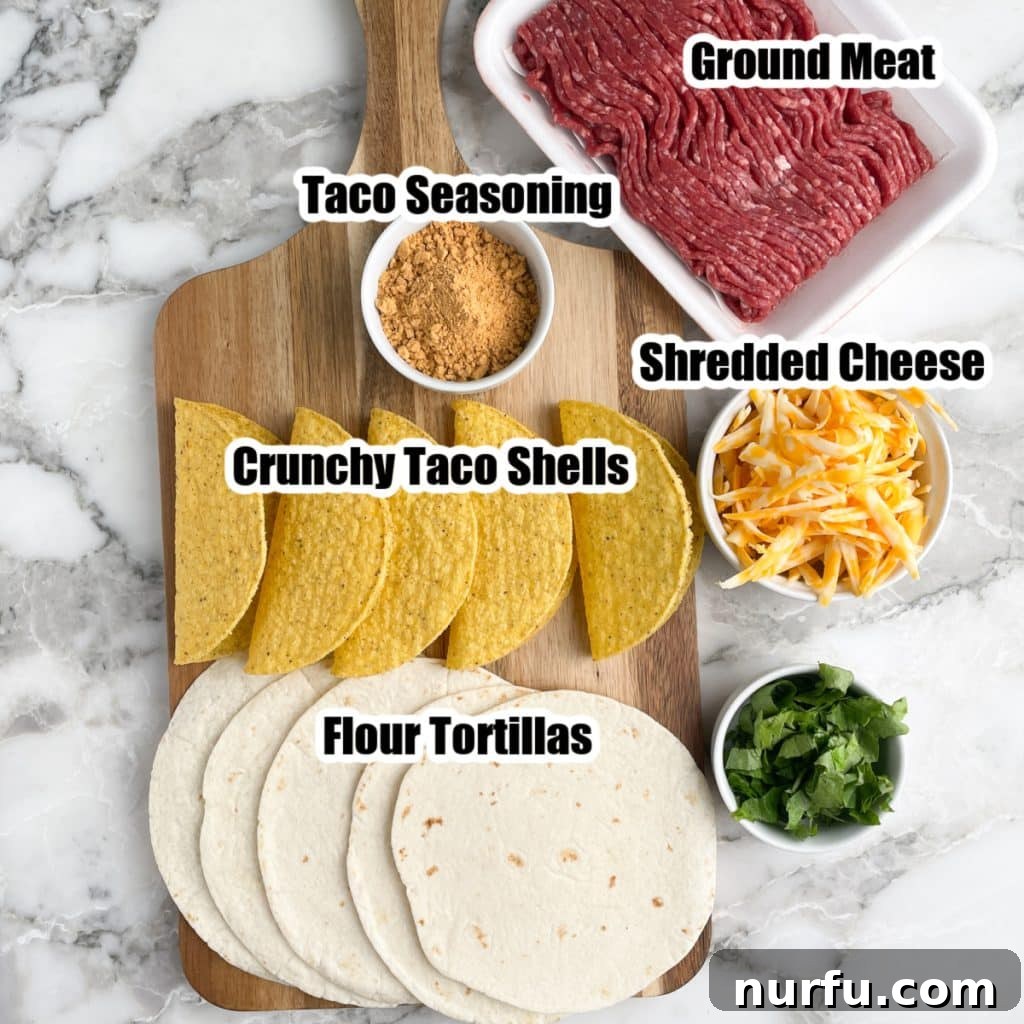
Soft Flour Tortillas: These form the comforting outer layer of your gordita. For optimal pairing with standard crispy taco shells, I highly recommend using fajita-sized tortillas. Their dimensions perfectly complement the crunchy inner shell, allowing for easy folding and a neat package. If you only have taco-sized tortillas, you might need to trim them slightly to fit. In a pinch, a soft piece of flatbread can also serve as a creative alternative for the outer wrap, offering a unique texture.
Crunchy Taco Shells: The quintessential “crunch” in Cheesy Gordita Crunch comes from these hard-shell tacos. They are readily available in most grocery stores, typically found in the international or Mexican food aisle. They are crucial for delivering that satisfying crispy element that contrasts beautifully with the soft tortilla and melted cheese. For an extra touch, you can lightly bake them to enhance their crispness and warmth.
Shredded Cheese: The melty, gooey cheese layer is what binds the two shells together and adds rich flavor. While pre-shredded cheese works, for the absolute best melt and creaminess, I highly recommend shredding your own cheese from a block. Popular choices include a robust Mexican cheese blend, the creamy combination of Colby Jack, the mild and buttery Monterey Jack, the classic sharp Cheddar cheese, or a zesty Pepper Jack if you enjoy a little heat. The goal is a cheese that melts smoothly and envelops the crunchy shell perfectly.
Flavorful Ground Meat: The hearty filling is traditionally seasoned ground meat. You have the flexibility to choose your favorite: classic ground beef, lean ground chicken, or healthier ground turkey. This recipe is also a fantastic way to utilize leftover shredded chicken, offering a quick and convenient option. Ensure your chosen meat is thoroughly cooked and well-seasoned for maximum taste.
Taco Seasoning: To infuse your meat with authentic Tex-Mex flavor, a packet of taco seasoning is your best friend for convenience. It’s a quick and reliable way to achieve that signature taste. However, for those who prefer to control their ingredients or customize the spice level, feel free to use a homemade taco seasoning mix. Many homemade blends allow you to adjust the salt, chili powder, cumin, and other spices to your liking.
The Creamy Sauce (Optional, but Recommended for Authenticity): While the original article suggests the Taco Bell quesadilla sauce as a topping, the Cheesy Gordita Crunch is famous for its distinct creamy, spicy ranch-like sauce. You can easily whip up a simple version at home by combining mayonnaise, sour cream, a dash of hot sauce (like Cholula or Frank’s RedHot), a squeeze of lime juice, and a pinch of garlic powder and onion powder. Alternatively, our copycat Taco Bell quesadilla sauce recipe is a fantastic choice for an extra layer of flavor and moisture.
Fresh Toppings: Customize your Cheesy Gordita Crunch with an array of fresh and flavorful toppings. Classic choices include cool sour cream, crisp shredded lettuce, tangy salsa, or a kick from sliced jalapeño peppers. Don’t hesitate to get creative with diced tomatoes, chopped onions, fresh cilantro, or even a dollop of guacamole for an added creamy texture.
Crafting Your Cheesy Gordita Crunch: A Step-by-Step Guide
Making your own Cheesy Gordita Crunch is a fun and straightforward process. Follow these steps to assemble your delicious creation:
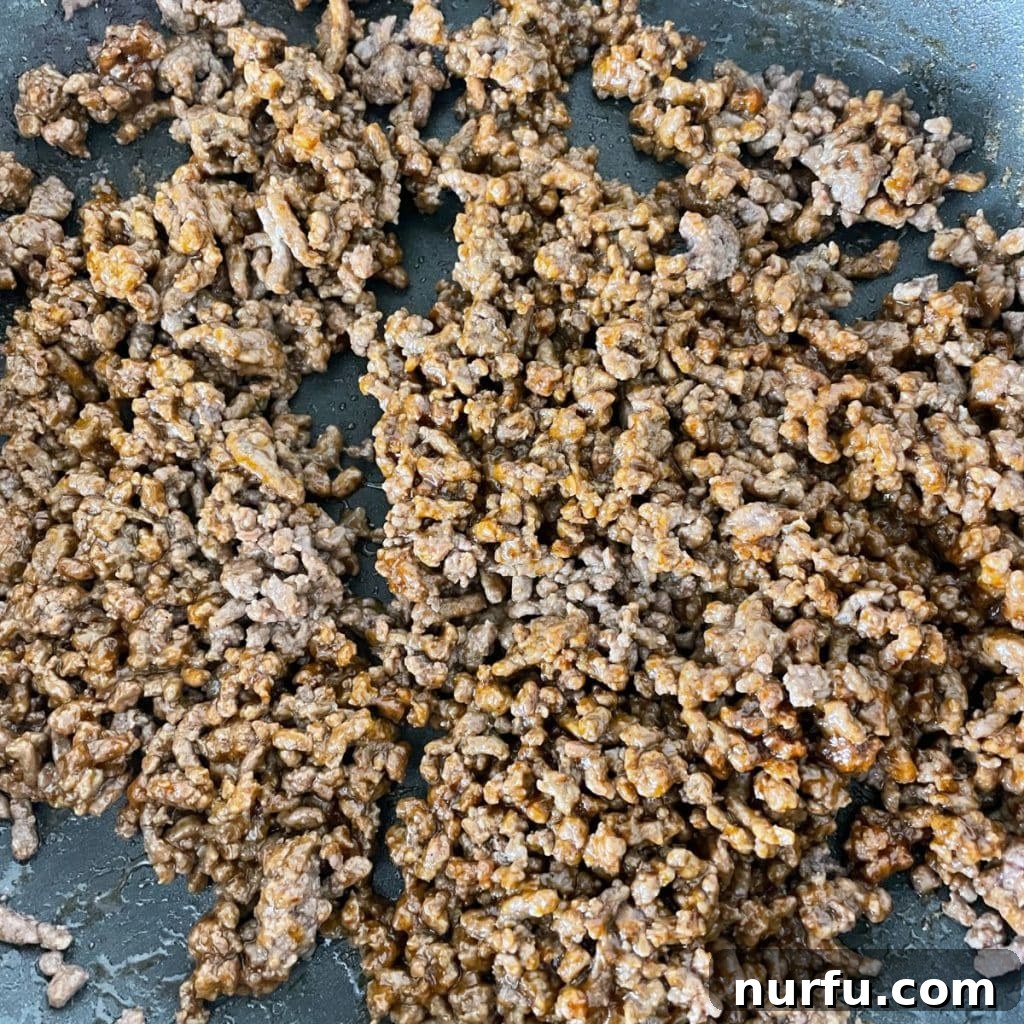
Step One: Prepare Your Ground Meat. Begin by browning your chosen ground meat (beef, chicken, or turkey) in a large skillet over medium-high heat. Break it apart with a spoon as it cooks until it’s no longer pink, typically about 5-7 minutes. Once cooked, drain any excess fat to prevent a greasy filling. Add a splash of water (about 4 tablespoons) to the skillet, then stir in your taco seasoning packet or homemade blend. Allow the mixture to simmer for a few minutes, stirring occasionally, until the liquid has mostly evaporated and the meat is well-coated and fragrant. Set aside.
Step Two: Warm the Crunchy Taco Shells. While your meat is simmering, preheat your oven to 350°F (175°C). Arrange the crispy taco shells on a baking sheet. Bake them for just 2-3 minutes to warm them through and enhance their crispiness. Be careful not to over-bake them, as they can burn quickly. Remove from oven and set aside.
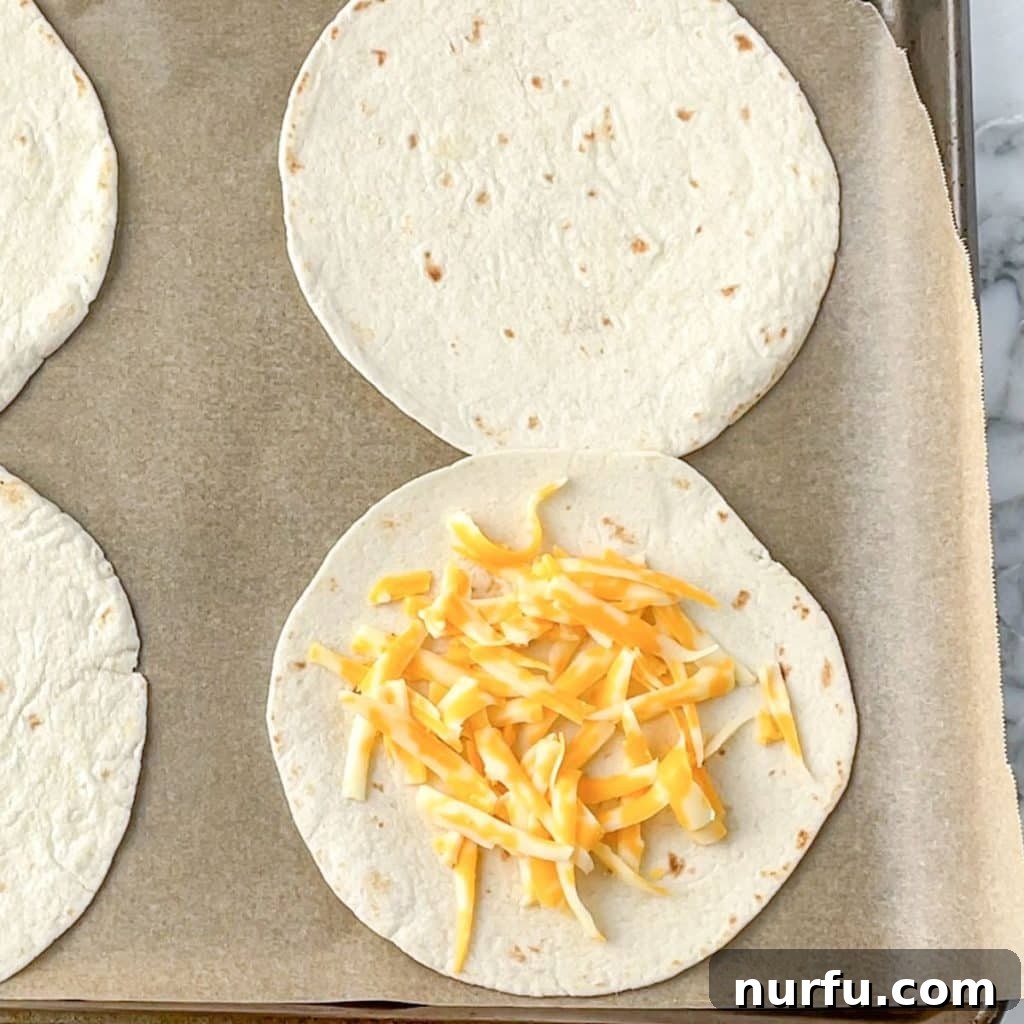
Step Three: Prepare the Soft Tortillas for Cheesy Perfection. Line one or two baking sheets with parchment paper or aluminum foil for easy cleanup. Lay your soft flour tortillas flat on the prepared baking sheets, ensuring they don’t overlap. (The number of baking sheets you’ll need will depend on how many gorditas you’re making and the size of your sheets.)
Step Four: Melt the Cheese onto the Soft Shells. Evenly sprinkle a generous layer of shredded cheese over each soft tortilla. Remember, this cheese layer is what glues the crunchy shell to the soft tortilla, so ensure good coverage without piling it too high. Place the baking sheets back into the preheated oven for 3-5 minutes, or until the cheese is beautifully melted and bubbly. Keep a close eye on them to prevent overcooking.
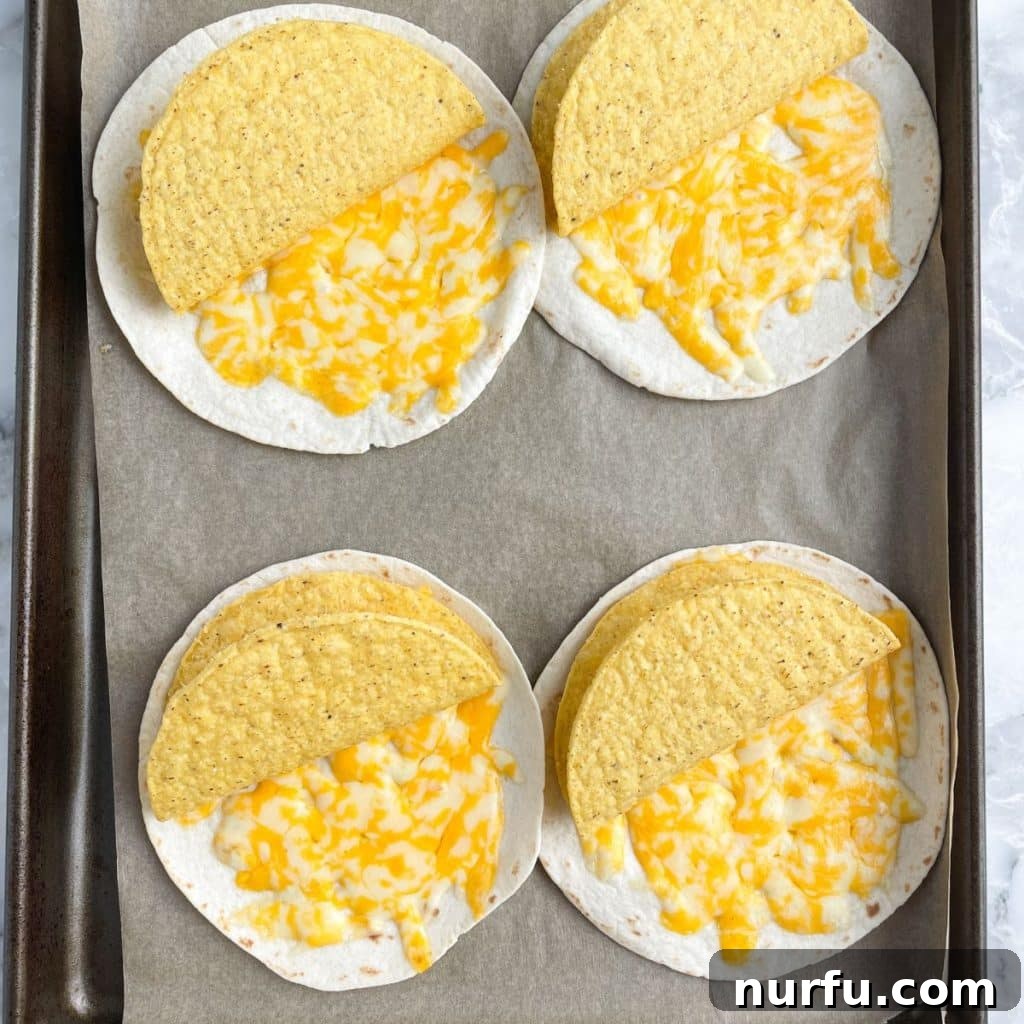
Step Five: Assemble the Iconic Shell Duo. Carefully remove the baking sheets from the oven. Working quickly while the cheese is still warm and melty, place one warmed crunchy taco shell directly on top of the melted cheese on each soft tortilla. Gently fold the soft tortilla around the crunchy shell, pressing lightly to ensure the melted cheese acts as a “glue.” This creates the signature Cheesy Gordita Crunch wrapper.
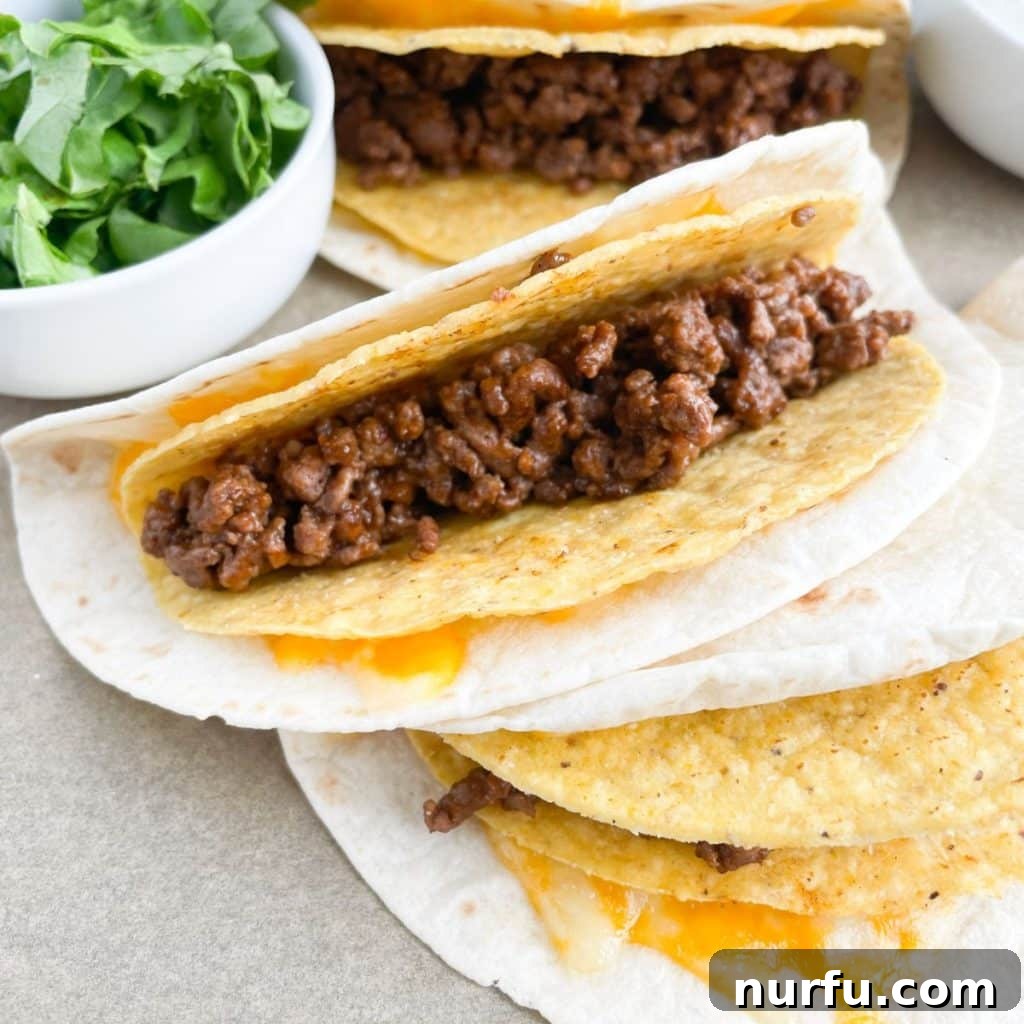
Step Six: Fill, Top, and Enjoy! Now comes the best part! Fill each assembled gordita shell with your seasoned ground meat. Drizzle with the creamy sauce (if using), then load up with your favorite toppings like shredded lettuce, sour cream, salsa, or jalapeños. Serve immediately while warm to best experience the textural contrast and melty cheese. Get ready to savor every bite of your homemade Cheesy Gordita Crunch!
Cheesy Gordita Crunch Recipe Tips for Success
Achieving Cheesy Gordita Crunch perfection is easier with a few insider tips:
- Embrace Freshly Shredded Cheese: While convenient, pre-packaged shredded cheese often contains anti-caking agents that can hinder its melting capability and create a grainy texture. For the ultimate smooth, gooey, and delicious melt, I highly recommend grating your own cheese from a block. It makes a noticeable difference in both taste and texture, elevating your gordita experience.
- Don’t Overdo the Cheese: When layering cheese onto your soft tortillas, aim for a single, even layer. Too much cheese can become unwieldy and potentially slide off, making assembly tricky. The goal is enough cheese to create a solid bond between the two shells, not an overflowing mess.
- Customizing Your Taco Seasoning: If you’re not a fan of seasoning packets or simply prefer a more tailored flavor, creating your own taco seasoning blend is a fantastic option. You can adjust the spices to match your preferred heat and flavor profile. Another excellent way to boost flavor and moisture in your ground meat is to mix in about 1/2 cup of your favorite salsa while it’s simmering. This adds a delicious zesty kick.
- Batch Cooking for a Crowd: This recipe is incredibly scalable. If you’re hosting a party, feeding a large family, or simply want to prep for meal an entire week, this recipe can be easily doubled, tripled, or even quadrupled. Just ensure you have enough baking sheets and oven space!
- Timing is Everything: For the best experience, try to assemble and serve your Cheesy Gordita Crunches immediately after melting the cheese and warming the shells. This ensures the soft tortilla is warm, the cheese is gooey, and the hard shell remains perfectly crisp.
Exciting Recipe Variations to Explore
One of the joys of cooking at home is the freedom to customize and experiment. Here are some delicious variations for your Cheesy Gordita Crunch:
Delightfully Meatless Options: You can effortlessly transform these gorditas into a fantastic vegetarian meal. Substitute the ground meat with savory black beans (either whole or mashed), rich refried beans, wholesome pinto beans, or any of your favorite vegan ground beef substitutes. This makes it a versatile dish suitable for various dietary preferences.
Bold Spice and Flavor Profiles: Don’t limit yourself to traditional taco seasoning! If you’re feeling adventurous, try cooking your meat filling with a different flavor profile. A zesty sloppy joe spice mix can offer a sweet and tangy twist, or for those who love a fiery kick, incorporating buffalo sauce into your meat will deliver a bold and spicy experience.
An Abundance of Toppings: The topping possibilities are virtually endless, allowing you to personalize each gordita to perfection. Beyond the classics, consider adding crisp iceberg lettuce, fresh chopped tomatoes, vibrant fajita vegetables (sautéed peppers and onions), briny black olives, creamy sour cream, luscious guacamole, freshly diced avocado, or a drizzle of your favorite taco sauce. Get creative and make it truly your own!
Storing Leftovers and Reheating for Later
While Cheesy Gordita Crunches are best enjoyed fresh, you can certainly manage leftovers to ensure future deliciousness.
For the best results, I recommend storing any leftover seasoned meat separately in an airtight container in the refrigerator. It will stay fresh and flavorful for up to a week. This allows you to assemble fresh gorditas whenever the craving strikes.
Regarding the shells, it’s always best to prepare and assemble them right before you plan to serve. The combination of soft and crunchy textures, along with the melty cheese, is at its peak when fresh. Assembled gorditas can become soggy if stored for too long. If you do have an assembled leftover, you can gently reheat it in a toaster oven or air fryer to try and regain some crispness, but expect a slight change in texture compared to freshly made.
What to Serve with Your Cheesy Gordita Crunch
While these homemade Cheesy Gordita Crunches are substantial enough to be a meal on their own, they also pair beautifully with a variety of delicious side dishes to create a more complete and satisfying feast. Consider these favorite accompaniments:
- Mexican Black Beans: A staple side, these flavorful beans add a hearty and nutritious element to your meal.
- Mexican Style White Dip: Creamy and tangy, this dip is perfect for drizzling over your gorditas or for dipping tortilla chips.
- Corn Salad: A refreshing and vibrant corn salad provides a burst of freshness and a delightful crunch.
- Charro Beans: These robust pinto beans, often cooked with bacon or chorizo, offer a smoky and deeply satisfying flavor.
- Santa Fe Soup: A lighter yet flavorful soup can be a wonderful prelude or accompaniment to your main course.
- Cilantro Lime Rice: A classic pairing, the zesty rice cuts through the richness of the gordita.
- Chips and Guacamole/Salsa: You can never go wrong with a classic chips and dip combo.
- A Simple Green Salad: For a lighter touch, a crisp green salad with a zesty vinaigrette provides balance.
Discover More Copycat Recipes to Love
If you’ve enjoyed recreating the Cheesy Gordita Crunch at home, you’ll be thrilled to discover how many other restaurant favorites you can master! Expanding your repertoire of copycat recipes is a fantastic way to save money, control ingredients, and enjoy your beloved dishes whenever you desire. Here are a few more popular copycat recipes to inspire your next culinary adventure:
- Copycat McDonald’s Steak And Egg Bagel: Start your day with a hearty and delicious breakfast sandwich, just like you’d get from your favorite golden arches.
- Copycat Olive Garden Shrimp Scampi: Indulge in a restaurant-quality Italian classic with succulent shrimp and a garlicky, buttery sauce, all made from scratch.
- Copycat Arby’s Chicken Salad: Recreate this light and flavorful sandwich filling, perfect for lunch or a quick snack.
- Copycat Popeye’s Red Beans And Rice: Bring the soulful flavors of Louisiana home with this iconic side dish, rich, creamy, and wonderfully seasoned.
Homemade Cheesy Gordita Crunch
Learn how to make your very own copycat Taco Bell Cheesy Gordita Crunch right at home. This easy recipe brings the fast-food favorite to your kitchen with fresh ingredients and amazing flavor.
10 mins
8 mins
20 mins
6 gorditas
Ingredients
- 1 pound ground beef (or ground chicken/turkey)
- 1 taco seasoning packet (or 2 tbsp homemade taco seasoning)
- 4 tablespoons water
- 6 small flour tortillas (fajita size recommended)
- 6 crunchy taco shells
- 1 1/2 cups shredded cheese (Mexican blend, Colby Jack, Cheddar, or your favorite melty cheese)
- Optional toppings: shredded lettuce, sour cream, salsa, diced tomatoes, jalapeños, copycat Taco Bell quesadilla sauce
Instructions
- Brown ground meat in a skillet over medium-high heat until fully cooked through, about 5 minutes. Drain any excess fat. Add water and taco seasoning, stir well, and simmer for 2-3 minutes until the liquid is absorbed and meat is flavorful.
- Preheat your oven to 350°F (175°C). Place the crispy taco shells on a baking sheet and bake for 2-3 minutes to warm them and enhance their crunch. Remove and set aside.
- Line a separate baking sheet (or two, if needed) with parchment paper or foil. Lay the soft flour tortillas out flat on the prepared sheet(s).
- Sprinkle an even layer of shredded cheese over each soft tortilla. Place the baking sheets in the oven and melt the cheese for 3-5 minutes, watching carefully until bubbly and fully melted.
- Carefully remove the baking sheets from the oven. Immediately place one warmed crunchy taco shell on top of the melted cheese on each soft tortilla. Fold the soft tortilla over the crunchy shell, pressing gently to adhere.
- Fill the assembled cheesy gordita shells with your seasoned ground meat and any of your favorite toppings. Serve warm and enjoy your homemade Taco Bell treat!
Nutrition Information
(Approximate values per serving)
Calories: 425kcal | Carbohydrates: 23g | Protein: 22g | Fat: 26g | Saturated Fat: 11g | Polyunsaturated Fat: 2g | Monounsaturated Fat: 10g | Trans Fat: 1g | Cholesterol: 76mg | Sodium: 500mg | Potassium: 291mg | Fiber: 2g | Sugar: 2g | Vitamin A: 207IU | Vitamin C: 0.1mg | Calcium: 211mg | Iron: 3mg
Nutrition information is automatically calculated, so should only be used as an approximation and can vary based on specific ingredients and brands used.