
Updated 12/19/2019
Holiday Jello Cake: A Burst of Festive Flavor and Color
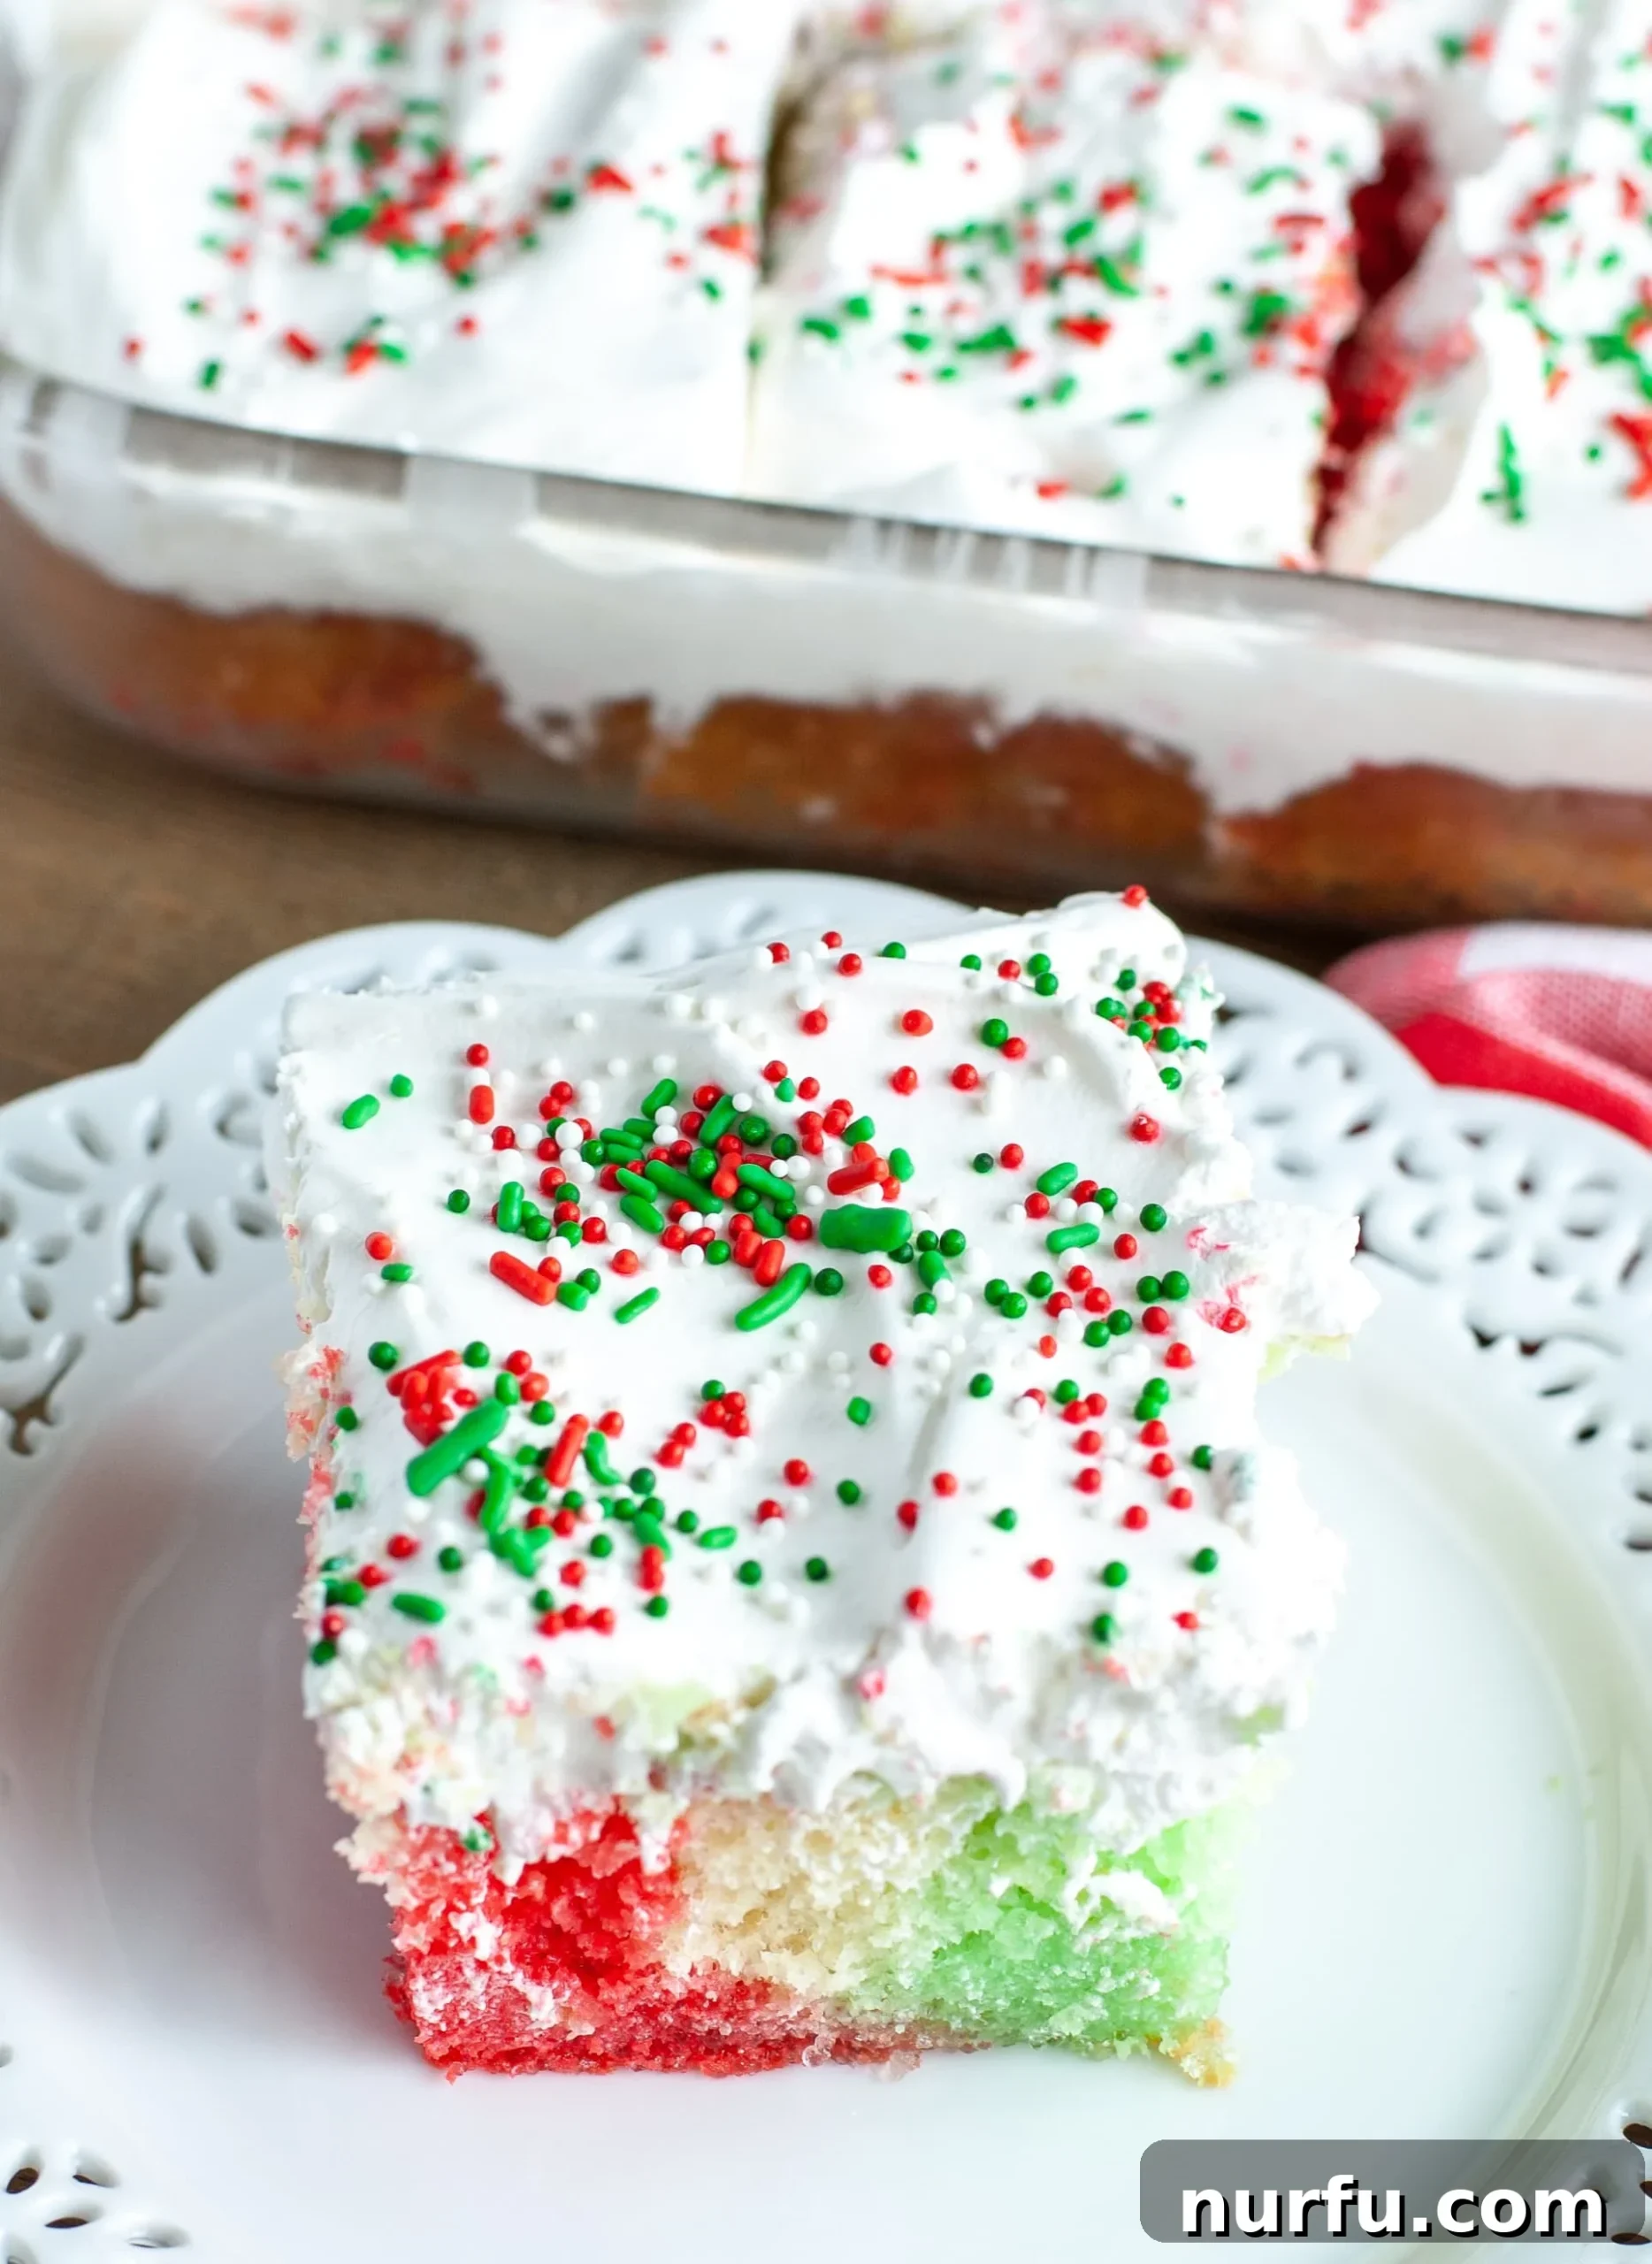
Embrace the joyful spirit of the holidays with a dessert that’s as simple to create as it is delightful to devour: the Holiday Jello Cake. This vibrant poke cake is more than just a sweet treat; it’s a nostalgic journey back to cherished family gatherings, a centerpiece that captures the eye with its striking red and green hues, and a light, refreshing alternative to heavier holiday indulgences. Perfect for potlucks, family dinners, or a cozy evening by the fire, this easy-to-make dessert is guaranteed to be a crowd-pleaser, leaving everyone reaching for another slice.
The magic of this cake lies in its simplicity and stunning visual appeal. Imagine a tender, moist cake infused with the fruity essence of cherry and lime, topped with a cloud of creamy whipped topping and a cascade of festive sprinkles. It’s a symphony of textures and flavors that embodies the celebratory mood of the season. Whether you’re a seasoned baker or just starting your culinary adventures, this Holiday Jello Cake recipe is designed for success, promising a delicious outcome with minimal effort. It joins the ranks of other delightful holiday treats like our popular Holiday Cookie Bars and the rich Easy Chocolate Cherry Cake, making your festive dessert spread truly unforgettable.
Why the Holiday Jello Cake is a Must-Make This Season
Jello cakes have a special place in dessert history, often making appearances at celebratory events thanks to their unique texture and impressive look. But what makes this holiday version truly exceptional?
- Effortlessly Easy: Starting with a simple cake mix, this recipe streamlines the baking process, allowing you to focus on the fun parts – like poking holes and pouring in the vibrant JELL-O.
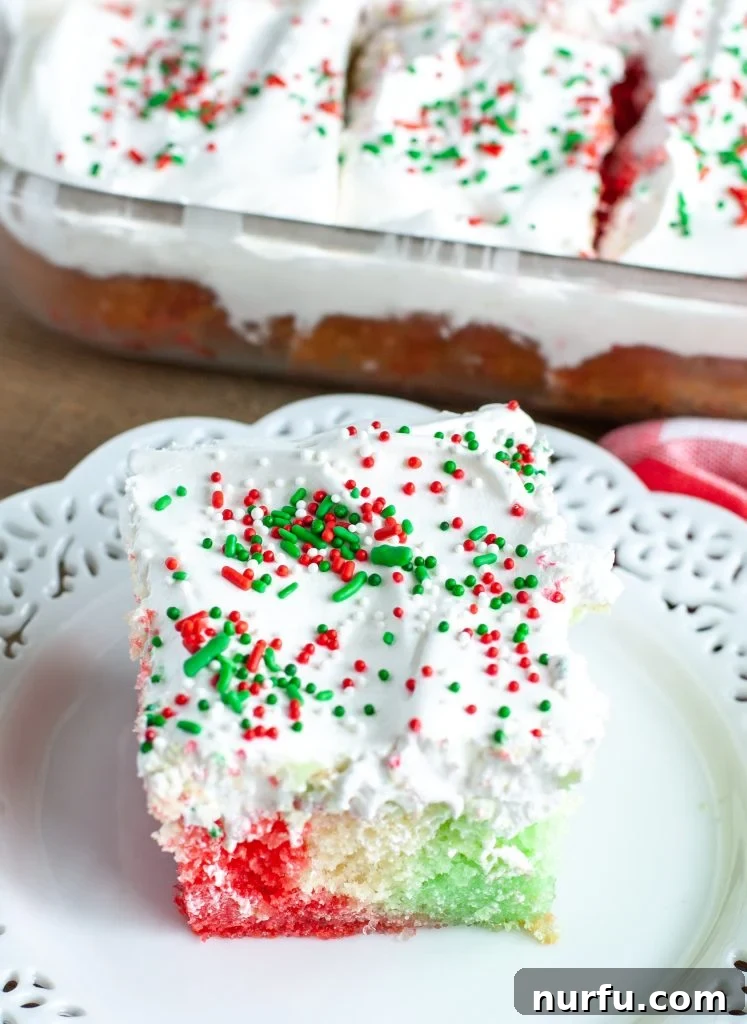
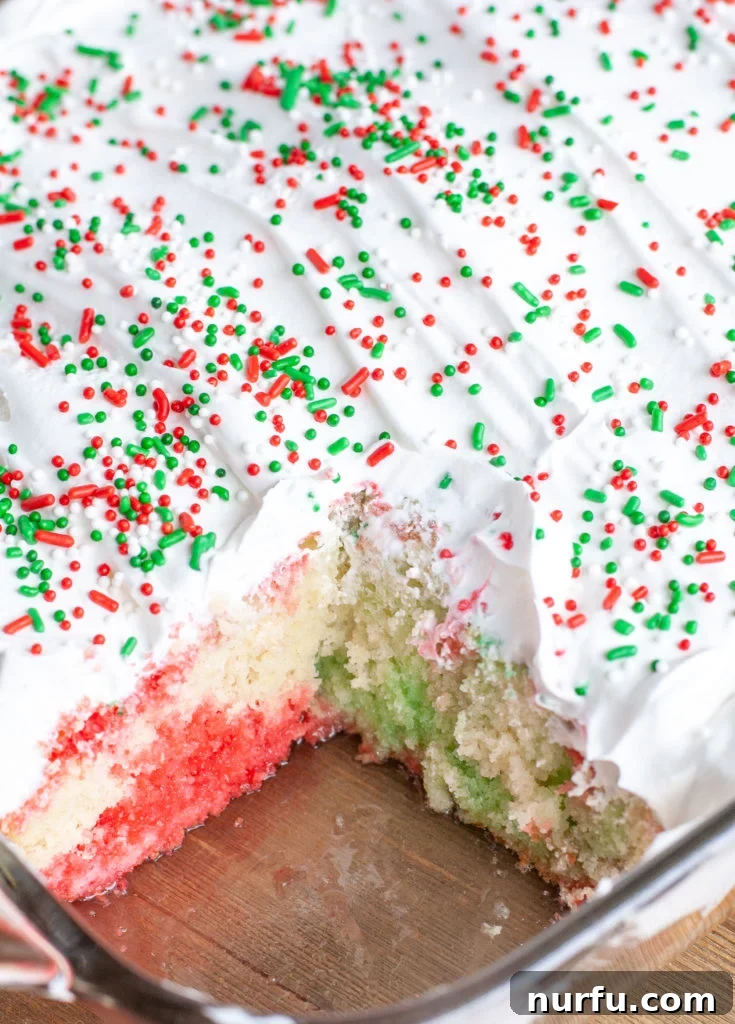
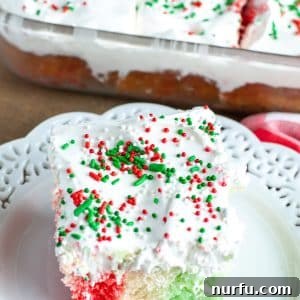
- Visually Stunning: The alternating rows of cherry red and lime green JELL-O create a dazzling marbled effect that’s undeniably festive and captivating, instantly brightening any dessert table.
- Delightfully Delicious: The combination of moist cake, fruity JELL-O, and light whipped topping offers a refreshing contrast to traditional heavy holiday desserts. It’s sweet, tangy, and incredibly satisfying.
- A Crowd Favorite: From children who adore its bright colors and fun texture to adults who appreciate its light and flavorful profile, this cake consistently earns rave reviews. It’s a dessert that transcends generations.
- Customizable Fun: While perfect for Christmas, this poke cake concept can be adapted for any celebration by simply changing JELL-O colors and sprinkles.
There’s something inherently charming about a Jello poke cake. The way the gelatin seeps into the cake, creating moist pockets of flavor, is truly magical. It’s a dessert that feels special and intricate, yet is surprisingly simple to assemble, making it a stress-free option during a busy holiday season.
Understanding the Magic: What is a Poke Cake?
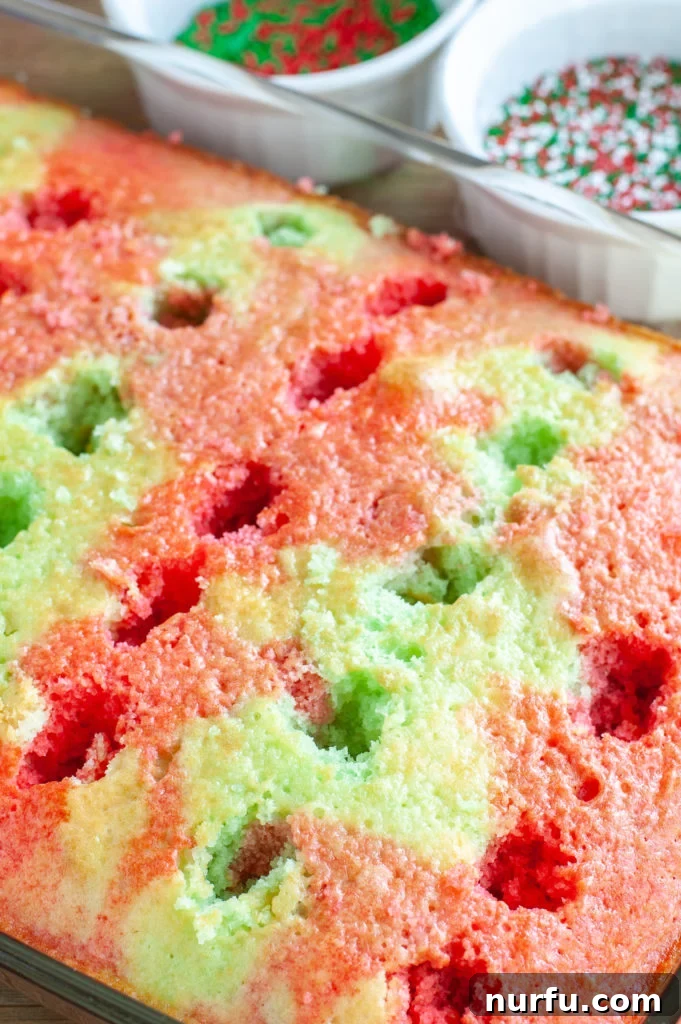
The term “poke cake” is delightfully descriptive. It refers to a cake that, once baked and slightly cooled, is “poked” with holes across its surface. These holes are then filled with a liquid or semi-liquid ingredient – in this case, flavored gelatin. As the liquid seeps into the cake, it creates moist, flavorful pockets and streaks, transforming a simple cake into something extraordinary. This technique not only adds moisture and flavor but also results in a stunning visual pattern when the cake is sliced, making it a popular choice for celebrations.
The beauty of a poke cake lies in its versatility. While JELL-O is a classic filling, you can also use puddings, condensed milk, fruit purees, or even chocolate ganache. The possibilities are endless, but for the holidays, the vibrant, translucent colors of JELL-O are truly unmatched for creating that festive appeal.
Essential Ingredients for Your Festive Jello Cake
Crafting this festive dessert requires just a handful of readily available ingredients. The key is to select quality components that will contribute to both the flavor and visual appeal of your cake.
The Cake Base
- White Cake Mix: Opting for a white cake mix is crucial for this recipe. Its neutral color allows the vibrant red and green JELL-O to truly pop, creating that signature holiday contrast. While a yellow cake mix would work in a pinch, it might slightly mute the bright JELL-O colors. Ensure you have the additional ingredients (eggs, oil, water, etc.) as listed on your specific cake mix box.
The JELL-O Layers
- Cherry JELL-O (3 oz box): This provides the rich, festive red color and a sweet, fruity cherry flavor that complements the cake beautifully. It’s a classic choice for holiday baking.
- Lime JELL-O (3 oz box): For the equally essential green hue, lime JELL-O brings a bright, tangy counterpoint to the cherry. The combination of cherry and lime is quintessential holiday flavor pairing that everyone loves.
- Water: You’ll need both boiling and cold water. Boiling water is essential for dissolving the gelatin powder completely, ensuring a smooth, lump-free JELL-O mixture. Cold water helps to cool down the mixture quickly, preparing it for absorption by the cake and allowing it to set more efficiently.
The Topping & Garnish
- Frozen Whipped Topping (16 oz, thawed): Brands like Cool Whip are perfect for this cake. They offer a light, airy, and stable topping that doesn’t overpower the JELL-O-infused cake. If you prefer, you can certainly make your own fresh whipped cream or use a cream cheese frosting for a richer finish.
- Holiday Sprinkles: These are non-negotiable for adding that final touch of festive sparkle! Look for red, green, and white sprinkles, or any mix that brings out the holiday cheer. They add texture and a playful element that kids especially love.
Gathering these simple ingredients is the first step towards creating a show-stopping dessert that will impress your guests and bring a smile to every face.
Step-by-Step Guide: Crafting Your Perfect Holiday Jello Cake
Creating this Holiday Jello Cake is an enjoyable process, and by following these detailed steps, you’ll achieve a stunning and delicious result every time. Remember, the key to success is allowing ample chilling time!
- Prepare and Bake the Cake: Begin by preheating your oven and preparing your 9×13 inch baking pan as directed on the white cake mix box. This usually involves greasing and flouring the pan or lining it with parchment paper. Mix the cake batter according to the package instructions, ensuring it’s smooth and free of lumps. Pour the batter evenly into your prepared baking pan and bake for the recommended time, or until a wooden skewer inserted into the center comes out clean.
- Cool and Poke Holes: Once the cake is baked, remove it from the oven and place it on a wire rack. Allow it to cool slightly in the pan for about 15-20 minutes. This partial cooling is important because the cake will be firm enough not to collapse but still warm enough to readily absorb the JELL-O. Using the back of a wooden spoon handle (or a fork if you don’t have one), poke holes evenly across the entire surface of the cake. Aim for holes that go about halfway through the cake, spacing them approximately 1 inch apart.
- Prepare the JELL-O Mixtures: While the cake is cooling, prepare your gelatin. In one bowl, combine the cherry JELL-O mix with 1 cup of boiling water. Stir continuously for at least 2 minutes until the gelatin powder is completely dissolved. Repeat this process in a separate bowl with the lime JELL-O mix and another 1 cup of boiling water, stirring until fully dissolved.
- Add Cold Water to JELL-O: Once both gelatin mixtures are fully dissolved, add ½ cup of cold water to the cherry JELL-O mixture and ½ cup of cold water to the lime JELL-O mixture. Stir each bowl well to combine. This cold water helps to bring the temperature down and aids in the setting process once poured into the cake.
- Pour JELL-O into Holes: Now comes the fun part! Carefully pour the red cherry JELL-O mixture into every other row of holes across the cake. Then, pour the green lime JELL-O mixture into the remaining rows of holes. Be precise and try to ensure that all the liquid JELL-O is distributed evenly into the holes. You might need to gently spoon it into specific areas to ensure full coverage.
- Chill the Cake: Once the JELL-O has been poured, place the cake, uncovered, into the refrigerator. This is a critical step for allowing the JELL-O to set completely within the cake, creating those distinct, moist pockets. Chill for a minimum of 3-4 hours, but for best results and firmest JELL-O, it’s highly recommended to chill it overnight.
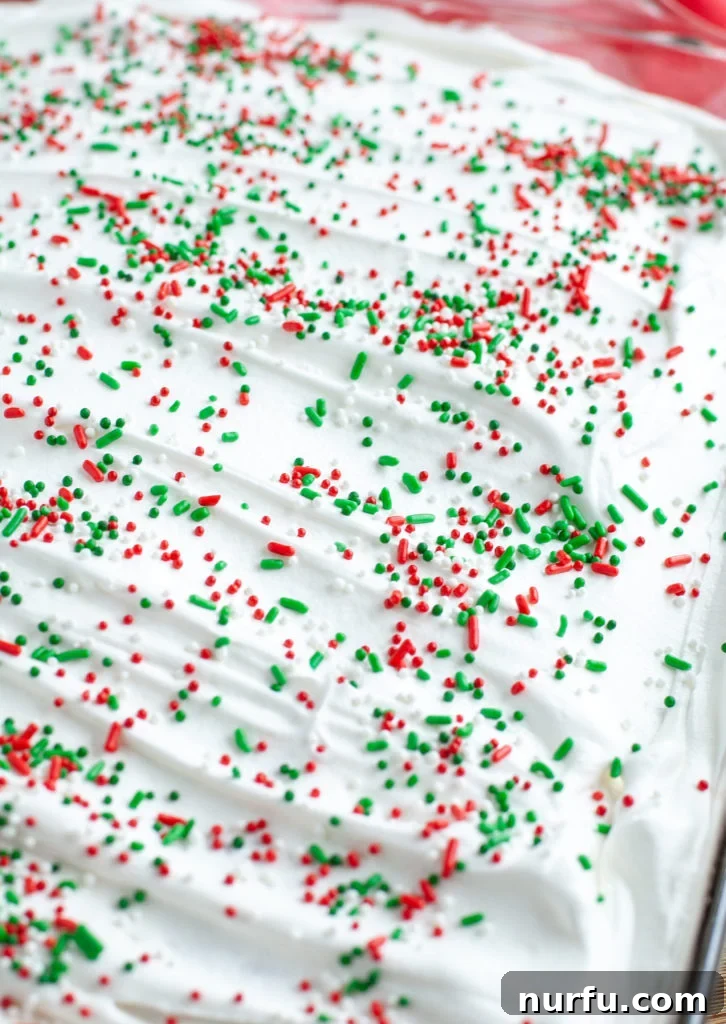
- Decorate and Serve: After the cake is thoroughly chilled and the JELL-O has set, remove it from the refrigerator. Spread the thawed whipped topping evenly over the entire surface of the cake, creating a smooth, inviting layer. Finally, generously garnish with your festive holiday sprinkles. Your stunning Holiday Jello Cake is now ready to slice and serve!
Expert Tips for a Flawless Jello Poke Cake
Even with a straightforward recipe, a few insider tips can elevate your Holiday Jello Cake from good to absolutely spectacular. Consider these pointers for the best possible outcome:
- Poking Tools: If a wooden spoon handle isn’t available, a sturdy fork can work effectively to prick holes. You can also use a chopstick or even the blunt end of a small skewer. The goal is to create holes wide enough for the JELL-O to seep in but not so large that the cake crumbles.
- Cake Mix Substitutions: While white cake mix is recommended for maximum color contrast, a yellow cake mix can be a delightful substitute if that’s what you have on hand or prefer the flavor profile. The JELL-O colors might appear slightly less vivid, but the taste will still be fantastic.
- Customizing JELL-O Flavors & Colors: The beauty of a poke cake is its adaptability. For other holidays or themed parties, feel free to swap out the cherry and lime JELL-O for different flavors and corresponding colors. Think orange and purple for Halloween, pastel colors for Easter, or red and blue for patriotic celebrations.
- The Importance of Chilling: Do not rush the chilling process! Allowing the cake to chill long enough (at least 3-4 hours, ideally overnight) ensures the JELL-O sets properly within the cake. If it’s not fully set, the JELL-O may run and the beautiful color definition will be lost.
- Even JELL-O Distribution: When pouring the JELL-O, take your time to ensure an even distribution into the holes. This creates a balanced flavor and a more uniform, striking appearance when sliced.
- Serving Temperature: This cake is best served chilled. The cold temperature enhances the refreshing quality of the JELL-O and keeps the whipped topping firm.
- Enhance the Whipped Topping: For an extra touch of flavor, consider folding a teaspoon of vanilla extract or a hint of almond extract into your thawed whipped topping before spreading it onto the cake.
Storage & Make-Ahead Guide
Proper storage is essential to keep your Holiday Jello Cake fresh and delicious, especially since it contains gelatin and a dairy-based topping. Here’s how to best store it:
- Refrigerator Storage: Since this poke cake contains JELL-O and whipped topping, it must be stored in the refrigerator. Cover the cake tightly with plastic wrap or place it in an airtight container to prevent it from drying out or absorbing other odors from the fridge.
- Shelf Life: When stored properly in the refrigerator, the Holiday Jello Cake will last for 2-3 days. The cake tends to become even moister and more flavorful on the second day as the JELL-O continues to infuse it.
- Make-Ahead Tips: This cake is an excellent make-ahead dessert, perfect for busy holiday preparations. You can bake the cake and infuse it with JELL-O the day before you plan to serve it. Allow it to chill overnight in the refrigerator. Add the whipped topping and sprinkles just a few hours before serving to ensure the topping remains fresh and light.
- Freezing: While technically possible to freeze Jello cakes, it’s generally not recommended for the best texture. The JELL-O can become watery and the cake might lose some of its moistness upon thawing. If you must freeze, do so before adding the whipped topping, wrap it very tightly, and consume within a month. Thaw in the refrigerator.
Frequently Asked Questions (FAQs) About Jello Poke Cakes
New to Jello poke cakes or simply have some lingering questions? Here are answers to common queries that will help you master this festive dessert:
- Can I use a homemade cake instead of a cake mix?
- Absolutely! While a cake mix offers convenience, a homemade white or yellow cake recipe will work wonderfully. Just ensure the cake is baked in a 9×13 inch pan and allowed to cool slightly before poking holes and adding the JELL-O.
- Can I use sugar-free JELL-O?
- Yes, you can substitute sugar-free JELL-O for the regular varieties if you’re looking to reduce sugar content. The setting process and overall flavor will be similar.
- How do I cut the cake neatly?
- For clean slices, ensure the cake is thoroughly chilled. Use a sharp knife that has been run under hot water and wiped dry between each cut. This will help prevent the whipped topping and JELL-O from sticking to the knife.
- My JELL-O didn’t set in the cake. What went wrong?
- The most common reasons for JELL-O not setting are insufficient chilling time or not using enough boiling water to fully dissolve the gelatin. Make sure you stir the JELL-O thoroughly with boiling water until no granules remain, and allow at least 3-4 hours, preferably overnight, for chilling.
- Can I make this cake in a different size pan?
- While a 9×13 inch pan is ideal, you can use other sizes. If using a smaller pan, the cake will be thicker, potentially requiring more JELL-O or deeper holes. For a larger pan, the cake will be thinner, and you might need to adjust the amount of JELL-O accordingly.
Flavor & Holiday Variations to Spark Your Creativity
While this Holiday Jello Cake is perfect for the Christmas season with its iconic red and green, the beauty of a poke cake lies in its endless adaptability. Get creative and customize your Jello cake for any occasion throughout the year:
- Valentine’s Day: Use strawberry or raspberry JELL-O for a romantic red or pink cake, topped with pink or red sprinkles.
- St. Patrick’s Day: Stick with lime JELL-O for an all-green cake, perhaps adding some mint extract to the whipped topping.
- Easter: Opt for pastel colors like lemon (yellow), berry blue, and lime (light green) JELL-O, adorned with spring-themed sprinkles.
- 4th of July: Use cherry or strawberry JELL-O with berry blue JELL-O for a patriotic red and blue cake. White sprinkles or whipped cream with blueberries and raspberries make a great topping.
- Halloween: Get spooky with orange and grape (purple) JELL-O, or even black cherry and lime for a darker theme, topped with black and orange sprinkles.
- Tropical Twist: For a summer party, try pineapple and orange JELL-O, topped with toasted coconut flakes.
- Birthday Fun: Choose the birthday person’s favorite colors of JELL-O and decorate with colorful birthday sprinkles.
The possibilities are truly endless, allowing you to tailor this versatile dessert to suit any theme, holiday, or personal preference. Don’t be afraid to experiment with different flavor combinations and decorative elements!
More Delightful Dessert Recipes to Explore
If you loved the simplicity and deliciousness of this Holiday Jello Cake, you’re in for a treat with these other easy and satisfying cake recipes from our kitchen. Perfect for any occasion, they promise flavor without the fuss:
- Decadent Chocolate Chip Bundt Cake: A rich and moist bundt cake studded with chocolate chips, perfect for a cozy dessert.
- Refreshing 7-Up Cake: A classic Southern favorite, this cake is incredibly moist and boasts a delightful lemon-lime flavor.
- Easy Pineapple Tiramisu Cake: A tropical twist on a beloved Italian dessert, offering layers of refreshing pineapple and creamy goodness.
- Classic Holiday Bundt Cake: A beautifully decorated bundt cake, perfect for special occasions and adding an elegant touch to your festive table.
Holiday Jello Cake Recipe Card
By: Heather Seeley
Summary: A vibrant and delicious Jello Poke Cake perfect for any holiday gathering. Its striking red and green colors and light texture make it an irresistible dessert that’s simple to prepare and always a favorite.
- Prep Time: 15 mins
- Cook Time: 30 mins
- Total Time: 45 mins (plus chilling time)
- Servings: 10
Ingredients
- 1 box white cake mix (plus ingredients required on box for preparation like eggs, oil, water)
- 1 (3 oz) box lime JELL-O
- 1 (3 oz) box cherry JELL-O
- 2 cups boiling water (divided)
- 1 cup cold water (divided)
- 1 (16 oz) frozen whipped topping (e.g., Cool Whip), thawed
- Holiday sprinkles, for festive garnish
Instructions
- Bake the Cake: Preheat your oven and prepare a 9×13 inch baking pan according to the directions on the white cake mix box. Mix the cake batter as instructed and pour it evenly into the prepared pan. Bake for the recommended time until a toothpick inserted into the center comes out clean.
- Poke Holes: Once the cake is baked, remove it from the oven and let it cool slightly in the pan for about 15-20 minutes. While still warm, use the back of a wooden spoon handle (or a fork) to poke holes evenly across the entire surface of the cake. Ensure the holes penetrate about halfway through the cake.
- Prepare JELL-O Mixtures: In two separate bowls, prepare the JELL-O. In the first bowl, combine the cherry JELL-O mix with 1 cup of boiling water, stirring until completely dissolved (about 2 minutes). In the second bowl, combine the lime JELL-O mix with the remaining 1 cup of boiling water, stirring until fully dissolved.
- Add Cold Water: Add ½ cup of cold water to the dissolved cherry JELL-O mixture and ½ cup of cold water to the dissolved lime JELL-O mixture. Stir both well to combine and cool down.
- Pour JELL-O: Carefully pour the red cherry JELL-O mixture into every other row of holes in the cake. Then, pour the green lime JELL-O mixture into the remaining rows of holes. Ensure all the liquid JELL-O is distributed as evenly as possible into the holes.
- Chill Thoroughly: Place the cake, uncovered, into the refrigerator. Chill for a minimum of 3-4 hours, or ideally overnight, to allow the JELL-O to set completely within the cake. This step is crucial for the cake’s unique texture and appearance.
- Decorate and Serve: Once the cake is thoroughly chilled and the JELL-O is set, spread the thawed whipped topping evenly over the entire surface. Garnish generously with holiday sprinkles before slicing and serving. Enjoy your festive creation!
Nutrition (Approximate per serving)
- Calories: 193 kcal
- Carbohydrates: 42 g
- Protein: 2 g
- Fat: 1 g
- Saturated Fat: 1 g
- Sodium: 363 mg
- Potassium: 32 mg
- Sugar: 21 g
- Calcium: 115 mg
- Iron: 1 mg
Nutrition information is automatically calculated and should only be used as an approximation.
Additional Information
- Course: Dessert
- Cuisine: American
We hope this delightful Holiday Jello Cake brings a touch of magic and sweetness to your celebrations. Its vibrant colors, refreshing flavor, and easy preparation make it a perfect addition to any festive menu. Don’t forget to share your wonderful creations with us! Enjoy! ~Heather